
On this page
Start here
Quick answer
Do not start with caulk. First stay off ladders and exterior surfaces during rain, wind, or lightning, and keep water away from electrical outlets and equipment. When conditions are dry, record whether water appears at the upper corner, side of the glass, lower glass or sill, or on the wall above or beside the door. A loose or damaged weatherstrip, lock that does not pull the panel tight, failed sealant around the glazing, or a blocked sill weep path can admit or retain water. Pella's door guidance identifies clogged drainage holes and a sweep that seals too tightly as storm-door water causes, while Andersen advises checking weatherstripping, locks, and deteriorated sealant. Water that appears above the frame or inside the wall points toward flashing, cladding, or the rough-opening drainage plane and needs a qualified inspection. Stop for cracked or loose glass, structural movement, hidden rot or mold, water near electricity, or unsafe weather.
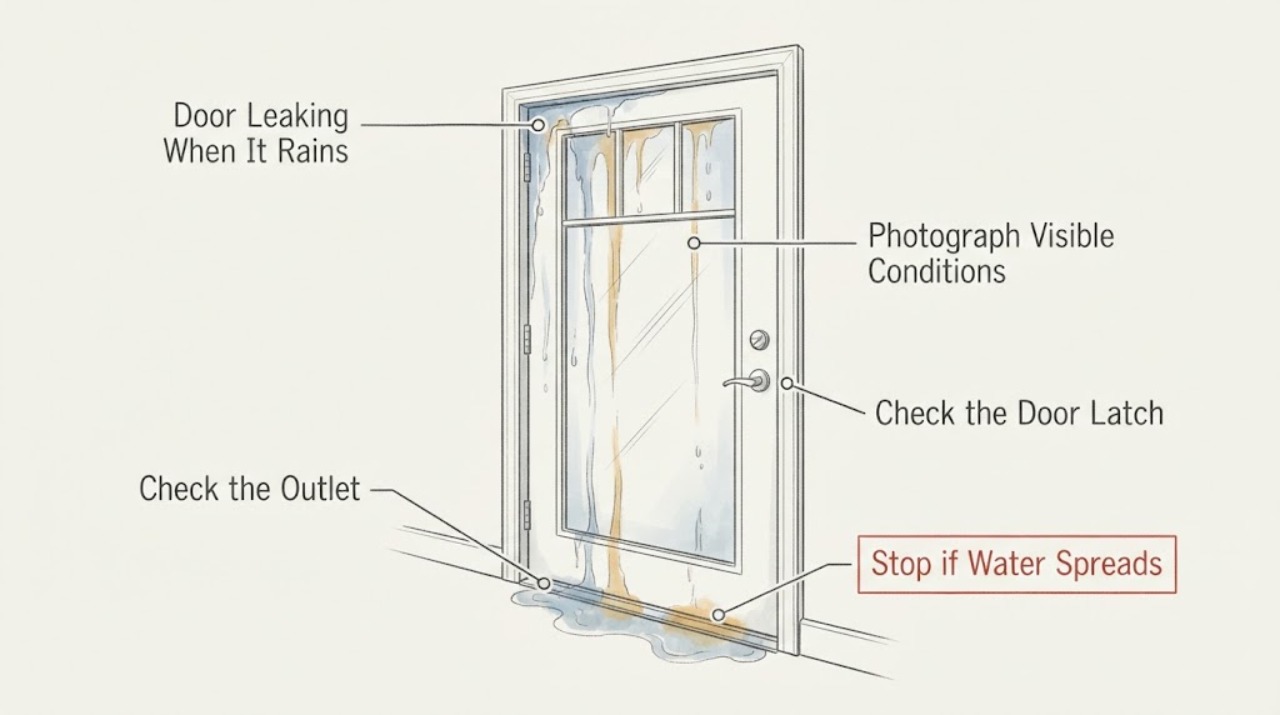
Work through in order
Diagnostic checks
Use only checks that match the exact appliance or system and its official guide.
-
Check 1
Before inspecting, stop if rain is accompanied by lightning, high wind, slippery surfaces, flooding, or an unsafe need to climb. Keep people away from cracked or loose glass. If water is near an outlet, appliance, doorbell, or other electrical equipment, avoid contact and isolate power only from a dry, safe location.
Expected result: The area is unsafe or water is contacting electricity, or the leak can be observed safely from inside at floor level.
Next step: Stay indoors during the hazard, contain water without leaning on the door, and arrange qualified help if electrical contact or structural damage is possible. Do not climb, open trim, or handle glass during the storm.
Why this matters
Why: Weather and electrical exposure can turn a window-and-door leak into an immediate injury hazard. A safe observation is enough to preserve the location and timing for later diagnosis.
-
Check 2
On a dry day, inspect and photograph the interior from top to bottom. Mark the first wet point at the head, upper corners, side jamb, glass edge, lower corner, sill, or wall beside the frame; also note whether the leak occurs only with wind from one direction or with any rain.
Expected result: Water starts at the glass perimeter or frame, collects at the sill, or appears above or outside the opening before reaching the interior.
Next step: Use the location to select the next check, but do not assume the lowest drip is the source. If the wall or trim remains damp, document it and arrange a building-envelope inspection.
Why this matters
Why: The first wet point separates glazing and weatherstrip issues from sill drainage and wall-opening or cladding issues. Water visible above the frame can be entering from the head flashing, siding, roof edge, or another higher joint.
-
Check 3
With the door closed and conditions dry, inspect the glass perimeter, glazing bead, weatherstrip, latch, and lock engagement from the accessible side. Look for a loose or damaged bead, cracked or missing sealant, torn or compressed weatherstrip, a panel that does not close evenly, or a lock that fails to pull the panel tight. Do not remove the glass or pry the bead.
Expected result: The glass edge or sealant is visibly loose or cracked, weatherstrip is missing or crushed, the lock does not secure the panel, or these areas look intact.
Next step: Clean only loose surface dirt and use the model-specific care instructions. Arrange qualified glass or door service for a failed glazing seal, damaged glass, a loose bead, or hardware misalignment; do not smear sealant over a moving joint as a permanent fix.
Why this matters
Why: Andersen explains that the primary glass seal is beneath the glazing bead and that weatherstripping can lose its seal through wear and compression. A door that does not close or lock properly can allow wind-driven water around the panel.
-
Check 4
Inspect the lower sill, track, bottom sweep, and visible drainage or weep openings only when the surface is dry and stable. Remove leaves or loose dirt from an accessible opening with a soft brush or cloth if the product instructions allow it; do not caulk over a weep, drill the sill, or force a sweep into a tighter seal.
Expected result: Water is pooled in the sill or track, a weep opening is blocked, the bottom sweep seals abnormally tightly, or the sill drains normally but water still enters.
Next step: Clear only an accessible obstruction and observe the next dry-weather rain event without climbing. If the sill is damaged, the sweep is distorted, water remains trapped, or the leak continues, arrange qualified door service.
Why this matters
Why: Pella describes weep holes as the route for water in the sill and track to drain outward, and identifies clogged drainage holes or an over-tight bottom sweep as storm-door leak causes. A clear sill with continuing water keeps the upper seal and wall drainage in scope.
-
Check 5
If the wet mark begins above the frame, at a side jamb, or inside adjacent trim, inspect from ground level for cracked exterior sealant, open joints, missing drip-cap or flashing details, damaged cladding, and a gutter or roof discharge aimed at the door. Do not remove siding, trim, flashing, or interior wallboard to chase the water yourself.
Expected result: Water enters from above or beside the unit, wind drives it through a joint, trim is swollen or soft, or the exterior layers look intact.
Next step: Keep a record of wind direction and rainfall, protect interior finishes, and arrange a qualified door or building-envelope inspection. Escalate promptly for soft framing, staining, musty odor, peeling finish, or suspected concealed rot or mold.
Why this matters
Why: The Department of Energy describes doors and windows as vulnerable breaks in the wall drainage plane and says properly integrated flashing should direct water out, not into the wall cavity. Hidden moisture can continue after the visible surface dries.
-
Check 6
After the area is dry, compare the leak pattern with the door's operation: closes and locks evenly, glass stays seated, sill drains, and no new moisture appears in the wall or trim. Do not hose-test the door, seal the bottom edge shut, or apply a permanent bead of caulk until the entry path is identified.
Expected result: The leak stops after a visible obstruction or drainage issue is corrected, or it returns at the same location during ordinary rain.
Next step: For a repeat leak, give the technician the photos, first wet point, rain and wind direction, door type, glass configuration, and any prior repair history. Keep the opening protected without blocking intended drainage.
Why this matters
Why: A resolved accessible obstruction supports a maintenance cause. A repeat leak at the glass, frame, sill, or wall after safe checks indicates a seal, installation, movement, or drainage defect requiring a targeted repair.
Use your observations
Decision map
Find the observation that best matches what you see, then follow the next safe action.
-
PATH 01Next step
What you see
The leak is being investigated during lightning, high wind, slippery rain, flooding, or an exterior climb would be required.
Do this next
Stay indoors, contain water, photograph only from a safe position, and wait for safe conditions or arrange qualified help. Do not climb or handle glass during the storm.
Why this path and its safety boundary
Why it matters: The inspection is unsafe regardless of the suspected glass or sill cause.
-
PATH 02Next step
What you see
Water first appears around the glass edge, glazing bead, weatherstrip, or lock side of the panel.
Do this next
Inspect only from a dry accessible position and arrange qualified door or glass service for damaged sealant, bead, glass, or hardware. Do not pry the bead or glass.
Why this path and its safety boundary
Why it matters: A glazing seal, bead, weatherstrip, closure, or lock-engagement problem is in scope.
-
PATH 03Next step
What you see
Water pools in the sill or track, or the lower sweep and visible weep path are blocked.
Do this next
Clear only loose accessible dirt as the product instructions allow, never block or caulk over weeps, and arrange service if the sill or sweep remains defective.
Why this path and its safety boundary
Why it matters: Sill drainage or sweep geometry may be retaining or admitting water.
-
PATH 04Next step
What you see
The first wet point is above the frame, at the side jamb, or inside adjacent trim and the leak is worse in wind-driven rain.
Do this next
Do not remove siding or trim as a first step. Document rainfall and wind direction and arrange a building-envelope or qualified door installation inspection.
Why this path and its safety boundary
Why it matters: Flashing, cladding joints, roof or gutter discharge, rough-opening drainage, or wall movement may be involved.
-
PATH 05Next step
What you see
Interior trim is swollen or soft, staining persists, a musty odor is present, or concealed rot or mold is suspected.
Do this next
Limit further water entry and arrange qualified building-envelope and moisture-damage assessment. Do not cover wet material or close the wall before its condition is evaluated.
Why this path and its safety boundary
Why it matters: The problem may have progressed beyond a surface seal and may include hidden moisture damage.
-
PATH 06Next step
What you see
Glass is cracked, loose, or shattered; the frame has moved; or the door cannot close, latch, or remain structurally supported.
Do this next
Keep people away, do not operate or brace the door with improvised materials, and arrange qualified glass or door service. Replace safety glass only with the correct product through qualified service.
Why this path and its safety boundary
Why it matters: This is a physical safety and weather-protection fault.
-
PATH 07Next step
What you see
Water reaches an outlet, appliance, wiring, or other electrical equipment, or the area has active sparking.
Do this next
Do not touch wet equipment. Isolate power only from a dry safe location if possible, leave the area for active electrical danger, and arrange qualified electrical and door service.
Why this path and its safety boundary
Why it matters: This is an immediate electrical stop condition.
Helpful context
Understand the symptom
Trace the first wet point, not the last drip
Water often travels along a frame, trim, wall cavity, or sill before it becomes visible. A drip at the bottom does not prove the sill is the entry point. On a dry day, photograph the inside and outside of the door, note the exact height of the first wet mark, and compare that position with the glass perimeter, jambs, head, sill, and nearby wall. The pattern during wind-driven rain is especially useful, but do not perform an exterior test during unsafe weather.
A glazed door has several water-control layers
The glass edge is held by a glazing bead and sealant; the panel and frame use weatherstripping and a lock or latch; the sill may collect and drain water through weep openings; and the wall opening depends on flashing and a drainage plane. Repairing the visible bead or adding sealant cannot correct a blocked sill or failed flashing behind the trim.
Safety boundary
Stop conditions
- Stop immediately for lightning, unsafe wind, flooding, slippery surfaces, cracked or loose glass, frame movement, or a door that cannot remain supported or closed.
- Stop for water contacting an outlet, appliance, wiring, or other electrical equipment; do not touch wet electrical equipment or test the leak with power connected.
- Do not climb during rain or a storm, remove glazing or wall trim, drill a sill, block or caulk over weep openings, or hose-test an unidentified leak.
- Escalate for soft or swollen framing, persistent staining, musty odor, suspected concealed rot or mold, or a leak that returns after accessible drainage and closure checks.
Only after diagnosis
Potential parts
- door weatherstrip or gasket
Only consider this after inspection confirms the weatherstrip is cracked, torn, compressed, missing, or no longer seals a correctly aligned panel.
Match the door manufacturer, series, profile, and opening type; a rain leak does not identify a universal seal. - glazing bead or glass seal
Only consider this after qualified inspection confirms a failed glass perimeter seal or damaged bead and the glass itself is safe and correctly supported.
Confirm the door series, glass thickness, safety-glass requirement, and manufacturer fit information before ordering. - bottom sweep or sill drainage component
Only consider this when the lower sweep is distorted or the sill drainage component is damaged after visible obstructions have been cleared.
Match the exact door type and sill design; never replace a drainage component by blocking intended weep openings. - sill pan, flashing, or exterior sealant system
Only consider this after a qualified building-envelope inspection traces water to the rough opening, sill pan, flashing, or exterior joint rather than to the glass or hardware.
Installation method depends on the wall system and door model; use qualified installation guidance instead of a generic sealant repair.
When checks do not resolve it
Need a professional?
Arrange qualified door or glass service when the glass seal, glazing bead, weatherstrip, lock, sweep, sill, or frame is damaged or misaligned; when a weep path is blocked below the accessible surface; or when the leak returns after safe maintenance. Arrange a building-envelope professional when water starts above or beside the opening, flashing or cladding may be involved, or trim is soft, stained, or musty. Use an electrician for water or damage involving electrical equipment.
Have this ready
- The door manufacturer, product or model information, material, swing or sliding type, and glass configuration
- Photos showing the first wet point and the lowest visible drip from inside and outside
- Whether the leak occurs only in wind-driven rain, from a particular direction, or during every rain
- The condition of the glass edge, glazing bead, weatherstrip, lock, sill, sweep, visible weeps, trim, and nearby wall
- Any cracked glass, frame movement, prior sealing or installation work, staining, soft wood, musty odor, electrical contact, or unsafe-weather event
Common questions
FAQ
Why does my door leak only when it rains?
Wind-driven rain can expose a weak glass seal, weatherstrip, lock closure, sill weep path, or flashing layer. Trace the first wet point on a dry day and note wind direction; the lowest drip is not always the entry point.
Can blocked weep holes make a glazed door leak?
Yes. Water collected in a sill or track is intended to drain outward through weep openings on products that use them. Clear only loose accessible dirt as the product instructions allow, and never caulk over the openings.
Could the glass seal be the source of the leak?
It can be. A loose glazing bead, deteriorated sealant beneath the glass, or damaged weatherstrip can admit wind-driven water. Do not remove the glass or bead; arrange qualified glass or door service for a failed perimeter seal.
What if water appears above the door frame?
Water above or beside the frame may be entering through head flashing, cladding joints, a roof or gutter discharge, or the rough-opening drainage plane. Document the pattern and arrange a building-envelope inspection instead of sealing only the lowest drip.
When should I stop investigating a leaking door?
Stop for lightning, unsafe wind, slippery or flooded conditions, cracked or loose glass, frame movement, soft or swollen trim, suspected rot or mold, or water near electricity. Do not climb, hose-test, open trim, or touch wet electrical equipment; arrange qualified help.
Read the exact guide
Official sources
- Aluminum Hinged Patio Door InstallationPella · Pella hinged patio-door safety, glass, weather, sill drainage, weep, flashing, and installation boundaries
- Water Managed Walls: WRBU.S. Department of Energy Building Science Education · Door and window wall-drainage-plane, wind-driven rain, flashing, and water-damage principles
- Window and Patio Door Maintenance TipsAndersen Windows & Doors · Andersen window and patio-door weatherstripping, locks, closure, and sealant inspection
- Modern Sliding DoorMarvin · Marvin sliding-door sill water-management and weep-system example
- Glazing Bead on Andersen Windows and Patio DoorsAndersen Windows & Doors · Andersen glazing-bead role, glass perimeter seal, and product-specific replacement guidance
- TROUBLE SHOOTING GUIDEPella · Pella storm-door water-between-doors, weep-hole, bottom-sweep, and door-operation troubleshooting
- Andersen installation materialsAndersen Windows & Doors · Andersen window and door installation, sealing, flashing, shimming, and water-management documentation
Community feedback
Share a repair observation
Share a plain-text repair observation. Accepted observations are published automatically; this page may take a moment to update.