
On this page
Start here
Quick answer
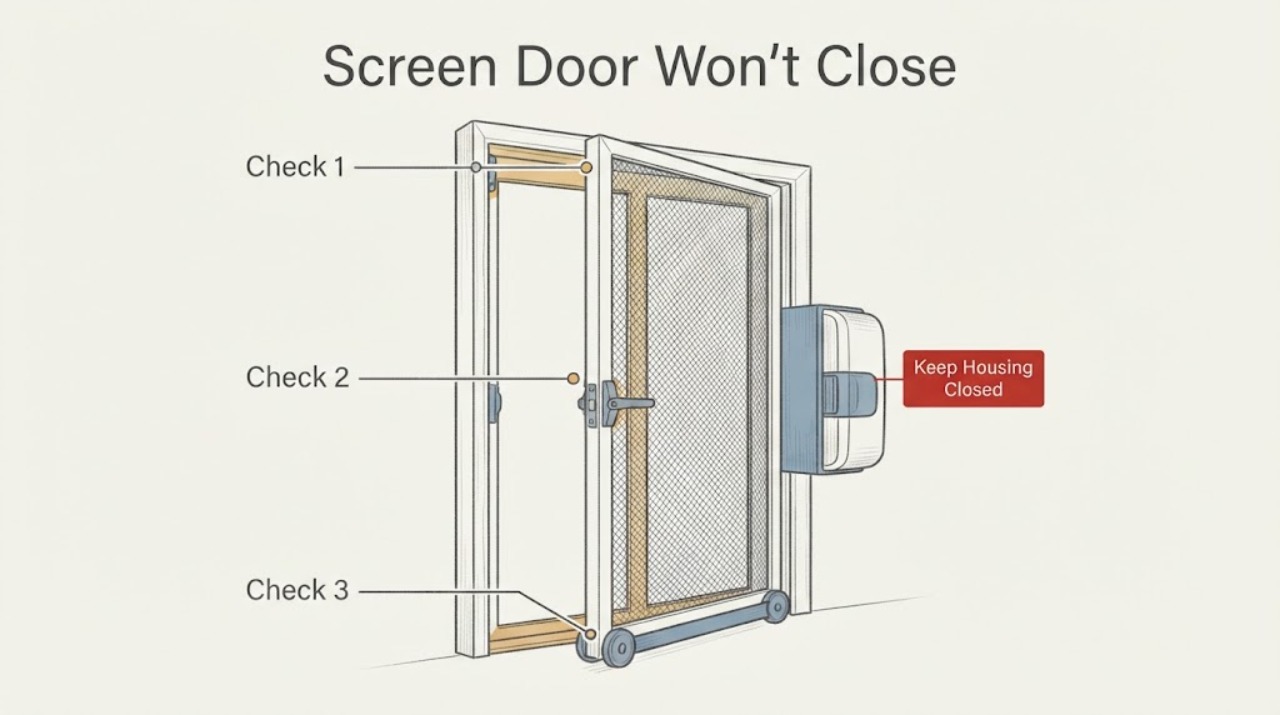
If a door with a screen will not close, do not force the screen or door panel. First determine whether the hinged or sliding door itself is stopping, or whether the screen fabric, cassette, track, bottom guide, pull bar, magnet, latch rail, sweep, or closer is preventing closure. From a safe position, look for screen fabric out of its guides, debris in the bottom guide or track, a misaligned screen handle or latch, a screen-use closer position, or a sweep that is too low. Manufacturer procedures are model-specific: one product may allow a screen to be reseated or a roller adjusted, while another needs a qualified repair. Stop for torn or unstable screen framing, damaged glass, a door that cannot be secured, a panel that must be lifted or removed, or any attempt that would require drilling, cutting, or forcing the frame.
Work through in order
Diagnostic checks
Use only checks that match the exact appliance or system and its official guide.
-
Check 1
From a safe standing position, move the door slowly toward closed until the first resistance without forcing the panel, and identify whether the screen itself, the main panel, the frame, sill, latch, or closer stops the movement.
Expected result: The screen fabric or pull bar catches; a sliding screen panel sits out of its guide; the door contacts the sill or jamb; the latch misses; or the closer does not draw the door shut.
Next step: Record whether the screen is retractable, sliding, or an insert, and photograph the first contact, model label, and latch area. Continue only if the panel is stable and the check needs no lifting or disassembly.
Stop if: Stop for an unstable panel, cracked glass, sharp frame damage, an uncontrolled closer, or a screen/door that could fall or swing unexpectedly.
Why this matters
Why: A screen-track problem follows a different path from a frame or latch problem. Identifying the first contact prevents a user from adjusting the wrong component or forcing the screen into a damaged guide.
-
Check 2
With the screen door supported in its normal position, inspect the accessible screen fabric, top and side guides, bottom track or guide, cassette, pull bar, and latch rail for fabric outside a channel, debris, a loose strip, or visible damage.
Expected result: The fabric is out of a guide; debris is visible in the bottom guide or track; the pull bar is not parallel; magnets or a latch rail do not meet; or the screen and guides look intact.
Next step: Remove only loose surface debris without tools and follow the exact product guide for reseating the screen. If the fabric, cassette, guide, or rail is damaged or cannot be reached safely, arrange qualified service.
Stop if: Do not pull hard on the fabric, dismantle a cassette, remove the panel, drill a guide, or cut the screen.
Why this matters
Why: An out-of-track screen or obstructed bottom guide can prevent even closure. A bent guide, torn fabric, loose cassette, or damaged rail is not evidence that a generic screen replacement will fit.
-
Check 3
For a sliding insect screen, compare the top and bottom rail orientation and observe whether the screen handle aligns with the frame latch; for a retractable screen, observe whether the pull bar and magnetic strip meet evenly when the screen is fully extended.
Expected result: The handle misses the latch, the screen appears installed upside down, the pull bar is skewed, the magnets do not meet, or the screen closes evenly but the main door still does not.
Next step: Follow the exact screen installation and adjustment guide for the identified system. Do not reverse or remove a screen panel unless the guide explicitly describes a safe homeowner procedure; otherwise call a professional.
Stop if: Stop if the screen must be lifted, the rail is bent, the latch cannot secure, or alignment would require drilling or changing the frame.
Why this matters
Why: Andersen states that handle/latch misalignment can indicate an incorrectly installed gliding insect screen and identifies the bottom adjustment-screw rail. A retractable screen's magnet or latch alignment is a separate check from the door closer.
-
Check 4
If the screen is part of a hinged storm door, check from the outside whether the bottom expander or sweep is centered and only lightly contacts the sill, and whether the closer is in the screen-use position specified by the exact manual.
Expected result: The sweep drags or bunches, the expander sits too low or off-center, the closer pin is in a different panel-use position, or the bottom and closer look correctly positioned.
Next step: Use only the exact guide's low-risk correction for the expander or closer position and make one change. Do not trim the panel or alter a sweep by guesswork; seek service if the door remains tight or cannot close.
Stop if: Do not remove closer pins under tension, cut the door panel, force the sweep, or adjust hardware while people or pets are in the closing path.
Why this matters
Why: Pella's storm-door troubleshooting separates bottom-expander, closer-position, and screen-use conditions because each can change closing force and clearance. The correct position depends on the specific storm-door system.
-
Check 5
Once the screen and panel meet the frame, close the door gently and observe the latch or strike without forcing the handle; keep the opening clear while the closer is allowed to move.
Expected result: The latch engages smoothly; the latch misses high or low; the door closes too slowly or too quickly; or the lock cannot secure the door.
Next step: Follow the exact manual for one safe strike or closer adjustment if explicitly permitted, checking operation after each small change. If the latch misses or the closer remains unsafe, stop and arrange qualified service.
Stop if: Stop for a door that slams, cannot latch, can swing uncontrolled, or requires force or lock disassembly.
Why this matters
Why: A screen that is aligned can still leave a separate storm-door latch or closer problem. A closer-speed or strike adjustment is model-specific and must not create a slamming or unsecured door.
-
Check 6
After one model-approved screen or closer correction, perform a few gentle open-and-close cycles while checking the screen alignment, guide contact, latch, sweep, and closing speed.
Expected result: The screen and door close evenly and latch; the screen leaves its guide again; the door improves briefly and then binds; or the symptom remains unchanged.
Next step: Use the door only if it closes, latches, and the screen remains stable as the exact manual allows. For recurrence, damage, or unresolved closure, provide the professional with photos, model details, and the correction attempted.
Stop if: Stop using the door if it cannot secure the opening, the screen or panel moves unexpectedly, or the same problem returns.
Why this matters
Why: A repeatable normal cycle supports a documented correction, while recurrence or unchanged binding indicates unresolved alignment, hardware, frame, or screen tension trouble.
Use your observations
Decision map
Find the observation that best matches what you see, then follow the next safe action.
-
PATH 01Safety boundary
What you see
Screen fabric is outside its guide or debris is visible in the bottom guide or track, with no bent or torn component.
Do this next
Remove only loose debris and follow the exact product guide for a gentle screen reseat, then test once.
Why this path and its safety boundary
Why it matters: An accessible obstruction or out-of-track screen may be stopping closure.
Safety stop: Do not force the fabric, pull a cassette, remove the panel, or cut the screen.
-
PATH 02Safety boundary
What you see
The screen handle, pull bar, magnet, or latch rail does not align when the screen reaches the frame.
Do this next
Use only the exact installation/adjustment instructions for that screen system; call a professional if the rail must be drilled, moved, or removed.
Why this path and its safety boundary
Why it matters: The screen alignment or installation path is more likely than a main-door closer fault.
Safety stop: Do not bend rails, substitute magnets, or alter the frame to make the latch meet.
-
PATH 03Safety boundary
What you see
The screen is aligned but the storm door sweep, bottom expander, closer position, or closing speed prevents the door from meeting the frame.
Do this next
Follow the exact storm-door manual for one documented expander or closer correction and test with the opening clear.
Why this path and its safety boundary
Why it matters: The screen is not the only closure component; clearance or closer setup is affecting the door.
Safety stop: Do not cut the panel, pull a loaded closer pin, or allow the door to slam.
-
PATH 04Safety boundary
What you see
The door reaches the frame evenly but the latch or strike does not engage.
Do this next
Use the exact hardware instructions for one safe strike adjustment if available; otherwise arrange service, especially if the opening cannot be secured.
Why this path and its safety boundary
Why it matters: The remaining problem is at the main-door latch or strike rather than the screen fabric.
Safety stop: Do not force the handle or dismantle the lock.
-
PATH 05Safety boundary
What you see
The screen, cassette, guide, frame, sweep, closer, or glass is torn, bent, cracked, unstable, or repeatedly leaves alignment.
Do this next
Keep the door out of use if it cannot secure the opening and arrange qualified door/window service with photos and model details.
Why this path and its safety boundary
Why it matters: The condition exceeds a safe surface-level screen check and may require replacement or alignment under product-specific procedures.
Safety stop: Do not remove the panel, drill, cut, bend, or substitute a part without confirmed compatibility.
-
PATH 06Safety boundary
What you see
One documented correction makes the door close but the symptom returns during normal use.
Do this next
Stop repeating adjustments and call a professional with the contact point, screen type, model details, and test result.
Why this path and its safety boundary
Why it matters: The correction did not establish a durable repair; screen tension, alignment, frame, or hardware movement remains unresolved.
Safety stop: Do not keep forcing or resetting the same screen or closer.
Helpful context
Understand the symptom
Separate the screen from the door closure
A screen may be a retractable insert, a sliding panel, a storm-door screen, or a screen attached to a glass sash. The first useful distinction is whether the main door is blocked by the screen assembly or whether the main door reaches its frame but does not latch. Pella and Andersen publish different procedures for screen alignment, rollers, closers, and latches, so do not combine steps from different systems.
Inspect only accessible parts
Work with the door stable and your hands clear of the closing edge. Look at the screen guides, bottom track or guide, magnets, latch rail, sweep, and closer from the accessible side. Do not pull a loaded screen cassette, lift a heavy panel, remove a door, drill a rail, or cut the screen to make it fit.
One documented correction is enough to test
If the exact product guide describes a homeowner-safe reseating, cleaning, roller, latch, or closer adjustment, make one small documented change and test gently. If the screen still does not close evenly, the door cannot latch, or the symptom returns, stop repeating adjustments and arrange qualified door service.
Safety boundary
Stop conditions
- Stop for a falling or unstable panel, cracked glass, torn or sharp screen/frame damage, an uncontrolled closer, or a door that cannot secure the opening.
- Do not force the screen, pull a cassette, remove panels, pull loaded closer pins, drill or cut rails/panels, bend the frame, or substitute an unverified screen part.
- Stop after one documented model-approved correction if the door still binds, the screen leaves its guide, or the symptom returns.
Only after diagnosis
Potential parts
- screen mesh or screen insert
Consider only after the exact manual or qualified diagnosis confirms torn, permanently deformed, or missing screen material as the closure cause.
Confirm exact door system, dimensions, frame channel, cassette/insert type, and manufacturer fit information before selection. - screen track or guide
Consider only after qualified diagnosis identifies a bent, damaged, or missing guide rather than removable debris or an alignment setting.
Confirm exact model, handing, guide position, mounting, and frame compatibility before selection. - storm-door closer
Consider only when the exact system's closer is damaged or cannot hold a safe closing action after documented adjustment.
Confirm exact door model, closer type, pin arrangement, mounting, and safe closing requirements before selection.
When checks do not resolve it
Need a professional?
Call for damaged or out-of-track screen components that cannot be safely reseated, unresolved latch/closer problems, or any need for panel removal or frame alteration.
Have this ready
- Screen type and door brand/model or serial details
- Photos of screen guides, track, pull bar/magnets, sweep, closer, frame, and latch
- Where closure first stops and whether the main panel reaches the frame
- Whether the symptom is constant or began after installation, impact, weather, or a panel change
- The one documented correction attempted and the result
Common questions
FAQ
Why won't my screen door close evenly?
Common decision points are screen fabric outside a guide, debris in a bottom guide or track, a misaligned pull bar or latch rail, a low sweep or expander, or a closer/hinge issue. Identify the first contact and use only the exact product instructions.
Can I push a screen back into its track?
Only if the exact product guide describes a safe reseating procedure and the screen is stable and undamaged. Do not force the fabric, pull a cassette, lift a panel, or bend a guide; arrange service if it does not reseat easily.
What if the screen closes but the door will not latch?
Treat it as a separate latch or strike check. Follow the exact hardware instructions for one safe alignment adjustment if available. If the lock still misses, requires force, or cannot secure the opening, call a professional.
Can a storm-door closer stop a screen door from closing?
Yes. A closer position, closing speed, sweep, or bottom expander can change clearance and closing force. Use only the model guide, keep people clear of the closing path, and stop if the door slams or remains unsecured.
When should I call for screen-door service?
Call when the screen, guide, cassette, frame, closer, hinge, or glass is damaged; the panel must be removed or lifted; the door cannot latch; the frame needs drilling or bending; or one documented correction does not hold.
Read the exact guide
Official sources
- TROUBLE SHOOTING GUIDEPella Corporation · Manufacturer-specific storm-door examples; use the exact product manual for other systems.
- Patio Door Gliding Insect Screen Handle AlignmentAndersen Windows & Doors · Applicable to Andersen gliding insect-screen systems covered by the support article.
- ADJUST CLOSING SPEED OF DOORAndersen Windows & Doors · Applicable to the storm-door closer system covered by the official guide; exact model instructions govern.
Community feedback
Share a repair observation
Share a plain-text repair observation. Accepted observations are published automatically; this page may take a moment to update.