
On this page
Start here
Quick answer
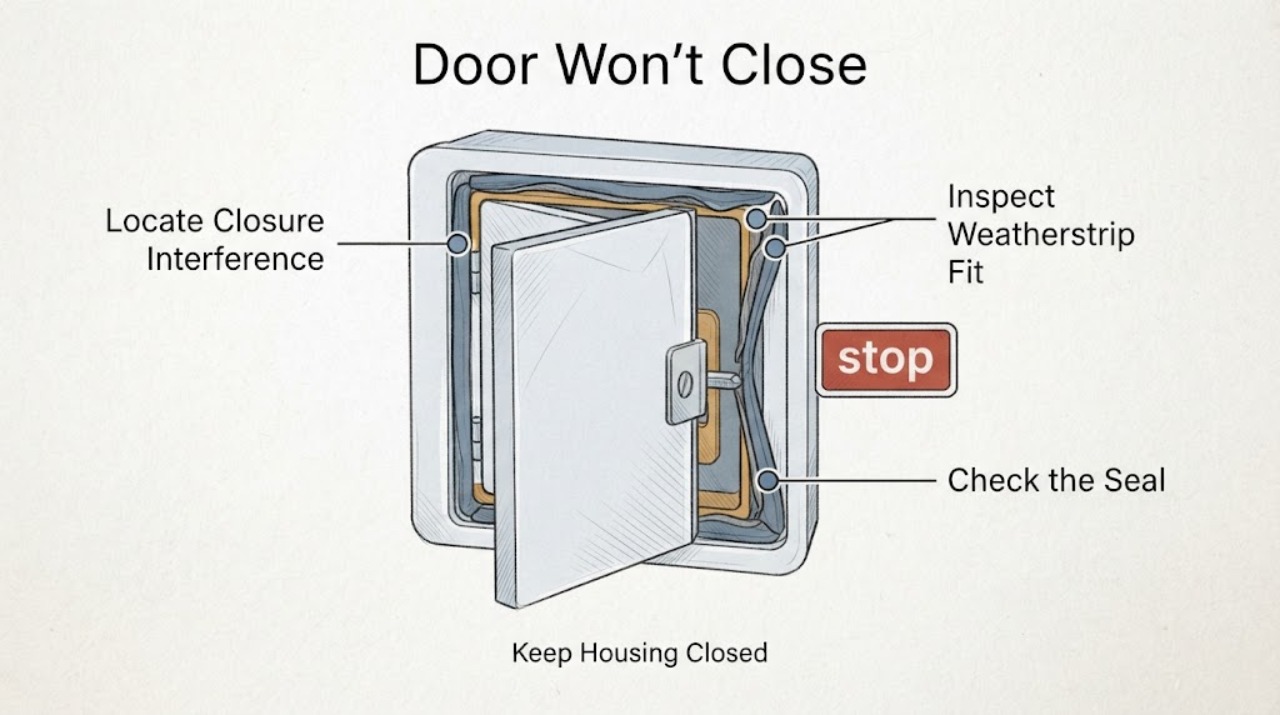
If a door will not close after weatherstripping was installed or replaced, do not force the latch. First identify where the panel stops: a bulky or mispositioned weatherstrip, loose hinge or hardware, a shifted strike, a raised threshold or sweep, or a frame that is out of square. The U.S. Department of Energy recommends correcting loose hardware and door fit before installing weatherstripping, measuring each side and the top or bottom, fitting the seal snugly, and checking smooth operation afterward. Weatherstripping should seal without preventing normal closure or emergency egress. If the door rubs badly, the frame or glass is damaged, the lock cannot engage, or adjustment would affect a fire or escape door, stop and use a qualified door or window professional.
Work through in order
Diagnostic checks
Use only checks that match the exact appliance or system and its official guide.
-
Check 1
Close the door slowly without forcing it and watch the perimeter, weatherstripping, sweep or threshold, hinges, latch, and strike area to identify the first point of contact.
Expected result: Record whether the seal is compressed evenly, folded or bulging, rubbing on one corner, caught behind the frame, or whether the panel stops at the floor, hinge side, or latch side.
Next step: Photograph the contact point and continue with the matching weatherstrip, hardware, or frame check rather than pushing harder on the handle.
Stop if: Stop for cracked glass, a loose panel, pinched fingers, a door that could fall, a jammed emergency exit, or any need to force the latch.
Why this matters
Why: A localized stop at the seal points toward weatherstrip size or placement; a floor stop points toward the sweep or threshold; a latch-side miss with an even seal points toward alignment or hardware.
-
Check 2
Inspect the weatherstripping around the jamb and door edge from ordinary safe access, checking for an oversized profile, doubled material, loose ends, buckling, missing sections, gaps, adhesive squeeze-out, or a strip installed on the wrong surface.
Expected result: Record whether the strip is continuous and aligned, compresses only when the door is nearly closed, or makes contact too early and prevents the panel from reaching the latch.
Next step: Use the installed product's instructions to identify the correct seal profile and position; do not stack a second strip over one that already blocks closure.
Stop if: Stop if the seal is part of a rated fire, smoke, security, or emergency-exit assembly and its replacement or alteration is not covered by the manufacturer's instructions.
Why this matters
Why: A strip that contacts too early, buckles, or is too thick can hold the door open; gaps or missing sections explain drafts but do not justify adding material without confirming the correct profile and placement.
-
Check 3
With the door supported and no force applied, check visible hinge screws, knob or handle movement, latch alignment, and the strike area for looseness, sag, or impact damage; do not remove the door or lock body.
Expected result: Record whether the hinges or hardware move, the panel is visibly out of square, the latch misses above or below the strike, or the frame or jamb is damaged.
Next step: Tighten only an obviously loose accessible fastener if the manufacturer's instructions permit it, then recheck alignment; request professional adjustment for sag, stripped framing, damaged hardware, or a door that remains out of square.
Stop if: Do not remove hinge pins, lift a heavy door, alter a lock or strike on a required exit, or continue if the panel is unstable.
Why this matters
Why: The Department of Energy says loose hinges, knobs, and strike plates should be adjusted before weatherstripping. Hardware or frame misalignment can prevent closure even with a correctly sized seal.
-
Check 4
Check the bottom sweep and threshold for a raised edge, displaced fastener, debris, or a seal that drags on the floor; compare the door's movement with the bottom seal clear of loose objects.
Expected result: Record whether the sweep touches before the jamb seal, the threshold is loose or lifted, the floor is obstructed, or the door closes freely when the bottom contact is isolated without dismantling the assembly.
Next step: Clean only loose debris and follow the installed sweep or threshold instructions; do not shave or permanently remove material until the correct replacement and clearance are confirmed.
Stop if: Stop for a trip hazard, water intrusion, unstable threshold, damaged flooring, or any adjustment that would compromise the door's weather, security, or emergency function.
Why this matters
Why: A bottom seal or threshold can stop closure even when the side weatherstripping is correct. A floor or threshold change may also indicate settlement or frame movement that needs more than a new strip.
-
Check 5
If the weatherstrip is worn or missing and the door hardware and frame are sound, measure each side plus the top or bottom as the Department of Energy job aid describes, and identify the seal type and attachment method from the manufacturer's instructions.
Expected result: Record the measured lengths, the gap or compression needed for closure, the existing channel or screw-hole pattern, and whether the proposed seal would contact evenly without over-compressing.
Next step: Choose a replacement by the exact door and frame instructions, keeping the old strip until the new fit is verified; use a professional when the profile or assembly is uncertain.
Stop if: Do not cut or install material on a fire, smoke, security, or emergency-exit assembly without the approved product and procedure.
Why this matters
Why: Correct length and profile support a seal that closes smoothly; a generic or oversized strip can buckle, leave gaps, or stop the door before the latch. Measurement alone does not establish compatibility with a rated or specialty door.
-
Check 6
Install or reposition weatherstripping only according to the exact product instructions, fitting it snugly and using the supplied fasteners or approved attachment method; avoid forcing the door while the seal is being aligned.
Expected result: Record whether the strip lies flat, meets at the corners without buckling or gaps, compresses only when closed, and allows the latch and lock to engage without excessive force.
Next step: Make only the small manufacturer-approved alignment adjustment, then perform the smooth-operation test; stop and use a professional if the door still will not latch or lock.
Stop if: Do not use extra layers, long fasteners that could damage hidden wiring or glass, permanent adhesive on a required exit, or force to compress the seal.
Why this matters
Why: The DOE job aid's desired outcome is a durable air seal that does not impede operation. A seal that still blocks closure is incorrectly sized, positioned, or being applied to an alignment problem.
-
Check 7
With the area clear, operate the door several times from both sides and confirm smooth closure, latch engagement, lock operation, and the ability to open it normally without excessive force.
Expected result: Record whether the door closes and latches evenly, daylight or a draft remains, the weatherstrip is uniformly compressed, the lock binds, or the door cannot open quickly from the designated escape side.
Next step: Leave the door in a safe usable state and arrange qualified door or window service for persistent rubbing, frame movement, lock misalignment, or impaired egress.
Stop if: Stop immediately if the door cannot open from the escape side, the lock cannot engage securely, the panel shifts, or the seal causes dangerous resistance.
Why this matters
Why: A complete seal is acceptable only when the door remains usable and secure. Binding, a missed latch, uneven compression, or impaired emergency opening means the underlying fit is not resolved.
Use your observations
Decision map
Find the observation that best matches what you see, then follow the next safe action.
-
PATH 01Safety boundary
What you see
The door stops against the weatherstrip before reaching the latch, and the strip is visibly bulky, folded, doubled, or installed too far toward the opening.
Do this next
Follow the manufacturer's fit instructions, remove only the incorrect material, and retest smooth closure before adding a replacement.
Why this path and its safety boundary
Why it matters: Weatherstripping fit is a plausible closure obstruction, but the correct profile and placement must be confirmed rather than compressed by force.
Safety stop: Use a professional for a rated, security, or emergency-exit assembly or when the correct profile is uncertain.
-
PATH 02Safety boundary
What you see
The seal compresses evenly but the panel sags, the latch misses the strike, or visible hinges, knobs, or strike hardware are loose or damaged.
Do this next
Tighten only permitted accessible fasteners and arrange professional adjustment for sag, damaged framing, stripped screws, or lock alignment.
Why this path and its safety boundary
Why it matters: The DOE recommends correcting hardware and door fit before weatherstripping; a new seal will not correct a shifted frame or latch.
Safety stop: Do not lift the door, remove hinge pins, or alter a required exit or security lock as a trial.
-
PATH 03Safety boundary
What you see
The sweep or threshold contacts the floor or a raised edge before the side seal and latch can engage.
Do this next
Clear loose debris and use the installed assembly's adjustment or replacement instructions; request service for a shifted threshold or floor movement.
Why this path and its safety boundary
Why it matters: Bottom clearance or threshold position is blocking closure, possibly because of a loose, displaced, or incorrect seal.
Safety stop: Do not shave a threshold, remove a sweep, or leave a trip or water-entry hazard.
-
PATH 04Safety boundary
What you see
The frame is out of square, the panel is warped or unstable, glass or jamb material is damaged, or the door rubs despite a correctly fitted seal.
Do this next
Keep the opening secured and arrange qualified door or window service for frame, panel, glass, or structural alignment diagnosis.
Why this path and its safety boundary
Why it matters: This exceeds a simple weatherstrip replacement and may affect security, weather resistance, or safe operation.
Safety stop: Do not force the panel, use long fasteners, or continue operating a loose or cracked assembly.
-
PATH 05Safety boundary
What you see
The seal is evenly compressed, the door closes and latches without excessive force, the lock works, and normal opening remains possible.
Do this next
Keep the product instructions and measurements with the door record and inspect the seal during routine maintenance.
Why this path and its safety boundary
Why it matters: The weatherstrip and door fit now meet the basic operation goal, but continue monitoring for buckling, gaps, or renewed rubbing.
Safety stop: Arrange service if closure degrades, a draft or water leak persists, or emergency opening becomes difficult.
Helpful context
Understand the symptom
Find the contact point before changing the seal
A door that stops before the latch reaches the strike is not necessarily a bad weatherstrip. Look for a continuous rub, a swollen or folded seal, a threshold or sweep touching the floor, hinge-side sag, or a latch that misses because the frame moved. A new compression seal can be too thick or installed out of position, while a loose hinge or strike can create the same symptom.
Weatherstripping is a fit-and-operation component
The Department of Energy's exterior-door job aid calls for measuring the opening, fitting weatherstripping snugly, fastening it with the manufacturer's supplied fasteners, and checking the door for smooth operation. Its desired outcome is an air seal that does not impede operation. Do not keep adding layers or caulk over a seal that already prevents closure; correct the fit first.
Preserve security and emergency opening
A door that cannot close, latch, lock, or open for emergency egress needs more than a draft fix. Andersen's safety guidance warns against weatherstripping a window shut and emphasizes keeping doors and windows usable during repairs. Do not nail, paint, screw, or adhesive-seal a required exit closed, and do not force a lock against a misaligned frame.
Safety boundary
Stop conditions
- Stop for cracked glass, an unstable or falling door, a damaged frame, pinched fingers, a lock that cannot secure, or a door that cannot open from the designated escape side.
- Do not force the latch, nail or paint a door or window shut, stack extra weatherstrip, use unapproved long fasteners, or alter a fire, smoke, security, or emergency-exit assembly without approved instructions.
- Arrange qualified door or window service when weatherstripping is not the true cause, the frame is out of square, hardware is damaged, or the door still will not close and operate smoothly after the permitted fit checks.
Only after diagnosis
Potential parts
- door weatherstripping
Consider a replacement only when the existing seal is worn, missing, buckled, or incorrectly fitted and the door hardware and frame are otherwise aligned.
Confirm the exact door manufacturer, profile, attachment method, and any fire, smoke, security, or egress requirements before ordering or installing. - door sweep or threshold seal
Consider this only when the bottom seal or threshold is the first closure contact and the installed assembly permits replacement.
Confirm bottom clearance, threshold design, door swing, water management, and manufacturer fit information; do not remove a required seal by guesswork.
When checks do not resolve it
Need a professional?
Request qualified door or window service when the door remains out of square, the frame, glass, hinges, latch, or threshold is damaged, the weatherstrip profile is uncertain, the door cannot latch or lock, or any adjustment could affect fire, security, or emergency egress.
Have this ready
- Give the professional photos of the first contact point, the door and frame type, seal profile and measurements, hardware or threshold observations, and the result of the smooth-closure and lock test.
Common questions
FAQ
Can new weatherstripping stop a door from closing?
Yes. A strip that is too thick, doubled, buckled, or installed too far toward the opening can contact too early. DOE guidance says the seal should fit snugly while the door still closes smoothly without excessive force.
Should I adjust the hinges or strike before replacing weatherstripping?
Check the door fit and visible hardware first. DOE specifically lists loose hinges, knobs, and strike plates as adjustments to make before weatherstripping because misalignment can be the real cause of a door that will not close.
How do I know the weatherstrip repair is complete?
The door should close and latch without excessive force, the weatherstrip should compress evenly without gaps or buckling, the lock should work, and the door must remain easy to open from the normal and designated escape sides.
Read the exact guide
Official sources
- Install Weatherstripping on an Exterior DoorU.S. Department of Energy · DOE illustrated installation aid for exterior door seals and sweeps
- Window and Door SafetyAndersen Windows · Manufacturer safety guidance for maintaining usable windows and doors during repair
- Winterize your windowsAndersen Windows · Manufacturer maintenance guidance for weatherstripping, closure, and alignment observations
- Repairing Windows & Doors: How To's for the Handy HomeownerU.S. Department of Energy · Government repair guidance on door alignment, weatherstripping compression, and closure
- Job Aid 11-1: Install Weatherstripping on an Exterior DoorU.S. Department of Energy · Government weatherization job aid for measuring, fitting, fastening, and checking door weatherstripping
Community feedback
Share a repair observation
Share a plain-text repair observation. Accepted observations are published automatically; this page may take a moment to update.