
On this page
Start here
Quick answer
Water at a sliding door can come from a blocked or damaged sill drainage path, a panel that does not close squarely against its seals, water entering at the fixed-panel or interlock area, or failed flashing and air or water sealing around the frame. First locate the entry point after rain without removing the panel, check the visible track, drain openings, gasket, latch, and exterior joints, and keep drainage paths open. If water reaches the wall, trim, flooring, or electrical components, the sill or frame is damaged, or the repair requires removing glass, trim, or concealed flashing, stop and use a qualified door or building-envelope professional.
Before you begin
Safety first
- Do not remove glass or panels, drill or seal drainage openings, cover the sill with generic caulk, disturb concealed flashing, or rebuild the rough opening from a symptom alone.
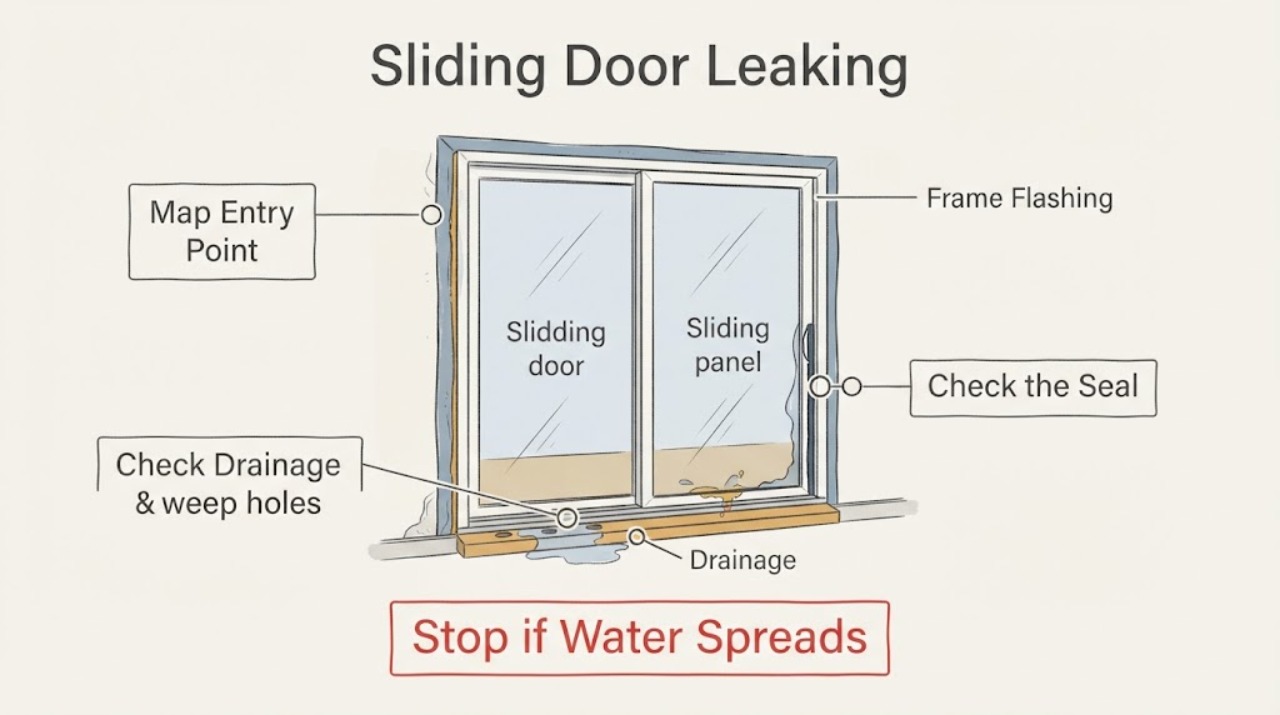
Work through in order
Diagnostic checks
Use only checks that match the exact appliance or system and its official guide.
-
Check 1
After rain, dry the interior and exterior surfaces you can safely reach, then inspect with the sliding panel fully closed and locked. Trace the wet edge from the meeting stile and fixed-panel edge down to the sill and separately inspect the side jambs and head trim.
Expected result: Water begins at the moving-panel seam, accumulates in the sill track, appears beside the fixed panel, or reaches the wall or interior trim before the sill is wet.
Next step: Mark the first wet location and follow only that branch. Take photos during rain and after drying so a professional can distinguish direct splash, track overflow, and concealed wall entry.
Stop if: Stop if water is near electrical equipment, the glass or frame is damaged, or the panel cannot be secured closed.
Why this matters
Why: A seam or track result favors panel sealing, alignment, or sill drainage. A fixed-panel or jamb result may involve interlock or frame sealing. Water at wall or trim indicates a possible installation or flashing path and should not be treated as a simple gasket replacement.
-
Check 2
Inspect the accessible sill track, drainage slots or channels, weep openings, and corners for dirt, leaves, sealant, standing water, or damage. Remove only loose surface debris with a soft brush or cloth as the model manual allows; do not push tools into hidden openings or seal over a drain.
Expected result: A visible drain or channel is blocked, water remains in the track, the sill is cracked or distorted, or the drainage path is clear and water exits outward.
Next step: Recheck after the next rain only if the obstruction was loose and the sill is intact. If a drain is sealed, inaccessible, damaged, or still overflows, stop and have the door's water-management system assessed.
Stop if: Stop if cleaning requires removing the panel, drilling the sill, applying sealant over an opening, or exposing concealed flashing.
Why this matters
Why: A blocked path can make normal sill water overflow to the room side. A cracked or distorted sill can require replacement or rebuilding. A clear path with an isolated panel-seam leak shifts attention to the seals or alignment.
-
Check 3
With the door closed, inspect the visible weatherstrips, meeting interlock, fixed-panel edge, latch contact, and panel reveal. Check whether the panel rubs, sits low, or fails to pull snugly into the jamb; do not lift out the glass panel or force a bent seal.
Expected result: The panel is uneven, the latch does not secure it tightly, a seal is torn or displaced, or the panel is square with continuous seal contact.
Next step: Use only the exact door manufacturer's documented roller or latch adjustment, changing one small setting at a time and checking closure. Identify the exact model before considering a seal or roller; do not use a thick generic strip that prevents drainage or locking.
Stop if: Stop if the panel must be removed, the glass or interlock is damaged, the lock will not engage, or adjustment makes operation worse.
Why this matters
Why: Poor panel alignment or incomplete latch contact can leave a direct path for wind-driven rain. A damaged or missing seal can allow water past the panel. Even contact with a sound seal makes the sill or installed frame more likely.
-
Check 4
Inspect the fixed-panel edge, side jambs, head, and exterior frame joints for separated sealant, open joints, displaced flashing, or water marks. Compare the wet path with the door's design joints; do not caulk over a weep, sill drain, or an active leak before its path is known.
Expected result: Water appears at the fixed-panel edge or frame joint, exterior sealant is visibly separated, flashing is exposed or displaced, or the joints look intact and the track is the only wet area.
Next step: Photograph the joint and arrange manufacturer or qualified door service when water enters around the frame or fixed panel. Use only a model-specific maintenance procedure for a removable seal; do not improvise structural or flashing repairs.
Stop if: Stop if the frame moves, siding or trim is wet inside the wall, the sill support is loose, or the repair requires opening the wall assembly.
Why this matters
Why: A fixed-panel or frame-joint leak can bypass the operating panel and may involve the installation water barrier. Intact visible joints do not rule out concealed flashing failure, but an isolated track overflow remains the more likely accessible cause.
-
Check 5
Inspect interior trim, drywall, flooring, and the wall beside the door for staining, swelling, peeling finish, damp insulation odor, or moisture that precedes wetting in the sill. Check above and beside the opening without removing trim or siding.
Expected result: The wall or trim is wet or damaged, the water appears only at the door track, or the area is dry after repeated rain.
Next step: For wall or trim moisture, stop cosmetic sealing and obtain a qualified door or building-envelope assessment; dry and protect materials while the source is addressed. For a dry wall, return to the track and panel branches.
Stop if: Stop if there is mold-like growth, structural swelling, an energized component nearby, or a need to remove trim, siding, or insulation.
Why this matters
Why: Wall or trim damage suggests concealed water migration, failed flashing, or a rough-opening problem rather than a replaceable sliding-panel part. A dry wall with track-only water supports a localized sill or panel investigation.
Use your observations
Decision map
Find the observation that best matches what you see, then follow the next safe action.
-
PATH 01Next step
What you see
Water collects in the sill track and the visible drainage path is blocked or does not discharge outward.
Do this next
Clear only loose accessible debris according to the model manual and keep drain openings and weeps open; do not drill or caulk the sill.
-
PATH 02Next step
What you see
Water begins at the moving panel, meeting interlock, or fixed-panel edge while the sill is not overflowing.
Do this next
Check the panel reveal, roller seating, latch pull-in, and visible seals; use only exact model-specific adjustment instructions.
-
PATH 03Next step
What you see
Water enters beside the fixed panel, at a side jamb, or at an exterior frame joint.
Do this next
Document the joint and check for separated sealant or displaced visible flashing without sealing over any drain or opening.
-
PATH 04Next step
What you see
Trim, drywall, flooring, or the wall beside the door becomes wet, stained, swollen, or damp before the sill track overflows.
Do this next
Stop cosmetic caulking and preserve the evidence with photos; keep water away from electrical components and arrange a building-envelope assessment.
-
PATH 05Next step
What you see
The door will not close or lock, the frame or glass is damaged, water persists after safe checks, or the source cannot be isolated.
Do this next
Stop DIY disassembly, secure the opening if possible, and provide the professional with leak location, weather conditions, photos, and model information.
Helpful context
Understand the symptom
The first useful distinction is where the water starts: on the room side of the moving panel, in the sill track, beside the fixed panel, or in the trim and wall. Dry the area, photograph the wet edge after the next rain, and keep the door closed while observing it. Water appearing at the interior trim can have traveled from above or beside the unit, so do not assume the visible puddle is the entry point.
A sill is intended to collect and drain incidental water. A door can leak when that path is obstructed, when the panel does not sit correctly on its rollers, or when the installed flashing and water-resistive barrier do not shed water outward. These are different repairs; adding caulk to every visible joint can trap water or block drainage.
Keep DIY work to accessible inspection and cleaning unless the exact door manual gives a model-specific procedure. Removing a heavy glass panel, opening the frame, or reconstructing sill flashing is professional work because it affects panel safety, water management, and the wall assembly.
Safety boundary
Stop conditions
- Water reaches electrical equipment, active wiring, or a potentially unsafe floor area.
- The glass, frame, sill, interlock, or track is cracked, bent, loose, or unsafe to operate.
- The panel cannot close and lock securely, or repair would require removing the glass or panel.
- A visible drain or weep is sealed, inaccessible, or damaged, or water repeatedly overflows after safe cleaning.
- Water enters trim, drywall, flooring, or the wall assembly, or the frame moves in the opening.
- The repair requires removing trim or siding, exposing concealed flashing, or rebuilding the rough opening.
Only after diagnosis
Potential parts
- Sliding patio door weatherstrip or interlock seal
Consider only when water begins at the panel seam and the visible seal is torn, missing, displaced, or not contacting after alignment is checked.
Confirm the complete manufacturer and model and the seal profile in the manufacturer's documentation; do not use a seal that blocks drainage or prevents locking. - Sliding patio door roller assembly
Consider only when the panel sits unevenly or cannot reach the seal after accessible debris is cleared and a documented adjustment does not restore alignment.
Roller access and fit are model-specific and may require panel removal, which should be handled by a qualified professional. - Sliding patio door sill or drainage component
Consider only when the sill is cracked, distorted, or its documented drainage component has failed after the leak path is confirmed.
Sill and drainage repairs affect water management and installation geometry; verify the exact door system and professional repair method before ordering.
When checks do not resolve it
Need a professional?
Call a qualified door or window professional when the panel, latch, fixed-panel seal, sill, or frame needs disassembly or model-specific parts., Use a building-envelope or weatherization professional when water reaches trim, drywall, flooring, the wall, or a concealed rough-opening path., Arrange prompt service for damaged glass or frame, a door that will not secure, recurring water entry, or water near electrical equipment.
Safety scope: Do not remove glass or panels, drill or seal drainage openings, cover the sill with generic caulk, disturb concealed flashing, or rebuild the rough opening from a symptom alone.
Common questions
FAQ
Why does water come in under my sliding door?
Common branches are a blocked or damaged sill drainage path, a panel that does not close squarely against its seals, or water entering around the fixed panel or installed frame. Locate the first wet point before choosing a sealant or part.
Should I caulk the inside track of a leaking sliding door?
Not as a first step. The sill may need to drain incidental water, and sealing a drain or weep can redirect water indoors. Identify whether the track is overflowing, the panel seal is leaking, or the frame is admitting water before applying any model-approved sealant.
Can a sliding door adjustment stop water leaks?
It can when the panel is visibly uneven or the latch does not bring it into seal contact, but use only the exact manufacturer's adjustment procedure. If the door remains difficult to move or lock, stop rather than forcing the panel or removing it.
When is a leaking sliding door an installation problem?
Suspect the installed frame or rough opening when water reaches trim, drywall, flooring, or the wall beside the door, or when the visible sill and panel seals are intact. Door openings need integrated sill, side, and head flashing that directs water outward; concealed repairs are professional work.
Read the exact guide
Official sources
- MultiGlide™ Sliding Glass Door SystemsAndersen Windows & Doors · Andersen MultiGlide sliding-door sill options and designed drainage channels; apply only to matching product features
- Installation Instruction - For Clad Sliding Patio DoorPella Corporation · Pella clad sliding patio door installation, sill support, sill flashing, side and head flashing, and water-resistive barrier integration
- The Parts of a Patio DoorPella · Pella sliding patio door panel, interlocker, roller, frame, jamb, and sill terminology
- Gliding Patio Door Hardware Adjustment and Replacement GuideAndersen Windows & Doors · Andersen gliding patio door roller alignment, reveal, lock adjustment, and panel-removal service boundary
- Fully Flashed Window and Door Openings: Sill FlashingU.S. Department of Energy Building Science Education · DOE sill flashing, back-dam, pan flashing, and moisture-direction principles for door and window openings
- Windows and Doors are Installed: Fully Flashed Window and Door OpeningsU.S. Department of Energy Building Science Education · DOE guidance on door-opening flashing and directing water out of the wall cavity
Community feedback
Share a repair observation
Share a plain-text repair observation. Accepted observations are published automatically; this page may take a moment to update.