
On this page
Start here
Quick answer
When a sliding door leaks, first locate whether water appears at the sill or track, at a jamb or frame joint, around the moving panel, or in the wall beside the opening. Sliding patio doors commonly use a sill drainage or weep system to move incidental water outside, so clear visible debris without sealing over a drain path. Confirm the panels close and latch normally and that the weather seals and interlock are not visibly displaced. If water enters during ordinary rain after the sill, drainage path, seals, and exterior frame are clear, the problem may be installation, flashing, sill pan, or concealed frame damage and needs a qualified door or building-envelope professional. Stop if the opening is unstable, the glass or frame is damaged, water reaches electrical equipment, or the wall shows swelling or active structural damage.
Work through in order
Diagnostic checks
Use only checks that match the exact appliance or system and its official guide.
-
Check 1
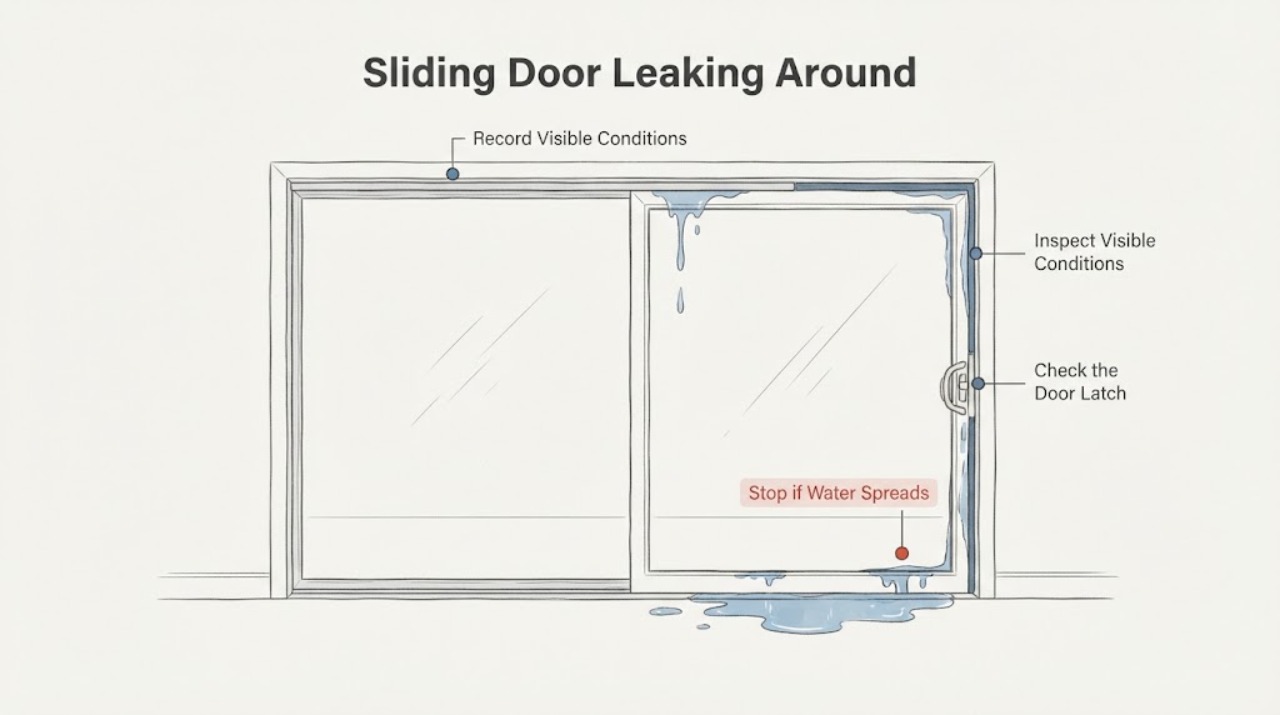
Protect the floor, keep people clear of the wet area, and inspect the sliding door from inside and outside without removing the panel, trim, glass, or frame. Record the first visible wet point: the track or sill, the moving-panel edge, a jamb or frame corner, the head above the panel, or the wall and trim beside the frame. Check for cracked glass, a loose or leaning frame, swollen wall material, or water near electrical equipment.
Expected result: Water begins at the sill or track; it appears around a panel or interlock; it starts at a jamb, head, or perimeter joint; or the surrounding wall or structure is already damaged.
Next step: If the frame is unstable, glass is damaged, the wall is swelling or soft, or water reaches electrical equipment, stop and arrange qualified door/building-envelope service and appropriate electrical help. Otherwise photograph the wet point and continue with the matching external inspection.
Why this matters
Why: The first wet point determines whether to investigate the sill drainage path, panel seals and closure, or the exterior frame and opening. Structural or electrical damage is a stop condition, not a caulking problem.
-
Check 2
With the door closed and the sill safe to reach, remove loose leaves, dust, and visible debris from the accessible track and sill using a soft brush or cloth. Look for visible drain or weep openings at the sill or jamb and confirm they are not covered by dirt, paint, tape, or sealant. Do not drill, enlarge, or fill an opening whose function is not confirmed by the door manual.
Expected result: Debris blocks an identified drainage opening; water can move toward the exterior after the accessible path is cleared; or no visible opening can be identified and water remains trapped in the track.
Next step: Clear only loose debris from a confirmed accessible path and observe the next rain event. If water still pools, the path is concealed, or the sill is damaged or misaligned, stop and arrange qualified service. Never seal over a drain opening to hide the symptom.
Why this matters
Why: A sliding sill is designed to manage incidental water, and a blocked or sealed path can send it toward the interior. A trapped-water symptom with an unknown sill design may require model-specific documentation or service rather than an improvised hole.
-
Check 3
Operate the sliding panel gently through its normal travel and then close and latch it. From the exterior and interior, inspect the visible weather seals, panel-to-panel interlocker, corner joints, and contact with the sill; do not force a dragging panel or remove it from the track.
Expected result: The panel closes squarely and latches with continuous visible seal contact; a gap remains at one edge; the panel drags or sits low; or a seal is torn, displaced, or compressed unevenly.
Next step: If the panel does not close and latch normally, stop forcing it and arrange sliding-door service. If a seal is visibly displaced and the exact model manual provides a user replacement procedure, document the part identity before ordering; otherwise have a professional confirm the seal and fit.
Why this matters
Why: A panel that does not close or engage its interlocker can leave a path for wind-driven rain. Dragging or a low panel can indicate roller, track, frame, or settlement problems; a damaged seal is a conditional repair item, not proof that the sill drain is blocked.
-
Check 4
Inspect the exterior perimeter of the frame without removing cladding or trim: look at the head, side jambs, sill-to-jamb corners, visible flashing or sill-pan edge, and the wall finish above and beside the opening. Compare the location of exterior wetting with the first interior wet point after ordinary rain; do not apply interior caulk before the drainage route is understood.
Expected result: Water appears above or beside the frame, at a frame-to-wall joint, at a sill-to-jamb corner, or only at the interior track while the exterior perimeter looks intact.
Next step: Do not dismantle the opening or apply a continuous bead across the sill. Photograph the perimeter and have a qualified door installer or building-envelope professional inspect any frame-to-wall, flashing, sill-pan, or concealed drainage issue.
Why this matters
Why: Water above or beside the unit can point to flashing, sill-pan, sealant, cladding, or wall drainage rather than a replaceable door seal. Water confined to the track keeps the sill and panel path as the leading branch, but a concealed failure is still possible.
-
Check 5
After the accessible sill, drainage, closure, and perimeter checks, monitor the next normal rain event without spraying water into the assembly or standing under an unsafe overhang. Record weather direction, the first entry point, whether the panel was fully latched, and whether clearing debris changed the result.
Expected result: The leak stops after the confirmed drainage path is cleared; it occurs only with wind-driven rain; it returns at the same frame location; or it continues in calm rain despite a normal closing panel and clear visible path.
Next step: Keep the affected area dry and arrange qualified service for a recurring leak. Provide the photos and observations so the professional can inspect the frame, sill, weather seals, flashing, and surrounding opening in the correct order.
Why this matters
Why: A changed symptom supports a surface drainage or debris branch, while recurrence at a frame or wall location supports an installation, flashing, sill-pan, seal, or concealed damage branch. Continued entry after low-risk checks is evidence to escalate, not to add more sealant blindly.
Use your observations
Decision map
Find the observation that best matches what you see, then follow the next safe action.
-
PATH 01Next step
What you see
The first wet point is an accessible sill or track and a confirmed exterior drainage opening is visibly blocked by loose debris.
Do this next
Clear only the loose debris, keep the opening open, and observe the next normal rain event. If water remains or the drainage design is unclear, arrange qualified service.
-
PATH 02Next step
What you see
The sliding panel does not close and latch squarely, the interlocker has a gap, or the panel drags or sits low.
Do this next
Stop forcing the panel and arrange sliding-door service to assess rollers, track, frame alignment, and seals. Do not remove the panel or adjust concealed hardware without the exact manual.
-
PATH 03Next step
What you see
Water begins above or beside the frame, at a sill-to-jamb corner, or in the wall even though the panel closes and the accessible track is clear.
Do this next
Treat the symptom as a possible perimeter, flashing, sill-pan, or building-envelope issue. Photograph it and arrange qualified door or building-envelope inspection; do not cover the sill or frame with interior caulk.
-
PATH 04Next step
What you see
The leak continues during ordinary rain after the visible drainage path, panel closure, seals, and exterior perimeter have been checked.
Do this next
Stop repeated testing and arrange qualified service for concealed drainage, seal, installation, or frame damage. Preserve photos and the weather conditions for the service visit.
-
PATH 05Next step
What you see
The frame is unstable, glass is cracked, water reaches electrical equipment, or the surrounding wall is swollen, soft, or actively deteriorating.
Do this next
Stop using the door and protect the area without dismantling it. Arrange qualified door/building-envelope service and appropriate electrical help where needed.
Helpful context
Understand the symptom
Trace the entry point before sealing anything
Water seen at the inside edge of a sliding door frame is not proof that the frame joint itself is leaking. It may have travelled along the sill or track from a blocked or overwhelmed drainage path, through a panel or interlock gap, or from the wall above and beside the opening. Note where the first wet spot appears and whether the symptom occurs only during wind-driven rain, after cleaning, or whenever the sill gets wet.
A drain opening is not a caulking target
Manufacturers use different sill profiles, but the common principle is to keep the designed water-management path open to the exterior. Do not run sealant across visible weep openings or pack material into a track simply because water is present there. If the correct drainage route is unclear, use the exact door manual or have a professional identify it before making a repair.
Separate a door leak from a wall leak
A wet jamb, trim, or floor can be downstream evidence rather than the point of entry. Check the head and side jambs, the exterior perimeter, and the transition between the frame and surrounding wall without removing trim or the panel. Persistent water above the sill, swelling materials, or an installation-related gap calls for building-envelope or door service rather than more interior caulk.
Safety boundary
Stop conditions
- Loose or unstable frame, cracked glass, or a panel that could fall or cannot be controlled safely
- Water reaching electrical equipment or concealed wiring
- Swollen, soft, or actively deteriorating wall, floor, or structural material
- Need to remove the panel, trim, sill, frame, flashing, or sealant to continue
- Uncertainty about which opening is a designed drain or weep path
Only after diagnosis
Potential parts
- sliding-panel weather seal or interlocker seal
Consider this category only when a professional confirms a torn, displaced, or compressed seal is the entry path after the panel closes and latches correctly.
Seal profiles are door-model-specific. Confirm the exact door system and installation orientation before ordering or replacing a seal. - sill weep cover or drainage component
Consider this category only when the exact door documentation identifies a damaged or missing drainage component and a professional confirms it is causing the leak.
Do not block, enlarge, or substitute a sill opening without model-specific guidance; water-management components must preserve the intended exterior path. - sill pan, frame gasket, or perimeter flashing repair
Consider this category only after inspection confirms water entering at the sill-to-jamb or frame-to-wall installation boundary rather than through the panel or track.
Sill-pan and flashing work can require removal of trim or the door unit and should be specified and installed by a qualified professional.
When checks do not resolve it
Need a professional?
Arrange qualified sliding-door or building-envelope service when the leak recurs after the accessible drainage and closure checks, the panel drags or will not latch, water starts above or beside the frame, a sill-pan or flashing issue is suspected, or the wall, glass, or frame is damaged.
Have this ready
- Provide the door make and model if known, panel configuration, first wet point, weather and wind conditions, photos of the sill, weep openings, seals, frame corners, exterior perimeter, and wall finish, plus whether the panel closes and latches and whether clearing visible debris changed the leak. Do not remove the panel or conceal the drainage path before inspection.
Common questions
FAQ
Why is my sliding door leaking at the bottom frame?
Trace the first wet point before sealing anything. Remove only loose debris from a confirmed accessible sill or track path and check that visible weep openings are not blocked. If the panel does not close normally or water continues after the path is clear, arrange qualified service.
Should I caulk the track or weep hole on a leaking sliding door?
No. A sill may be designed to move water through a drainage or weep system to the exterior. Do not seal across a drain opening or fill the track when its function is uncertain; use the exact door documentation or have a professional identify the path.
Can a sliding door seal cause water to leak around the frame?
Yes, a torn, displaced, or poorly engaged panel seal or interlocker can leave a path for wind-driven rain, but water beside the frame may also come from flashing, a sill pan, or the surrounding wall. Confirm that the panel closes and latches before treating a seal as the cause.
When should I call a professional for a leaking sliding door?
Call when the leak recurs after the accessible drainage and closure checks, the panel drags or will not latch, water starts above or beside the frame, a sill-pan or flashing issue is suspected, or the wall, floor, glass, or frame is damaged. Stop immediately if water reaches electrical equipment or the frame is unstable.
Read the exact guide
Official sources
- The Parts of a Patio DoorPella · Pella sliding patio doors; frame, head, jamb, sill, panel, interlocker, rollers, and related door components
- Accessory Guide - Patio Doors including Stormwatch® - Double Insect Screen Track -- 400 Series - Frenchwood® Hinged - 0005207Andersen Windows · Andersen patio-door sill and accessory assemblies; sealant placement and preserving the sill drain hole
- Aluminum Sliding Patio Door InstallationPella · Pella aluminum sliding patio door installation; frame-to-sill joints, sill support, sill pan, flashing, and opening water management
- Modern Sliding DoorMarvin · Marvin modern sliding patio doors; sill water-management and weep system, panel tracks, and exterior drainage
Community feedback
Share a repair observation
Share a plain-text repair observation. Accepted observations are published automatically; this page may take a moment to update.