
On this page
Start here
Quick answer
A draft at a storm window usually comes from a panel that is not fully seated, a latch or frame gap, worn weatherstripping, or air leaking around the surrounding window opening. Start with safe, ground-level observations: note exactly where the air is felt, confirm that accessible latches are closed without force, inspect visible seals, and compare the draft with the primary window and nearby trim. Do not climb, remove a glass panel, or try to correct an installation detail from the outside. If the panel is loose, glass is damaged, water is entering, or the leak appears to be around the wall opening, arrange professional window service.
Work through in order
Diagnostic checks
Use only checks that match the exact appliance or system and its official guide.
-
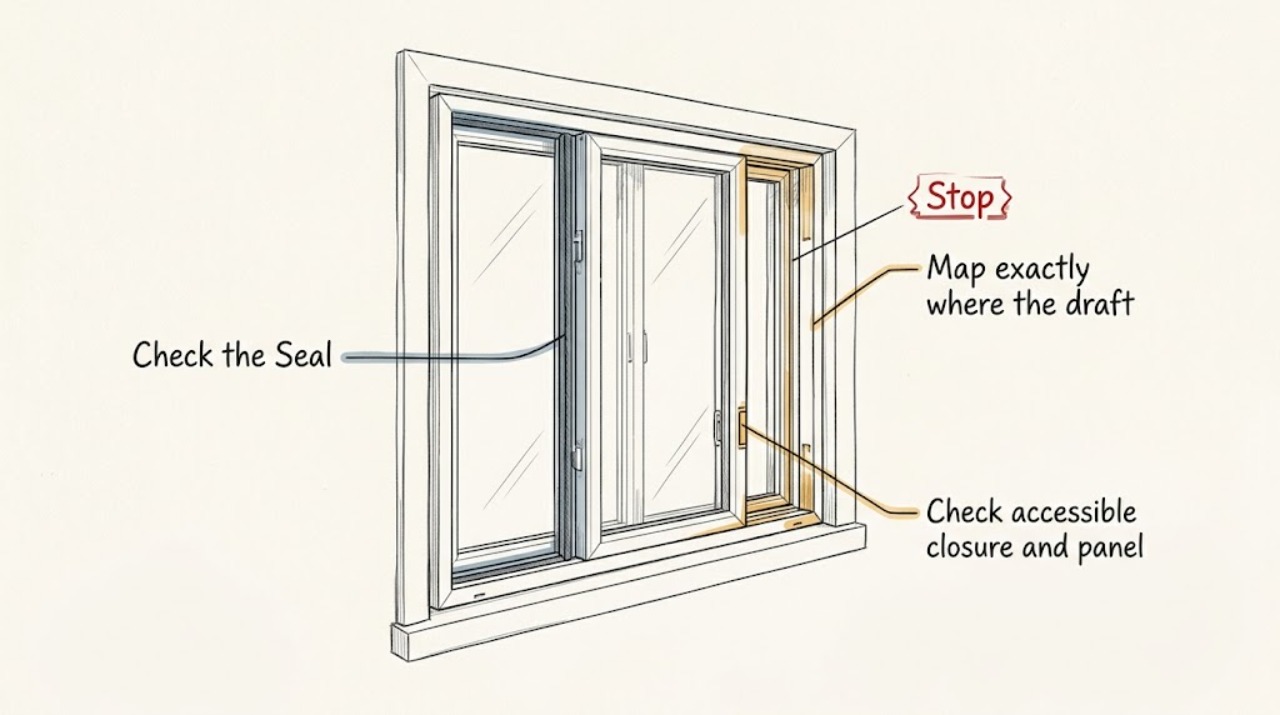
Map exactly where the draft is felt
On a cool or windy day, stand inside on a dry, stable floor and note the draft location without touching the glass: meeting rail, lower edge, side frame, top frame, or the trim around the window. Compare the feeling with the nearby primary window and wall surface.
Expected result: Record whether air is felt at one short section, along a broad perimeter, at the storm-panel meeting edge, or around the opening and trim. Note whether the draft changes when wind direction or outdoor temperature changes.
Next step: Photograph the location and continue with the accessible closure and seal observations. Do not assume a strip of material placed on the first noticeable gap will address a different leak path.
Stop if: Stop if the draft is accompanied by loose glass, a cracked pane, an unstable frame, or water entering the room; keep people clear and request professional service.
Why this matters
Why: A localized edge draft makes the panel seating or visible weather seal worth checking. A broad draft around the opening may be outside the storm panel and needs a window or air-sealing assessment. DOE explains that air leakage through fenestration can cause drafts and condensation, while the leak path still has to be located at the individual unit.
-
Check accessible closure and panel seating
From inside and without removing anything, look at the storm window's visible latches, catches, meeting edges, and lower seating surface. If a latch is readily reachable, close it gently according to the existing hardware's normal travel; do not force a stiff latch or press on the glass.
Expected result: Note whether the latch reaches its normal closed position, whether a panel edge looks uneven in its track or frame, and whether a visible gap remains after ordinary closure. Record any bent-looking hardware, missing fastener cover, or panel that appears to shift.
Next step: Leave the unit in its safe existing position, take close photos of the hardware and gaps, and provide the window style and any label information to the service provider. Do not remove a glass or storm panel to investigate the track.
Stop if: Stop immediately if closure requires force, the panel shifts, glass is cracked, or any part could fall. Keep the opening closed only if it can be secured normally and safely.
Why this matters
Why: A latch that does not engage or a panel that is visibly out of position can leave an air path, but it does not identify why the fit changed. A panel that is loose, distorted, or difficult to secure should be handled by a window professional rather than forced back into place.
-
Inspect visible weatherstripping and seals
With the unit closed normally, use a flashlight to inspect only the visible seal or weatherstrip along the accessible frame and meeting edges. Look without pulling, scraping, or removing the material.
Expected result: Record whether the material is continuous, compressed, cracked, torn, displaced, or missing, and whether the gap lines up with the place where the draft was felt. Note any deteriorated sealant or open corner visible from inside.
Next step: Photograph the seal in place and record its shape, color, and location before considering a replacement weatherstrip. If the seal is inaccessible, bonded, or part of a glass-retaining system, request professional identification instead of disturbing it.
Stop if: Stop if inspecting the seal would require reaching over a sill, handling a glass edge, opening an upper-level unit, or disturbing a material that may retain the panel.
Why this matters
Why: Andersen notes that light, moisture, temperature, wear, and compression can reduce weatherstrip sealing, and Marvin describes weatherstripping as the flexible material that closes gaps between sash and frame. A damaged or missing seal is a plausible repair lead, but its profile and location must match the window system.
-
Separate draft, condensation, and water-entry clues
Look at the sill, lower corners, adjacent trim, and the space between the storm and primary window from a safe indoor position. Record condensation, frost, staining, dampness, or a recent water mark, and note whether the clue appears only during cold weather, wind-driven rain, or after indoor humidity rises.
Expected result: A dry surface with moving air is different from recurring condensation or a wet trail. A mark at the wall or trim is different from moisture on the glass or storm-panel edge. Do not wet-test the window or open a sealed space.
Next step: Keep a dated photo and weather note, reduce exposure to the affected area if water is entering, and request a window or building-envelope assessment when the clue is recurring or extends into trim or wall materials.
Stop if: Stop and arrange prompt service if water is actively entering, the wall or trim is swelling or staining, or the area cannot be kept dry.
Why this matters
Why: Condensation can result from moist indoor air meeting a cooler glass surface, while water at the perimeter can involve flashing or the wall opening. DOE building-science guidance describes windows as vulnerable interruptions in the drainage plane, so a water mark outside the panel perimeter should not be treated as a weatherstrip-only problem.
Use your observations
Decision map
Find the observation that best matches what you see, then follow the next safe action.
-
PATH 01Safety boundary
What you see
The draft is localized at a visible, accessible seal; the panel is stable, glass is intact, and the frame closes normally.
Do this next
Ask a window professional to identify the exact weatherstrip profile and confirm whether a compatible storm-window weatherstrip or removable air-sealing product is appropriate. Preserve the photos and do not rely on a generic fit claim.
Why this path and its safety boundary
Safety stop: If the replacement material does not match the existing channel or the draft remains, stop adding material and request a full fit assessment.
-
PATH 02Safety boundary
What you see
A latch will not engage, the panel is visibly loose or out of track, or closure requires force.
Do this next
Keep people away from the opening and schedule storm-window service. Provide photos of the hardware, panel position, and draft location; do not remove the panel or attempt an elevated adjustment.
Why this path and its safety boundary
Safety stop: Treat cracked, shifting, or unsecured glass as an immediate stop condition and do not operate the unit until it is assessed.
-
PATH 03Safety boundary
What you see
The draft is broad around the outer frame or trim, or moisture marks extend beyond the storm-panel edge.
Do this next
Request a window and building-envelope assessment that considers the surrounding opening, perimeter seal, flashing, and the primary window. A storm-panel accessory alone may not address this path.
Why this path and its safety boundary
Safety stop: Do not cover an active water path or conceal swollen, stained, or damp trim with a cosmetic seal.
-
PATH 04Safety boundary
What you see
The panel is stable and the main clue is condensation without a clear air path.
Do this next
Record indoor humidity and when condensation appears, keep the window area dry, and ask a window professional to assess the storm-to-primary-window air space and ventilation. Do not assume condensation proves a failed seal.
Why this path and its safety boundary
Safety stop: Escalate if condensation is recurring with mold-like odor, wet materials, or damage to the sill, trim, or wall.
Helpful context
Understand the symptom
Why the location matters
A breeze at the meeting edge or lower rail points the inspection toward the storm panel and its seal. A breeze at the outer frame or adjacent trim can involve the perimeter of the unit or the surrounding opening. Condensation and water marks add a separate moisture clue. The location narrows the next step but does not prove that the storm panel itself is the only leak path.
Keep the check observational
Perform the inspection from inside or from stable ground at an accessible height. Use normal lighting or a flashlight, take photos, and avoid putting hands on glass edges or applying force to a panel. Do not use a flame or smoke to find a leak, and do not change a panel, fastener, or exterior seal from an elevated position.
Only after diagnosis
Potential parts
- storm-window-weatherstrip
Only consider this category after the draft is localized to a damaged or missing visible seal and the panel, channel, and frame are confirmed stable.
Match the seal profile, length, attachment method, window type, and manufacturer information; a generic strip may not seat or compress correctly. - rope-caulk
Consider a removable air-sealing material only for a small, accessible, dry, non-moving perimeter gap after a professional or manufacturer guidance confirms it will not block drainage or normal operation.
Do not use it on moving tracks, weep paths, glass-retaining edges, or an active water leak; confirm that it can be removed without damaging the finish. - window-film
Consider film only as a temporary interior comfort measure when the storm window and primary window are intact, stable, and not showing an unresolved water path.
It does not repair a loose panel, failed weatherstrip, or perimeter flashing; confirm the film is suitable for the glass and finish before use.
When checks do not resolve it
Need a professional?
Call a qualified window or storm-window professional when a panel is loose, a latch will not engage, glass is damaged, a draft persists after normal closure, or water or condensation is recurring. Use a building-envelope or water-intrusion professional when moisture extends into trim or wall materials.
Have this ready
- Provide the draft location, window and storm-panel style, photos of the visible frame, latch, seal, sill, and trim, weather conditions when the issue appears, and any history of panel movement or water entry.
Common questions
FAQ
How can I tell whether the storm window or the surrounding frame is leaking air?
Note the exact location of the moving air from inside: the panel edge and meeting rail suggest the storm unit, while a broad draft at the trim or wall edge points toward the surrounding opening. A professional can confirm the path without removing glass.
Should I remove the storm panel to inspect the draft?
No. Keep the inspection to visible, accessible areas. Removing or handling a glass panel can create a breakage or fall hazard, and it can disturb drainage or the fit. Photograph the panel, latch, frame, and seal in place and arrange service if the fit is uncertain.
Can window film or rope caulk fix a storm-window draft?
They may be conditional comfort or temporary air-sealing options only when the window is intact, stable, dry, and the gap is suitable. Neither corrects a loose panel, damaged glass, failed hardware, or water entering around the opening.
Read the exact guide
Official sources
- Window and Patio Door Maintenance TipsAndersen Windows · Supports visual checks of draft location, weatherstrip condition, locks, sealant, and condensation; exact storm-window hardware varies by product.
- Parts of a Window: Diagram of a WindowMarvin · Supports distinguishing a storm sash, frame, sill, and weatherstripping during a visual inspection; the page is not a repair instruction for an unknown storm window.
- Purchasing Energy-Efficient Residential Storm WindowsU.S. Department of Energy · Supports checking drafts and closure, and explains that lower air leakage improves comfort; it does not identify the defect in a particular window.
- Window FlashingU.S. Department of Energy Building Science Education · Supports escalating water marks around the frame or wall opening rather than treating them as a storm-panel-only defect.
Community feedback
Share a repair observation
Share a plain-text repair observation. Accepted observations are published automatically; this page may take a moment to update.