
On this page
Start here
Quick answer
A visible gap around a drafty window is not one single fault: it may be between a moving sash and its frame, between the fixed frame and the wall opening, at trim or exterior sealant, or around damaged glazing. First map exactly where daylight or air enters and whether the sash still closes and latches squarely. A gap at an operable sash generally calls for the correct weatherstripping or an alignment check, while a gap between the frame and wall may require careful air sealing of the rough opening; do not caulk a moving joint, block drainage paths, or use a random foam or sealant. Use only ground-level or interior access, and stop for a window that will not stay open or closed, cracked glass, water intrusion, rot, a loose frame, or any repair requiring a ladder, roof access, trim removal, glazing work, or force.
Before you begin
Safety first
- Do not force a stuck or falling sash, remove glazing or trim, lean a ladder on the window, climb to an upper exterior opening, seal a moving sash joint shut, block weep holes or sill drainage, or fill an unknown cavity with foam. Keep people clear of cracked or loose glass and leave an unstable window secured in its safest position.
Work through in order
Diagnostic checks
Use only checks that match the exact appliance or system and its official guide.
-
Check 1
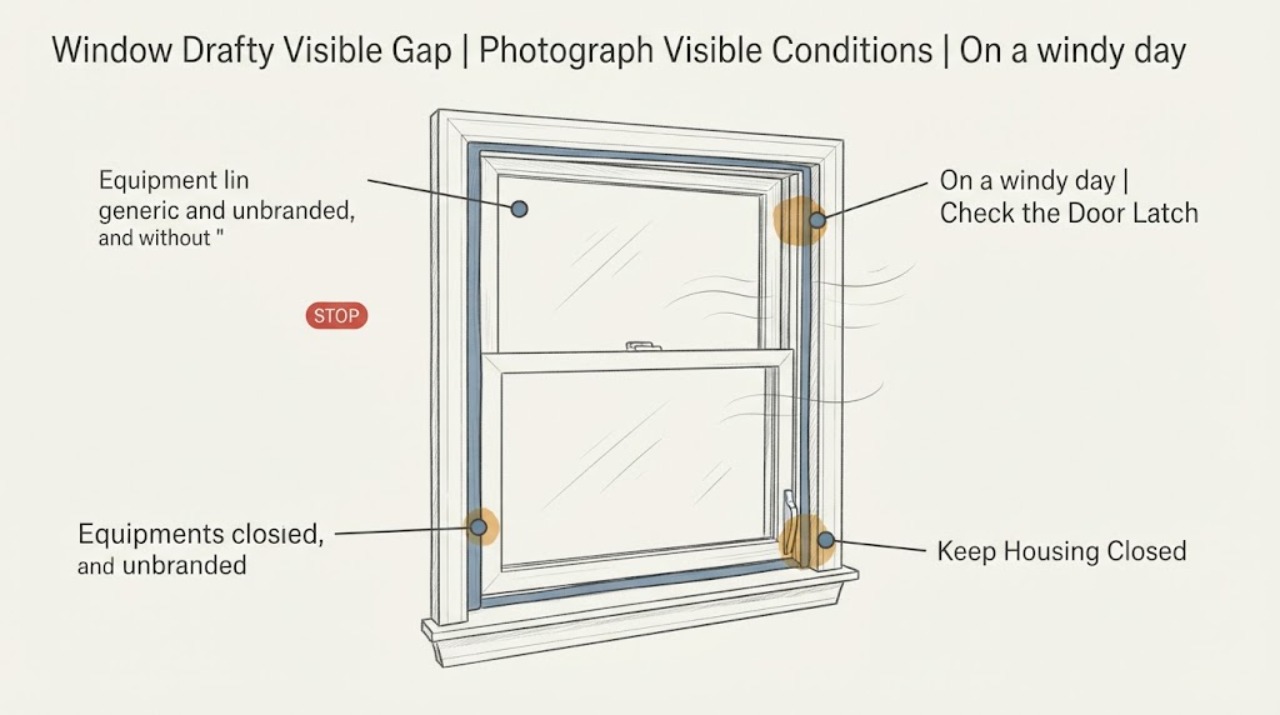
With the window closed as it normally is, photograph and mark the exact visible gap: at the sash-to-jamb or meeting rail, around the fixed frame and trim, at the sill, around the glass, or where the exterior wall meets the frame. Inspect from inside and only from a safe ground-level exterior position.
Expected result: The gap follows the moving sash perimeter; it is a stationary line between frame and wall; it is a crack or loose edge around the glass; or it appears only at a corner, sill, or trim joint.
Next step: Use the gap location to choose the next check and give the photographs to a service provider if the opening, glass, or exterior edge is not safely accessible. Do not seal a moving joint or cover a damaged pane as a substitute for repair.
Stop if: Stop immediately for cracked or loose glass, a loose frame, exposed sharp edges, a gap at an upper story, or any closer inspection that needs a ladder, roof access, or trim removal.
Why this matters
Why: A moving-perimeter gap points toward weatherstripping, closure, or alignment. A stationary frame-to-wall gap points toward the rough-opening or trim air seal. A glazing crack or loose edge is a glass and weather-exclusion issue, not a reason to apply ordinary caulk over the pane.
-
Check 2
On a windy day or while the room is otherwise quiet, hold a narrow strip of tissue or light paper near the closed gap without using a flame, smoke, or an electrical tool. Move it around the sash perimeter, frame-to-wall seam, sill, and trim, keeping clear of moving parts.
Expected result: The strip moves at the sash edge, only at a fixed frame-to-wall seam, at more than one window location, or does not move despite the visible line.
Next step: Record the exact locations and compare them with the first action. Prioritize the path that moves air, while keeping the window operable and avoiding any material that could be pulled into the track.
Why this matters
Why: Movement at the operable edge supports an active sash seal or closure leak. Movement at a stationary seam supports an opening or trim air-seal issue. Movement at several locations may reflect broader house pressure and other leaks; a visible line without airflow may be a surface joint, shadow, or inactive crack rather than the main draft path.
-
Check 3
Operate the window only through its normal handle, latch, or lock: open it slightly if it is safe to do so, then close and latch it without force. Observe whether the sash closes evenly, the latch engages, the visible gap changes when latched, and the sash stays in its intended position.
Expected result: The gap closes when the latch engages; one corner remains open; the sash binds, drops, or will not latch; or the frame moves when the sash is operated.
Next step: If normal operation is smooth and the gap is limited to the seal, identify the existing seal profile before considering a system-matched replacement. If operation is abnormal, leave the window in its safest stable position and arrange service rather than forcing hardware or the sash.
Stop if: Stop if the sash can fall, will not stay secured, the lock will not engage, the frame shifts, or operation requires unusual force.
Why this matters
Why: A gap that changes with latching may involve compression, a worn seal, or an adjustment issue. A corner that remains open or a sash that binds, drops, or moves the frame raises an alignment, hardware, or structural concern; adding thicker weatherstripping can worsen that condition.
-
Check 4
Inspect the visible sill, frame, trim, and wall immediately around the gap for staining, soft or swollen material, peeling sealant, open joints, condensation, or a draft that worsens during rain. Do not probe behind trim, remove sealant, or close any visible drainage opening.
Expected result: There is dry air leakage with intact material; water staining or swelling is present; exterior caulk is cracked or missing at the frame-to-wall seam; or condensation is on the room-side glass or frame.
Next step: Photograph moisture evidence and arrange a window or building-envelope assessment when material is soft, stained, swollen, or repeatedly wet. Do not seal over wet or deteriorated material or block sill drainage to hide the symptom.
Stop if: Stop for active water entry, visible rot, mold-like growth, loose exterior material, or any need to access a high exterior seam.
Why this matters
Why: A dry perimeter leak may be an air-seal or weatherstripping problem. Staining or swelling means moisture may be entering and the leak source must be found before cosmetic sealing. Condensation can involve indoor humidity, a cold surface, or air leakage and is not proof that a new window or seal is needed.
-
Check 5
Compare the draft with other nearby openings while keeping the suspect window in its normal closed position. Note whether the room draft changes when the window is latched, whether other windows or doors also move the paper strip, and whether the gap is limited to one frame or part of a larger wall area.
Expected result: Only one window has airflow; several openings draft similarly; the window is tight but the room remains drafty; or the draft is strongest during exhaust-fan or other pressure changes.
Next step: Document the comparison and ask for an air-leak assessment that considers the window and the surrounding envelope. Use temporary movable coverings only as a comfort measure, not as a way to conceal water damage or prevent the window from serving its normal function.
Why this matters
Why: A single-window result supports a local sash, frame, or rough-opening issue. Similar movement at several openings or a draft that persists with a tight window makes broader air leakage or house pressure more likely, so replacing one window may not solve the comfort problem.
Use your observations
Decision map
Find the observation that best matches what you see, then follow the next safe action.
-
PATH 01Next step
What you see
Airflow is strongest along the moving sash edge, the sash closes and latches normally, and the frame and glass appear intact.
Do this next
Identify the window type and existing seal profile, then use the manufacturer's repair guidance or a qualified service provider. The replacement must preserve normal movement and latch compression; do not caulk the sash to the jamb.
Why this path and its safety boundary
Why it matters: A worn, missing, compressed, or poorly seated weatherstrip or a closure adjustment is more likely than a gap in the wall opening.
-
PATH 02Next step
What you see
The paper moves at a stationary line between the frame, trim, and wall, while the sash seal and latch appear to work normally.
Do this next
Arrange careful frame-to-wall air-sealing assessment. If the trim is removable without damage and the work is within the building's construction scope, the professional may select a window-and-door-rated low-expansion material or other appropriate seal; do not fill an unknown cavity blindly.
Why this path and its safety boundary
Why it matters: An air path around the rough opening or trim is more likely. A surface bead may not address a concealed gap, and the correct seal depends on the wall and window assembly.
-
PATH 03Next step
What you see
The sash binds, drops, will not latch, leaves one corner open, or makes the frame move when operated.
Do this next
Leave the window secured in its safest stable position and arrange qualified window service. Do not force the sash, remove hardware, or use the gap as a place to wedge a tool or fastener.
Why this path and its safety boundary
Why it matters: Alignment, hardware, frame movement, or deterioration is more likely than a simple weatherstrip gap. A thicker seal can mask the symptom or add closing force without correcting the cause.
-
PATH 04Next step
What you see
The gap is accompanied by cracked or loose glass, repeated water entry, swelling or rot, staining, or a wet sill.
Do this next
Keep people away from damaged glass, document the wet area, and arrange qualified window or building-envelope service. Do not cover a cracked pane, seal over wet deterioration, or block sill drainage.
Why this path and its safety boundary
Why it matters: The issue exceeds a comfort-only draft. Glazing, flashing, frame, or wall-envelope damage may be allowing moisture to enter, and sealing the visible line alone could trap or redirect water.
-
PATH 05Next step
What you see
The window closes tightly, but several openings draft similarly or the room remains drafty when the window is latched.
Do this next
Request an envelope or energy assessment that compares the window with doors, attic, basement, and other common leak locations. Do not replace the window solely from the room sensation.
Why this path and its safety boundary
Why it matters: The window may not be the dominant leak path. House pressure and hidden leaks in other parts of the envelope can draw air around more than one opening.
Helpful context
Understand the symptom
The location of the gap determines the safe next step
A gap at the meeting edge or perimeter of a moving sash behaves differently from a gap between a fixed frame and the surrounding wall. The first affects compression, closure, and weatherstripping. The second may expose the rough opening or a failed trim seal. A crack in glazing, a loose pane, or a water-stained sill adds a moisture and glass-safety concern. Identify the location before choosing a sealant or replacement part.
Keep the check low-risk
The checks below are visual, light-touch observations from inside or from a safe ground-level position. Do not force a stuck sash, remove trim or glazing, lean a ladder on the window, climb to an upper exterior opening, seal a sash joint shut, or block weep holes and other drainage paths. A qualified window or building-envelope professional should handle elevated access, damaged framing, glass, or hidden rough-opening work.
Only after diagnosis
Potential parts
- window weatherstripping or sash seal
Consider this category only when airflow is confirmed at a normally closing sash perimeter and the existing seal is worn, missing, compressed, or damaged.
Confirm the window type, sash profile, seal channel, dimensions, material, and manufacturer guidance before ordering. A thicker or visually similar strip can interfere with latching or operation. - window latch or adjustment hardware
Consider this category only when the sash is otherwise intact but the latch does not draw it closed or the confirmed diagnosis identifies worn or missing hardware.
Confirm the original hardware pattern, mounting location, sash material, and manufacturer fit information; do not drill new holes into a weakened frame as a first response. - window-and-door-rated air-sealing material
Consider this category only for a confirmed stationary frame-to-wall or rough-opening air path after the surrounding material is dry, sound, and suitable for sealing.
Choose material and application method for the actual window-and-wall assembly. Preserve sash movement and sill drainage; a generic sealant or uncontrolled foam application is not a compatibility determination.
When checks do not resolve it
Need a professional?
Stop and arrange qualified window or building-envelope service for cracked or loose glass, a sash that can fall or will not stay secured, a frame that moves, repeated water entry, soft or swollen wall material, visible rot, concealed frame-to-wall gaps, or any repair needing a ladder, roof access, glazing, trim removal, or force. Do not seal a moving joint or block sill drainage to hide a draft.
Safety scope: Do not force a stuck or falling sash, remove glazing or trim, lean a ladder on the window, climb to an upper exterior opening, seal a moving sash joint shut, block weep holes or sill drainage, or fill an unknown cavity with foam. Keep people clear of cracked or loose glass and leave an unstable window secured in its safest position.
Common questions
FAQ
Should I caulk the visible gap around a drafty window?
Only after identifying which surfaces form the gap. A stationary frame-to-wall gap may need careful air sealing, but caulking between a moving sash and its jamb can stop the window from opening. Preserve the sash's movement and all sill or weep drainage, and do not seal over wet or deteriorated material.
How can I tell whether the draft is from the sash or the wall opening?
With the window normally closed, use a light paper strip on a windy day and move it along the sash perimeter, then the fixed frame-to-wall seam and trim. Movement at the operable edge points toward the sash seal or closure; movement at a stationary seam points toward the rough opening or trim. Compare nearby openings because a room can have more than one leak path.
Can thicker weatherstripping fix a window that will not latch?
Do not assume so. A sash that binds, drops, leaves a corner open, or needs force may have an alignment, hardware, frame, or deterioration problem. A thicker seal can add closing resistance without correcting that cause; leave the window stable and arrange qualified service.
Why is the room still drafty after the window is closed?
A closed window can be only one of several leak paths. ENERGY STAR notes that windows and doors are common locations, while hidden leaks elsewhere in the building envelope can also draw air. Compare other openings and consider an envelope or energy assessment before replacing a sound window.
Read the exact guide
Official sources
- Weatherization of Historic Buildings: Eliminate Air InfiltrationNational Park Service, U.S. Department of the Interior · Official building weatherization guidance for loose-fitting windows, frame-to-wall gaps, and operable sash seals
- Rough Opening Flashing: Air SealingBuilding Science Education, U.S. Department of Energy · Official building-science guidance for fixed frame-to-wall and rough-opening air leakage
- Weatherization of Historic Buildings: Repair and Upgrade Windows and DoorsNational Park Service, U.S. Department of the Interior · Official guidance for diagnosing window condition before selecting seal or replacement work
- Locating Air LeaksENERGY STAR, U.S. Environmental Protection Agency and U.S. Department of Energy · Official guidance for distinguishing a window draft from other household air-leak paths
Community feedback
Share a repair observation
Share a plain-text repair observation. Accepted observations are published automatically; this page may take a moment to update.