
On this page
Start here
Quick answer
A draft at a closed window sash usually comes from an air path at the meeting rail, side stops, weatherstripping, lock-side gap, or surrounding frame—not proof that the glass itself is leaking. Close and latch the sash, use a paper or tissue check to locate movement, and inspect visible seals without removing trim or glass. If the sash will not compress its seal, is difficult to close, or has rot, water staining, cracked glass, or a gap around the frame, stop and arrange window service. Weatherstripping, rope caulk, or temporary window film may be appropriate only after the leak location and window type are identified.
Before you begin
Safety first
- The self-check covers closing, observing, and documenting only. Window service should handle sash removal, glass, balances or tensioned hardware, trim/opening access, lead-paint precautions, moisture repair, and permanent air sealing.
Work through in order
Diagnostic checks
Use only checks that match the exact appliance or system and its official guide.
-
Close and latch the sash without forcing it
From inside, clear the sill, close the moving sash normally, and engage the existing lock. Observe whether meeting rails align and the sash sits evenly against the stops; do not force a stiff lock or lean on glass.
Expected result: The sash closes and latches evenly, or remains proud, tilted, loose, or difficult to latch.
Next step: If it will not close or latch normally, leave it in the safest closed position and arrange window service. If it latches evenly, continue with a paper or tissue check around the perimeter.
Stop if: Stop if the sash drops, binds sharply, glass moves, or the lock needs force or disassembly.
Why this matters
Why: An uneven or unlatched sash can leave the seal uncompressed and is an alignment or hardware clue. A normally latched sash shifts attention to the visible seal, frame, or opening.
-
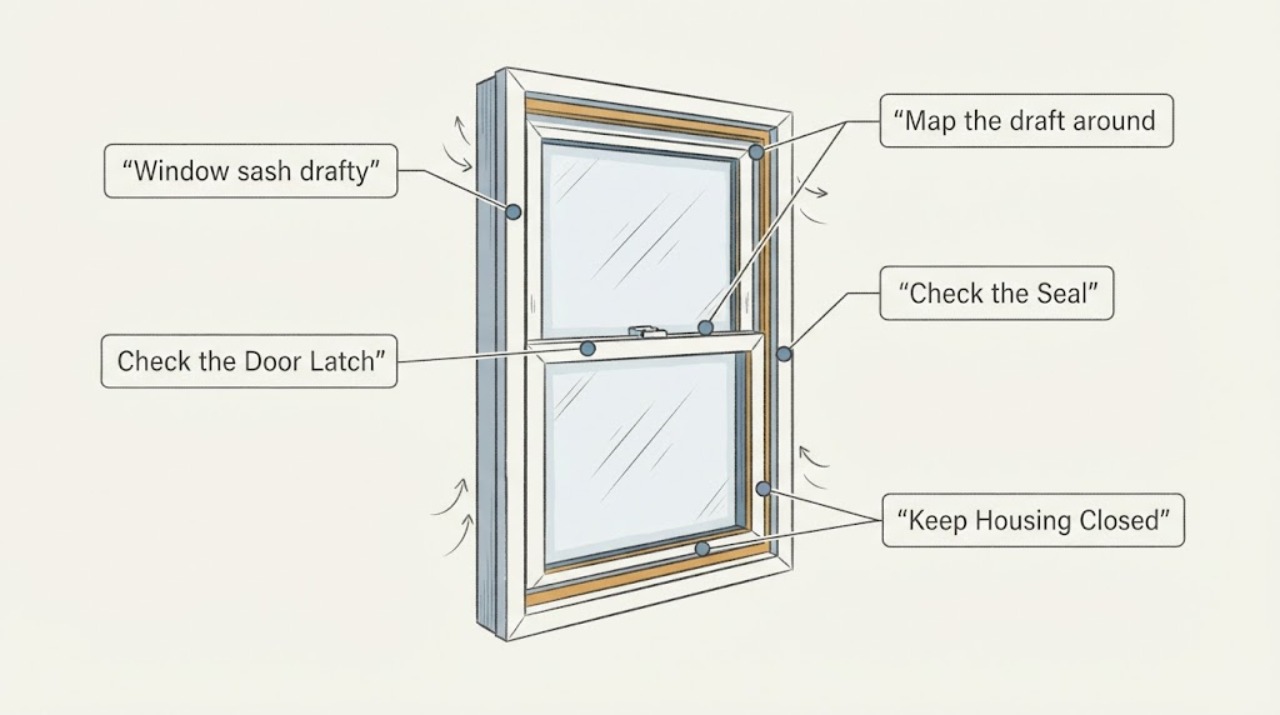
Map the draft around the closed sash
With the sash closed and latched, place a narrow strip of paper or tissue at separate points along the meeting rail, lock side, side channel, and lower sill, closing on it one location at a time. Remove it without pulling hard and note where it slides freely.
Expected result: The paper is loose at one edge or several sash points, or is held similarly around the perimeter.
Next step: Photograph and mark loose locations. Compare them with the visible seal and lock before considering a model-matched weatherstrip or professional adjustment.
Stop if: Stop if the test requires forcing the sash, touching damaged glass, or working near a broken lock or sharp edge.
Why this matters
Why: A loose strip identifies reduced compression at that point and makes the adjacent weatherstrip, latch pressure, or alignment the next suspect. A firm strip does not prove the window is airtight; the draft may be at trim, a hidden channel, or another opening.
-
Inspect visible sash seals and channels
With the sash open only as far as it normally travels, look at meeting rail, side stops or channels, corners, and sill. Check for flattened, missing, brittle, displaced, painted-over, or dirty weatherstripping and debris preventing seating; do not pry out seals or remove stops.
Expected result: The seal is visibly damaged or missing, the channel is obstructed, or the seal appears intact while the paper test found a leak.
Next step: Clean only loose surface dust with a dry soft cloth, leave the seal in place, and record its profile and location. Discuss compatible weatherstrip or service rather than substituting generic foam.
Stop if: Stop if a seal is bonded to glass, a stop or balance is loose, paint may contain lead, or inspection needs hardware or trim removal.
Why this matters
Why: A damaged visible seal can explain a localized sash draft, while debris or a displaced seal can prevent compression. An intact-looking seal with a leak may indicate a concealed channel, balance or alignment issue, or a perimeter leak needing service.
-
Separate sash leak from frame or trim leak
On a calm day, repeat the paper/tissue observation at the sash perimeter and inspect the visible joint between frame and interior trim. Look for a gap, peeling paint, staining, dampness, or air movement at casing rather than sash; do not remove casing or probe the wall.
Expected result: Air movement is concentrated at the sash, at the trim/frame joint, or no moving air is found but the pane feels cold.
Next step: For a trim result, request an opening and air-seal assessment. For a cold-pane result, document indoor humidity and window type and discuss glazing or storm-window options; do not caulk a moving sash shut.
Stop if: Stop if trim is loose, water damage or soft wood is present, or checking the joint would disturb paint, masonry, or hidden wiring.
Why this matters
Why: Sash-only movement points toward seal compression, alignment, or sash hardware. Trim-joint movement points toward perimeter air sealing or installation. A cold pane without moving air can be a surface-temperature or insulation issue rather than a sash gap.
-
Prepare a model-safe service handoff
Record window style, approximate age if known, movable sash, lock behavior, paper-test locations, seal condition, wind/weather conditions, photos, and any condensation, staining, rot, cracked glass, or operating difficulty. Include whether the leak is at sash or trim.
Expected result: Notes distinguish a sash seal/compression issue from frame-opening, moisture, glass, or operation issues, or the location remains uncertain.
Next step: Request normal-priority window service for a persistent draft, poor latch, damaged seal, or damaged frame. Provide photos and do not order a replacement seal until profile and window type are confirmed.
Stop if: Stop self-diagnosis when sash, glass, balance, trim, or opening needs removal, tension adjustment, or concealed access.
Why this matters
Why: A clear location and window identity help a professional select the correct weatherstrip or adjustment path and avoid sealing drainage or movement paths. Uncertain location warrants diagnosis before parts or permanent sealing.
Use your observations
Decision map
Find the observation that best matches what you see, then follow the next safe action.
-
PATH 01Safety boundary
What you see
Sash will not close or latch evenly, or binds, tilts, or drops.
Do this next
Leave it secured without forcing it and request window service for alignment, hardware, balance, or sash inspection.
Why this path and its safety boundary
Safety stop: Do not pry the sash, remove stops, or work on balances or tensioned hardware.
-
PATH 02Safety boundary
What you see
Paper or tissue is loose at the sash perimeter and adjacent visible seal is worn, missing, or displaced.
Do this next
Document location and identify window type/profile; consider only compatible weatherstrip or rope-caulk discussion after fit is confirmed.
Why this path and its safety boundary
Safety stop: Do not glue a sash seal, pack a moving joint solid, or block weep/drainage paths.
-
PATH 03Safety boundary
What you see
Air movement is at the frame-to-trim joint rather than sash, or gaps/staining surround the opening.
Do this next
Request air-sealing and moisture assessment of the rough opening and exterior interface.
Why this path and its safety boundary
Safety stop: Do not remove trim or inject foam into an unknown cavity as a first test.
-
PATH 04Safety boundary
What you see
No moving air is found, but pane feels cold or comfort changes with outdoor temperature.
Do this next
Document window type and indoor humidity and discuss glazing, storm-window, or whole-home air-leak assessment options.
Why this path and its safety boundary
Safety stop: Do not assume replacing sash weatherstrip will fix a surface-temperature issue.
-
PATH 05Safety boundary
What you see
Water staining, soft/rotted frame material, persistent condensation between panes, cracked glass, or damaged sash is present.
Do this next
Stop permanent sealing and request window service to assess moisture entry, glazing, and structural condition.
Why this path and its safety boundary
Safety stop: Do not paint over damage, seal drainage openings, or handle cracked glass.
Helpful context
Understand the symptom
Start with the closed sash and exact draft location
A cold feeling near a window can come from actual air infiltration or air circulating beside a cold pane. A sash that is not fully closed, latched, square, or compressed against its seal can leak at the meeting rail and jambs. A leak around trim or the wall opening is a different repair path from a worn sash seal, so locate the path before buying material.
Keep checks visual and low risk. Do not remove the sash, glass, stops, counterweights, or interior trim, and do not probe a gap with a knife or screwdriver. For older homes or painted trim, disturbing coatings can create a separate hazard; a professional can assess that safely.
Use the result to choose the next step
If the paper or tissue moves at the closed sash, the seal or latch pressure is suspect. If movement is at casing or trim, the rough opening or perimeter seal may be involved. If there is no moving air but the glass is very cold, comfort may be affected by surface temperature rather than a sash leak. ENERGY STAR notes that windows and doors are common draft locations but larger hidden leaks elsewhere can change how air moves around a window.
Record the window before service or parts selection
Photograph the whole window and close-ups of the meeting rail, side channels, lock, seal, trim, and any staining or damage. Record whether it is single-hung, double-hung, sliding, casement, or another design; which sash moves; whether the lock engages; and whether the problem changes with wind or only in cold weather. A part selected by appearance alone may not fit the sash profile.
Safety boundary
Stop conditions
- Do not force, pry, remove, or disassemble the sash, glass, stops, balances, counterweights, or tensioned hardware.
- Do not caulk or foam a moving sash shut, block weep/drainage paths, or choose weatherstrip by appearance alone.
- Stop if glass is cracked, the sash drops, hardware is loose, the frame is soft or wet, or trim disturbance could create paint dust.
- Persistent draft, poor operation, moisture damage, or an uncertain leak path is a reason to arrange window service before permanent sealing.
Only after diagnosis
Potential parts
- window weatherstripping
Consider only when paper test identifies a sash leak and existing weatherstrip is worn, missing, or displaced.
Confirm window style, manufacturer/profile, dimensions, and attachment method before ordering; generic foam may not preserve sash travel or drainage. - rope caulk
A temporary seasonal seal may be relevant for a confirmed stationary gap while permanent service is pending.
Use only where it will not block sash movement, drainage, or required ventilation, and follow product directions for the window material. - window film
A temporary interior layer may help with a cold-pane or broad seasonal comfort issue after confirming the problem is not a moving sash or moisture leak.
Check window finish and manufacturer guidance; film is not a substitute for repairing a loose sash, water entry, or failed glazing.
When checks do not resolve it
Need a professional?
Request window service when the sash will not align or latch, a draft persists after the visible area is documented, weatherstripping is damaged or unidentified, or the leak is at trim, frame, or opening. Escalate promptly for cracked glass, a dropping sash, water intrusion, soft/rotted material, or unsafe hardware.
Safety scope: The self-check covers closing, observing, and documenting only. Window service should handle sash removal, glass, balances or tensioned hardware, trim/opening access, lead-paint precautions, moisture repair, and permanent air sealing.
Common questions
FAQ
How can I tell if the sash itself is drafty?
Close and latch it normally, then perform a gentle paper or tissue check at the meeting rail, lock side, channels, and sill. A loose strip at the sash points toward seal compression or alignment, while movement at trim points toward the surrounding opening.
Should I caulk around a drafty window sash?
Do not caulk a moving sash, its meeting rail, weep path, or drainage opening. First identify whether the leak is at the sash seal or fixed frame-to-trim joint; use a professional for an uncertain or moisture-related path.
Will replacing weatherstripping fix every cold window?
No. Weatherstripping can help a confirmed sash air leak, but a cold pane without moving air may reflect surface temperature, glazing, or indoor humidity. A trim leak, water damage, or poor operation needs a different assessment.
Can I remove the sash to replace its seal?
Not as a first troubleshooting step. Sash removal can involve glass, stops, balances, counterweights, or tensioned hardware. Document the visible seal and window identity and arrange window service if removal or adjustment is needed.
Read the exact guide
Official sources
- Locating Air LeaksENERGY STAR · Supports treating windows as one possible draft location and considering broader air movement when a window feels drafty.
- Sealing Behind Window & Door Trim ProjectENERGY STAR · Supports the paper test for sash tightness, visible signs of frame/trim leakage, weatherstripping as a possible response, and professional escalation for difficult trim or older painted homes.
- Rough Opening Flashing: Air SealingU.S. Department of Energy Building Science Education · Supports distinguishing a sash leak from gaps around the window unit and the need for care when addressing rough-opening air sealing.
Community feedback
Share a repair observation
Share a plain-text repair observation. Accepted observations are published automatically; this page may take a moment to update.