
On this page
Start here
Quick answer
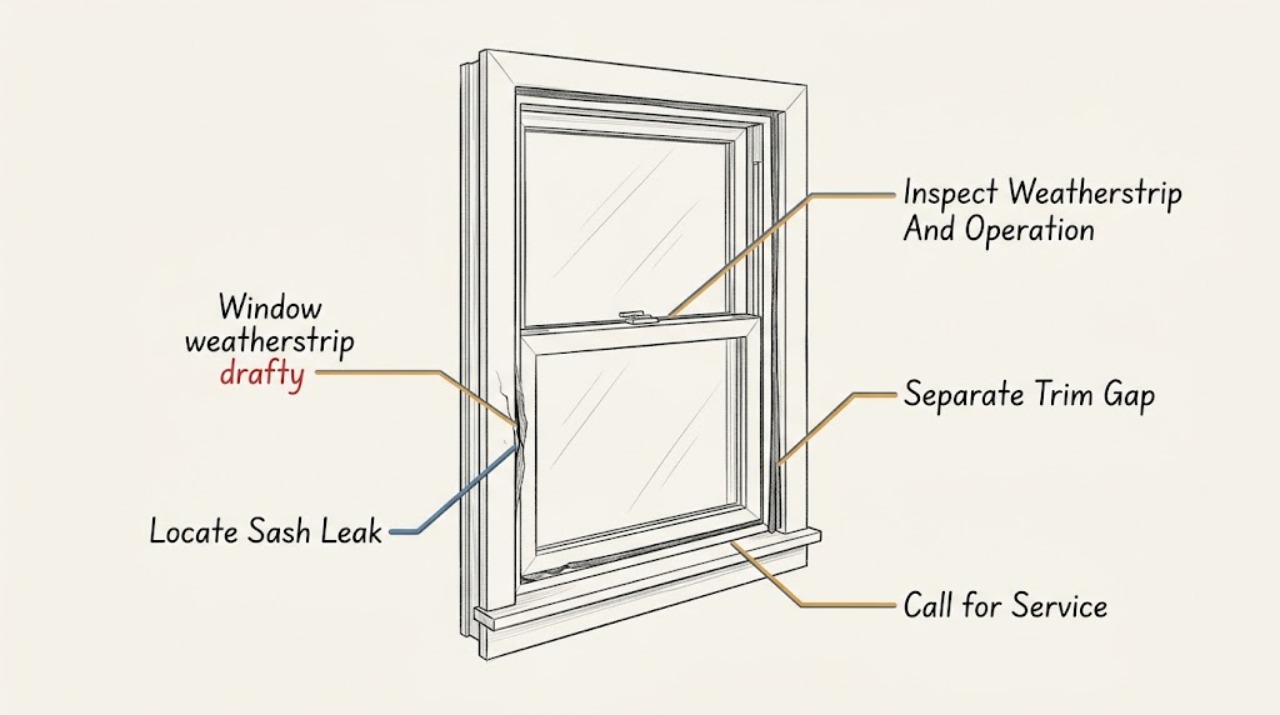
A draft around a closed window usually comes from a compressed, missing, damaged, or incorrectly fitted weatherstrip, but the air may also be entering around the fixed trim or through a larger installation gap. First locate the leak with a safe paper check and inspect the sash, meeting rail, latch side, corners, and fixed trim. Replace or adjust weatherstrip only when the exact window instructions identify it as a user-serviceable profile; do not caulk over moving joints or drainage paths. If the sash will not close or lock, water enters, the frame or glass is damaged, the repair needs trim removal or elevated access, or the draft remains after a correct seal replacement, arrange a qualified window or weatherization assessment.
Work through in order
Diagnostic checks
Use only checks that match the exact appliance or system and its official guide.
-
Check 1
Close and latch the window normally, then slide a narrow piece of paper at several points between the sash and its stop or meeting rail. Test the latch side, hinge or opening side, top and bottom corners, and any visible weatherstrip without forcing the window or putting fingers near a moving hinge.
Expected result: The paper is held firmly at most points but slides freely at one section, or it slides freely around the full sash perimeter; note whether the gap is at the weatherstrip, corner, latch side, or meeting rail.
Next step: Photograph the exact leak location and compare it with the manufacturer's window instructions before choosing a replacement profile or adjustment.
Stop if: Stop if the sash binds, will not latch, the glass or frame moves unexpectedly, or the test requires an elevated or unsafe position.
Why this matters
Why: A localized loose section makes a compressed, missing, or damaged weatherstrip or a sash-alignment issue more likely. A leak around the full perimeter makes frame alignment, installation, or a worn seal more likely than one small patch.
-
Check 2
From indoors and outdoors only where safely reachable, inspect the weatherstrip along the sash edges, meeting rail, corners, and latch side. Look for a missing section, flattening, tears, gaps at a corner, adhesive failure, paint over the seal, or a sash that closes without compressing it; operate the window gently to confirm it closes and locks normally.
Expected result: The weatherstrip is visibly damaged or absent while the sash remains square and operable, the seal appears intact but the sash is loose or misaligned, or the window will not close or lock.
Next step: Record the window type, manufacturer label, seal shape, and dimensions only where safely visible. Use the exact window instructions or a professional to confirm the repair path.
Stop if: Stop for cracked glass, sharp edges, a loose frame, a failed lock, a window that may fall, or any need to remove a sash or hardware.
Why this matters
Why: A clearly damaged seal can support a model-specific weatherstrip replacement. A loose or misaligned sash may require adjustment or repair rather than a thicker seal. A window that cannot close or lock is a security, weather, and egress concern, not a reason to force it.
-
Check 3
Check the fixed perimeter separately by looking and gently feeling for a draft along the interior casing, sill, and wall-to-trim joint while the sash is closed. Do not remove trim, cut paint, drill, or insert foam into the rough opening during this first check.
Expected result: Air movement or a visible crack is concentrated at the fixed trim or wall joint rather than the moving sash, or the trim is intact while the sash test identified the leak.
Next step: For a small, clearly fixed joint, follow the window and sealant instructions for a compatible interior seal. If the gap is large, concealed, wet, or behind trim, arrange a building-envelope or window professional.
Stop if: Stop if the check exposes crumbling material, suspected lead paint, mold-like growth, active water, or a gap that connects to an unknown cavity.
Why this matters
Why: A fixed-joint result points to perimeter air sealing or installation details, not a replacement weatherstrip on the sash. A sash result keeps the repair focused on the moving seal, latch, or alignment.
-
Check 4
Inspect the sill, corners, lower frame, and nearby wall for condensation, staining, peeling paint, soft material, or water after rain. Compare the draft on a windy or cold day with a calm day, and note whether the cold sensation is on the glass surface without a measurable air movement.
Expected result: There is actual air movement at the seal, or there is condensation or cold glass without a clear leak; staining or moisture may be present with either result.
Next step: Document the weather and moisture pattern. Keep the sill dry and arrange professional assessment for recurring water, damaged materials, or a leak that follows the wall or frame rather than the sash.
Stop if: Stop if water reaches electrical equipment, the frame or wall is unstable, or suspected contamination or hazardous paint is disturbed.
Why this matters
Why: Air movement supports an infiltration path. Cold glass or interior condensation can instead reflect surface temperature and indoor humidity. Staining or recurring moisture suggests flashing, drainage, or wall damage that weatherstrip alone will not correct.
-
Check 5
If the leak is clearly at an accessible moving seal and the exact window instructions permit replacement, clean and dry the contact surface and install only the specified weatherstrip profile without blocking the sash track, latch, weep holes, or drainage path. Make one change and close the window gently.
Expected result: The sash closes and latches with even resistance and the paper check improves at the original leak, or the new seal bunches, prevents closure, leaves a gap, or the draft remains.
Next step: Undo only a visibly incorrect, accessible fit if the instructions allow, then stop and obtain exact fitment or professional adjustment guidance. Do not add layers or force the sash closed.
Stop if: Stop if the window cannot lock, the weatherstrip blocks drainage, the frame shifts, or the correction requires removing glass, hardware, trim, or a sash.
Why this matters
Why: Improvement at the same leak supports a seal-related cause. Binding, a remaining gap, or no change suggests the profile, alignment, frame, or installation is wrong; a thicker generic strip can worsen operation or hide the real defect.
-
Check 6
After one permitted correction, repeat the paper check at the original leak and inspect the room side during the next suitable weather event. Record whether the window still drafts, operates and locks normally, and stays dry.
Expected result: The original leak is sealed and the window remains operable, the draft returns intermittently, or the draft persists with water, movement, damage, or a fixed-frame gap.
Next step: Provide the professional with the leak location, paper-test results, window identity, photos, weather conditions, and exactly what seal or adjustment was attempted.
Stop if: Stop further DIY work when the symptom recurs, the window cannot lock, or the next step involves trim, glass, elevated access, lead paint, or concealed framing.
Why this matters
Why: A stable improvement supports monitoring. Recurrence suggests alignment, frame, installation, or weatherstrip compatibility has not been resolved; moisture or movement raises the need for a broader building-envelope assessment.
Use your observations
Decision map
Find the observation that best matches what you see, then follow the next safe action.
-
PATH 01Safety boundary
What you see
The paper test identifies a localized sash or meeting-rail leak, the weatherstrip is visibly worn or missing, and the sash still closes and locks squarely.
Do this next
Match the exact seal profile and installation method to the window instructions, make one accessible correction, and repeat the same paper test.
Why this path and its safety boundary
Why it matters: A model-specific weatherstrip replacement is plausible; the evidence does not justify a generic thicker strip or a conclusion that the frame is sound everywhere.
Safety stop: Stop if the replacement binds the sash, blocks drainage, or changes the lock or egress operation.
-
PATH 02Safety boundary
What you see
The sash paper test is firm, but air movement or a visible gap is concentrated at the fixed casing, sill, or wall joint.
Do this next
Use a compatible fixed-joint seal only when the gap is small and accessible; otherwise obtain a window or building-envelope assessment.
Why this path and its safety boundary
Why it matters: Perimeter sealing or installation is more likely than a moving weatherstrip failure. Removing trim can expose hidden gaps and hazardous paint or materials.
Safety stop: Do not caulk moving tracks or drainage holes, remove trim, or inject foam into an unknown cavity without the correct installation method.
-
PATH 03Safety boundary
What you see
Draft is accompanied by staining, recurring water, peeling paint, a soft or shifting frame, cracked glass, or a sash that will not close or lock.
Do this next
Keep the area dry and arrange qualified window or building-envelope service; provide photos and avoid operating a damaged or unsecured window.
Why this path and its safety boundary
Why it matters: Water management, structural, glazing, or hardware problems may be involved. Weatherstrip alone can hide the symptom while damage continues.
Safety stop: Stop immediately for unstable glass or frame, water near electrical equipment, suspected contamination, or suspected lead-paint disturbance.
-
PATH 04Safety boundary
What you see
The exact accessible weatherstrip was replaced or adjusted as instructed, but the same leak remains or returns while the sash is square and locked.
Do this next
Stop adding material and schedule a professional leak assessment that can distinguish the sash, trim, wall, and glass paths.
Why this path and its safety boundary
Why it matters: The remaining cause may be frame alignment, concealed installation sealing, glazing, pressure-driven leakage elsewhere, or a wrong seal profile.
Safety stop: Do not force the sash, remove glass, or remove trim to chase a draft without the correct equipment and safety plan.
Helpful context
Understand the symptom
Find the leak before buying a seal
A cold feeling near glass is not automatically a weatherstrip failure. Air can pass between a moving sash and its stop, around a meeting rail or latch side, through a visible gap at the trim, or through a larger concealed gap between the frame and wall. A simple paper check on the closed sash helps identify a loose compression seal; a separate check around the fixed trim prevents putting weatherstrip in the wrong location.
Weatherstrip and fixed-frame sealing are different repairs
Weatherstrip belongs around a window or sash that opens and closes. Caulk or other air-sealing treatment may be appropriate at a fixed crack or trim joint, but sealing a moving track, weep path, or drainage opening can make the window harder to operate or trap water. Do not use a generic foam or caulk product until the leak location and window construction are known.
When a draft needs more than weatherstrip
A draft accompanied by peeling paint, staining, recurring moisture, a loose frame, damaged glass, or a sash that will not close or lock is not just a comfort issue. Older trim work can also involve lead-paint risk, and high or hard-to-reach windows need a safer access plan. Those conditions call for a qualified window, building-envelope, or weatherization professional.
Safety boundary
Stop conditions
- Stop for cracked or loose glass, an unstable frame, a failed lock, active water near electrical equipment, or a window that may fall.
- Do not remove trim or glass, block tracks or weep holes, inject foam into an unknown cavity, disturb suspected lead paint, or use unsafe elevated access.
- After one model-specific weatherstrip correction and a repeat paper check, stop adding material if the draft remains or returns.
Only after diagnosis
Potential parts
- window sash weatherstrip
Consider this only when the leak is located at a moving sash or meeting rail, the existing seal is damaged or missing, and the window instructions permit accessible replacement.
Match the exact window type, manufacturer, model, seal profile, attachment method, and orientation; appearance alone is not sufficient. - compatible window caulk
Consider this only for a small, clearly fixed trim or casing joint after confirming that the gap is not a moving joint, weep path, water-management detail, or concealed structural gap.
Confirm the substrate, interior or exterior location, paint compatibility, and manufacturer instructions; do not seal drainage openings. - temporary interior window film
Consider this only as a reversible seasonal comfort measure when the window is intact and secure; it does not repair a failed weatherstrip, frame, lock, or water-management detail.
Confirm the film's approved surface, ventilation, removal method, and local fire or egress requirements before use.
When checks do not resolve it
Need a professional?
Call a qualified window or weatherization professional when the window will not close or lock, the frame or glass is damaged, water or staining is present, the leak is behind trim, the window is high or hard to reach, the home may contain lead paint, or the draft persists after one correct seal check.
Have this ready
- Window type and any safely visible manufacturer or model label
- Exact leak location from the paper test and photos of the seal and frame
- Whether the sash closes, latches, locks, and drains normally
- Weather conditions, condensation, staining, or water observations
- The weatherstrip or fixed-joint correction attempted and its result
Common questions
FAQ
How do I know whether the weatherstrip is the leak?
Close and latch the window, then use a paper check at several points around the sash and meeting rail. A paper slip that moves freely at one section points toward a local seal or alignment issue; a draft at fixed trim points to a different repair path.
Can I use thicker weatherstripping to stop the draft?
Only if the exact window instructions support that profile. A thicker seal can prevent the sash from closing or locking, interfere with drainage, or hide a frame-alignment problem. Confirm the leak location and fitment first.
Should I caulk around a drafty window?
Caulk may suit a small fixed trim joint, but it should not be used on moving sash tracks, weep holes, or an unknown gap behind the trim. If the leak is large, wet, concealed, or connected to the wall, obtain a professional assessment.
Is condensation proof that the window weatherstrip failed?
No. Condensation can form when the interior glass is below the dew point of humid indoor air, even without a measurable air leak. Record both condensation and actual air movement, and investigate recurring water or staining separately.
When should a window draft be handled by a professional?
Use professional help when the window cannot close or lock, the frame or glass is damaged, water enters, the leak is behind trim, access is high, lead paint may be disturbed, or one correct weatherstrip check does not resolve the draft.
Read the exact guide
Official sources
- Locating Air LeaksENERGY STAR · General building-envelope guidance; a window draft may be only one part of the home's air-leak path.
- Seal and Insulate with ENERGY STARENERGY STAR · General residential sealing guidance used to distinguish moving-window seals from fixed gaps; it does not identify a specific replacement profile.
- Sealing Behind Window & Door Trim ProjectENERGY STAR · Government-backed residential air-sealing guidance; the correct seal and repair method still depend on the window construction and manufacturer instructions.
- Residential Windows, Doors, & SkylightsENERGY STAR · Government-backed window performance and installation guidance; exact window product and local conditions govern.
Community feedback
Share a repair observation
Share a plain-text repair observation. Accepted observations are published automatically; this page may take a moment to update.