
On this page
Start here
Quick answer
Moisture on the inside trim or sill is not automatically a failed window. First dry the area and identify whether droplets form on the room-side glass and run down, collect only at a cold corner or edge, appear between sealed panes, or return after rain. Room-side condensation is promoted by humid indoor air, cold glass, low air exchange, and coverings or furniture that block circulation. Reduce moisture at the source, use existing ventilation as directed, and keep safe airflow across the glass and trim. If the trim or wall is wet without matching glass droplets, water follows rain, the frame is swollen or stained, or moisture is trapped between panes, stop treating it as a simple humidity problem and arrange qualified window or building-envelope service. Do not seal over an active leak or dismantle the glazing.
Work through in order
Diagnostic checks
Use only checks that match the exact appliance or system and its official guide.
-
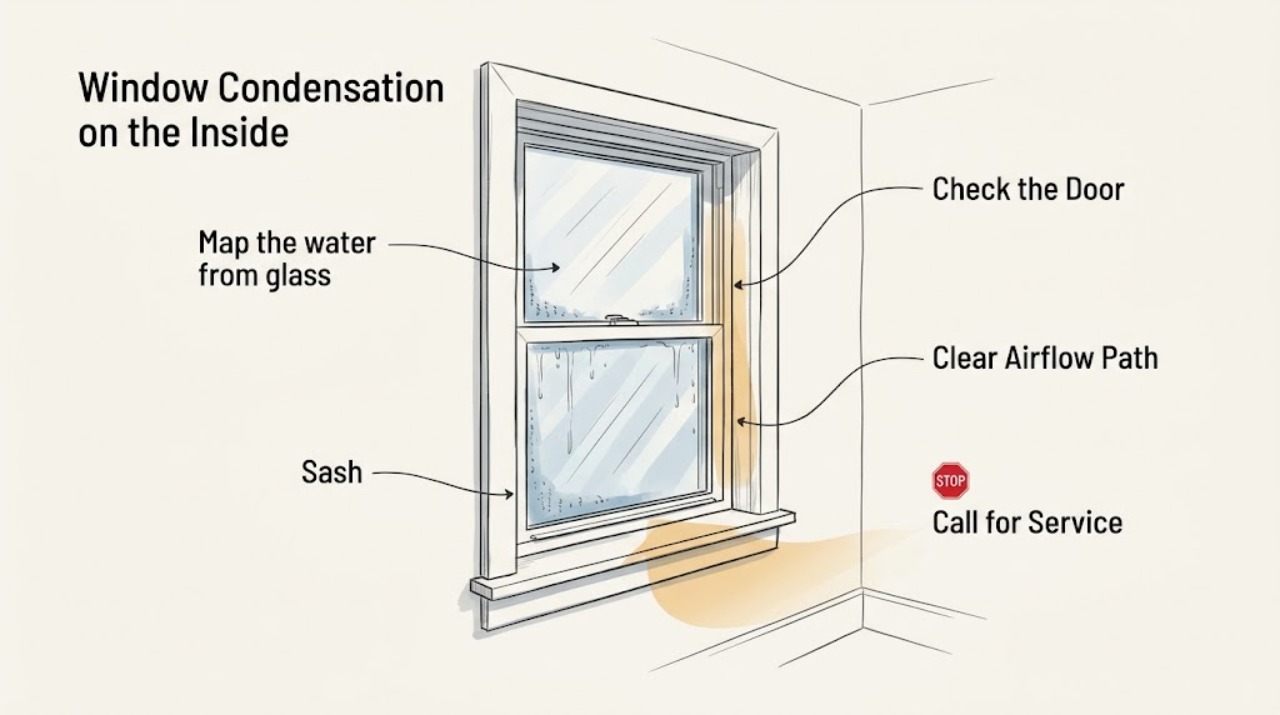
Map the water from glass to trim
Blot the room-facing glass, lower sash, sill, and inside trim with a clean cloth. Observe where droplets reappear: across the pane, along one glass edge, at the lower corner, only on the trim, or between panes. Take a photo before drying and do not press on cracked or loose glass.
Expected result: Water reappears on the room-side glass and runs onto the trim, collects only at a cold edge or corner, remains between sealed panes, or returns on trim while the glass stays dry.
Next step: Continue with humidity and airflow checks for surface droplets. Arrange glazing service for between-pane moisture and window or envelope service for dry-glass wet-trim patterns or material damage.
Stop if: Stop if glass is cracked, loose, sharp, or moving; keep people away and arrange qualified glass service.
Why this matters
Why: A glass-to-trim trail supports surface condensation reaching the sill. An edge-only pattern may reflect local cold air or restricted circulation. Persistent between-pane fog suggests a sealed-unit problem, while wet trim with dry glass raises a frame, drainage, or building-envelope question.
-
Check whether indoor moisture drives the trim wetness
Record when the trim becomes wet and what happened nearby: showering, cooking, laundry, humidifier use, sleeping, a cold spell, or a crowded room. If available, compare a humidity reading near this window with another room; do not change a humidifier to an extreme setting based on one reading.
Expected result: Moisture follows a household activity or cold weather, appears on several windows, or remains isolated to this opening despite similar room conditions.
Next step: Reduce moisture at its source and use existing ventilation as directed, then monitor the same trim. If only this opening remains damp, inspect airflow and the frame boundary before considering replacement.
Stop if: Do not deliberately add moisture, disable required ventilation, or operate an unvented combustion appliance as a test.
Why this matters
Why: An activity-linked or whole-home pattern supports indoor humidity and air exchange as contributors. One opening that remains wet may have a colder edge, blocked airflow, local air leakage, or a window-specific defect; the pattern alone does not prove a failed seal.
-
Restore safe airflow across the glass and trim
Open interior blinds or curtains enough to let room air reach the glass and trim. Move only light objects that block the sill or nearby supply vent, and make sure heating or ventilation registers are not covered. Do not move heavy furniture or block an emergency egress window.
Expected result: The trim is behind tightly closed coverings, a sill or object traps still air, a heat register is blocked, or the area already has an unobstructed air path.
Next step: Leave safe clearance and monitor whether the trim dries during normal room operation. If water remains at one corner or behind the trim, document it for window or envelope service.
Stop if: Do not cover heating equipment, force a stuck shade, or make a change that compromises ventilation or emergency egress.
Why this matters
Why: Restricted circulation can keep the glass edge and trim cold, allowing moisture to collect and run downward. Milgard recommends leaving clearance for air movement between shades and the window; persistent wetness with clear airflow needs a broader inspection.
-
Use existing ventilation at moisture sources
During showering, cooking, or laundry, run the existing bathroom or kitchen exhaust according to its instructions and keep the room air path open. If the home has an HRV or ERV, check its normal operating status and maintenance guidance without changing system design or settings beyond the user controls.
Expected result: The trim dries more quickly after source ventilation, remains damp throughout the home, or becomes worse after a ventilation change.
Next step: Continue normal source ventilation and monitor. Request qualified ventilation or building advice for persistent whole-home humidity, an HRV or ERV issue, or a proposed retrofit.
Stop if: Stop a ventilation change for combustion odor, backdrafting concerns, unusual appliance behavior, unsafe depressurization, or other indoor-air safety symptoms.
Why this matters
Why: Improvement after source control supports indoor humidity as the driver. No improvement suggests a cold edge, blocked circulation, frame air path, or water entry. Health Canada notes that ventilation changes have climate and indoor-air tradeoffs and that retrofits need qualified assessment.
-
Inspect the visible frame boundary without dismantling it
After the area is dry, inspect the accessible inside trim, lower sill, corners, sash edges, and visible gasket or weatherstripping for gaps, swelling, peeling finish, staining, or mold-like growth. Look from ground level at the exterior perimeter for obvious damage or blocked drainage only if it is safely visible; do not remove trim, glazing beads, or exterior sealant.
Expected result: The trim is sound and only the glass becomes wet, a visible gap or damaged weatherstrip is present, materials are swollen or stained, or water appears only after rain.
Next step: Photograph any defect and arrange window or building-envelope service for wet materials, damaged seals, or rain-linked water. Do not apply unverified sealant before the path is diagnosed.
Stop if: Do not climb, remove exterior components, scrape suspected hazardous growth, or seal a wet assembly as a temporary diagnosis.
Why this matters
Why: Sound trim with glass droplets remains consistent with surface condensation. A gap, damaged seal, swollen material, or rain-linked pattern can indicate air leakage, drainage, flashing, perimeter-seal, or building-envelope trouble rather than ordinary humidity.
-
Check for moisture between sealed panes
Inspect double- or triple-pane glass from a safe position after drying both accessible surfaces. Look for persistent fog, droplets, or a milky band in the sealed space and record whether it changes with weather. Do not drill, puncture, pry, or inject anything into the glass unit.
Expected result: The haze stays between panes, only surface condensation is present, or the glass unit has a crack, edge damage, or displaced spacer.
Next step: Provide photos, pane count, and window information to a qualified glazier for an insulated-glass-unit assessment. Continue humidity and airflow control only for surface condensation.
Stop if: Do not attempt a sealed-unit repair, remove glazing components, or handle cracked or loose glass without qualified glass procedures.
Why this matters
Why: Pella explains that a broken insulating-glass seal allows moisture into the space between panes and typically requires replacement of the window or insulated glass unit. Surface droplets on the trim do not by themselves identify that failure.
-
Set the trim and wall damage boundary
Keep a record of the trim location, photos, weather, room humidity if available, moisture activities, pane location, airflow changes, and whether the water followed rain. Check the adjacent wall and flooring for softening, staining, swelling, peeling, or spreading discoloration without cutting into the assembly.
Expected result: The trim dries after moisture and airflow control, the same corner repeatedly wets, the wall or sill is damaged, or the water follows rain with little glass condensation.
Next step: Continue normal moisture control when no materials are damaged. Otherwise keep the area dry as practical and arrange qualified glazing, window, or building-envelope service with the record and photos.
Stop if: Stop and seek urgent help for rapidly spreading wall damage, structural movement, falling trim, cracked or loose glass, or water reaching electrical equipment.
Why this matters
Why: A repeatable improvement supports a humidity and surface-temperature issue. Recurrent localized wetness or material damage means moisture is reaching the trim or wall and may be caused by an opening, drainage, flashing, seal, or failed glazing condition that needs professional diagnosis.
Use your observations
Decision map
Find the observation that best matches what you see, then follow the next safe action.
-
PATH 01Next step
What you see
Room-side droplets form on the glass and run down onto otherwise sound inside trim after a shower, cooking, laundry, or cold weather.
Do this next
Control moisture at the source, use existing ventilation as directed, keep safe airflow across the glass, and monitor the trim after drying it.
Why this path and its safety boundary
Why it matters: Indoor humidity and the cold glass surface are the leading explanation.
-
PATH 02Next step
What you see
Condensation is concentrated at one edge or corner behind a closed covering or blocked vent.
Do this next
Restore safe circulation around the pane and monitor; arrange service if the same corner remains wet with clear airflow.
Why this path and its safety boundary
Why it matters: Restricted air movement or a locally colder surface may be concentrating moisture at the trim.
-
PATH 03Next step
What you see
Fog or droplets remain between double- or triple-pane glass after both accessible surfaces are dry.
Do this next
Photograph the haze and arrange qualified glazing assessment; do not puncture or dismantle the unit.
Why this path and its safety boundary
Why it matters: An insulating-glass-unit seal failure is possible.
-
PATH 04Next step
What you see
The inside trim or wall is wet while the glass is dry, or staining and swelling follow rain.
Do this next
Keep the area dry as practical and arrange window or building-envelope service; do not seal over the active path.
Why this path and its safety boundary
Why it matters: A perimeter, drainage, flashing, frame, or building-envelope leak must be considered.
-
PATH 05Next step
What you see
Several rooms show condensation and it improves after normal source ventilation.
Do this next
Continue source control within the existing system's instructions and consult a qualified ventilation professional for persistent humidity or system changes.
Why this path and its safety boundary
Why it matters: Whole-home moisture production or inadequate air exchange is contributing.
-
PATH 06Next step
What you see
Trim, sill, or wall damage spreads, glass is cracked or loose, or water reaches electrical equipment.
Do this next
Keep people away, avoid touching wet electrical components, and obtain urgent qualified window, glass, building, or electrical help as appropriate.
Why this path and its safety boundary
Why it matters: This is a material, glass, or electrical safety stop rather than routine condensation maintenance.
Helpful context
Understand the symptom
Trim location matters
Interior trim can become wet when room-side droplets run down the glass, when the glass edge or sill is colder than the center, or when moisture enters around the opening. A visible glass-to-trim trail supports a condensation path; a wet wall or trim without corresponding glass droplets, especially after rain, needs a window or building-envelope investigation.
Dry the material while you diagnose
Blot standing water from the sill and trim and leave the area open to normal room air. Do not cover wet trim with caulk, paint, or furniture before the moisture source is identified. Persistent dampness can damage components and adjacent wall surfaces, so record the timing and location rather than repeatedly wiping without checking the pattern.
Safety boundary
Stop conditions
- Do not drill, puncture, pry, or inject material into sealed glass, remove glazing beads, or dismantle the window as a condensation test.
- Stop for cracked, loose, sharp, or falling glass; keep people away and arrange qualified glass service.
- Do not climb, remove exterior trim, scrape suspected hazardous growth, or seal over a wet assembly or active leak before its path is diagnosed.
- Stop a ventilation change for combustion odor, backdrafting concerns, unsafe depressurization, or other indoor-air safety symptoms.
Only after diagnosis
Potential parts
- insulated glass unit
Consider this category only when a qualified glazing assessment confirms moisture between sealed panes or another failed insulating-glass condition.
Confirm the exact opening dimensions, pane configuration, frame system, and safety requirements with the glazing professional before ordering. - window weatherstripping or perimeter seal
Consider this category only when inspection identifies a failed operable-sash or perimeter air path and not simply room-side humidity.
Match the window system and profile through the manufacturer or professional; do not use an unverified seal to conceal drainage, flashing, or structural damage.
When checks do not resolve it
Need a professional?
Arrange qualified glazing service when moisture is trapped between panes, the glass is cracked or loose, or one insulated unit remains fogged. Arrange window or building-envelope service when inside trim, sill, wall, or flooring is wet or damaged, water follows rain, or one corner stays damp after safe humidity and airflow checks. Consult a qualified ventilation professional for persistent whole-home condensation or changes to an HRV, ERV, exhaust, or combustion-air arrangement.
Common questions
FAQ
Why is the inside window trim wet but the center of the glass is mostly dry?
A colder edge, restricted air movement, or a local frame or opening condition can concentrate moisture at the trim. If the trim is wet without a glass-to-trim trail or after rain, investigate a window or building-envelope leak rather than assuming humidity alone.
Can condensation on the glass run down and wet the inside trim?
Yes. Room-side condensation can collect on cooler glass and run onto the sill or trim, especially with high indoor humidity or blocked airflow. Dry the area, control the moisture source, and monitor whether the trail returns.
How can I tell condensation from a leak around window trim?
Condensation usually matches room humidity, cold weather, or glass droplets. A leak is more likely when the glass is dry but trim or wall materials are wet, staining follows rain, or water enters at one frame corner. Document timing and arrange qualified service before applying sealant.
Does fog between panes cause wet inside trim?
Fog between panes is a separate sign of moisture inside a sealed insulating-glass unit and may indicate seal failure. It normally needs a glazing assessment; it cannot be wiped away from the room side or safely repaired by drilling the glass.
When should wet window trim be treated as damage?
Treat it as a service issue when trim or wall material swells, stains, peels, softens, grows mold-like discoloration, stays wet after the glass dries, or is repeatedly wetted by rain. Excess condensation can also damage window and surrounding wall components over time.
Read the exact guide
Official sources
- Ventilation and the indoor environmentHealth Canada · Homes where condensation on glass or inside trim may reflect indoor humidity, low air exchange, or an air path at the frame
- Purchasing Energy-Efficient Residential Windows, Doors, and SkylightsU.S. Department of Energy · Residential window glass, trim, and surrounding wall surfaces when persistent condensation is being assessed
- About CondensationMilgard · Residential windows where condensation reaches room-side glass, trim, sill, or sealed panes
- Frequently Asked Questions About WindowsPella · Residential windows where moisture location must be distinguished between surfaces and sealed panes
Community feedback
Share a repair observation
Share a plain-text repair observation. Accepted observations are published automatically; this page may take a moment to update.