
On this page
Start here
Quick answer
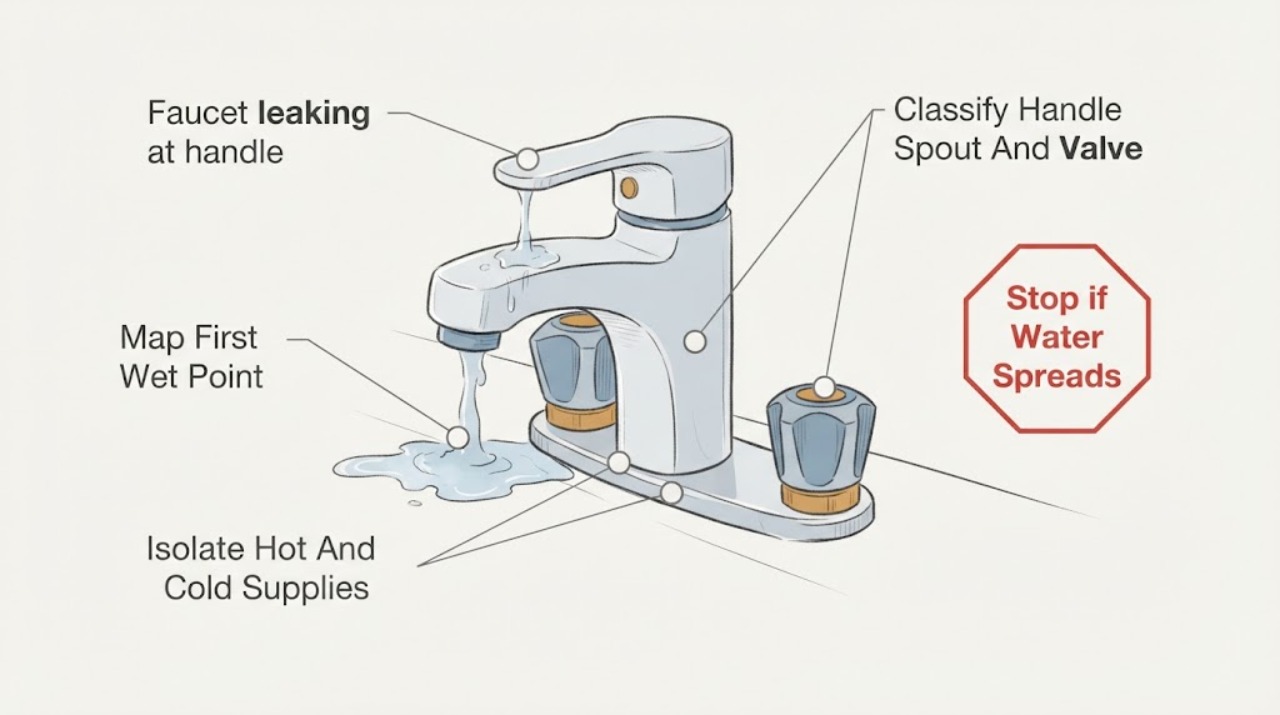
First dry the faucet and identify whether water starts under the handle, at the spout, around the base, or below the counter. Close the hot and cold angle stops before removing a handle or cartridge, then test one supply side at a time only when the stops are clearly identified and the area is safe. A leak under the handle commonly points toward a loose retainer, cartridge seal, valve cartridge, or valve body, but water can travel from a supply connection and appear at the handle. American Standard's repair guidance is model-specific: record the faucet model, use its installation or repair-parts diagram, and do not assume that a cartridge or handle part from another American Standard faucet fits. Do not force a stuck stop, overtighten a retainer, work over a wet electrical area, or leave the faucet pressurized while the source is uncertain.
Before you begin
Safety first
- This article supports drying and locating the source, closing clearly identified angle stops, recording the model, and following a matching American Standard guide for permitted work on an isolated faucet. A qualified plumber should handle failed stops, concealed or pressurized plumbing, cracked bodies, internal valve work, and leaks near electrical equipment.
Work through in order
Diagnostic checks
Use only checks that match the exact appliance or system and its official guide.
-
Check 1
With the handle closed, dry the visible faucet and underside, then watch for the first new water at the handle seam, spout, base, supply connection, angle stop, drain, or countertop.
Expected result: Water may emerge only under the handle, begin at the spout, track down the faucet body, appear at a supply nut, or come from the drain or sink rim.
Next step: Photograph the first wet point and note whether the faucet is single-handle, two-handle, bathroom, kitchen, pull-out, or pull-down before isolating the supplies.
Stop if: Stop for uncontrolled flow, a cracked body, a concealed wall leak, water near electrical equipment, or a source that cannot be viewed without moving the faucet or cabinet.
Why this matters
Why: The first wet point separates a cartridge or retainer path from a spout seal, supply-line, angle-stop, drain, or faucet-body problem. The lowest puddle can be downstream from the actual leak.
-
Check 2
Close the clearly identified hot and cold angle stops beneath the sink, then open the faucet briefly to release residual pressure; for a two-handle faucet, isolate one side at a time only if the stop is operable without force.
Expected result: The leak may stop when one side closes, stop only when both sides close, continue as residual water, or continue because a stop is not isolating the faucet.
Next step: Leave the affected stop closed and dry the area again; arrange plumbing service if a stop will not close or the faucet cannot be safely isolated.
Stop if: Do not force a stuck stop, loosen a pressurized supply nut, or remove the handle while water remains active.
Why this matters
Why: The side that stops the leak narrows a two-handle cartridge or valve diagnosis. Continued water after both stops are closed suggests residual water, a failed stop, an upstream connection, or a misidentified source.
-
Check 3
With water isolated, compare the handle leak with any spout drip or base moisture and record whether the leak occurs only while the handle is open or also when the faucet is off; do not remove the cartridge without the exact model guide.
Expected result: Water may appear only while operating the handle, continue from the spout when off, or collect around the handle base even with the spout dry.
Next step: Use the American Standard model's repair guide to determine whether the handle, retainer, cartridge, or seal can be serviced; if the model is unknown or the body is damaged, arrange service.
Stop if: Do not pry decorative trim, force a seized retainer, or substitute a cartridge based on visual similarity.
Why this matters
Why: A handle-only leak keeps a retainer, cartridge seal, or valve-stem path likely. A spout drip points toward the cartridge or valve seat; base moisture can be a mounting or body leak rather than a handle repair.
-
Check 4
After both angle stops are closed and the area is dry, inspect the supply lines, faucet shanks, mounting area, and drain for water that may be traveling upward or downward; do not remove a supply line or faucet body.
Expected result: The supply line or angle stop may be wet, the faucet shank or mounting area may leak, the drain may be wet, or all connections may remain dry while the handle area leaks.
Next step: Document the connection and source, then arrange plumbing service for a failed stop, supply line, mounting leak, drain, or any internal faucet leak that cannot be safely accessed.
Stop if: Do not tighten a nut under pressure, disturb the faucet mounting hardware, use the sink over a wet cabinet, or open the wall to trace a leak.
Why this matters
Why: A supply, mounting, or drain leak can mimic a handle leak. Dry connections with a confirmed handle-area source keep the cartridge, retainer, or valve body in the differential.
-
Check 5
Record the American Standard model, handle configuration, leaking side and timing, stop-isolation result, photos, and any model-approved retainer, cartridge, seal, or connection correction; restore water slowly only for a brief attended test.
Expected result: The leak may stop, return immediately, appear at another seam, or remain unchanged after the model-specific correction.
Next step: Close the stops again if the leak returns and give the model, photos, and test sequence to a licensed plumber or American Standard service technician.
Stop if: Do not leave a repaired faucet pressurized unattended, repeat adjustments to compensate for a worsening leak, or use a part without confirming model compatibility.
Why this matters
Why: A returning or moved leak suggests another seal, cartridge, valve body, supply, or installation problem. The model number and test result are needed to choose a compatible American Standard part and avoid repeating the wrong repair.
Use your observations
Decision map
Find the observation that best matches what you see, then follow the next safe action.
-
PATH 01Safety boundary
What you see
Water starts under the handle while the spout, supply lines, and angle stops remain dry.
Do this next
Close the stops, identify the exact model, and follow the matching American Standard repair guide; arrange service if the leak persists or the valve body is damaged.
Why this path and its safety boundary
Why it matters: A retainer, cartridge seal, cartridge, or valve-stem path is more likely than a supply leak.
Safety stop: Do not force the retainer, pry trim, or remove the valve without fully isolating water.
-
PATH 02Safety boundary
What you see
The handle area is wet and the spout also drips after shutoff, with no wet supply connection.
Do this next
Use the model-specific repair-parts diagram to identify the valve or cartridge and arrange service if cleaning or approved replacement does not stop both symptoms.
Why this path and its safety boundary
Why it matters: A cartridge or valve-seat problem may be affecting both the handle seal and shutoff, but the exact valve family is still unknown.
Safety stop: Do not install a generic cartridge or continue testing with water flowing into the cabinet.
-
PATH 03Safety boundary
What you see
On a two-handle faucet, closing one clearly identified angle stop stops the handle leak while the other side is unaffected.
Do this next
Leave that side closed, record whether the handle is hot or cold, and use the exact model guide or a plumber to identify the correct valve part.
Why this path and its safety boundary
Why it matters: The isolated hot or cold branch's cartridge, valve, or connection is more likely than the opposite side.
Safety stop: Do not reverse hot and cold valve parts, remove the cartridge under pressure, or assume both sides use the same part.
-
PATH 04Safety boundary
What you see
Water appears at a supply line, angle stop, faucet shank, or mounting area and then tracks toward the handle.
Do this next
Keep the stops closed and arrange plumbing service for the supply, stop, mounting, or faucet-body connection.
Why this path and its safety boundary
Why it matters: The visible handle moisture is downstream from a supply or mounting leak; a cartridge replacement would not correct the source.
Safety stop: Do not tighten a connection under pressure, disturb a failed stop, or use the sink while water is entering the cabinet or wall.
-
PATH 05Safety boundary
What you see
Water continues after both stops are closed, or a stop fails to isolate the faucet.
Do this next
Keep the area dry, protect the cabinet, and have a plumber isolate the branch at a safe point before any faucet disassembly.
Why this path and its safety boundary
Why it matters: Residual water, a failed stop, an upstream connection, or a misidentified drain or wall leak is possible; handle repair is not yet safe.
Safety stop: Stop for uncontrolled flow, wall saturation, cabinet damage, or water near an electrical receptacle.
-
PATH 06Safety boundary
What you see
The faucet body, valve housing, countertop, wall, or concealed connection is cracked, corroded, or wet beyond the handle area.
Do this next
Close both stops, protect the surrounding materials, and arrange licensed plumbing service to assess the faucet and plumbing assembly.
Why this path and its safety boundary
Why it matters: A body, mounting, or concealed plumbing repair is more likely than a replaceable handle seal or cartridge.
Safety stop: Do not open the wall, operate the faucet, or leave a cracked body or concealed leak pressurized.
Helpful context
Understand the symptom
Water under the handle is a location, not a diagnosis
A handle leak can be caused by a retainer or cartridge seal, but water from the spout, base, supply line, or faucet body can run along the trim and appear beneath the handle. Dry everything first and watch for the first new drop. That observation decides whether a handle-area repair is sensible or whether the faucet must remain isolated for plumbing service.
Use the model before choosing a cartridge
American Standard publishes model-specific repair diagrams and parts. Handle style, single- versus two-handle construction, valve orientation, and cartridge family can differ even when two faucets look similar. Record the model from the faucet, paperwork, or product label before removing a part.
Stage the supply test
Close both angle stops, release residual pressure at the faucet, and dry the underside. If the faucet is a two-handle type and the stops work, testing the hot and cold sides separately can show which valve path is involved. Do not loosen a connection until the water is fully isolated.
A recurring leak needs service, not more torque
If a correct model-specific cleaning or retainer check does not stop the leak, the cartridge, valve body, supply line, or faucet mounting area may be involved. Overtightening can crack a cartridge or damage a fitting. Close the stops and arrange a licensed plumber or American Standard service assessment.
Safety boundary
Stop conditions
- Close the appropriate hot and cold angle stops for a leaking American Standard faucet and do not leave the faucet pressurized unattended while the source is uncertain.
- Do not remove the handle, retainer, cartridge, valve, or supply connection until water is isolated and the exact model instructions support the work.
- Do not force a stuck angle stop, overtighten a retainer or connection, cross-thread a fitting, or use a cartridge, seal, or valve selected only by appearance.
- Stop for uncontrolled flow, a failed stop, a cracked faucet body, concealed wall moisture, cabinet saturation, or water near electrical equipment; obtain qualified plumbing service.
- Arrange service when an approved model-specific correction does not stop the leak, the source moves or remains unclear, or repair requires opening the wall, valve body, or pressurized supply.
Only after diagnosis
Potential parts
- American Standard model-specific cartridge or ceramic valve
Consider this only when the leak is confirmed at the handle or spout valve path and the exact model repair diagram identifies the cartridge or valve.
Match model, handle configuration, hot or cold side, valve family, and orientation; similar-looking American Standard cartridges are not assumed interchangeable. - handle retainer, stem seal, or gasket
Consider this only when the model guide confirms a separate handle-area retainer, stem seal, or gasket is the source and the valve body is sound.
Use the model's repair instructions and avoid overtightening; a seal cannot correct a cracked valve body or failed supply connection. - faucet supply line or angle-stop component
Consider this only when the first wet point is the supply line or angle stop and water can be safely isolated.
Verify connection type, length, shutoff condition, and plumbing requirements; a stuck or damaged stop should be handled by a plumber. - faucet valve body or complete faucet assembly
Consider this only when a qualified diagnosis confirms a cracked or internally damaged valve body that a cartridge or seal cannot correct.
Confirm model, mounting, connections, handle arrangement, and repair-part availability before replacement.
When checks do not resolve it
Need a professional?
Arrange American Standard or licensed plumbing service when the faucet leaks from the valve body, a cartridge or retainer correction does not stop the handle leak, an angle stop will not isolate the faucet, a supply or mounting connection is wet, the faucet body or wall is damaged, or the model-specific part is uncertain. Close the stops and seek urgent plumbing help for uncontrolled flow, rapidly saturating cabinetry, concealed leaks, or water near electrical equipment.
Safety scope: This article supports drying and locating the source, closing clearly identified angle stops, recording the model, and following a matching American Standard guide for permitted work on an isolated faucet. A qualified plumber should handle failed stops, concealed or pressurized plumbing, cracked bodies, internal valve work, and leaks near electrical equipment.
Common questions
FAQ
Why is my American Standard faucet leaking under the handle?
A retainer, cartridge seal, cartridge, or valve-stem path is possible, but water can also travel from the spout, supply connection, mounting area, or faucet body. Dry the area, find the first wet point, close the angle stops, and use the exact model repair guide before removing a part.
Can I tighten the handle or retainer to stop the leak?
Only make a model-approved adjustment after the water is isolated and the retainer is correctly aligned. Do not force or overtighten it; that can damage a cartridge or fitting. If the leak returns, arrange plumbing service.
How do I know whether the cartridge or supply line is leaking?
Close both angle stops, dry the underside, and watch the first new drop. Moisture that starts at the handle or valve area keeps a cartridge or retainer likely; water at a supply nut, stop, shank, or mounting point points toward plumbing or connection work. Do not remove a supply line under pressure.
How do I choose an American Standard replacement cartridge?
Use the faucet model number and its American Standard repair-parts diagram or installation guide. Handle configuration and hot or cold valve orientation can differ. Do not rely on appearance or a generic cartridge listing, and use a plumber when the model or valve is uncertain.
Read the exact guide
Official sources
- Colony PRO 4-Inch Centerset 2-Handle Bathroom FaucetAmerican Standard · Opened American Standard product page for one two-handle faucet family used only to show that model pages expose specific valve and parts documentation; it does not identify the user's faucet or part.
- How To Replace The Spout Seal Kit For Your Reliant FaucetAmerican Standard · Opened American Standard guidance for the Reliant faucet family used to support the isolation and model-specific repair boundary; it is not a universal procedure for every American Standard faucet.
- American Standard Parts StoreAmerican Standard · Opened American Standard's official parts page used for the model-identification and parts-reference boundary, not for a commercial recommendation or a specific replacement.
Community feedback
Share a repair observation
Share a plain-text repair observation. Accepted observations are published automatically; this page may take a moment to update.