
On this page
Start here
Quick answer
Water appearing around a faucet handle usually points to the valve cartridge in a single-handle faucet or a stem, cartridge, or seal under one of the handles in a two-handle faucet. First dry the faucet and identify whether water starts only when the handle moves, whether one or both handles are involved, and whether the trail actually begins at the spout base or a supply connection. If the leak is inside the handle assembly, shut off the local supply valves if they are accessible and clearly identified, then use the faucet model instructions for any repair. Do not force a seized handle, remove a decorative part without the model procedure, or continue using a faucet that leaks into the cabinet or wall. Call a qualified plumber when the shutoff will not close, the source is concealed, or the leak persists after a model-correct repair.
Before you begin
Safety first
- Homeowner checks are limited to drying and observing the leak, using a known local shutoff, and following a model-specific visible adjustment. No pressurized disassembly, forced hardware, concealed-wall work, or uncontrolled water isolation.
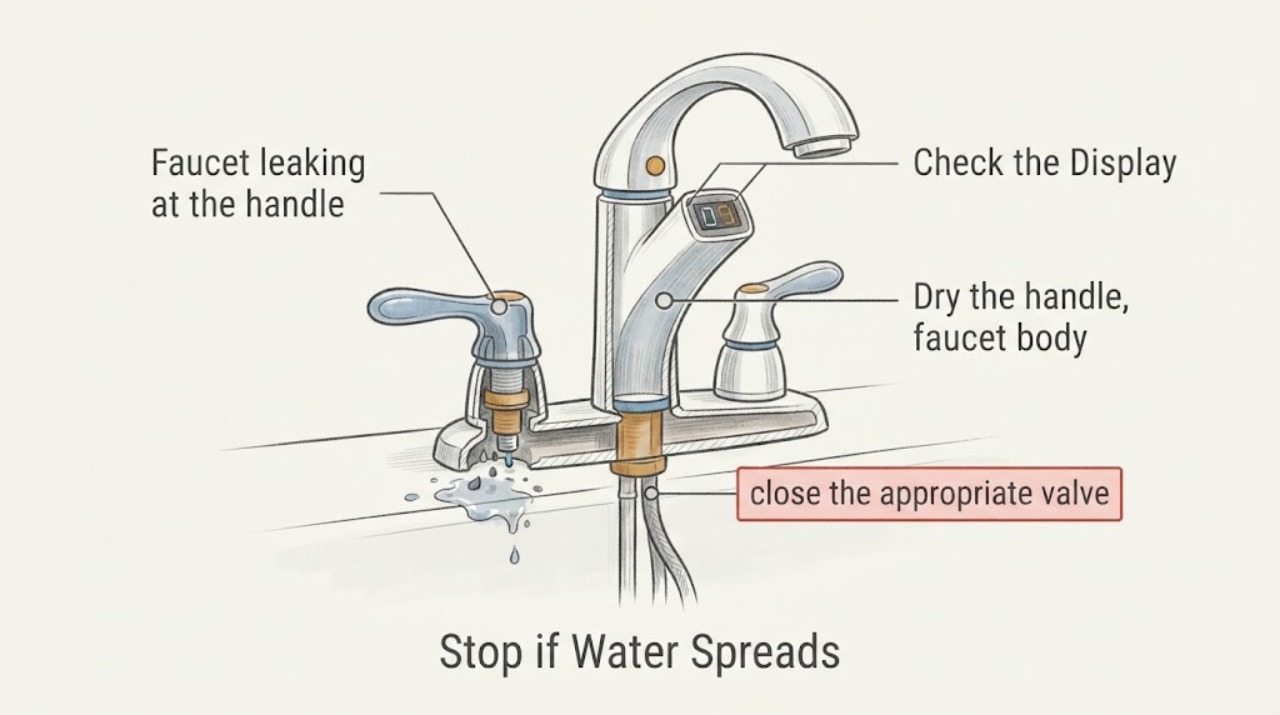
Work through in order
Diagnostic checks
Use only checks that match the exact appliance or system and its official guide.
-
Check 1
Dry the handle, faucet body, spout base, and the visible supply connections. Turn the faucet on and off normally while watching the first point that becomes wet; do not spray water around the assembly.
Expected result: Water that begins at the handle or rises under it differs from water starting at the spout base, the faucet mounting area, or a supply hose below the sink.
Next step: Photograph the first wet point and continue only with the matching branch. Do not order a cartridge until the leak location and faucet model are identified.
Why this matters
Why: A handle-origin leak makes the cartridge, stem, bonnet, or seal more likely. A different starting point can indicate a spout O-ring, mounting, or supply connection rather than a handle valve.
-
Check 2
Determine whether the faucet has one control or separate hot and cold controls. On a two-handle faucet, operate one handle at a time briefly while the area is dry; on a single-handle faucet, note whether movement in any direction reproduces the leak.
Expected result: One side causing the leak differs from both sides leaking, and both differ from a single handle that leaks regardless of direction.
Next step: Record the affected handle and whether the leak occurs only while open or also while closed. Use that observation to select model-specific parts or service, not a universal cartridge.
Why this matters
Why: A single-handle faucet generally directs the diagnosis to its one cartridge. On a two-handle faucet, the affected side narrows the valve or stem diagnosis; two affected handles can reflect two worn valves or a shared water path.
-
Check 3
If the local shutoff valves are accessible and clearly identified, close the appropriate valve or valves under the sink before any handle or bonnet access. Open the faucet briefly, then close it and keep a towel in the cabinet.
Expected result: The flow should stop after residual pressure drains. A valve that will not close, drips at its stem, or cannot be confidently identified is a different condition from a reliable local shutoff.
Next step: Stop before disassembly if the shutoff is seized, leaking, inaccessible, or uncertain. Do not force it or remove the faucet under pressure.
Why this matters
Why: A reliable shutoff limits water damage during a model-specific repair. An unreliable or concealed shutoff raises the risk of an uncontrolled leak and requires a plumber or building-level water shutoff procedure.
-
Check 4
With water isolated and the model instructions in hand, inspect only the externally accessible handle fastener or bonnet area. Do not pry trim, pull a cartridge, or disconnect a hose unless the model procedure clearly identifies that step and you are prepared to stop if the part resists.
Expected result: A loose bonnet or handle fastener differs from a seized fastener, damaged trim, a corroded valve body, or a leak that remains after a correct model-specific adjustment.
Next step: Use only the model's repair instructions and stop if access is unclear or force is needed. Keep all parts contained and do not substitute a cartridge or stem based only on appearance.
Why this matters
Why: Some two-handle designs may respond to a bonnet adjustment, while a continuing leak can require a correctly identified stem. A single-handle handle-area leak commonly requires the correct cartridge, but the model determines the part and access method.
-
Check 5
With the cabinet dry and the faucet unused, place a dry paper towel beneath the faucet body, supply connections, and shutoff valves without wrapping it around a pressurized fitting. Check it again after the faucet has been operated and then left closed.
Expected result: A towel wet below the handle or at a supply connection differs from one that stays dry when the faucet is closed; water may also appear only while the handle is moving.
Next step: Use the first wet location to select the correct branch. If the connection or shutoff is wet, isolate the supply if possible and arrange plumbing service rather than tightening parts at random.
Why this matters
Why: A connection or valve leak is not corrected by replacing a handle cartridge, while a leak that appears only during operation keeps the valve assembly or its seals in consideration.
-
Check 6
After any model-approved adjustment or replacement, restore water slowly while watching the handle, spout base, mounting area, supply connections, and cabinet. Operate the affected control through its normal range and dry the area again.
Expected result: A dry handle and cabinet through several normal on/off cycles differs from a continuing seep, a new leak at the base, or water returning only when the control moves.
Next step: Close the local valves again and call a qualified plumber if the leak persists, moves into the wall or cabinet, or cannot be isolated. Do not keep tightening a part that is already snug.
Why this matters
Why: A dry test supports that the immediate leak was corrected, but a new wet point indicates a different seal or connection may be involved. Continued handle leakage means the part, installation, or valve body still needs diagnosis.
Use your observations
Decision map
Find the observation that best matches what you see, then follow the next safe action.
-
PATH 01Next step
What you see
Water begins at the handle of a single-handle faucet and the local shutoff works, with no leak at the spout base or supply connection.
Do this next
Use the manufacturer's model instructions or have a plumber replace and verify the correct cartridge. Do not force the handle or substitute a visually similar cartridge.
-
PATH 02Next step
What you see
Only one side of a two-handle faucet leaks under its handle, while the other handle and the spout remain dry.
Do this next
Isolate that side if the local shutoff arrangement allows it and follow the exact model procedure. If a bonnet adjustment does not stop the leak, arrange service for the correct stem or valve repair.
-
PATH 03Next step
What you see
Both handles leak, or the leak continues with the faucet closed and the wet trail begins below the handle area.
Do this next
Trace the first wet point with the area dry, isolate the water if possible, and have a plumber evaluate the valves, mounting, and connections before parts are selected.
-
PATH 04Next step
What you see
The water starts between the spout and handle or at the faucet base rather than under the handle.
Do this next
Use the model's leak diagram or call a plumber. Do not order a handle cartridge until the spout or base source has been ruled out.
-
PATH 05Next step
What you see
The local shutoff will not close, the valve itself leaks, water is entering a cabinet or wall, or a handle or fastener is seized.
Do this next
Stop disassembly, keep clear of the water, and contact a qualified plumber or the appropriate building water-shutoff service. Do not force the handle, valve, or wall trim.
Helpful context
Understand the symptom
The wet spot is a clue, not the part name
A handle leak can begin at the valve cartridge or stem and run along the handle, but water from the spout base, mounting area, or supply connection can travel and look similar. The first decision is therefore where the water starts and whether one or two valve controls reproduce it. A two-handle faucet may have a separate valve on each side; a single-handle design commonly uses one cartridge, but the exact cartridge depends on the model.
Keep the repair boundary safe
Shut off the local faucet valves only when they are reachable and clearly identified, and open the faucet briefly to relieve residual pressure. Keep a towel over the drain and protect the cabinet. Do not force a stuck valve or handle, work on a concealed wall valve, or leave the water supply on while removing an internal faucet part.
Only after diagnosis
Potential parts
- single-handle faucet cartridge
Consider this only when a single-handle faucet leak is confirmed to start at the handle or valve and the faucet model identifies the cartridge.
Cartridges are not universal; confirm the complete faucet model and manufacturer fit information before ordering. - two-handle faucet stem or valve cartridge
Consider this only when the affected side of a two-handle faucet has been identified and a model-specific diagnosis points to its stem or cartridge.
Hot and cold sides and faucet models can use different parts. Confirm the model, side, and installation details before ordering. - faucet O-ring or seal
Consider this only when the leak is traced to a model-specific seal at the spout, handle, or valve body rather than a supply connection.
Seal dimensions and material depend on the faucet design. Use the manufacturer's parts diagram or a plumber's identification.
When checks do not resolve it
Need a professional?
Call a qualified plumber when the leak persists after a model-correct repair, the local shutoff will not close, the shutoff itself leaks, water is entering the cabinet or wall, a handle or bonnet is seized, or the valve body is corroded or damaged. Stop immediately if water reaches electrical equipment or the leak cannot be controlled. Do not remove internal faucet parts while pressurized, force seized hardware, or work on a concealed valve without the proper access and isolation.
Safety scope: Homeowner checks are limited to drying and observing the leak, using a known local shutoff, and following a model-specific visible adjustment. No pressurized disassembly, forced hardware, concealed-wall work, or uncontrolled water isolation.
Common questions
FAQ
Why does water leak from around a faucet handle?
The cartridge, stem, bonnet, or a seal may be leaking, but water from the spout base or a supply connection can travel toward the handle. Dry the area and identify the first wet point before choosing a part.
Does a two-handle faucet need two cartridges?
Many two-handle designs have a separate valve or stem for each side, while a single-handle design generally uses one cartridge. The exact arrangement and part depend on the faucet model.
Should I replace the cartridge if only one handle leaks?
Only after confirming that the water starts under that handle and the faucet model identifies the correct cartridge or stem. A leak at the spout base, mounting area, or supply hose needs a different diagnosis.
What if the faucet shutoff valve is stuck?
Do not force it. Stop disassembly and contact a qualified plumber or the appropriate building water-shutoff service, especially if water is entering the cabinet or wall.
Read the exact guide
Official sources
- Kitchen Faucet: Leaking Around The HandleMoen Solutions · Moen kitchen faucet handle leaks and single- versus dual-handle cartridge diagnosis
- Kitchen faucet leaks between the spout and the handleMoen Solutions · Moen faucet leaks between spout and handle, O-rings, cartridges, and model identification
- Find Parts and Identify Your ProductDelta Faucet · faucet leak part categories and model-based product identification
- What do I do if my two-handle faucet leaks under the handle?Delta Faucet · Delta two-handle faucet leaks under a handle, bonnet, stem, and water isolation
Community feedback
Share a repair observation
Share a plain-text repair observation. Accepted observations are published automatically; this page may take a moment to update.