
On this page
Start here
Quick answer
Water appearing around an American Standard faucet handle usually means water is escaping at the valve stem, handle or bonnet area, but it can also be running down from the spout or a supply connection. Dry the faucet, trace the first wet point while the faucet is opened and closed, identify the exact model, and shut off the water before any disassembly. American Standard's faucet instructions show handle, cartridge, seal, and shutoff steps, but the stem and cartridge arrangement varies by model. If the leak continues with the supply off, the faucet body is cracked, or you cannot isolate the correct model-specific procedure, leave it off and arrange qualified plumbing service.
Before you begin
Safety first
- Keep the water supply off for uncontrolled flow, a spray, flooding risk, a damaged body or connection, or water near electrical equipment. Do not force trim or work on a pressurized faucet.
Work through in order
Diagnostic checks
Use only checks that match the exact appliance or system and its official guide.
-
Check 1
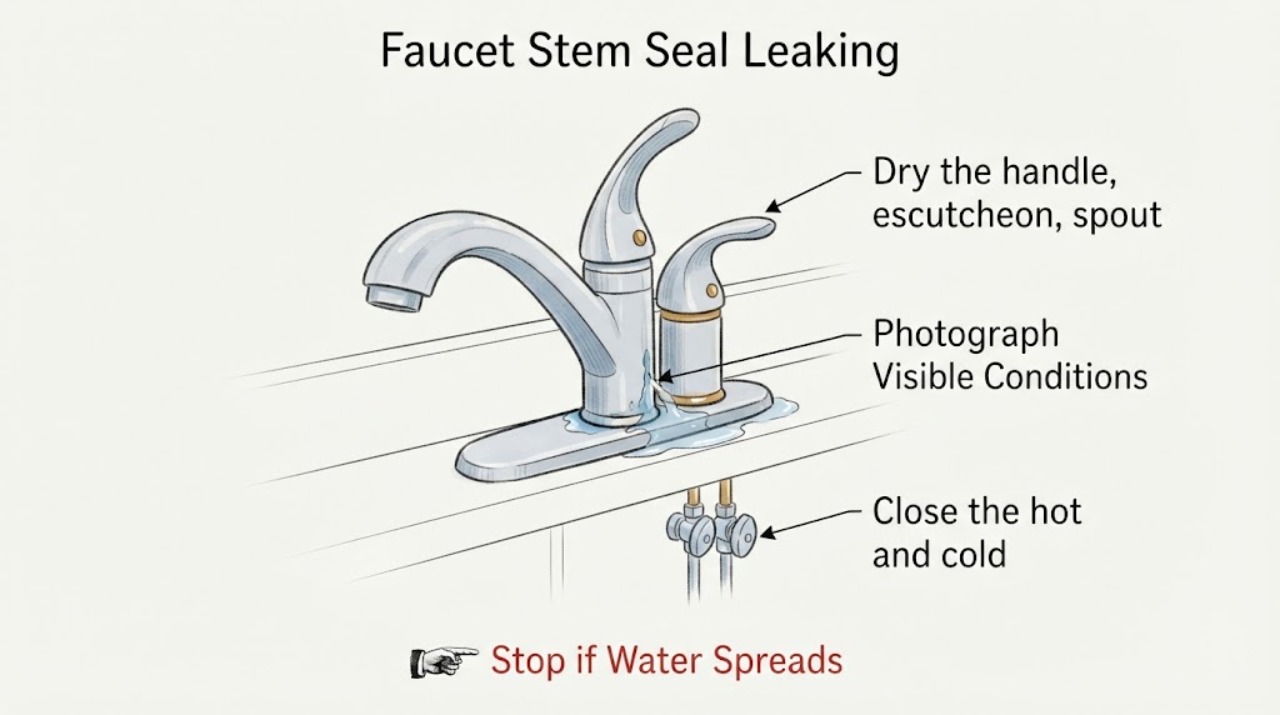
Dry the handle, escutcheon, spout, deck, and visible supply connections. Open and close the American Standard faucet briefly while watching with a flashlight; touch only dry exterior surfaces with a tissue rather than reaching into the water path.
Expected result: The first wet point is at the stem or handle base, at the spout joint, at a hose or supply connection below the deck, or nowhere until the faucet is moved.
Next step: Record the location and whether it leaks only while open, while the handle is moving, or while fully closed. Follow the matching branch before removing trim.
Why this matters
Why: A first wet point at the handle area makes a stem seal, bonnet, cartridge, or handle-area seal more likely; a different first wet point points away from the stem seal.
-
Check 2
Identify whether the faucet is single-handle or two-handle and photograph the handle, trim, spout, and any model marking before taking anything apart. Compare that identity with the American Standard product or repair-parts information for the faucet family.
Expected result: The model marking and handle style match a product page or manual, or the model is missing, unreadable, or does not match the available diagram.
Next step: Use only the exact matching manual or parts diagram for further access. If the model cannot be identified, stop at external diagnosis and request plumbing help rather than guessing a seal or cartridge.
Why this matters
Why: American Standard lists different cartridges, handles, seals, and repair diagrams across faucet families, so a generic stem-seal procedure cannot establish the correct part or sequence.
-
Check 3
Close the hot and cold supply stops under the sink, or the household water shutoff if local stops do not isolate the faucet. Open the faucet briefly to release pressure, then verify that water has stopped before loosening a handle or trim screw.
Expected result: Flow stops and pressure is relieved, or water continues to flow, a stop will not turn, or a shutoff is inaccessible.
Next step: Do not remove the handle, cartridge, or stem hardware while water continues. If the shutoff will not isolate the faucet, leave it closed as far as safely possible and call a plumber.
Why this matters
Why: A successful shutoff makes limited model-specific service safer; continuing flow means the faucet is still pressurized and a disassembly attempt could cause flooding.
-
Check 4
With water isolated, inspect the visible index cap, handle screw, handle base, and bonnet or escutcheon for looseness, mineral buildup, corrosion, or a damaged finish. Use a soft cloth and the exact model instructions; do not overtighten or force a seized fastener.
Expected result: The handle or retaining hardware is visibly loose or damaged, the area is clean and tight, or the bonnet is stuck and begins to deform when turned.
Next step: Only reseat or snug an accessible handle fastener as the model manual specifies. Do not use force to remove trim; service a damaged or seized assembly.
Why this matters
Why: Loose or damaged external hardware can let water collect around the stem, while a clean, secure handle area makes an internal stem or cartridge seal more likely. A deforming bonnet or screw is a service boundary.
-
Check 5
Compare the leak timing with the faucet position after the exterior check: test once with the handle fully closed, once while opening, and once at a steady flow, keeping a towel under the work area and stopping if water escapes unexpectedly.
Expected result: Water appears only while the handle is being moved or the faucet is open, appears with the faucet closed, or appears below the sink instead of at the handle.
Next step: Use the pattern to choose service scope. Do not replace a stem seal solely because the handle became wet if the first wet point is elsewhere.
Why this matters
Why: A movement-related handle leak supports a stem or upper cartridge seal problem; a closed-faucet drip with a dry handle points more toward the valve's closure or cartridge; a below-deck leak points to a connection or hose.
-
Check 6
If the water is fully off and the exact American Standard manual shows owner-accessible handle and cartridge service, follow that diagram one step at a time: remove only the documented cap and screw, lift the handle without prying against the finish, and stop before removing the cartridge or stem if the parts do not release normally.
Expected result: The handle comes off cleanly and the diagram exposes a seal or cartridge, or the handle, retaining nut, or stem is stuck, corroded, cracked, or different from the diagram.
Next step: Inspect and replace a seal only when the exact model procedure identifies it and the part is confirmed for that model. Otherwise reassemble what was safely opened and arrange service.
Why this matters
Why: A clean match to the model diagram supports a controlled seal or cartridge inspection; a mismatch or stuck part means the assumed stem-seal repair may be wrong and force could damage the faucet or supply connection.
-
Check 7
After any documented, low-risk reseating or model-specific seal service, reinstall the handle and trim, keep the cabinet visible, and restore water slowly while checking the handle area, spout joint, and supply connections.
Expected result: The handle area stays dry through several open-and-close movements, the leak returns immediately, or a new leak appears at a connection or under the deck.
Next step: Close the stops again if the leak returns, do not keep cycling the faucet, and arrange qualified plumbing service with the model and leak pattern.
Why this matters
Why: A dry supervised test supports a successful seal or trim correction; a returning or relocated leak means the part, fit, cartridge, faucet body, or connection still needs diagnosis.
Use your observations
Decision map
Find the observation that best matches what you see, then follow the next safe action.
-
PATH 01Next step
What you see
The first wet point is at the handle stem or handle base, and it appears while the handle moves or water is flowing.
Do this next
Use the exact American Standard model diagram after shutting off and relieving water. Consider a seal or cartridge only after the diagram and diagnosis identify it; stop if trim is stuck or damaged.
Why this path and its safety boundary
Why it matters: A stem seal, bonnet, upper cartridge seal, or related valve component is more likely than a spout or supply leak.
-
PATH 02Next step
What you see
The handle area stays dry, but water drips from the spout when the faucet is closed.
Do this next
Do not order a stem seal from the handle symptom alone. Use the exact model's cartridge or valve guidance, or request plumbing service if the drip persists.
Why this path and its safety boundary
Why it matters: The valve's closure or cartridge is more likely than a stem seal at the handle.
-
PATH 03Next step
What you see
Water first appears under the sink at a supply hose, mounting area, or connection rather than at the stem.
Do this next
Close the affected supply stop and dry the area. Do not continue a handle-seal repair; arrange plumbing service if tightening or model-directed external inspection does not identify a safe correction.
Why this path and its safety boundary
Why it matters: The observed leak is outside the handle valve seal and may involve a hose, supply connection, mounting seal, or sink interface.
-
PATH 04Next step
What you see
The exact model cannot be identified, or the handle, stem, retaining nut, or seal arrangement does not match the American Standard diagram.
Do this next
Reassemble only what was safely opened, keep the supply off if it leaks, and arrange qualified service with photographs and the model marking.
Why this path and its safety boundary
Why it matters: The part and disassembly sequence are uncertain, so a guessed stem-seal repair could damage the faucet or leave a pressurized leak.
-
PATH 05Next step
What you see
The leak continues after a model-directed seal or cartridge service, or the faucet body, stem, trim, or supply connection is cracked or badly corroded.
Do this next
Close the water stops, protect the cabinet from further water, and call a qualified plumber. Do not keep tightening or repeat disassembly under pressure.
Why this path and its safety boundary
Why it matters: The seal may not be the root cause, the part may be wrong or worn, or the faucet or connection may need replacement-level work.
-
PATH 06Next step
What you see
Water reaches electrical equipment, the supply cannot be shut off, the leak becomes a spray, or the cabinet is at risk of flooding.
Do this next
Keep clear, shut off the household supply only from a safe location, and obtain emergency plumbing help. Do not operate electrical equipment in wet surroundings.
Why this path and its safety boundary
Why it matters: This is an immediate water-damage or electrical-safety stop, not a routine handle-seal adjustment.
Helpful context
Understand the symptom
A handle leak is a location problem first
A wet handle does not by itself prove that the stem seal is the failed part. Water may emerge at the stem, collect under the handle, travel from the spout, or rise from a connection under the sink. Wipe the faucet dry and watch the first place that becomes wet during a brief, controlled use. The exact American Standard faucet family matters because a single-handle ceramic cartridge and a two-handle valve do not use the same service sequence.
Use the faucet's own service information
American Standard's parts and product pages provide model-specific repair diagrams and list different handle, cartridge, seal, and mounting components. Record the model marking before ordering a part or removing the trim. A seal that looks similar is not proof that it fits this faucet.
Keep the repair dry and reversible
Place a towel in the cabinet and protect the drain from dropped screws. Turn off the faucet's supply stops if present, or use the household shutoff when the local stops do not isolate it. Open the faucet briefly to relieve pressure, then leave it open while confirming that flow has stopped. Do not force a stuck handle, pry against the finish, loosen a pressurized connection, or open a wall or cabinet to reach hidden plumbing.
Safety boundary
Stop conditions
- Stop before disassembly if water cannot be isolated, the local shutoff is seized, or flow continues after the faucet is opened briefly to relieve pressure.
- Do not force a handle, bonnet, retaining nut, or stem, pry against the finish, or continue when a part is cracked, badly corroded, or different from the exact American Standard diagram.
- Keep the faucet off and obtain qualified plumbing help for a spray, flooding risk, hidden leak, damaged supply connection, or water near electrical equipment.
- Do not guess a stem seal or cartridge by appearance. Confirm the exact American Standard model and the model-specific parts information first.
Only after diagnosis
Potential parts
- stem seal, packing, or valve seal
Consider this only when the first wet point is confirmed at the valve stem or handle area and the exact model documentation identifies a replaceable seal for that location.
Seal shape and service method vary by American Standard faucet family. Confirm the exact model and diagram before ordering or fitting any seal. - faucet cartridge or valve cartridge
Consider this only when the model-specific diagnosis points to the cartridge or valve after the handle leak location is confirmed and the stem seal is not the separate service part.
American Standard product pages list model-specific cartridges and repair diagrams. Do not select a cartridge by appearance or brand alone. - handle or retaining hardware
Consider this only when the handle screw, base, or retaining hardware is visibly damaged or cannot hold the handle correctly after the leak source is confirmed.
Handle parts and finishes differ across models. Confirm the model marking and the manufacturer's parts information before selecting a replacement.
When checks do not resolve it
Need a professional?
Arrange qualified plumbing service when the American Standard faucet cannot be isolated, the model-specific stem or cartridge procedure is unavailable, a handle or bonnet is seized, the faucet body or connection is damaged, or the leak returns after a documented seal or cartridge service. Request urgent help for a spray, uncontrolled flow, flooding risk, a hidden leak, or water near electrical equipment.
Safety scope: Keep the water supply off for uncontrolled flow, a spray, flooding risk, a damaged body or connection, or water near electrical equipment. Do not force trim or work on a pressurized faucet.
Common questions
FAQ
Does water around an American Standard faucet handle always mean the stem seal failed?
No. Water can travel from the spout, a cartridge or bonnet area, or a connection below the sink. Dry the faucet and identify the first wet point before choosing a stem seal.
Should I shut off the water before removing an American Standard faucet handle?
Yes. Shut off the local hot and cold supplies or the household supply if necessary, open the faucet briefly to release pressure, and verify that flow has stopped. American Standard's service instructions begin with the valve in the off position or turning off the water.
Can I use any American Standard stem seal or cartridge that looks similar?
No. American Standard lists different handle, seal, and cartridge components for different faucet families. Use the exact model marking and matching repair information before selecting a part.
What if the handle or bonnet will not come off?
Stop rather than forcing it. A stuck or corroded part can damage the finish, valve, or supply connection. Keep the water isolated and arrange qualified plumbing service if the model instructions do not release it safely.
When should I call a plumber for this leak?
Call when you cannot isolate the faucet, the model-specific procedure is unclear, the body or connection is damaged, the leak returns after documented service, or water is spraying, flooding, hidden, or near electrical equipment.
Read the exact guide
Official sources
- Heritage® Wall Mount Faucet With Gooseneck Spout and Lever HandlesAmerican Standard · Heritage wall-mount faucet product page; used to show that another American Standard family has a distinct valve and handle arrangement.
- Raleigh® Pull-Down Kitchen Faucet SsAmerican Standard · Raleigh model 9379300.075 product page; its listed cartridge, seal washer, handle kit, and repair diagram demonstrate model-specific parts, not universal fit.
- How to Replace the Spout Seal Kit for Your Reliant FaucetAmerican Standard · Reliant faucet spout-seal guide; used for its explicit shutoff and staged handle/cartridge access sequence, not as proof that a Reliant spout seal fits another faucet.
- Raleigh™ Kitchen FaucetAmerican Standard · The specified Raleigh model manual; its handle, cartridge, seal, shutoff, and care sequence illustrates model-specific service and must not be assumed universal.
- American Standard Parts StoreAmerican Standard · Brand parts catalog and support landing page; use the exact faucet model to select a repair diagram or part.
Community feedback
Share a repair observation
Share a plain-text repair observation. Accepted observations are published automatically; this page may take a moment to update.