
On this page
Start here
Quick answer
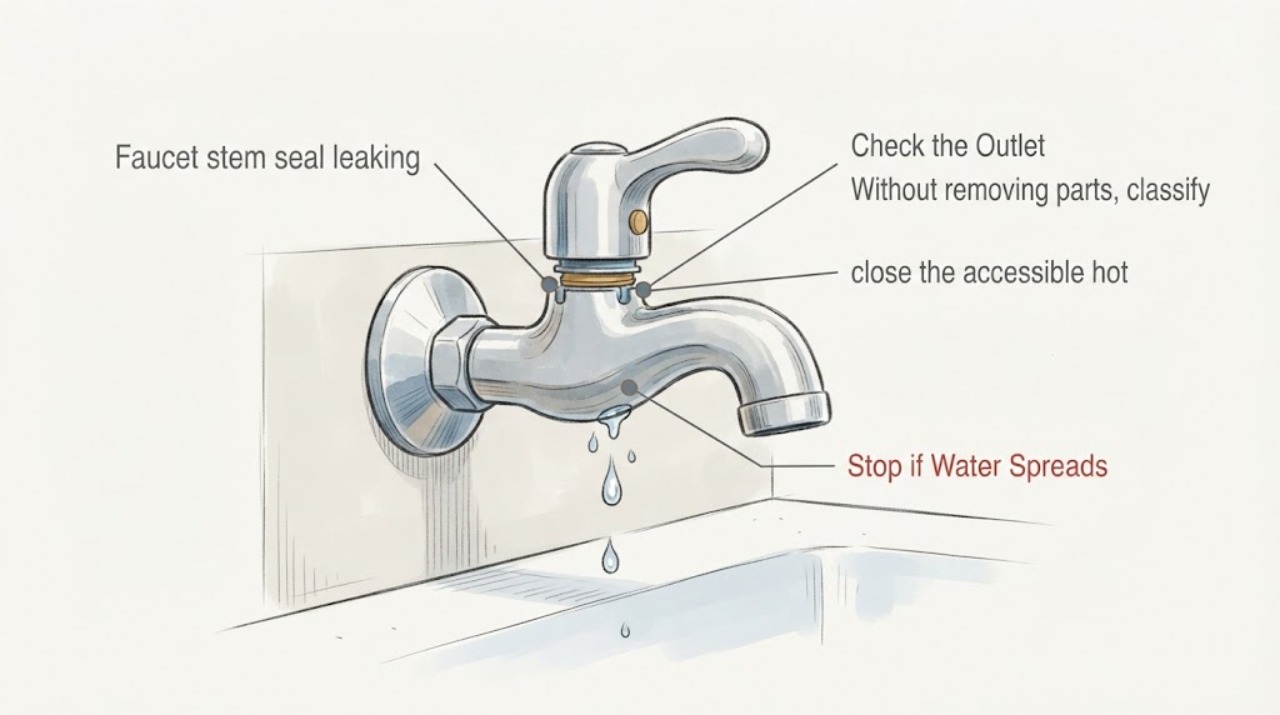
A leak at a faucet handle can involve the stem seal, a cartridge, the spout, or the faucet base, so do not assume an O-ring or stem is the right repair from the wet spot alone. First locate the first point that becomes wet and note whether it happens only while that handle is open or continues with the handle closed. Before any authorized disassembly, close the accessible fixture shutoffs and briefly open the faucet to verify that flow has stopped; do not force a stuck valve. If the shutoff is unreliable, the valve or faucet is corroded, water sprays or reaches a cabinet, wall, floor, or electrical equipment, or the leak is concealed, leave the faucet isolated and call a plumber. Use the exact faucet model and handle style to decide between a stem valve, cartridge, or seal rather than assuming a universal part.
Before you begin
Safety first
- Before any authorized disassembly, close the accessible fixture shutoffs and confirm flow has stopped. Do not force valves, cut supply tubing, disconnect concealed plumbing, pull a stuck stem or cartridge, or work where water contacts electrical equipment.
Work through in order
Diagnostic checks
Use only checks that match the exact appliance or system and its official guide.
-
Check 1
From a dry, safe position, identify whether water first appears around the handle or stem, at the spout outlet or base, at the faucet base, or below at a supply connection; make only a brief normal-use observation and stop if the leak worsens.
Expected result: The leak may start only while the handle is open, continue with the handle closed, or travel from the spout or base toward the handle.
Next step: Record the first wet point, handle position, and whether the cabinet or floor is affected, then limit use and prepare for a model-specific plumbing assessment.
Stop if: Stop immediately for a spray, rapidly increasing leak, water in a wall or electrical area, a slipping hazard, or any observation that requires contact with wet plumbing.
Why this matters
Why: Timing and first wet point separate a possible stem-seal symptom from a cartridge, spout, base, or supply leak; the visible wet spot does not identify the part by itself.
-
Check 2
Without removing parts, classify the faucet as single-handle or two-handle and note the handle style, visible brand or model marking, and whether the handle moves normally; do not force a stiff handle or remove a cap to identify it.
Expected result: The faucet may use one cartridge, separate stems, a knob or lever, or an unidentified construction; the handle may also bind, wobble, or move without changing water flow normally.
Next step: Photograph the intact hardware and use the exact model information for parts identification; call a plumber for binding, corrosion, loose mounting, or unidentified hardware.
Stop if: Stop if the handle is seized, the faucet body moves, the control area is corroded, or identification would require invasive removal or concealed plumbing access.
Why this matters
Why: Faucet architecture and model identity determine whether a stem valve, cartridge, or seal could apply. A two-handle stem diagnosis cannot safely be generalized to a single-handle cartridge design.
-
Check 3
Before any authorized disassembly, close the accessible hot and cold fixture shutoffs and briefly open the faucet to verify that flow and pressure have stopped; do not force either valve or proceed while water continues.
Expected result: Flow may stop fully, reduce but continue, or a valve may be stuck, damaged, corroded, or inaccessible.
Next step: Proceed only within the exact model instructions and safe skill boundary after a confirmed shutoff; otherwise leave the faucet intact and arrange service.
Stop if: Stop for continued flow, a valve that will not turn normally, corrosion, a sudden leak, or any water near electrical equipment.
Why this matters
Why: Confirmed isolation is a prerequisite for safe faucet access. Continued flow means the fixture shutoffs cannot be relied upon and the supply or concealed plumbing needs a plumber.
-
Check 4
With the water isolated, inspect only visible areas under the handle and inside the cabinet for corrosion, mineral buildup, wet supply connections, cabinet swelling, or faucet movement; do not cut tubing, disconnect a supply, or probe concealed plumbing.
Expected result: The stem area may be clean while a supply connection is wet, or there may be corrosion, mineral buildup, cabinet damage, or water extending into a concealed space.
Next step: Photograph the condition and provide it to a plumber; keep reliable shutoffs closed if the fixture is no longer needed and the area can be isolated safely.
Stop if: Stop and isolate the area for a failed shutoff, active spray, severe corrosion, soft cabinet material, concealed leakage, sewage contamination, or water near electricity.
Why this matters
Why: A wet connection or damaged cabinet can be the actual source or evidence of a longer leak, and corrosion can make a seal-only repair unsafe or incomplete.
-
Check 5
Compare the exact faucet model, handle count, first wet point, and leak timing with the manufacturer's parts information before selecting a stem valve, cartridge, or O-ring; do not assume the visible leak requires a universal seal.
Expected result: The model may identify a stem assembly, cartridge, or seal system, or it may show that several parts can produce similar handle symptoms.
Next step: Give the model marking, photos, handle style, first wet location, shutoff result, and part-family question to a plumber or the manufacturer for a fitment decision.
Stop if: Stop if model identity is uncertain, the proposed part lacks documented fit, the valve is corroded, or repair would require force, cutting, concealed plumbing work, or continued leakage.
Why this matters
Why: Model-specific fitment controls whether a seal is separate, integrated, or part of a stem or cartridge assembly. A visually similar part can still be wrong.
Use your observations
Decision map
Find the observation that best matches what you see, then follow the next safe action.
-
PATH 01Next step
What you see
Water starts at or under a handle while that handle is open, and the faucet model and handle style are known.
Do this next
Use the model-specific information to distinguish a stem or cartridge seal from another handle-area component; do not assume the visible leak proves an O-ring.
-
PATH 02Next step
What you see
Both accessible fixture shutoffs close normally and a brief faucet opening confirms that flow has stopped.
Do this next
A qualified person may follow exact model instructions within the safe boundary, keeping water isolated before access.
-
PATH 03Next step
What you see
The handle is two-handle and the model information points to a stem assembly or stem seal.
Do this next
Treat a stem valve or its seal as conditional and confirm the exact model and orientation before selecting a part.
-
PATH 04Next step
What you see
The leak sprays, worsens, reaches a wall, floor, cabinet, or electrical equipment, or corrosion prevents reliable isolation.
Do this next
Close a reliable fixture shutoff only if it operates normally, isolate the area, and call a plumber promptly.
Helpful context
Understand the symptom
Locate the first wet point
Water around a handle can travel from the stem area, spout base, faucet base, supply connection, or a nearby splash. Make only a brief observation from a dry position during ordinary use if the leak is stable, then stop using the fixture. Note whether the leak starts as the handle opens, continues when the handle is OFF, or appears below the counter. That timing is more useful than the final puddle location.
Isolate and verify before access
If a qualified person will open the faucet, close the accessible hot and cold fixture shutoffs first, then briefly open the faucet to confirm that flow and pressure have stopped. Never force a corroded or stuck valve. If water continues, the shutoff is inaccessible, or the connection is concealed, leave the faucet intact and arrange plumbing service.
Stem seal, cartridge, and O-ring are not interchangeable labels
Two-handle faucets often use separate stems, while single-handle designs commonly use a cartridge, but the model and construction control the diagnosis. A manufacturer may identify a stem assembly, cartridge, or O-ring at different leak locations, and some seals are integrated rather than separate replacement pieces. Use the model marking, handle style, and first wet point before selecting a part.
Stop before the repair becomes unsafe
Do not pull a stuck stem, turn a corroded shutoff with force, cut a supply tube, or continue a test that increases the leak. Keep the cabinet and floor dry, isolate the area if water is spreading, and give the plumber the leak timing, location, shutoff result, photos, model information, and any visible corrosion.
Only after diagnosis
Potential parts
- faucet cartridge
A cartridge may apply when the exact faucet model and leak timing identify a single-handle or cartridge-based valve as the source.
Confirm the exact faucet model, handle design, cartridge family, orientation, and manufacturer fit information; cartridges are not universally interchangeable. - faucet stem valve
A stem valve may apply when a two-handle faucet's model-specific diagnosis links the handle leak to the stem assembly or its seal.
Confirm handle side, stem family, stop or rotation arrangement, model, and whether the seal is separately replaceable before selection; do not assume a similar stem fits. - faucet o-ring kit
An O-ring kit is relevant only when the exact faucet construction identifies a separate worn seal at the leaking handle or related joint.
Match seal location, material, dimensions, lubricant guidance, and faucet model; visible leak location alone is not enough to choose a generic seal.
When checks do not resolve it
Need a professional?
Call a plumber when the fixture shutoff will not close or is corroded, water continues after attempted isolation, the leak sprays or worsens, supply or concealed plumbing is involved, the faucet is loose or damaged, water reaches the cabinet, wall, floor, or electrical equipment, or model-specific repair cannot be confirmed.
Safety scope: Before any authorized disassembly, close the accessible fixture shutoffs and confirm flow has stopped. Do not force valves, cut supply tubing, disconnect concealed plumbing, pull a stuck stem or cartridge, or work where water contacts electrical equipment.
Have this ready
- Provide faucet type and handle count, visible brand and model markings, first wet location, whether the leak occurs with the handle open or closed, cabinet or floor damage, shutoff accessibility and verification, photos, corrosion, and any flow that continued after shutoff.
Common questions
FAQ
Does water under the faucet handle always mean the stem seal is bad?
No. A stem, cartridge, handle seal, spout, base, or supply connection can produce water around a handle. Find the first wet point and identify the exact faucet model before selecting a part.
Do I need to shut off water before opening the faucet handle area?
Yes. Close the accessible hot and cold fixture shutoffs and briefly open the faucet to verify that flow and pressure have stopped before any authorized disassembly. If a valve is stuck, corroded, inaccessible, or still passes water, call a plumber.
Can I use a universal O-ring for a stem leak?
Do not assume one fits. Some faucets use a separate O-ring, while others use an integrated stem or cartridge assembly, and dimensions and materials vary. Match the exact model and documented seal location or have a plumber identify it.
What should I do if the handle leak reaches the cabinet?
Limit or stop fixture use, close a reliable accessible shutoff only if it operates normally, isolate the area, and arrange plumbing service. Provide photos, leak timing, the first wet point, cabinet damage, and the shutoff result.
Read the exact guide
Official sources
- Find Parts and Identify Your ProductDelta Faucet · Supports using the model number and distinguishing leak locations such as under-handle, spout, and base symptoms; it does not establish fit for another faucet brand.
- Kitchen Faucet: Leaking Around The HandleMoen Solutions · Supports that a handle leak can be cartridge-related and that cartridge families are not interchangeable; it is manufacturer-specific guidance rather than a universal faucet diagnosis.
- What do I do if my two-handle faucet leaks under the handle?Delta Faucet · Supports shutting off water before authorized service and treating the stem assembly as model-specific; the page is for the described two-handle designs, not every faucet.
Community feedback
Share a repair observation
Share a plain-text repair observation. Accepted observations are published automatically; this page may take a moment to update.