
On this page
Start here
Quick answer
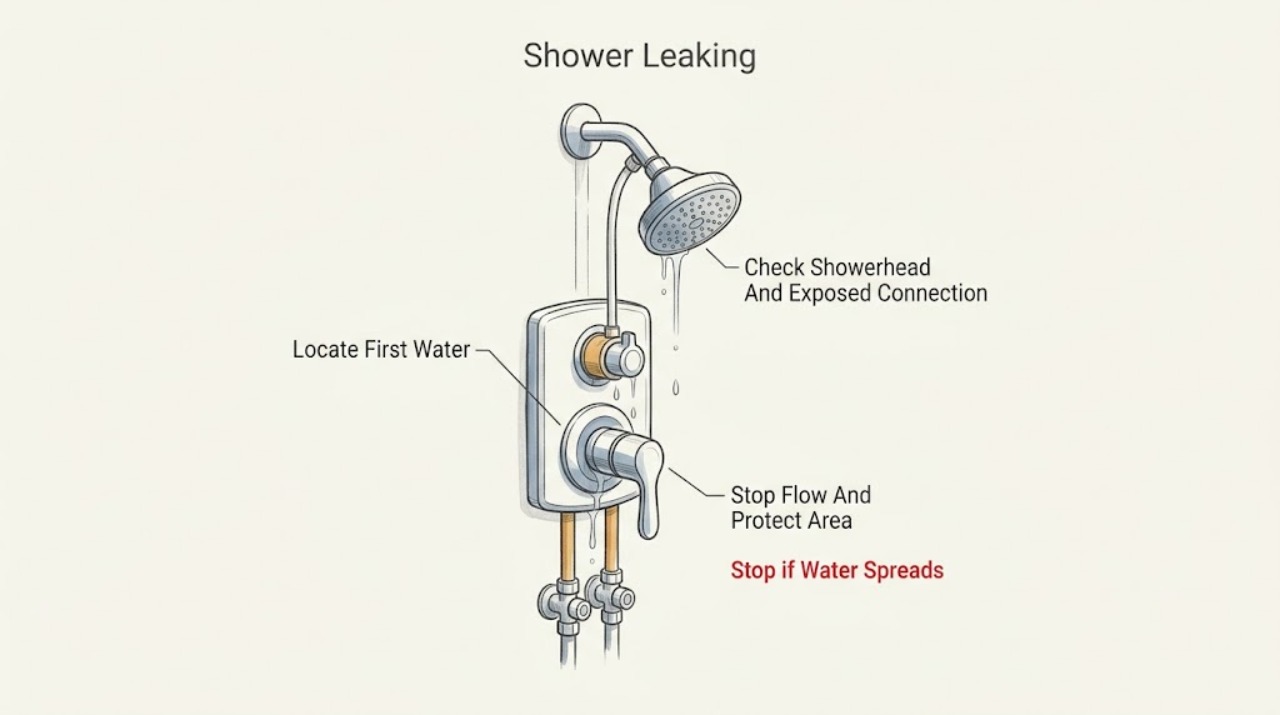
For a leaking American Standard shower, first identify whether water comes from the showerhead, handle or trim, tub spout or diverter, a visible connection, or behind the wall. Turn the shower off and use the accessible local or main water shutoff if water is continuing to escape; protect the floor and do not remove the trim to search for a leak. A showerhead or exposed connection may need a model-approved seal or cleaning check, while a drip from the valve area can involve the cartridge, pressure-balancing unit, retaining hardware, or concealed supply. American Standard documents multiple shower valve and cartridge arrangements, so do not assume a cartridge or seal fits from appearance alone. Stop using the shower and arrange prompt plumbing service for a wall leak, water damage, uncontrolled flow, a stuck shutoff, or any leak that returns after a safe external check.
Before you begin
Safety first
- This article covers water isolation when safe, external leak localization, visible connection checks, model-directed ordinary maintenance, and documentation only. Do not open concealed plumbing, remove valve parts, test pressure, or alter the pressure-balancing system.
Work through in order
Diagnostic checks
Use only checks that match the exact appliance or system and its official guide.
-
Check 1
Turn the shower control fully Off, move people and electrical items away from wet areas, and use an accessible local or main water shutoff only if water continues to run or the leak is substantial. Do not remove trim or open the wall.
Expected result: Water stops when the control is Off, continues to drip or run, cannot be isolated at the accessible shutoff, or is reaching the wall, ceiling, floor below, or electrical equipment.
Next step: Keep the shower out of use and proceed only with dry, external observations when flow is stopped and there is no damage. Arrange prompt service for continuous flow, structural wetting, or a failed shutoff.
Stop if: Stop immediately for flooding, water near electrical equipment, ceiling staining or bulging, a burst connection, uncontrollable flow, or any need to enter a wall or ceiling.
Why this matters
Why: A brief residual drip can be water left in the showerhead or riser, but continuous flow or water entering the structure indicates a supply, valve, connection, or concealed leak. An inaccessible or failed shutoff increases the need for prompt plumbing help.
-
Check 2
Dry the visible showerhead, handle, escutcheon, diverter or tub spout, hose, and nearby wall surface from a stable position. If the area is safe and the leak is not active, perform one brief normal use while watching for the first point where new water appears, then turn the control Off.
Expected result: Water starts at the showerhead or hose, the handle or escutcheon, the tub spout or diverter, an exposed threaded connection, or behind the trim or wall.
Next step: Photograph the first wet point and record whether the leak occurs only while flowing, after shutoff, or continuously. Use the matching branch instead of tightening every visible fastener.
Stop if: Do not remove an escutcheon, drill the wall, probe a gap, or continue the test when water is entering the structure or the trim is loose.
Why this matters
Why: A showerhead or exposed connection points toward a localized seal, washer, debris, or fitting check. Handle or escutcheon water points toward the valve or cartridge and possibly a concealed seal. Water behind trim or a wall points toward concealed plumbing or valve-body service.
-
Check 3
If the first wet point is the showerhead, hose, or exposed connection, inspect the joint, washer or seal area, threads, and hose without forcing the fitting. Follow the exact American Standard model instructions for any cleaning or reseating that is explicitly user-accessible.
Expected result: The connection is dry but the showerhead drips from its outlet, a joint wets during flow, a washer or seal is visibly displaced, the hose is cracked, or the fitting is corroded or cannot be moved safely.
Next step: Use only the model-approved cleaning or seal procedure and perform one brief retest. If the leak remains, worsens, or the connection is damaged, leave the shower unused and arrange plumbing service.
Stop if: Do not overtighten, cross-thread, use unapproved sealant, cut a hose, heat a fitting, or continue using a connection that sprays into the wall or floor.
Why this matters
Why: An outlet drip can be residual water or a valve that is not fully closing; a joint leak supports a seal, washer, thread, or hose issue. Corrosion, a cracked hose, or a fitting that will not move safely needs replacement or professional handling rather than force.
-
Check 4
If water appears at the handle or escutcheon, note whether it leaks only while the shower is running, continues after the control is Off, changes when the handle is moved, or occurs with temperature or pressure changes. Keep the trim in place and do not loosen cartridge hardware.
Expected result: The leak is only during operation, continues with the control Off, comes from the handle stem or trim, or is accompanied by temperature instability, a stiff control, or an inability to shut off.
Next step: Record the shower assembly and model information and arrange qualified service for cartridge, pressure-balancing, valve-body, or concealed-connection diagnosis. Do not order a cartridge solely from the symptom.
Stop if: Do not remove the handle or cartridge, bypass a pressure-balancing feature, force the control, or open the wall as an ordinary-user test.
Why this matters
Why: A leak during operation can involve the cartridge seals or valve connections; a continuing leak with the control Off suggests the valve is not closing or a pressurized connection is leaking. Temperature or pressure instability can involve the pressure-balancing unit or broader plumbing and should not be treated as a simple trim leak.
-
Check 5
If the leak appears at a tub spout, diverter, shower arm, escutcheon edge, or wall, inspect only the visible joint and surrounding finish for movement, staining, soft material, or a widening wet area. Do not remove the trim or seal over a suspected wall leak.
Expected result: Water is limited to the exposed spout or diverter, the escutcheon edge wets while the shower runs, water continues behind the trim, or staining or softness extends beyond the fixture.
Next step: Stop using the shower for any wall-side leak or finish damage and arrange qualified plumbing service. Provide the first-wet-point photo and whether the leak is use-dependent or continuous.
Stop if: Do not caulk over active water, cut the wall, pull the shower arm, tighten concealed fittings, or continue operating a fixture that wets the structure.
Why this matters
Why: An exposed spout or diverter may have a localized seal or valve issue, while water behind the trim can come from the valve, supply, shower arm, or failed waterproofing. Staining, softness, or spread indicates that the structure may already be affected.
-
Check 6
After a safe, model-directed external check has been completed and the area is dry, perform one brief retest with the shower control and diverter in their normal positions. Photograph the result and record whether the leak is gone, reduced, unchanged, or now reaches a different point.
Expected result: The leak is gone, returns from the same point, appears at a new point, or continues when the control is Off.
Next step: Keep the shower out of use for any recurring or uncontrolled leak and give the technician the model, photos, first-wet-point location, timing, shutoff result, and any prior work.
Stop if: Do not repeat tests, tighten parts incrementally, or use the shower when water enters the wall, the floor is unsafe, or the leak is worsening.
Why this matters
Why: A lasting result after a permitted external correction supports a localized connection or control issue, but a returning or migrating leak can indicate pressure, seal, cartridge, valve-body, or concealed plumbing trouble. A leak with the control Off requires isolation and service.
Use your observations
Decision map
Find the observation that best matches what you see, then follow the next safe action.
-
PATH 01Next step
What you see
The showerhead drips briefly after shutoff, no joint or wall becomes wet, and the drip stops without recurring during a later normal use.
Do this next
Monitor without disassembling the valve. Arrange service if the outlet continues dripping with the control Off, the drip grows, or the shower cannot maintain shutoff.
Why this path and its safety boundary
Why it matters: Residual water in the showerhead or riser is more likely than an active supply leak, although a drip that returns or never stops needs valve assessment.
-
PATH 02Safety boundary
What you see
Water starts at the showerhead, hose, or exposed threaded connection while flowing, and the surrounding wall and trim remain dry.
Do this next
Follow only the exact model's accessible cleaning or reseating procedure and retest once. Replace or service the connection when it is cracked, corroded, loose, or still leaks.
Why this path and its safety boundary
Why it matters: A localized washer, seal, hose, thread, or fitting issue is more likely than a concealed valve leak.
Safety stop: Do not overtighten, cross-thread, use unapproved sealant, or operate a connection that directs water into the wall.
-
PATH 03Next step
What you see
Water appears at the handle or escutcheon during use, continues with the control Off, or changes with handle movement and temperature or pressure behavior.
Do this next
Isolate the shower if possible and arrange qualified plumbing service with the American Standard model information. Do not remove the cartridge or bypass the pressure-balancing feature as a test.
Why this path and its safety boundary
Why it matters: A cartridge, pressure-balancing unit, retaining assembly, valve body, or concealed connection is more likely than a simple showerhead issue.
-
PATH 04Next step
What you see
Water appears behind the escutcheon or wall, staining or softening spreads beyond the trim, or the leak continues after the control is Off.
Do this next
Stop using the shower, use the water shutoff if needed, protect the area, and arrange prompt qualified plumbing service. Seek urgent help for active flooding or water near electrical equipment.
Why this path and its safety boundary
Why it matters: A concealed supply, valve-body, shower-arm, or waterproofing problem may be wetting the structure and cannot be safely localized by surface tightening.
-
PATH 05Safety boundary
What you see
The shower will not shut off, the accessible shutoff fails, water is entering a ceiling or wall, the floor is becoming unsafe, or the leak is accompanied by significant damage.
Do this next
Leave the shower area, isolate the home's water only if safe and accessible, keep people away from electrical hazards, and contact qualified emergency plumbing or building assistance.
Why this path and its safety boundary
Why it matters: This is an active plumbing and property-safety event rather than a routine fixture adjustment.
Safety stop: Do not continue testing, remove trim, open the wall, or handle electrical equipment in the wet area.
Helpful context
Understand the symptom
The leak location is the most useful first observation
Water from the showerhead while the handle is fully off is a different decision from water appearing around the handle, escutcheon, spout, hose, or wall. Dry the visible trim from a safe position, observe where the first new water appears during a brief controlled use if there is no active damage, and then shut the shower off. Water that disappears when the supply is isolated, or water that continues behind the trim, should not be chased by tightening random parts.
American Standard valve parts are model-dependent
American Standard publishes different shower assemblies with cartridges, pressure-balancing units, diverters, trim, and retaining hardware. A cartridge that looks similar can still be the wrong design or fit. Record the product or model information and use the model-specific parts diagram or support path before ordering or removing a valve component.
Protect the wall and floor while deciding whether service is needed
A drip at an exposed connection may be contained temporarily, but water behind an escutcheon or into a wall can damage framing and finishes without being visible. Keep the shower out of use when the leak path is uncertain, when the trim moves, or when water continues after the control is off. Do not enlarge the opening or remove waterproofing to inspect a concealed valve.
Safety boundary
Stop conditions
- Do not open the wall or ceiling, remove the valve cartridge, pull concealed fittings, or probe behind the escutcheon as an ordinary-user test.
- Do not force handles, overtighten or cross-thread connections, bypass pressure-balancing features, or use unapproved sealant to hide a leak.
- Stop using the shower for water behind the trim, staining or soft wall material, water damage, continuous flow, or a leak that returns after one safe external check.
- Use the accessible water shutoff only when safe; stop for flooding, water near electrical equipment, an unsafe floor, or a failed shutoff.
- Do not order an American Standard cartridge, seal, diverter, or valve part from appearance alone; confirm exact model fit and the diagnosed leak location.
Only after diagnosis
Potential parts
- showerhead hose or connection seal
Consider this category only when the leak is localized to an exposed showerhead, hose, or connection and inspection confirms a damaged or displaced seal or hose.
Confirm the exact American Standard model, thread, washer or seal design, and hose connection before ordering; do not compensate for mismatch by overtightening. - shower valve cartridge
Consider this category only when qualified diagnosis traces a handle or escutcheon leak or failed shutoff to the cartridge rather than the valve body or supply.
Confirm the exact shower series, cartridge design, retaining hardware, temperature feature, and manufacturer fit information before ordering. - pressure balancing unit
Consider this category only when qualified diagnosis links leakage or unstable temperature or pressure to the pressure-balancing assembly.
Confirm the exact valve body and shower assembly; do not bypass or substitute the pressure-balancing unit based on appearance. - shower diverter or valve-body seal
Consider this category only when the leak location and qualified inspection identify a diverter, valve-body, or concealed seal issue.
Confirm the exact trim and rough-in valve, access requirements, seal material, and installation method with American Standard or a qualified plumber.
When checks do not resolve it
Need a professional?
Arrange qualified plumbing service when an American Standard shower leaks from the handle, escutcheon, diverter, valve area, or wall; when a showerhead or exposed connection still leaks after one model-approved external check; or when water continues with the control Off. Seek prompt or emergency help for active flooding, a failed shutoff, water near electrical equipment, ceiling or wall damage, an unsafe floor, or uncontrolled flow.
Safety scope: This article covers water isolation when safe, external leak localization, visible connection checks, model-directed ordinary maintenance, and documentation only. Do not open concealed plumbing, remove valve parts, test pressure, or alter the pressure-balancing system.
Common questions
FAQ
Why is my American Standard shower leaking?
The leak may be at the showerhead or hose connection, handle or cartridge, pressure-balancing unit, diverter, shower arm, valve body, supply connection, or behind the wall. Locate the first wet point and note whether it occurs during use, after shutoff, or continuously before choosing a repair path.
Why does the showerhead drip after I turn it off?
A brief drip can be residual water in the showerhead or riser. If dripping continues, returns on every use, grows, or occurs with the control Off, the valve may not be closing or a pressurized connection may be leaking and needs qualified diagnosis.
Could the American Standard shower cartridge cause a leak?
Yes, a cartridge or its seals can be involved in a handle-area leak or a valve that does not shut off, but American Standard has multiple shower assemblies and cartridge references. Confirm the exact model and diagnosis before ordering or removing a cartridge.
What if water leaks from behind the shower handle or escutcheon?
Keep the shower out of use and check only for visible spreading water or wall damage. Water behind trim can involve the cartridge, pressure-balancing unit, valve body, shower arm, supply, or waterproofing; do not caulk over it or open the wall as a home test.
Can I tighten the shower trim to stop the leak?
Do not tighten parts at random. Overtightening can damage threads, seals, trim, tile, or the waterproofing boundary and may hide a leak rather than repair it. Identify the first wet point and use the exact model instructions or qualified plumbing service.
When should I stop using a leaking American Standard shower?
Stop for continuous flow, water behind the trim or wall, staining or soft material, an unsafe floor, flooding, water near electrical equipment, a failed shutoff, or a leak that returns after one safe external check. Isolate water only when safe and arrange prompt qualified plumbing help.
Read the exact guide
Official sources
- Parts/AssemblyAmerican Standard · Model-specific American Standard parts diagram used to show the range of components in a shower valve assembly; it is not a universal removal or compatibility guide.
- Flash® 2-Way Integrated Shower Diverter Rough-In Valve with Pressure Balance Valve CartridgeAmerican Standard · American Standard Flash product reference; features and service parts vary by installed model and trim.
- Shower Faucet Cartridge with ScrewsAmerican Standard · American Standard replacement-part listing used only to establish that shower cartridges are identified by a specific model or part reference; it does not authorize replacement for an unidentified shower.
- Contact UsAmerican Standard · Official support contact reference for American Standard product identification and service escalation; it is not a substitute for local plumbing emergency assistance.
Community feedback
Share a repair observation
Share a plain-text repair observation. Accepted observations are published automatically; this page may take a moment to update.