
On this page
Start here
Quick answer
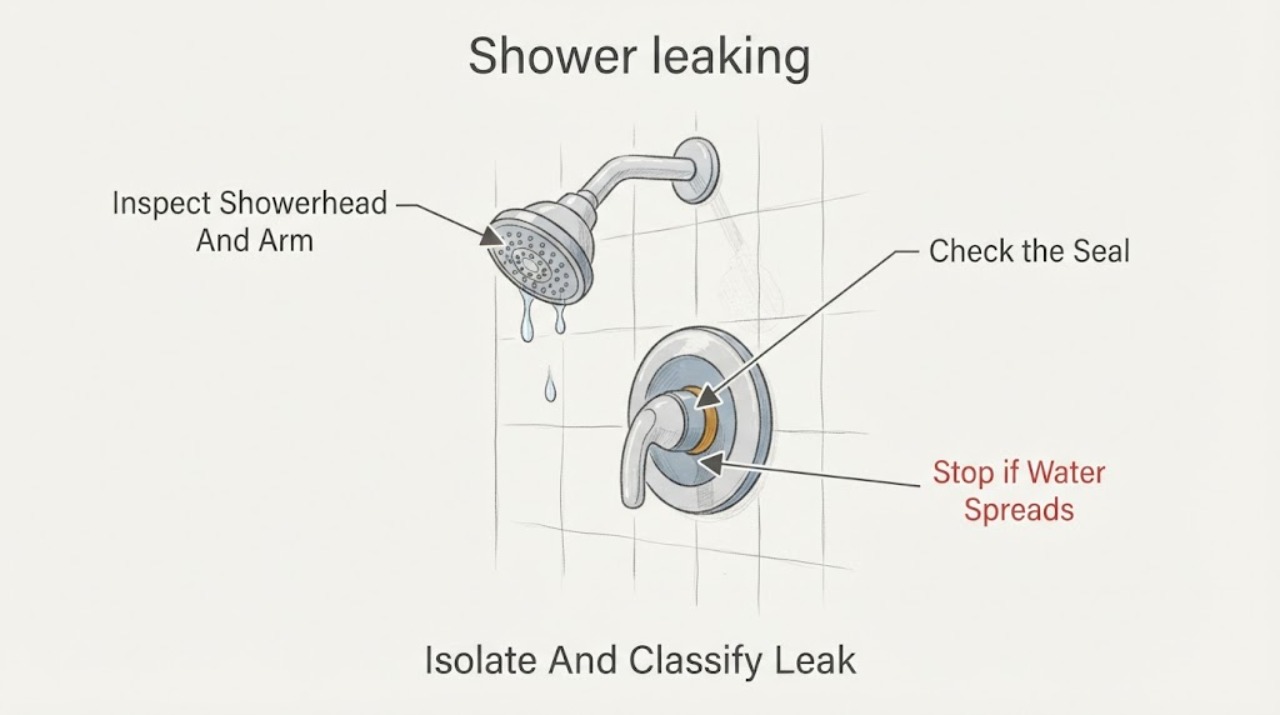
A leaking GROHE shower can be coming from the showerhead outlet, hose seals, threaded connection, hand-shower connection, mixer or handle, tub diverter, or a concealed connection behind the wall. First stop the water and identify whether it leaks with the water off, only while the shower is running, at the hose ends, from the showerhead, or behind the trim. From dry, ordinary access, check that visible seals are present and seated, the hose is not cracked, the showerhead and arm connection is not cross-threaded, and the spray is not escaping sideways. GROHE's installation guidance specifically calls for checking the proper placement of seals in a flex hose; EPA guidance also identifies the showerhead outlet, shower arm, threaded connection, and tub spout as leak points. Do not force a fitting, bury a leak under caulk, remove a mixer cartridge, open the wall, or use abrasive or acidic cleaners. Shut the local water supply or main if water is entering the wall or floor and arrange qualified plumbing service for a valve, cartridge, diverter, concealed, or persistent leak.
Before you begin
Safety first
- A homeowner may observe the timing and location, inspect exposed fittings from dry access, check visible hose seals without force, and clean the finish as GROHE directs. A qualified plumber should handle concealed leaks, valve bodies, cartridges, diverters, pressure-balance parts, wall openings, damaged threads, and pressurized or inaccessible connections.
Work through in order
Diagnostic checks
Use only checks that match the exact appliance or system and its official guide.
-
Check 1
Turn the shower controls fully off, dry the exposed fittings, and observe from a dry, safe position whether water continues to appear; if the leak is active or reaching the wall or floor, close the local shutoff or main only when it can be reached safely.
Expected result: Record whether the drip occurs with water off, only while running, only when the hand shower is moved, at the showerhead, at a hose end, around the handle or escutcheon, at the tub spout, or behind the trim.
Next step: Keep the shower unused while checking the exposed connections. Give a plumber the timing, first wet point, photographs, and whether the water stopped after isolation.
Stop if: Stop immediately for water entering the wall or ceiling, a slippery floor, hot-water scald risk, a large spray, a damaged fixture, or any need to remove trim or open the wall.
Why this matters
Why: A drip with the control off makes a valve, cartridge, or shutoff fault more likely. A run-only leak focuses attention on exposed connections, seals, hose, spray, mixer, or diverter. Moisture behind trim or in a wall is not a cosmetic fitting leak until proven otherwise.
-
Check 2
With the water off, inspect the GROHE showerhead outlet, exposed shower arm, and threaded joint for a sideways spray mark, scale, cross-threading, cracks, or a missing washer; wipe only with a soft damp cloth.
Expected result: Classify the leak as a showerhead-to-arm joint leak, a spray-face or outlet leak, a crack, a dry fitting, or a leak that seems to originate behind the escutcheon or wall.
Next step: Use the exact GROHE product instructions to confirm the seal and connection arrangement; if the fitting is damaged, cross-threaded, or still leaks, stop and arrange plumbing service.
Stop if: Do not force the showerhead or arm, use pliers on the finished surface, drill an outlet, apply random sealant, or use abrasive or acidic descaler.
Why this matters
Why: A leak at an exposed joint can be associated with its washer, thread alignment, or approved seal method. A crack or leak behind the escutcheon is not a reason to add caulk or force the head; it may involve the arm or concealed connection.
-
Check 3
If the leak is at the hand-shower hose and the connections are reachable without force, inspect both hose ends for the correct rubber or fiber seal, a displaced washer, damaged threads, kinks, or a split hose; keep the water supply off while inspecting.
Expected result: Record whether moisture starts at the smaller end, larger end, hose body, or the hand-shower or mixer connection, and whether the seal is present, flattened, cut, or missing.
Next step: Follow the exact GROHE model instructions for restoring a visible seal and connection, then check for leaks only from a dry, safe position. Arrange service if the hose or thread is damaged or the leak persists.
Stop if: Do not use a hose without its specified seal, over-tighten a fitting, substitute an unknown washer, bend a kinked hose sharply, or work while the line is pressurized.
Why this matters
Why: GROHE's guide treats seal placement and the two hose ends as distinct installation points. A missing or damaged seal can leak at one end, while a wet hose body or damaged thread points to a hose or fitting problem rather than a simple washer reseat.
-
Check 4
Without removing the handle, trim, cartridge, or wall cover, observe whether the showerhead or tub spout drips after the controls are off, whether the handle or escutcheon becomes wet, and whether water leaks from the tub spout while shower mode is selected.
Expected result: Note a continuing showerhead drip, water around the handle, a tub spout stream during shower mode, temperature instability, or no visible exposed leak.
Next step: Close the local water isolation if available and arrange qualified plumbing service for a mixer, cartridge, diverter, pressure-balance, or concealed leak diagnosis; provide the exact GROHE model if known.
Stop if: Do not remove trim, cartridge retaining parts, pressure-balance components, or wall material, and do not keep using the shower to reproduce a hidden leak.
Why this matters
Why: A continuing outlet drip can indicate a valve or cartridge that is not shutting off; water around the handle can indicate a seal or cartridge area; excess tub-spout flow in shower mode can indicate a diverter issue. No exposed leak with wetness behind trim increases concern for a concealed connection.
-
Check 5
After the dry-access checks, document the GROHE product identity, leak timing, first wet point, visible seal and hose condition, shutoff status, and any water stain or damage; do not run a full shower test if the source is unresolved.
Expected result: Record whether a corrected visible seal or connection stopped the leak, whether dripping continues with controls off, whether moisture returns behind trim, and whether the leak has affected grout, drywall, flooring, or a ceiling below.
Next step: Keep the water isolated as appropriate and arrange qualified plumbing service. Provide photographs, model and installation information, the timing pattern, and what was or was not changed.
Stop if: Do not conceal the wet area with caulk or paint, open the wall, remove the mixer, or continue operation when water damage or a hidden leak is possible.
Why this matters
Why: A leak that stops after a model-approved exposed seal correction is different from a leak that persists with water off or reappears behind the wall. Damage or recurring moisture can indicate a concealed plumbing or waterproofing problem, not a finish-cleaning issue.
Use your observations
Decision map
Find the observation that best matches what you see, then follow the next safe action.
-
PATH 01Safety boundary
What you see
The leak begins at one end of the GROHE flex hose, the hose body is intact, and a visible washer or seal is missing, displaced, or damaged.
Do this next
Use the model-specific GROHE instructions to restore the specified seal or arrange a compatible hose service; check only from dry access and do not over-tighten.
Why this path and its safety boundary
Why it matters: A connection seal or hose-end assembly is more likely than a concealed valve leak.
Safety stop: Keep water off if the thread is damaged, the hose body is split, or the connection continues to leak.
-
PATH 02Safety boundary
What you see
Water escapes at the exposed showerhead-to-arm or arm-to-fitting joint only while the shower is on, with no moisture behind the escutcheon.
Do this next
Follow the GROHE model instructions and EPA's exposed-connection guidance; use only a suitable soft-cloth inspection and stop if the finished fitting needs force.
Why this path and its safety boundary
Why it matters: Thread alignment, an approved sealing method, a washer, scale, or a damaged exposed fitting is plausible.
Safety stop: Do not use pliers on the finish, add sealant blindly, or continue if water reaches the wall or ceiling.
-
PATH 03Safety boundary
What you see
The GROHE showerhead or spout continues dripping after the handle or diverter is turned off, and the exposed hose and showerhead joints are dry.
Do this next
Stop using the shower, isolate the local water supply if safely accessible, and arrange qualified plumbing diagnosis with the exact model and symptom.
Why this path and its safety boundary
Why it matters: A valve, cartridge, diverter, or related shutoff issue is more likely than an outlet connection leak.
Safety stop: Do not remove the handle, cartridge, or trim as a generic fix or keep running the shower to test it.
-
PATH 04Safety boundary
What you see
Water continues to flow from the tub spout while shower mode is selected, or the diverter area leaks during a shower.
Do this next
Stop the test, document the amount and timing, and have a plumber assess the diverter or spout against the installed GROHE configuration.
Why this path and its safety boundary
Why it matters: A diverter or tub-spout sealing problem is possible; a small residual drip and a continuous stream are not the same observation.
Safety stop: Do not force a diverter, remove the spout, or open the wall without model-specific instructions and safe water isolation.
-
PATH 05Safety boundary
What you see
Water appears behind the escutcheon, at the wall or ceiling below, returns after the exposed fittings are dry, or the first wet point cannot be seen safely.
Do this next
Keep the shower and water supply off as appropriate, protect nearby finishes, and arrange qualified plumbing inspection; report any spreading stain or structural damage promptly.
Why this path and its safety boundary
Why it matters: A concealed connection, valve body, shower arm penetration, waterproofing, or pipe leak is more likely than a simple head or hose seal.
Safety stop: Do not caulk over the area, open the wall, remove trim, or keep using the shower to locate the source.
Helpful context
Understand the symptom
Locate the first wet point before tightening anything
Dry the shower and watch from a safe position during one brief, controlled use only if there is no active spray, electrical hazard, or water entering the wall. A drip from the showerhead outlet with the controls off points toward the valve or cartridge; a leak only when the water is on can be at a hose seal, threaded connection, showerhead, hand shower, mixer, or diverter. Water appearing at the escutcheon, wall, ceiling below, or floor outside the shower is a different risk from a drip at an exposed hose end. Mark or photograph the first wet point rather than relying on where the water eventually collects.
Treat hose seals and threaded joints as separate checks
GROHE's installation guide says to check that the seals in the flex hose are correctly placed, then connect the smaller end to the unit and the larger end to the hand shower. A missing or displaced washer can leak even when the threads feel tight. A threaded connection may need the sealing method specified by the product instructions; do not add tape to a joint that seals with a washer or force a metal fitting against a plastic thread.
Protect the finish and know the wall-leak boundary
GROHE recommends cleaning its fixtures with a little soap and a damp cloth, then rinsing and drying, and advises against abrasive sponges, solvents, acidic cleaners, limescale removers, household vinegar, and acetic-acid cleaners. Cleaning cannot repair a worn cartridge or hidden pipe. If moisture is behind the trim, recurring after the water is shut off, spreading into the wall or ceiling, or impossible to trace from exposed connections, stop using the shower and have a plumber isolate the cause.
Safety boundary
Stop conditions
- Stop using the shower for an active spray, water behind trim or in a wall, a stain on the ceiling below, spreading floor damage, or a slippery unsafe area.
- Do not open the wall, remove a mixer cartridge or pressure-balance component, pull out trim, or work on concealed plumbing as a general homeowner check.
- Do not force finished fittings, over-tighten a hose, substitute an unknown washer, or apply caulk or sealant to conceal a leak.
- Do not use abrasive sponges, solvents, acidic cleaners, limescale removers, household vinegar, or acetic-acid cleaners on GROHE fixtures.
- Arrange qualified plumbing service for persistent dripping with the controls off, a valve or diverter symptom, a damaged hose or thread, or any leak that cannot be identified from dry visible access.
When checks do not resolve it
Need a professional?
Arrange qualified plumbing service when a GROHE shower continues to drip with the controls off, leaks at a mixer, cartridge, diverter, or concealed connection, shows water behind trim or on a ceiling below, has a damaged hose or thread, or still leaks after a model-approved visible seal correction. Isolate the water supply as safely as possible for an active or hidden leak.
Safety scope: A homeowner may observe the timing and location, inspect exposed fittings from dry access, check visible hose seals without force, and clean the finish as GROHE directs. A qualified plumber should handle concealed leaks, valve bodies, cartridges, diverters, pressure-balance parts, wall openings, damaged threads, and pressurized or inaccessible connections.
Common questions
FAQ
Why is my GROHE shower leaking from the hose connection?
A missing, displaced, or damaged washer can leak at one hose end. GROHE's guide says to check seal placement at the hose connections. Keep water off while inspecting and use the exact model instructions rather than over-tightening.
What if the GROHE showerhead drips after I turn it off?
If the exposed showerhead and hose joints are dry, a continuing outlet drip can point toward the mixer valve, cartridge, or diverter rather than the head connection. Stop using it and arrange qualified plumbing diagnosis.
Can I use vinegar or a strong descaler on a GROHE shower?
GROHE's care guidance advises against abrasive sponges, solvents, acidic cleaners, limescale removers, household vinegar, and cleaners containing acetic acid. Use the manufacturer's care instructions and a soft damp cloth instead.
How do I know if a GROHE shower leak is behind the wall?
Moisture that appears behind the escutcheon, returns after exposed fittings are dry, reaches a ceiling below, or cannot be located from safe visible access should be treated as a possible concealed leak. Isolate water as safely as possible and call a plumber.
What should I tell a plumber about a leaking GROHE shower?
Provide the model if known, whether the leak occurs with water off or only during use, the first wet point, photos, hose and seal observations, any wall or ceiling damage, and whether closing the local shutoff stopped the moisture.
Read the exact guide
Official sources
- GROHE Sense FAQGROHE · GROHE leak detection, water shutoff context, monitoring for stains, and professional installation boundary
- WarrantyGROHE · GROHE product care and cleaning limits, product identification for service, and warranty service context
- Installation guide - Change flex hose and hand showerGROHE · GROHE flex hose and hand-shower connection sequence, seal placement, and safe water-on check
- SupportGROHE · GROHE consumer support, product diagrams, videos, warranty, and parts resources for model-specific service
- WaterSense Labeled Homes Technical Sheet: Free of Water LeaksU.S. Environmental Protection Agency WaterSense · WaterSense visible leak checks for showerheads, shower arms, threaded connections, tub spouts, hoses, valves, and appliances
- Home MaintenanceU.S. Environmental Protection Agency WaterSense · WaterSense showerhead leak inspection, exposed connection, and scale-maintenance guidance
Community feedback
Share a repair observation
Share a plain-text repair observation. Accepted observations are published automatically; this page may take a moment to update.