
On this page
Start here
Quick answer
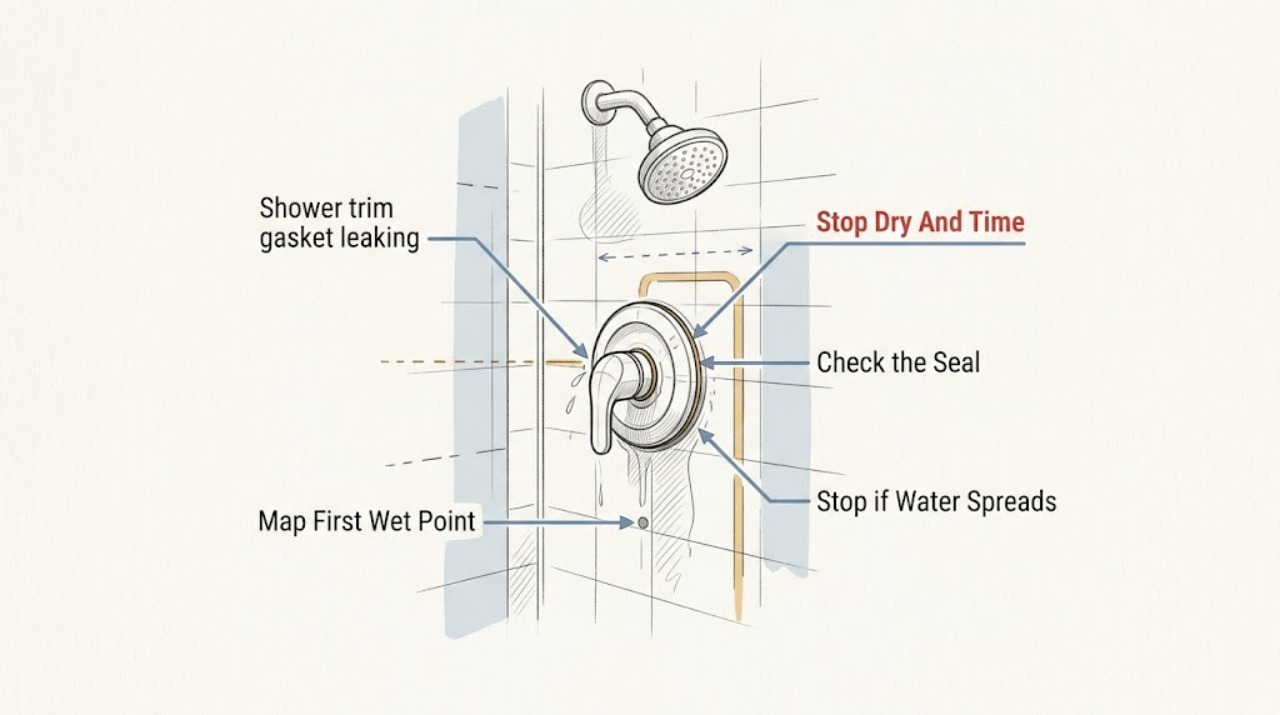
If an American Standard shower trim gasket appears to leak, first stop the shower, dry the trim and wall, and identify whether water is coming from the outer escutcheon edge only while the shower runs or from the handle, center opening, shower arm, or wall opening. A displaced, folded, mineral-coated, or damaged visible gasket can allow splash or spray to pass the trim, but water from behind the plate or a drip that continues with the shower off may involve the cartridge, rough-in valve, supply connection, or another hidden source. Do not remove the trim under pressure, open the wall, or cover an unknown leak with caulk. Use the exact model's American Standard diagram and installation information when the trim itself is the confirmed source; arrange qualified plumbing service for a continuous drip, water entering the wall, movement or corrosion, wet building materials, or any check that would disturb a pressurized valve.
Work through in order
Diagnostic checks
Use only checks that match the exact appliance or system and its official guide.
-
Check 1
Stop using the shower and dry the escutcheon, handle area, shower arm, nearby wall, and shower base with a clean towel. Do not remove the trim or operate a hidden shutoff just to begin this check.
Expected result: After the area is dry, note whether a drip continues with the shower controls off, whether the wall or base is wet, and whether the water was hot, cold, or only ordinary shower runoff.
Next step: Keep the shower out of use and move to the service branch for a continuing drip, wall wetness, or building-material damage. Continue only with the visible, dry inspection when there is no active water path or damage.
Stop if: Stop immediately for water entering a wall opening, a wet ceiling below, active flow, a musty or electrical hazard, or uncertainty about how to isolate the fixture safely.
Why this matters
Why: A continuing drip or wetness that returns without a shower spray is less consistent with splash at the gasket and more concerning for a valve, connection, or concealed leak. Water that stops when the area is dry and the shower is off still needs its path identified before a seal is replaced.
-
Check 2
With the trim still assembled, place dry tissue or a dry paper towel at separate visible locations: the outside edge of the escutcheon, below and around the handle, the center opening, the shower arm connection, and the tub-spout or diverter area if present. Do this from outside the enclosure and without inserting anything into a gap.
Expected result: Record which tissue becomes wet first during normal use, whether the water travels downward from another fitting, and whether the outer gasket edge stays dry while the handle or center opening wets.
Next step: Photograph the first wet point and use it to select a branch. Do not remove the plate to confirm a suspected behind-plate leak; that confirmation belongs to qualified service.
Stop if: Stop for water appearing behind the escutcheon, an enlarging wet area, a loose or moving plate, sharp corrosion, or any need to push tissue into the wall opening.
Why this matters
Why: First wetness at the plate perimeter makes the trim boundary a reasonable suspect; first wetness at the handle, center opening, arm, or spout makes a cartridge, valve, threaded connection, or runoff path more likely than the gasket alone.
-
Check 3
From a dry position, inspect only the visible gasket or seal boundary and the face of the escutcheon with a flashlight. Look for a displaced edge, fold, pinching, gap, missing section, mineral or soap buildup, corrosion, cracked trim, and uneven contact with the wall; do not pry, scrape, or apply sealant.
Expected result: The seal is evenly seated and intact, or it is visibly displaced, hardened, torn, missing, or unable to meet the wall because the plate or valve body is moving.
Next step: If the visible seal defect and the perimeter-first pattern agree, record the trim family and follow its exact manufacturer instructions or have a plumber replace it. If the seal looks sound, the plate moves, or the path starts elsewhere, use the corresponding service branch.
Stop if: Stop if the gasket is bonded to a surface you would need to cut, the wall finish is soft or swollen, the trim is cracked, or the inspection would require loosening screws or fittings.
Why this matters
Why: A clearly visible seal defect supports a trim-seal diagnosis only when the water path also begins at that perimeter. An intact-looking edge does not rule out a leak behind the plate, and movement or corrosion suggests a mounting, valve, or water-damage issue rather than a simple gasket swap.
-
Check 4
Only when the area is fully dry, there is no wall or electrical hazard, and another person can stop the water immediately, run the shower for a brief normal-use observation while watching the previously marked points from outside the spray path. Do not remove trim, direct a jet at the plate, or continue the test after the first abnormal wetness.
Expected result: Water appears only when spray or runoff reaches the trim and stops promptly when the controls are off, or water emerges from the handle, center opening, behind the plate, or a wall-side area independently of surface splash.
Next step: Stop the test at the first abnormal path, dry the area, and document it. Use the trim branch only for a perimeter-first pattern with no continuing drip; send an internal-source pattern to qualified plumbing service.
Stop if: Do not perform this test when water is already active, the wall is damp, the shower base is unsafe, the fixture is near exposed electrical equipment, or the observer cannot stop it immediately.
Why this matters
Why: A short-lived perimeter wetting pattern can be splash, runoff, or a trim boundary that is no longer sealing; water from an opening or a drip after shutoff is more consistent with an internal valve or connection path. The test cannot make a hidden leak safe to investigate.
-
Check 5
Record the American Standard trim name or model number from visible paperwork, the trim, or the fixture documentation without disassembling the assembly. Compare the recorded identity with the manufacturer's support resources and the matching Tub & Shower installation or parts diagram.
Expected result: A model-specific diagram identifies the trim gasket or escutcheon seal and its approved installation method, or the model is unknown and several trim or valve families appear possible.
Next step: Save the model information and diagram reference for service or for a manufacturer-directed, low-risk trim procedure. If the model cannot be confirmed, do not order or install a substitute part based only on appearance.
Stop if: Stop if finding the model would require removing the trim, opening the wall, shutting off an unfamiliar supply, or handling a hot or pressurized component.
Why this matters
Why: A matching diagram can distinguish a genuine trim seal from a cartridge, retaining, or valve component. An unknown identity means a generic gasket is not a reliable diagnosis or fitment decision.
-
Check 6
Prepare a service note with the fixture location, American Standard trim or model identity, when the leak appears, the first wet point, whether dripping continues with the shower off, photos of the dry and wet areas, and any wall or ceiling damage. Keep the shower out of use while waiting.
Expected result: The note distinguishes a perimeter-only leak during use from a handle, center-opening, arm, wall, or continuing-drip pattern and shows whether the trim is loose or corroded.
Next step: Use the service guidance and give the note to a qualified plumber or American Standard support. If damage is spreading or the source cannot be isolated, treat it as urgent water-leak service.
Stop if: Do not resume the shower to gather more evidence, remove a valve cover, or make a temporary repair that seals water inside the wall.
Why this matters
Why: A time-and-location record helps a plumber assess the correct boundary without repeating risky tests. A concealed or continuing pattern warrants service even if the visible gasket looks intact.
Use your observations
Decision map
Find the observation that best matches what you see, then follow the next safe action.
-
PATH 01Next step
What you see
The area is dry when unused; a brief normal-use observation makes the outer escutcheon perimeter wet first; the handle, center opening, wall opening, and shower arm remain dry; and there is no continuing drip.
Do this next
Keep use limited, document the edge and model identity, and follow the exact American Standard trim instructions or arrange plumbing service for the seal and trim alignment. Do not apply generic caulk over a wet or unexplained path.
-
PATH 02Next step
What you see
The handle stem or center opening becomes wet before the escutcheon edge, water collects behind the plate, or the plate moves while the perimeter seal looks intact.
Do this next
Stop using the shower and call a qualified plumber; provide the first-wet-point photo and model information. Do not loosen trim or cartridge parts under pressure or open the wall to inspect the valve.
-
PATH 03Next step
What you see
Dripping continues after the shower is off, moisture reaches the wall cavity, ceiling below, flooring, or insulation, or the wet area grows without additional spray.
Do this next
Keep people away from the wet area, stop using the fixture, and contact qualified plumbing service promptly. If a known accessible fixture stop or main shutoff can be operated without entering a hazard, follow the property's safe emergency procedure; do not guess at a shutoff or open the wall.
-
PATH 04Next step
What you see
The shower arm, tub spout, diverter, or an upper surface becomes wet first and water then tracks toward the trim, while the gasket perimeter is not the first wet location.
Do this next
Dry and document the upstream fitting, avoid directing more water at it, and use a plumber when the fitting leaks, the water continues with the shower off, or any connection would need to be loosened.
-
PATH 05Next step
What you see
The model cannot be confirmed, the gasket is not visible, the trim has no stable contact with the wall, or the suspected seal is bonded or inaccessible without disassembly.
Do this next
Leave the assembly intact, keep the shower out of use if water is entering the wall, and send photos and the fixture identity to qualified plumbing service or American Standard support for the model-specific procedure.
Helpful context
Understand the symptom
First separate trim-edge water from a valve or pipe leak
A gasket at the visible shower trim is intended to close the boundary around the escutcheon or plate, but the same area can collect water that came from the handle, cartridge, shower arm, or a fitting behind the wall. A wet outer edge during a shower is therefore a location to investigate, not a diagnosis. Dry the area completely, observe the first place that becomes wet, and stop if water appears inside the wall opening or continues after the controls are off. American Standard's support page links to product diagrams and Tub & Shower Installation help, and its shower-valve information shows that trim, cartridge, and rough-in valve are separate parts of the assembly.
Do not make a gasket substitution before the model is known
Trim appearance is not enough to select a replacement seal. Different American Standard families can use different escutcheons, valve depths, cartridges, retaining arrangements, or sealing methods. Record the model or trim name if available and use the manufacturer's matching diagram before considering a part. A generic washer or a bead of caulk may hide the path, prevent drainage, interfere with service, or leave a valve leak uncorrected. If the gasket is not clearly visible or the plate is loose, corroded, or hard to move, leave it in place and provide the information to a plumber or American Standard support.
Protect the wall while the source is being identified
Keep the shower out of use while the trim and surrounding wall are wet. Do not probe the wall, remove a plate to look behind it, loosen a cartridge retaining part, or run a long test to see how much water escapes. If the wall, base, ceiling below, insulation, or flooring is already wet, treat the situation as water damage rather than a cosmetic seal problem. A plumber can isolate the fixture, identify the valve or supply-side source, and determine the correct repair without turning an uncertain trim observation into a concealed leak.
Safety boundary
Stop conditions
- Stop using the shower and seek qualified plumbing service for a continuing drip, water behind the escutcheon, wall or ceiling wetness, swelling, mold-like odor, or an enlarging wet area.
- Do not remove trim, loosen a cartridge or valve retaining part, open the wall, probe a cavity, or disturb a pressurized or hot-water assembly as a homeowner diagnostic.
- If water is near exposed electrical equipment, leave the area and use the property's safe emergency procedure; do not touch electrical equipment while standing in water.
- Do not cover an unknown leak with caulk, glue, tape, or a replacement gasket before the source and exact model are established.
Only after diagnosis
Potential parts
- trim gasket or escutcheon seal
Only consider this category when the water starts at the outer trim perimeter during shower use, the visible seal is displaced or damaged, and there is no continuing drip or wall-side moisture.
Confirm the exact American Standard trim and rough-in valve model, seal location, dimensions, and manufacturer procedure before ordering or installing; similar-looking trim does not establish fit. - shower escutcheon or trim plate
This may be relevant only when the plate is cracked, warped, corroded, or cannot hold the confirmed model's seal against the wall after the source is isolated.
Match the exact collection, finish, valve depth, mounting arrangement, and gasket or sealing method; a plate is not a substitute for a leaking cartridge or concealed connection. - cartridge or stem sealing component
Consider this only when water begins at the handle or center opening, or a plumber confirms an internal valve leak rather than a trim-edge leak.
The valve family and cartridge revision must be confirmed by model and service information; do not remove or replace a cartridge based on trim appearance alone. - rough-in valve or supply connection component
This is a professional-service category for a continuing drip, water behind the plate, wall wetness, or a connection that leaks independently of surface splash.
Have a qualified plumber identify the installed valve, connection method, access requirements, and code-compatible repair before any component is selected.
When checks do not resolve it
Need a professional?
Call a qualified plumber promptly when water continues with the shower off, appears from the handle, center opening, behind the escutcheon, shower arm, or wall, or has reached building materials. Call immediately for active flow, rapidly spreading damage, unsafe hot water, or a situation where the accessible shutoff cannot be identified safely. For a dry, perimeter-only leak with a confirmed trim model, American Standard support or a plumber can provide the model-specific trim-seal procedure.
Have this ready
- American Standard trim name or model number if known
- First-wet-point and dry-area photos
- Whether the drip continues with the shower off
- Whether the handle, center opening, shower arm, or wall became wet first
- Any loose trim, corrosion, swelling, ceiling or flooring damage, or recent installation work
Common questions
FAQ
Can I fix an American Standard shower trim gasket leak by caulking around the plate?
Not as a first response. Caulk can hide the exit path while a cartridge, rough-in valve, supply connection, or wall-side leak continues. Dry and map the first wet point, confirm the exact trim instructions, and use qualified service when water comes from behind the plate or continues after shutoff.
How can I tell whether the gasket or the shower valve is leaking?
After drying the area, a perimeter-first wetting pattern that occurs only during normal shower use supports a trim-boundary check. Water at the handle or center opening, water behind the escutcheon, or a drip with the shower off points more toward the cartridge, valve, connection, or a concealed path. Do not remove the trim under pressure to prove the difference.
Should I remove the escutcheon to inspect the gasket?
Avoid removing it as a homeowner diagnostic when the fixture may be pressurized, hot, wet behind the plate, corroded, loose, or connected to a concealed valve. Use an exterior inspection and the model-specific American Standard diagram; have a plumber handle disassembly when the source is uncertain or water has entered the wall.
What information should I have before asking for a replacement gasket?
Have the trim or collection name, model number if available, valve identity if known, photos of the plate and seal boundary, the first wet point, and whether dripping continues with the shower off. A generic gasket chosen by appearance may not match the trim's dimensions or sealing arrangement.
Is a small shower trim leak urgent?
It is more urgent when water continues after shutoff, reaches the wall or ceiling below, grows over time, or appears near electrical equipment. A dry, perimeter-only leak during shower use is usually a prompt repair rather than a reason to keep testing it; leave the area dry and arrange a model-specific repair.
Read the exact guide
Community feedback
Share a repair observation
Share a plain-text repair observation. Accepted observations are published automatically; this page may take a moment to update.