
On this page
Start here
Quick answer
Water under an American Standard sink can come from a P-trap joint, the sink tailpiece or drain body, a supply connection, a wall connection, or water that ran down from the faucet rather than from the trap. Stop using the sink, empty standing water carefully, and dry the underside so you can identify the first wet point during one small controlled drain test. American Standard offers different P-trap and drain-assembly designs, including models with a removable trap section, so do not assume every trap has the same connection or that a replacement fits by appearance. If a joint is cracked, the wall entry is wet, the leak continues after the sink is empty, the cabinet is damaged, or the water cannot be isolated safely, keep the sink out of use and arrange qualified plumbing service. Do not loosen a wet or contaminated trap, force a fitting, or use sealant as a substitute for a missing or damaged connection seal.
Before you begin
Safety first
- This article supports stopping water, drying and observing visible parts, model identification, and one cautious drain test when no chemical or sewage exposure is present. Do not loosen pressurized plumbing, open walls, remove the trap by force, or improvise a seal repair.
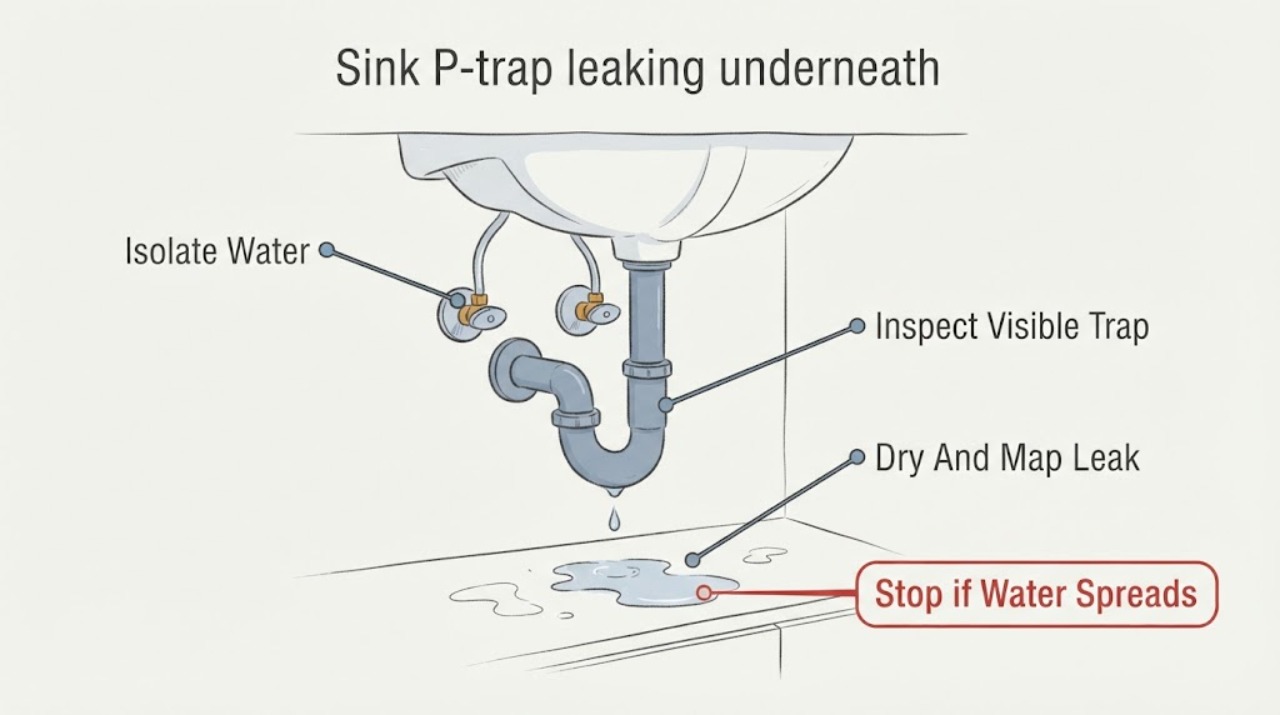
Work through in order
Diagnostic checks
Use only checks that match the exact appliance or system and its official guide.
-
Check 1
Stop using the American Standard sink, empty only readily contained standing water, place a dry towel beneath the P-trap, and dry the trap, tailpiece, drain body, supply lines, cabinet base, and wall entry without disconnecting anything.
Expected result: Record whether the first wet point is a P-trap joint, curved trap body, drain-body connection, supply line or shutoff, faucet underside, cabinet surface, or wall entry; note whether the water is clear, dirty, or possibly contaminated.
Next step: Photograph the first wet point and keep the sink unused. Continue only with a single controlled drain check when the area is dry and safe; arrange service for a wall leak, contaminated water, or an unclear source.
Stop if: Stop for sewage, chemical cleaner, flooding, water near electrical equipment, a cracked pipe, a soft cabinet or wall, or a leak that cannot be contained.
Why this matters
Why: A wet P-trap joint points toward a seal, alignment, or connection issue. Moisture above the trap can run downward from the faucet or drain body, while wall-entry moisture or contaminated water raises the service and cleanup boundary.
-
Check 2
Keep the faucet off and operate only a clearly identified sink supply shutoff gently if a supply leak is suspected; if the shutoff will not close or the leak source is the drain, use the home's main water shutoff only when it can be operated safely.
Expected result: Record whether the supply flow stops, slows, or continues; note whether the P-trap area stays dry with no new faucet use and whether water remains in the drain path.
Next step: Leave the sink out of use and arrange plumbing service when water cannot be isolated, the shutoff is seized, or a concealed connection may be wet. Do not loosen a pressurized fitting.
Stop if: Do not force a shutoff, remove a valve cover, loosen a supply line, or continue if water is spraying, flooding, or reaching electrical components.
Why this matters
Why: A supply leak that stops at the local valve is separate from a P-trap leak. Continued flow, an unknown valve, or water that reappears without faucet use suggests a pressurized or concealed source that needs service.
-
Check 3
With water isolated as needed and the underside dry, inspect the visible P-trap body, joints, washers, tailpiece, and wall connection from outside the cabinet; use the exact American Standard product information to determine whether a trap section is intended to be removable, but do not loosen it.
Expected result: Look for a hairline crack, corrosion, cross-threading, displaced washer, misalignment, a missing cleanout or trap section, or moisture that begins only when the sink drains; mark the trap design as unknown if the model cannot be identified.
Next step: Keep all parts in place and give the photos and model markings to a plumber. Only an exact model procedure should authorize accessible trap service; arrange service when the trap is damaged, inaccessible, or contaminated.
Stop if: Do not remove a cleanout or trap section, pry a joint, scrape a seal, add putty or tape blindly, or reach into contaminated standing water.
Why this matters
Why: A cracked or corroded body needs replacement, while a joint leak may involve alignment or a seal. A dry trap with a wet drain body or wall entry means replacing the P-trap alone would not address the source.
-
Check 4
Only when the underside is dry, no chemical cleaner or sewage is present, and the visible trap has no obvious crack, add a small amount of clean water to the sink and let it drain once while watching the towel and each joint.
Expected result: Record whether the basin drains normally and remains dry below, or whether moisture appears at the stopper, drain body, tailpiece, trap joint, curved body, wall entry, or supply area; note whether the leak occurs only during draining or continues afterward.
Next step: Stop the test at the first new moisture, close or leave unused the affected sink, and arrange service with the wet-point sequence. A dry test does not prove that a concealed wall connection is sound.
Stop if: Stop for rising water, foul or unknown liquid, a spraying joint, cabinet or wall wetness, or any need to apply force or open the pipe.
Why this matters
Why: A leak that appears only during draining points to the drain path or a non-pressurized joint. Moisture that continues after the basin is empty, or appears without a drain event, points toward stored water, a supply leak, or a concealed connection.
-
Check 5
After an authorized accessible adjustment or model-specific service, place a dry towel below the assembly, restore water slowly, and perform one brief drain test while watching the previously wet joint and the wall entry.
Expected result: The towel remains dry and the sink drains steadily, or the same joint, another connection, the cabinet, or the wall becomes wet again; note whether the recurrence follows draining or occurs while the sink is idle.
Next step: If any moisture returns, isolate the water if needed, stop using the sink, and provide the technician the before-and-after photos, model information, and test sequence rather than tightening further.
Stop if: Do not repeat disassembly, force slip joints, use additional sealant, or continue using a sink that leaks into the cabinet or wall.
Why this matters
Why: A dry controlled test supports that the accessible connection is holding, but recurrence indicates an unresolved seal, damaged pipe, misalignment, or concealed leak. A new wet point means the original source may have been misidentified.
Use your observations
Decision map
Find the observation that best matches what you see, then follow the next safe action.
-
PATH 01Safety boundary
What you see
The underside is dry until a small amount of water drains, then one P-trap joint becomes wet while the wall entry remains dry.
Do this next
Stop using the sink, photograph the joint, and arrange model-specific plumbing service; do not tighten or remove the joint by guesswork.
Why this path and its safety boundary
Why it matters: A joint seal, alignment, or connection problem is more likely than a pressurized supply leak, but the installed trap design and seal still need confirmation.
Safety stop: Stop for a crack, corrosion, contaminated water, a seized fitting, or any need to force the trap apart.
-
PATH 02Safety boundary
What you see
Water appears on the curved P-trap body, a crack or corrosion is visible, or the trap drips even when the sink is not draining.
Do this next
Keep the sink out of use and arrange qualified plumbing service to identify the exact trap and compatible replacement.
Why this path and its safety boundary
Why it matters: The trap body may be damaged or retaining water, so a seal-only adjustment is unlikely to be a durable repair.
Safety stop: Do not wrap the crack as a permanent repair, apply unknown sealant, or continue using the sink over a damaged cabinet.
-
PATH 03Safety boundary
What you see
The P-trap stays dry, but water begins at the sink drain body, tailpiece, stopper area, or the underside of the basin and runs onto the trap.
Do this next
Stop the drain test, keep the cabinet dry, and request plumbing service for the drain-body seal or assembly; provide the first wet-point photo.
Why this path and its safety boundary
Why it matters: The source is above the trap, and replacing or adjusting the trap would not correct the observed leak.
Safety stop: Do not remove the sink drain or add sealant without the exact model procedure, and do not keep draining water into the cabinet.
-
PATH 04Safety boundary
What you see
The wall entry is wet, the cabinet or wall is soft or stained, water appears while the sink is idle, or the source cannot be seen at the trap.
Do this next
Stop using the sink, isolate water when safe, protect the cabinet from further exposure, and arrange prompt plumbing and water-damage assessment.
Why this path and its safety boundary
Why it matters: A concealed drain, supply, or wall connection may be leaking; the visible P-trap is not established as the cause.
Safety stop: Do not open the wall, pull the pipe from the wall, run more tests, or use the cabinet if contamination or electrical risk is present.
-
PATH 05Safety boundary
What you see
Water appears at a faucet supply line or shutoff and stops when a working local valve is closed, while the P-trap stays dry.
Do this next
Leave the local valve closed, keep the sink out of use, and arrange plumbing service for the supply connection or shutoff.
Why this path and its safety boundary
Why it matters: The observed leak is pressurized supply plumbing rather than the drain trap.
Safety stop: Do not force the shutoff, loosen the supply line, or restore water when the valve or connection continues to leak.
-
PATH 06Safety boundary
What you see
The underside is dry immediately after an authorized service but the same or another joint becomes wet during later draining.
Do this next
Stop repeated adjustments, document the exact recurrence, and arrange qualified plumbing diagnosis with the original and new wet points.
Why this path and its safety boundary
Why it matters: The repair may have used the wrong seal or alignment, the trap or drain body may be damaged, or water may be traveling from another connection.
Safety stop: Do not add sealant, swap parts by appearance, or continue using a sink that leaks into the cabinet or wall.
Helpful context
Understand the symptom
Find the first wet point before touching the P-trap
Water under a sink is often misidentified because it travels along the bottom of a pipe or cabinet. Dry the trap, tailpiece, drain body, supply lines, shutoffs, cabinet base, and wall entry, then observe one small drain event. A leak that starts at a slip joint is different from a crack, a sink drain seal, a faucet leak running downward, or a wall connection. The P-trap's curved section is only one part of the path.
American Standard trap designs are model-specific
American Standard's product information includes a decorative P-trap with a removable trap section for cleaning and also lists drain assemblies with separate bodies and tailpieces. Those products do not prove that a particular sink has the same dimensions, joint style, or service access. Use the model information and the installed configuration, not a finish or general appearance, when deciding whether a seal, trap, or drain assembly is relevant.
Control water before a cabinet or wall is damaged
Stop running the faucet and remove only water that can be contained without splashing. If the leak is from a supply connection, use the accessible shutoff only if it operates normally; if it will not close or the source is unclear, use the main supply when safe and arrange service. Portland Water Bureau guidance similarly recommends locating a leak, shutting off local valves or the main supply when local isolation is unavailable, handling parts gently, and checking for leaks after restoration.
Safety boundary
Stop conditions
- Stop using the sink for a cracked or corroded trap, water entering the wall, a soft or stained cabinet, sewage or chemical contamination, or a leak that continues while the sink is idle.
- Do not loosen a pressurized supply connection, force a shutoff, pry a P-trap joint, or pull a pipe from the wall.
- Do not remove a trap section, cleanout, drain body, or seal by guesswork; use the exact American Standard model procedure or a qualified plumber.
- Do not add drain cleaner, mix products, use unknown sealant, or handle standing water when chemical or sewage contamination is possible.
- Arrange qualified plumbing service for any recurring leak, hidden moisture, damaged cabinet or wall, multi-point leak, or source that cannot be identified from ordinary safe access.
Only after diagnosis
Potential parts
- American Standard P-trap assembly
Consider this category only when inspection or qualified diagnosis confirms that the installed trap body is cracked, corroded, missing, or incompatible with the sink and wall connection.
Confirm the exact sink, trap design, inlet and wall connection dimensions, finish, and installation procedure; American Standard lists multiple P-trap configurations. - P-trap joint washer or seal
Consider this category only when the exact joint is confirmed as the leak source and the trap body and threads are intact and correctly aligned.
Confirm the connection style and seal material with the manufacturer or plumber; a seal cannot correct a cracked, cross-threaded, or misaligned pipe. - American Standard sink drain assembly or tailpiece
Consider this category only when moisture begins above the P-trap at the drain body, stopper, or tailpiece and a qualified assessment separates that source from the trap itself.
Confirm the exact sink, drain style, tailpiece dimensions, overflow arrangement, and installation instructions before ordering.
When checks do not resolve it
Need a professional?
Arrange qualified plumbing service when the American Standard sink P-trap leaks after a controlled drain test, the trap is cracked or corroded, a joint cannot be safely accessed, the wall entry or cabinet is wet, the leak continues while the sink is idle, the supply shutoff will not isolate water, or the leak returns after an authorized service. Request prompt assessment for flooding, sewage or chemical exposure, water near electrical equipment, soft building materials, or an increasing leak. Provide the sink and trap model markings, first wet point, drain-versus-idle timing, shutoff behavior, photos, and any prior work or product used.
Safety scope: This article supports stopping water, drying and observing visible parts, model identification, and one cautious drain test when no chemical or sewage exposure is present. Do not loosen pressurized plumbing, open walls, remove the trap by force, or improvise a seal repair.
Common questions
FAQ
Does water under an American Standard sink always mean the P-trap is leaking?
No. Water can run down from the faucet, drain body, tailpiece, supply line, or shutoff, or appear at the wall connection. Dry the underside and identify the first wet point during one cautious drain test before choosing a trap part.
Can I tighten the P-trap joint to stop the leak?
Do not tighten by guesswork. A joint can leak from a displaced seal, cross-threading, misalignment, crack, or a source above the trap. Keep the sink unused and have the exact connection inspected when the source is not certain.
When should I shut off the main water supply?
Use the main supply when the local shutoff cannot be found or will not isolate an active leak, and only if it can be operated safely. Do not force a valve or loosen pressurized plumbing; arrange qualified service for an uncontrolled or concealed leak.
Can I remove the P-trap to clean or inspect it?
Only an exact model procedure should authorize accessible trap service, and the area must be free of chemical or sewage exposure. Do not force a joint, handle contaminated water, or open a trap when the connection, wall, or cabinet is damaged; arrange plumbing service instead.
Read the exact guide
Official sources
- DRAIN ASSEMBLYAmerican Standard · Use for separating a drain-body or tailpiece leak above the trap from a P-trap leak; exact model and sink compatibility remain necessary.
- How to fix a faucet leakPortland Water Bureau · General fixture-leak safety guidance applied to isolation and controlled testing; the page is not an American Standard P-trap repair manual.
- Decorative P-TrapAmerican Standard · Use for distinguishing a visible P-trap assembly and its model-specific removable trap section from a universal repair assumption; the listed decorative model may not be the user's installed trap.
Community feedback
Share a repair observation
Share a plain-text repair observation. Accepted observations are published automatically; this page may take a moment to update.