
On this page
Start here
Quick answer
If an A. O. Smith water heater drain valve is leaking, first shut down the heater safely for its fuel type, close the cold-water supply, and dry the area so you can identify whether water comes from the valve outlet, the valve-to-tank fitting, a nearby connection, or the tank itself. A drain valve that is closed but still drips may need model-specific replacement; water from the tank fitting or base needs a qualified plumber. Never drain a hot tank, work on a gas or energized electric heater, cap a temperature-and-pressure relief discharge, or turn the heater back on until the tank is full and the leak source has been corrected.
Before you begin
Safety first
- Do not drain a hot or pressurized tank, remove threaded valves, cap a relief discharge, test energized wiring, work on gas components, or restore operation before the tank is full and the leak is corrected.
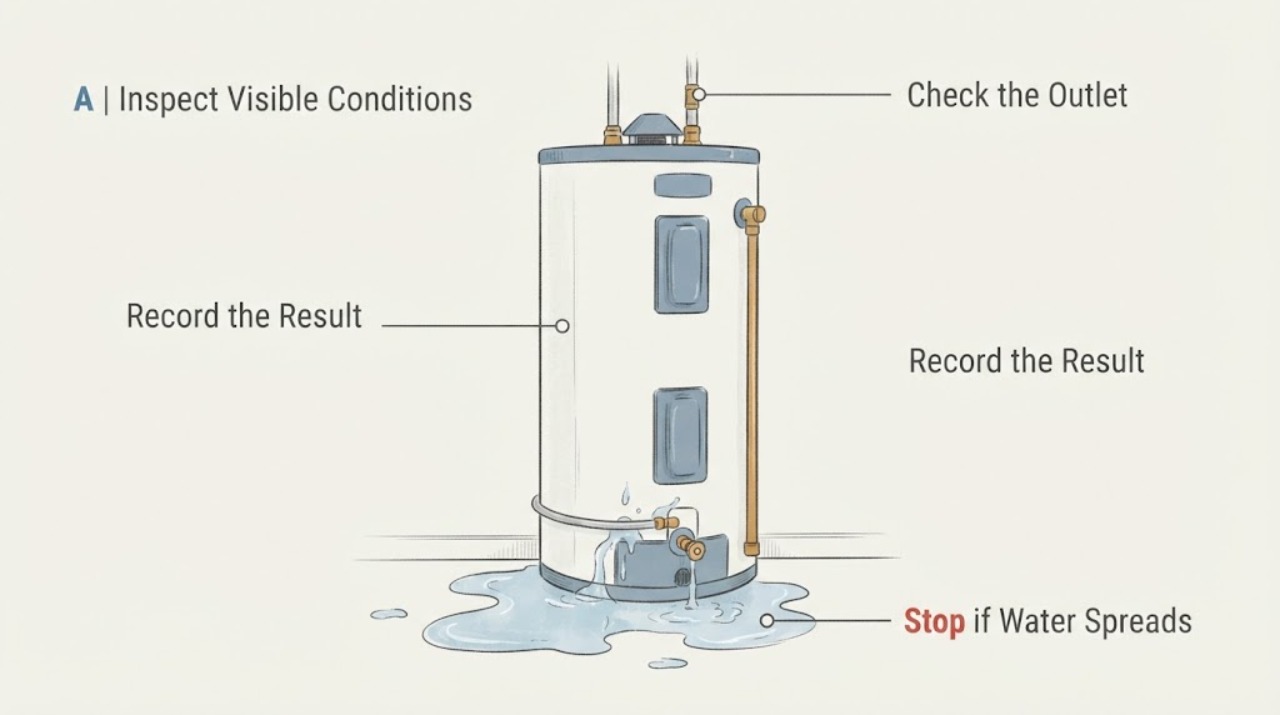
Work through in order
Diagnostic checks
Use only checks that match the exact appliance or system and its official guide.
-
Check 1
Make the area safe before touching the heater. Identify whether it is gas, electric, or another configuration from the label, turn the gas control or electrical supply off only as the manual and your situation safely allow, and close the cold-water supply valve. If you smell gas, see a flame or damaged wiring, or cannot safely reach a shutoff, leave the area and contact the appropriate emergency or qualified service provider.
Expected result: The heater is safely shut down and the water supply is closed, or the leak, gas, heat, wiring, or access conditions prevent a safe shutdown.
Next step: Do not proceed with inspection or drain-valve work when the heater cannot be safely isolated. Protect people and flooring and arrange qualified plumbing or water-heater service.
Why this matters
Why: Turning off energy and water limits scalding, electrical, gas, and property-damage risk while the source is located. An unsafe or inaccessible shutoff is itself a reason not to continue as a homeowner.
-
Check 2
After allowing the accessible surfaces to cool, dry the drain valve, nearby inlet and outlet connections, relief discharge area, and drain pan with paper towels. Touch only cool, accessible surfaces and use a fresh dry towel at one point at a time to see where moisture returns; do not remove insulation that could expose hot piping or a vent.
Expected result: The first wet point is the drain-valve outlet, the threaded area where the valve meets the tank, a nearby pipe fitting, the relief discharge pipe, or the base or pan.
Next step: Photograph the wet point and keep the water and energy supplies off. Continue only with the matching visual branch below; do not loosen a fitting or relief valve to prove the source.
Why this matters
Why: A wet outlet points to the valve's closing function; moisture at the tank fitting points to a threaded connection; a relief discharge drip has a pressure or temperature path; water at the base can indicate a tank problem. A dry towel that becomes wet elsewhere prevents mislabeling a nearby leak as a drain-valve leak.
-
Check 3
If the drain-valve outlet is the first wet point, verify visually that the valve handle or closure is fully in its normal closed position without forcing it. Look for a drip that stops after the valve is closed, a drip that continues, or water coming from around the valve body or tank fitting instead of the outlet.
Expected result: The drip stops when the valve is closed, the outlet continues to drip while closed, or the valve-to-tank joint is wet.
Next step: If closing the valve stops the drip, dry and monitor after the heater is safely restored according to its manual. If it continues or the tank joint is wet, keep the water and energy supplies off and arrange a qualified plumber for diagnosis or replacement.
Why this matters
Why: A valve that was slightly open may explain the water. Continued outlet dripping makes a faulty or worn drain valve more likely; moisture at the tank joint indicates a threaded fitting leak and is not fixed by repeatedly tightening the handle.
-
Check 4
Check whether the water is actually coming from the temperature-and-pressure relief discharge pipe or valve rather than the drain valve. Observe the pipe termination and the tank-side fitting from a safe distance; do not cap, plug, bend, test, or remove the relief device.
Expected result: Water comes from the relief discharge path, the relief fitting at the tank, or nowhere near the relief path.
Next step: Leave the relief path unobstructed, keep the heater shut down, and arrange qualified plumbing or water-heater service for any relief discharge leak. Do not substitute a drain-valve repair for a relief-valve diagnosis.
Why this matters
Why: A relief-path leak can indicate pressure, temperature, or thermal-expansion conditions and requires a different diagnosis from a drain-valve leak. Blocking that discharge can defeat a safety device. If it is dry, return attention to the drain valve, fittings, or tank.
-
Check 5
Inspect accessible cold-water inlet, hot-water outlet, and other nearby threaded connections for a fresh wet ring or a trail that runs down onto the drain valve. Do not remove a threaded connection, apply sealant, or drain the tank as a first step; those operations require a cool, isolated tank and model-specific procedure.
Expected result: A nearby connection is wet while the drain-valve outlet is dry, or the valve and nearby connections remain dry while water collects at the base.
Next step: Keep the supplies off and arrange a qualified plumber for a threaded connection or suspected tank leak. Do not turn energy back on until the tank is confirmed full and the leak source is corrected.
Why this matters
Why: A leaking connection can make the drain valve look wet by runoff. Water at the base with dry external fittings raises concern for an internal tank leak, which A. O. Smith treats as a serious replacement-level condition rather than a handle adjustment.
-
Check 6
Rule out a short-lived condensation event only when the heater is newly installed, the tank was recently refilled, or the room and incoming water are unusually cold. Dry the pan and observe whether moisture returns from a fitting or valve after the surface is dry; do not treat repeated or increasing water as condensation.
Expected result: Moisture disappears as the tank warms and no valve or connection becomes wet, or water returns from the drain valve or another point.
Next step: Monitor only a clearly limited condensation pattern with no active leak point. For recurring water, a wet drain valve, or uncertainty about the source, keep the heater isolated and arrange service.
Why this matters
Why: A. O. Smith notes that condensation can occur temporarily with cold water or at startup, but a repeatable wet valve, fitting, or base is a leak that needs attention. Condensation should not be used to explain a growing puddle or water damage.
-
Check 7
Once the source is repaired by an approved model-specific procedure, confirm that the tank is completely filled before restoring gas or electric operation. Open a nearby hot-water fixture only as the manual directs, watch for a steady water flow, and inspect the repaired area for renewed moisture without placing hands near hot surfaces.
Expected result: The repaired area stays dry, water returns from the drain valve or fitting, the tank cannot be confirmed full, or the heater shows a gas, electrical, temperature, or pressure abnormality.
Next step: Do not restore operation when the tank is not confirmed full or any leak, gas smell, wiring concern, relief discharge, or abnormal condition remains. Keep the heater isolated and call a qualified plumber or water-heater technician.
Why this matters
Why: A dry observation supports the repair but does not override the manual's filling and startup sequence. Operating an incompletely filled tank can damage the heater, and recurrence means the leak or its cause remains unresolved.
Use your observations
Decision map
Find the observation that best matches what you see, then follow the next safe action.
-
PATH 01Next step
What you see
The drain-valve outlet drips even though its closure is fully closed, while the tank-side fitting is dry.
Do this next
Keep the cold-water and energy supplies off and arrange qualified plumbing service for model-specific drain-valve replacement. Do not force the handle or attempt replacement on a hot or pressurized tank.
Why this path and its safety boundary
Why it matters: A faulty or worn drain valve is more likely than a loose nearby connection.
-
PATH 02Next step
What you see
Water is wet around the point where the drain valve enters the tank, rather than only at the outlet.
Do this next
Do not loosen the valve. A qualified plumber must isolate and cool the tank, drain it with the model procedure, and diagnose the threaded fitting before selecting a replacement.
Why this path and its safety boundary
Why it matters: The drain-valve tank fitting or its threaded seal is more likely involved; this is not a simple handle-closing issue.
-
PATH 03Next step
What you see
Water comes from the temperature-and-pressure relief discharge path or fitting instead of the drain valve.
Do this next
Leave the discharge unobstructed, keep the heater shut down, and arrange qualified service. Never cap or plug the pipe and do not replace the drain valve as a substitute diagnosis.
Why this path and its safety boundary
Why it matters: Pressure, temperature, thermal expansion, or a relief-device issue is more likely and can involve a safety function.
-
PATH 04Next step
What you see
A top connection or nearby pipe is wet, and water runs down toward the drain valve while the valve outlet is dry.
Do this next
Keep the supplies off and arrange qualified plumbing repair. Do not remove or reseal the connection without the cool-tank, isolation, and model-specific procedure.
Why this path and its safety boundary
Why it matters: Runoff from an inlet, outlet, or other threaded connection is more likely than a drain-valve failure.
-
PATH 05Next step
What you see
Water collects at the base or in the pan while the external drain valve and connections remain dry.
Do this next
Stop operation, close the water supply, protect flooring, and arrange qualified diagnosis. Do not remove the drain valve or assume a new valve will repair a leaking tank.
Why this path and its safety boundary
Why it matters: An internal tank leak or another concealed source is more plausible than a drain-valve outlet drip; a tank leak can require replacement.
-
PATH 06Next step
What you see
Moisture appears only briefly after startup or refill, disappears as the tank warms, and no valve, fitting, or tank surface continues to wet.
Do this next
Monitor the dry area while following the model manual. If any valve or fitting becomes wet again, or the puddle grows, isolate the heater and arrange service.
Why this path and its safety boundary
Why it matters: Temporary condensation is plausible, but the pattern should not be used to explain recurring or increasing water.
-
PATH 07Next step
What you see
The leak cannot be isolated safely, the tank is hot or pressurized, water reaches wiring or the burner area, there is a gas smell, or the leak returns after repair.
Do this next
Leave the area as appropriate, keep gas or power and water isolated only when safe, and arrange qualified plumbing or water-heater service. Do not restart the heater or attempt a drain-down without the correct training and model procedure.
Why this path and its safety boundary
Why it matters: The situation exceeds a safe homeowner observation and may involve scalding, gas, electrical, pressure, or tank failure risk.
Helpful context
Understand the symptom
A drip from the outlet is not the same as a leak at the tank fitting
Dry the heater and trace the first wet point. Water at the end of the drain-valve outlet, moisture around the valve where it enters the tank, water from the relief discharge pipe, and water at the base describe different repair paths. A puddle can also be condensation or water traveling from another connection. Do not assume the valve itself is the failed part until the wet point is identified.
Hot water, gas, and stored pressure change the safety boundary
The tank can hold scalding water and pressure, and the heater may use gas or line voltage. Use the exact A. O. Smith manual for the model and fuel type. A homeowner-level inspection can document an accessible wet point, but draining a tank, removing a threaded drain valve, servicing a relief valve, or opening gas or electrical compartments belongs to a qualified professional unless the model instructions and the person's training clearly permit it.
Safety boundary
Stop conditions
- Do not drain a hot tank, remove a threaded drain valve, open a relief valve, cap or plug a relief discharge pipe, test energized wiring, or work on gas components as a routine homeowner check.
- Stop immediately for a gas smell, flame or venting concern, damaged wiring, water near electrical parts or a burner, an uncontrolled leak, a hot or pressurized tank, or a shutoff that cannot be safely reached.
- Do not restore gas or electric operation until the leak source is corrected and the tank is confirmed full using the exact A. O. Smith manual. Use a qualified plumber or water-heater technician for a tank-fitting leak, relief-path leak, hidden source, or recurring drain-valve leak.
Only after diagnosis
Potential parts
- A. O. Smith water-heater drain valve
Consider only when the drain-valve outlet continues to leak while closed and a qualified diagnosis rules out the tank fitting, nearby runoff, relief path, and tank corrosion.
A. O. Smith requires model or serial information for an appropriate parts recommendation. Confirm the exact unit and professional diagnosis before selecting a valve. - A. O. Smith drain-valve sealing material or fitting
Consider only when qualified service identifies a leak at the threaded drain-valve-to-tank fitting and confirms that the tank itself is sound.
Thread, seal, and potable-water requirements vary by model and installation. The tank must be isolated, cool, and drained by the prescribed procedure. - A. O. Smith temperature-and-pressure relief valve
Consider only when qualified diagnosis confirms that water comes from the relief path and identifies a failed valve or an underlying pressure or temperature condition.
Relief devices are safety components and must match the exact water-heater model and rating. Do not select or cap one based on a puddle alone. - A. O. Smith water-heater tank or replacement unit
Consider only when a qualified inspection confirms the storage tank itself is leaking or repair is not practical for the unit's condition.
Replacement requires matching fuel type, capacity, venting, connections, installation rules, and local requirements. A qualified installer should confirm the selection.
When checks do not resolve it
Need a professional?
Arrange qualified plumbing or water-heater service when the drain valve continues to drip while closed, the leak is at the tank fitting, the tank base or pan is wet, water comes from the temperature-and-pressure relief path, the leak is behind insulation or a cover, the tank is hot or pressurized, the unit uses gas or electrical access you cannot safely isolate, or water returns after an accessible check. Provide the exact model and serial information, fuel type, first wet point, timing, shutoff status, photos, and whether the valve outlet or tank fitting was wet.
Safety scope: Do not drain a hot or pressurized tank, remove threaded valves, cap a relief discharge, test energized wiring, work on gas components, or restore operation before the tank is full and the leak is corrected.
Common questions
FAQ
Why is my A. O. Smith water-heater drain valve leaking?
First identify whether water comes from the drain-valve outlet, the point where the valve enters the tank, or a nearby connection running onto it. A valve that does not stop dripping when closed may need replacement, while a tank-fitting or base leak needs qualified diagnosis. Keep the heater and water supply isolated when safe and never work on a hot or pressurized tank.
Can I tighten a leaking A. O. Smith drain valve?
Do not force the handle or loosen the threaded valve as a quick fix. A. O. Smith distinguishes a valve that was slightly open from a valve that continues to leak when closed and from a leak at the tank fitting. A qualified plumber should isolate and cool the tank before any drain-valve or threaded-fitting work.
How do I know if the puddle is from the relief valve instead of the drain valve?
Dry the accessible surfaces and observe the first wet point from a safe distance. Water from the temperature-and-pressure relief discharge path is a separate pressure, temperature, or thermal-expansion concern. Leave that discharge unobstructed, do not cap it, and arrange qualified service rather than replacing the drain valve.
Can condensation look like an A. O. Smith water-heater leak?
Yes. A. O. Smith notes that condensation can occur temporarily with cold incoming water or at startup. It should stop as the heater warms and should not be used to explain a repeatable wet valve, fitting, growing puddle, or water at the tank base. When uncertain, keep the heater isolated and have the source checked.
Read the exact guide
Official sources
- Why Is My Water Heater Leaking? | A.O. SmithA. O. Smith · Official A. O. Smith water-heater information-center guidance; the exact model manual and fuel configuration control for service procedures.
- Order OEM Parts for Water Heaters | A. O. SmithA. O. Smith · Official A. O. Smith parts-support page; model and serial information are required to identify an appropriate replacement part.
- Technical Bulletins - Bulletin #51 Puddle On The FloorA. O. Smith · Official A. O. Smith technical bulletin for identifying possible water sources around water heaters; use the exact manual and qualified service for repairs.
- LEAKAGE CHECKPOINTSA. O. Smith · Official A. O. Smith Signature 500 Series Power Direct Vent manual; use only the portions applicable to the exact model and do not generalize its gas-specific procedures.
Community feedback
Share a repair observation
Share a plain-text repair observation. Accepted observations are published automatically; this page may take a moment to update.