
On this page
Start here
Quick answer
A leaking drain gasket is possible, but the wet gasket may be downstream from the real source. First stop unnecessary water use, dry the area, and identify the first point that becomes wet during a brief controlled observation. Under a sink, distinguish the strainer or tailpiece gasket from the P-trap slip-joint gasket and from a supply-line leak; a gasket at a tub, shower, toilet, or concealed drain needs the fixture's exact instructions or a plumber. If an accessible, untreated slip joint is visibly leaking and the gasket is damaged or displaced, the correct model- and size-matched seal may solve it. Do not keep tightening plastic fittings, force a corroded or glued joint, use unapproved sealant, open a chemical-treated drain, or continue when water reaches electrical equipment, a ceiling, wall, or finished floor.
Before you begin
Safety first
- This article supports observation and, only for an untreated accessible fixture joint, a cautious gasket inspection or exact-instruction replacement. It does not authorize chemical handling, concealed-pipe work, structural waterproofing work, electrical contact, or forced disassembly.
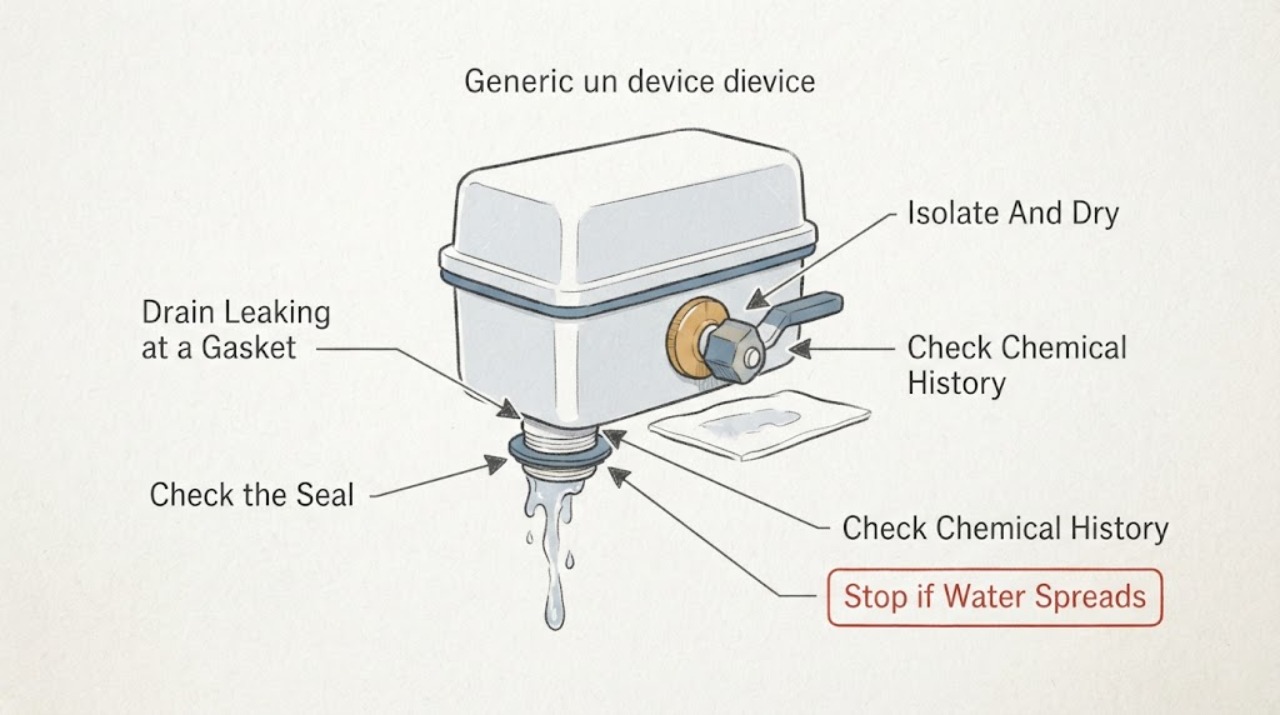
Work through in order
Diagnostic checks
Use only checks that match the exact appliance or system and its official guide.
-
Check 1
Stop using the leaking fixture, remove stored items, and from a dry position close the local water shutoff if one is accessible; wipe or blot the exposed pipe, gasket, cabinet, floor, or ceiling area dry without reaching into contaminated water.
Expected result: The leak stops when fixture use stops, continues without water use, is limited to a small visible joint, or has reached a wall, ceiling, finished floor, outlet, or electrical appliance.
Next step: Keep the fixture isolated and document the area. If water has reached electricity or hidden building materials, leave the area dry and safe, isolate power only from a safe location, and arrange plumbing and property/electrical service.
Stop if: Do not touch electrical equipment from wet flooring, enter a wet ceiling or wall cavity, or keep using the fixture when the leak is spreading or the water source cannot be isolated.
Why this matters
Why: A leak that stops with fixture use points to a drain or supply connection that is being loaded. A leak that continues can be pressurized supply water, trapped water, or a concealed failure. Water at electrical equipment or building surfaces has a property-damage and safety consequence beyond a gasket swap.
-
Check 2
Before loosening any drain fitting or applying cleaner, determine whether drain opener, bleach, acid, descaler, vinegar, or another chemical was recently poured into the fixture or standing water; keep the product label if one was used.
Expected result: No chemical was used, the product was used but the label's handling period and flushing instructions are complete, or the product and residue state are unknown or still present.
Next step: If chemical residue is possible, stop mechanical work, do not add another product, and contact a plumber or poison/emergency service for handling guidance; provide the label and exposure details.
Stop if: Never mix drain cleaners, bleach, acids, vinegar, ammonia, or other household chemicals, and do not loosen a gasket joint against suspected chemical residue.
Why this matters
Why: Only an untreated, accessible joint is a candidate for ordinary visual inspection. Chemical residue can splash or react with another product, so an unknown or treated drain is not safe to open or plunge as a gasket check.
-
Check 3
After the area is dry and water is isolated, place separate dry tissues or paper towels beneath the visible drain flange, tailpiece, P-trap or trap arm, supply connections, and nearby cabinet or floor edge; if safe, run a small amount of water once while watching from outside the wet zone.
Expected result: The first wet point is at the drain flange or gasket, a slip-joint gasket, a pipe seam or crack, a supply connection, or a concealed area; no visible joint wets but water appears below or elsewhere.
Next step: Photograph and mark the first wet point. Use only a safe visible-joint check if it is an untreated sink-style connection; otherwise stop water use and call a plumber.
Stop if: Do not run repeated tests, fill a basin, use a hose, or continue when the leak reaches a wall, ceiling, electrical equipment, sewage, or an unstable floor.
Why this matters
Why: A first wet point at a gasket supports a seal or seating diagnosis. A pipe crack, supply leak, or concealed wet point is not fixed by replacing a drain gasket. Water appearing away from the fixture can be travel from a higher joint or a building-surface failure.
-
Check 4
Identify the drain as a sink, tub or shower, toilet, floor drain, appliance drain, or another fixture, then visually map the gasket or sealing surface without removing trim; under a sink, distinguish the upper strainer or flange gasket from the P-trap slip-joint gasket.
Expected result: The fixture type and leaking joint are clear, the joint is hidden or covered, or the observed water could be from a supply, overflow, waste-arm, or concealed connection instead of the named gasket.
Next step: Record the fixture, fitting shape, gasket location, and any markings. Seek the exact fixture instructions or a plumber when the joint is concealed, structural, glued, or not confidently identified.
Stop if: Do not remove a toilet, shower drain, floor drain, appliance connection, wall cover, or waterproofing component to find a gasket without the correct instructions and a qualified plan.
Why this matters
Why: Gaskets are not interchangeable across fixture types. An upper drain gasket seals a different interface from a trap slip-joint seal, and a toilet or shower drain may involve waterproofing or structural interfaces that should not be disturbed based on a drip alone.
-
Check 5
Only for an untreated, accessible sink-style slip joint with the water isolated, place a pan below it and inspect the nut, washer or gasket, threads, pipe ends, alignment, and visible corrosion without forcing the connection; do not open a glued or concealed joint.
Expected result: The gasket is visibly displaced, flattened, cracked, missing, or contaminated; the joint is loose but intact; the pipe or threads are cracked/corroded; or the joint will not move safely.
Next step: If no damage or chemical residue is present and the fitting design permits it, use only the exact replacement and reassembly procedure for that fixture. Otherwise resecure the area and call a plumber.
Stop if: Do not use pliers to force plastic nuts, heat the fitting, cut pipe, pry a gasket from a glued joint, or put hands into unknown wastewater.
Why this matters
Why: A damaged or displaced gasket can explain a joint leak if the mating surfaces and alignment are sound. A cracked fitting, damaged thread, corrosion, or an immovable joint means a gasket alone may not seal and force can create a larger leak.
-
Check 6
If the leak is confirmed at an accessible gasket joint and the exact fixture instructions support replacement, compare the old seal with the documented replacement, clean only the permitted mating surfaces, seat the seal in the specified orientation, and reassemble without adding unapproved compound or changing the fitting.
Expected result: The seal matches and seats evenly, a replacement cannot be confirmed, the mating surface is scratched or distorted, or the fitting remains misaligned or damaged.
Next step: Stop at the first uncertainty. Have a plumber confirm the seal, joint geometry, and fitting condition rather than stretching a gasket, stacking seals, or compensating with excessive tightening.
Stop if: Do not stack gaskets, stretch a seal, substitute a generic size, add excess putty or sealant, overtighten, or reuse a visibly damaged seal when the instructions require replacement.
Why this matters
Why: A correctly matched seal on sound, aligned surfaces can restore a joint. A mismatch, damaged mating surface, or persistent misalignment indicates a flange, pipe, fitting, or installation problem that a gasket alone will not solve.
-
Check 7
After the joint is reassembled and the surrounding surfaces are dry, make one brief, low-volume flow observation while watching the repaired joint, adjacent joints, cabinet, floor, and ceiling from a dry safe position.
Expected result: No drip appears, the same gasket joint wets, a nearby joint wets first, or water travels to a concealed or building surface.
Next step: Stop after the single observation. Keep the fixture out of service and call a plumber for any repeat or displaced leak, concealed moisture, or building damage.
Stop if: Do not fill the basin, run a long cycle, repeatedly tighten the joint, or continue testing when water is spreading or electrical equipment could be contacted.
Why this matters
Why: No drip during a limited observation supports the repair only for that condition. A repeat leak at the same joint suggests seal seating, surface, alignment, or fitting damage; a new first wet point means the original source was misidentified or another leak exists.
-
Check 8
Prepare a service note with fixture type and location, first wet point, leak timing, gasket or fitting identity, photos, chemical history, water-isolation result, and whether the trap, flange, supply, wall, floor, or ceiling was affected.
Expected result: The evidence distinguishes a confirmed accessible gasket leak, a suspected but unverified seal, a pipe or supply leak, a concealed leak, or a shared/wastewater problem.
Next step: Give the note and photos to a licensed plumber; keep the water isolated and the fixture out of service until the connection is confirmed watertight.
Stop if: Do not order a gasket by appearance alone or reopen a joint after chemical treatment, corrosion, pressure, sewage backup, or structural water damage.
Why this matters
Why: A clear timeline and first-wet-point record helps a plumber choose the correct seal, fitting, drain access, waterproofing assessment, or downstream investigation without repeating unsafe tests.
Use your observations
Decision map
Find the observation that best matches what you see, then follow the next safe action.
-
PATH 01Safety boundary
What you see
Drain cleaner or another chemical was used, remains in standing water, or the chemical history is unknown.
Do this next
Stop mechanical work, do not add another product, keep the label, and ask a plumber or poison/emergency service for handling guidance.
Why this path and its safety boundary
Why it matters: Opening the gasket joint can expose skin and eyes to corrosive material or create a dangerous reaction.
Safety stop: Do not open, plunge, flush with a different chemical, or touch the liquid with an unprotected hand.
-
PATH 02Safety boundary
What you see
A dry, untreated, accessible sink-style joint is confirmed as the first wet point and the fitting can be handled without force.
Do this next
Use the exact fixture instructions and matched seal, then perform one limited leak observation; stop for mismatch, corrosion, or persistent wetting.
Why this path and its safety boundary
Why it matters: A gasket or washer may be the cause if the mating surfaces and alignment are sound.
Safety stop: Do not stack, stretch, or generically substitute the gasket or compensate with excessive tightening.
-
PATH 03Safety boundary
What you see
The gasket looks sound or the repaired joint stays dry, but a pipe seam, supply fitting, overflow, or concealed area wets first.
Do this next
Keep the fixture isolated and arrange a plumber to assess the actual first wet point and the adjacent piping or fixture interface.
Why this path and its safety boundary
Why it matters: The named gasket is not established as the source; replacement may leave the actual leak untouched.
Safety stop: Do not keep changing seals or open walls, ceilings, floors, or waterproofing to chase the drip.
-
PATH 04Safety boundary
What you see
The joint is concealed, glued, corroded, cracked, misaligned, structural, or cannot be opened without force.
Do this next
Leave the water isolated and have a licensed plumber identify the correct fitting, access, seal, and repair.
Why this path and its safety boundary
Why it matters: A DIY gasket attempt can damage the pipe or create a hidden leak and may involve waterproofing or building work.
Safety stop: Do not cut, pry, heat, hammer, or move the fixture to reach the joint.
-
PATH 05Safety boundary
What you see
Water reaches an outlet, appliance, ceiling, wall cavity, finished floor, or other building material, or sewage is present.
Do this next
Leave the wet area, isolate water and power only from a safe dry location, and arrange plumbing plus property/electrical service as applicable.
Why this path and its safety boundary
Why it matters: The risk includes electrical contact, contamination, hidden damage, and a leak that may be larger than the visible gasket.
Safety stop: Do not stand in water to reach a switch or outlet and do not continue fixture testing.
Helpful context
Understand the symptom
The first wet point matters more than the lowest drip
Water can run along the outside of a drain, trap, cabinet base, wall, or floor before it drips. Dry all visible surfaces, place a dry paper towel or cloth beneath separate joints, and watch from a safe position during a brief flow observation. The first wet gasket or fitting is stronger evidence than the place where water finally collects.
A gasket leak is not always a gasket-only repair
A sink drain may have a gasket or sealing surface at the strainer, tailpiece, or P-trap slip joint. A trap can also be clear while a flange, pipe, crack, misalignment, or concealed connection leaks. A seal replacement is conditional on the joint being the source, the surfaces being intact, and the replacement matching the exact fitting.
Keep chemical and water-damage boundaries explicit
Do not open a drain or trap if drain opener or another cleaner may be present. EPA and poison-prevention guidance says to follow labels and never mix household chemicals. Isolate water when possible, avoid contact with wastewater, and escalate quickly if the leak is spreading, sewage is backing up, or water can reach an outlet, appliance, ceiling, or wall cavity.
Safety boundary
Stop conditions
- Stop for water near electrical equipment, a wet wall or ceiling, sewage, a slippery or contaminated floor, a burst pipe, or a leak that continues when the fixture is not used.
- Do not mix drain cleaners, bleach, acids, vinegar, ammonia, or other chemicals, and do not open a gasket joint after chemical use or when residue is uncertain.
- Do not cut glued pipe, force corroded fittings, heat or hammer a joint, move a heavy fixture, or disturb a toilet, shower waterproofing, floor drain, or concealed wall connection without qualified guidance.
- Do not stack, stretch, generically substitute, or overtighten a gasket; do not use unapproved sealant to hide a leak.
- Call a licensed plumber when the first wet point is uncertain, a matched gasket does not stop the leak, the joint is inaccessible or damaged, multiple fixtures are affected, or the leak involves a branch, sewer, wall, floor, or ceiling.
Only after diagnosis
Potential parts
- drain gasket or washer
Consider this category only after the first wet point is confirmed at an accessible drain gasket and the exact fixture and seal design are identified.
Confirm fixture type, fitting dimensions, seal material, orientation, and manufacturer or plumber fit information; do not choose by appearance alone. - P-trap slip-joint gasket
Consider this category only when an untreated, accessible sink-style P-trap slip joint is confirmed as the first wet point and the trap and threads are sound.
Confirm the trap size and joint design and preserve the original pipe alignment; a gasket will not repair cracked, corroded, glued, or misaligned piping. - drain flange sealing assembly
Consider this category only when the leak is confirmed at the fixture drain flange and the exact fixture instructions or plumber identify a compatible seal assembly.
Confirm fixture type, flange dimensions, sealing method, and any waterproofing or local plumbing requirements before ordering.
When checks do not resolve it
Need a professional?
Call a licensed plumber when the drain gasket cannot be confidently identified, the fixture is a toilet, tub, shower, floor, appliance, or concealed drain, a joint is glued, corroded, cracked, or structural, a matched seal does not stop the leak, water reaches electrical equipment or building materials, sewage is involved, or more than one fixture is affected. Keep water isolated until the repair is confirmed watertight.
Safety scope: This article supports observation and, only for an untreated accessible fixture joint, a cautious gasket inspection or exact-instruction replacement. It does not authorize chemical handling, concealed-pipe work, structural waterproofing work, electrical contact, or forced disassembly.
Common questions
FAQ
How do I know whether the drain gasket is actually leaking?
Dry the visible joints, place separate dry tissues beneath them, and make one brief controlled observation from a safe position. The first joint that wets is stronger evidence than the lowest drip. A supply connection, pipe seam, overflow, or concealed area can mimic a gasket leak.
Can I replace a gasket under a sink?
Only consider it when the untreated, accessible joint is confirmed as the first wet point, the exact seal is identified, and the fitting opens without force. Do not cut glued pipe, force corroded fittings, stack seals, or use a generic gasket by appearance.
What if the P-trap is clear but the drain still leaks?
A clear P-trap does not prove the flange, tailpiece, trap arm, branch, supply, or concealed connection is sound. Recheck the first wet point once, then isolate water and have a plumber assess the actual leak source.
Can I open the drain after using drain cleaner?
No. Treat the liquid and joint as chemically contaminated when cleaner was used or the history is uncertain. Do not open, plunge, or mix products; keep the label and obtain qualified plumbing or poison-safety guidance.
When is a leaking drain urgent?
Treat it as urgent when water reaches an outlet or appliance, spreads into a wall, ceiling, or floor, sewage backs up, the supply cannot be isolated, a pipe bursts, or chemical exposure is possible. Leave the wet area and use a safe emergency or qualified-service route.
Read the exact guide
Official sources
- Prevention TipsHealth Resources and Services Administration, U.S. Department of Health & Human Services · U.S. Poison Help household chemical-prevention guidance.
- Fix a Leak WeekU.S. Environmental Protection Agency · EPA WaterSense household leak-detection guidance; fixture instructions and local plumbing requirements control a particular repair.
- Waste and vent pipe installationKing County, Washington · King County government plumbing guidance; common waste/vent principles are used here without asserting local code for every property.
- Leaks in Water-Using FixturesPacific Northwest National Laboratory, U.S. Department of Energy Building America Solution Center · U.S. Department of Energy Building America guidance for water-using fixture leak prevention and verification.
- Household Hazardous Waste (HHW)U.S. Environmental Protection Agency · EPA household hazardous-waste guidance; product labels and local hazardous-waste rules control a particular chemical.
- Minor Home RepairsHenrico County, Virginia · Henrico County homeowner training material; it describes common sink plumbing and does not replace fixture instructions or local code.
Community feedback
Share a repair observation
Share a plain-text repair observation. Accepted observations are published automatically; this page may take a moment to update.