
On this page
Start here
Quick answer
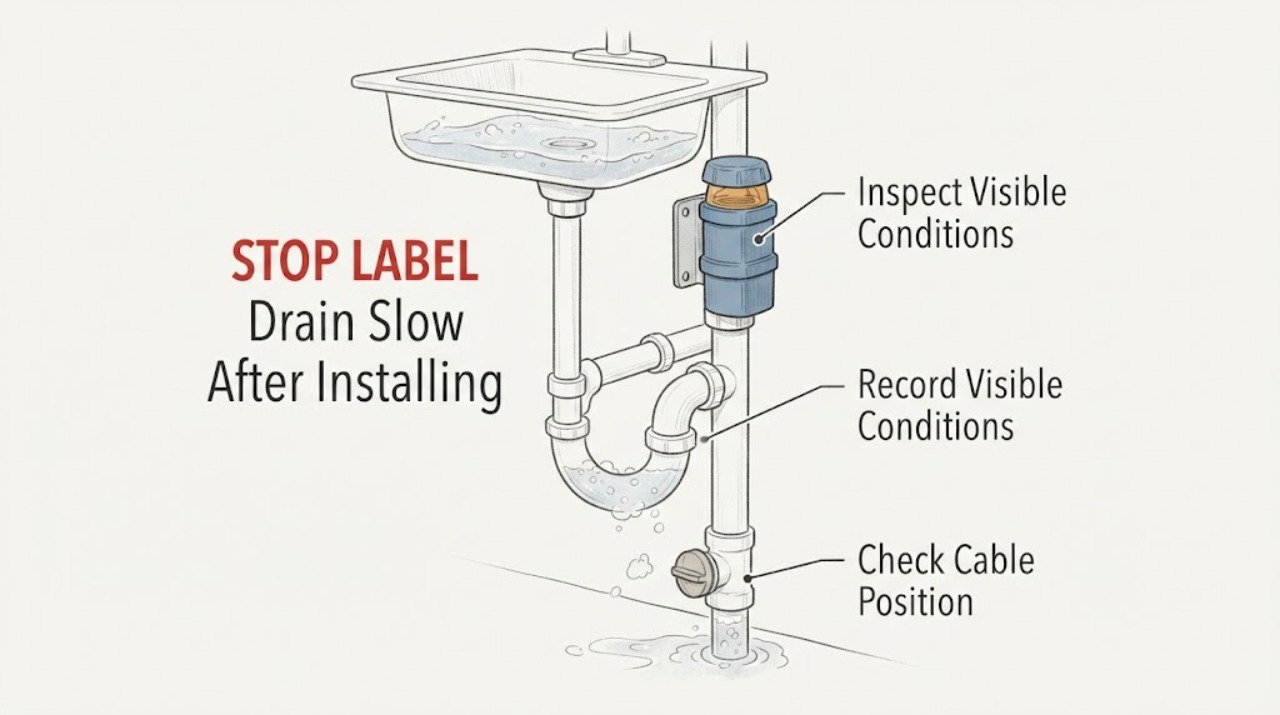
Because the slow drain started after the AAV was installed, first separate an AAV/venting change from a blockage or pipe-layout problem. With no sewage, overflow, chemical, pressure, or electrical hazard, record whether the symptom began immediately, whether one fixture or several are slow, and whether there is gurgling or sewer odor. From a safe, accessible position, compare the AAV's vertical orientation, clearance above the branch, access and airflow, and the visible pipe direction with the exact manufacturer instructions and local code; do not cut, loosen, or relocate concealed piping as a test. A slow drain with backup or several affected fixtures points toward a restriction or shared system issue, while gurgling or odor after an AAV change points toward venting or valve sealing. Stop and call a qualified plumber for sewage, overflow, strong odor, chemical residue, water near electricity, or any work beyond a safe visual check.
Work through in order
Diagnostic checks
Use only checks that match the exact appliance or system and its official guide.
-
Check 1
Before adding water or touching the new AAV, look for sewage or contaminated water, an active overflow, strong sewer-gas odor, chemical residue or fumes, water near an outlet or powered pump, and any tank or line that may be pressurized. Keep the area clear while observing.
Expected result: A hazard is present, the water cannot be isolated safely, or the AAV is on a pressurized or unknown system.
Next step: Stop using the fixture, isolate water or power only from a safe dry location, and arrange the appropriate emergency, poison, electrical, or plumbing help. Do not remove the AAV or open the line.
Stop if: Stop immediately for sewage, uncontrolled overflow, strong or persistent sewer-gas odor, chemical fumes, a pressurized system, or water contacting energized equipment.
Why this matters
Why: The priority is contamination, gas, chemical, pressure, slip, or electrical safety, not diagnosing a slow drain.
-
Check 2
Record exactly when the slow drain began and map the symptom: identify the fixture served by the AAV, whether the drain is slow immediately or only after several uses, whether water stands or backs up, and whether nearby fixtures are also slow or gurgling. Use only a small controlled flow of clean water if there is no backup or hazard.
Expected result: The symptom began immediately after installation and is limited to one fixture, or it also affects nearby fixtures, causes standing water, or appears intermittently.
Next step: Follow the matching branch rather than repeatedly flushing. Stop adding water if it rises, gurgles severely, or backs up elsewhere.
Stop if: Stop for rising sewage, overflow, water entering a concealed space, strong odor, or water near electrical equipment.
Why this matters
Why: Immediate single-fixture symptoms make the AAV placement, orientation, seal, or local branch worth checking; multi-fixture, standing-water, or intermittent symptoms keep a blockage, shared vent, trap, or downstream issue in play.
-
Check 3
From an accessible position, compare the installed AAV with its exact instructions and local code: verify that it is upright, not permanently covered, has room for air to enter, remains accessible for inspection, and is above the branch drain by the applicable requirement. Do not assume one jurisdiction's dimensions apply everywhere.
Expected result: The valve is tilted, enclosed, inaccessible, below the permitted height, surrounded by insulation or obstructions, or the local code and manufacturer instructions are unknown.
Next step: Do not cut or relocate pipe as a trial. Photograph and record the layout, then have a qualified plumber or local building authority assess the installation and any required correction.
Stop if: Stop if checking would require removing the valve, cutting pipe, opening a wall or ceiling, reaching a confined space, or disturbing a pressurized connection.
Why this matters
Why: An installation or compliance problem can prevent the valve from operating as intended or prevent safe maintenance; the distance and approved use are application- and jurisdiction-dependent.
-
Check 4
Inspect only visible connections and pipe direction around the AAV for a loose threaded joint, moisture, a cracked fitting, an incorrect directional fitting, a kink, or an obstruction that could restrict the branch. Do not over-tighten, solvent-weld, or dismantle the valve while the line is in service.
Expected result: A visible leak, cracked body, incorrect flow direction, kink, or displaced fitting is present, or the visible installation appears sound.
Next step: If safe, stop using the fixture and arrange a plumber for the defect. If nothing visible is wrong, continue with the single-versus-shared symptom check instead of opening the pipe.
Stop if: Stop for a leak into a cabinet or wall, a cracked valve, chemical contamination, a pressurized fitting, or any need to use force or a cutting tool.
Why this matters
Why: A leak or incorrect connection needs correction under the applicable instructions; a sound visible installation does not rule out an internal valve, trap, gradient, or blockage fault.
-
Check 5
With the AAV still installed and the area safe, observe the drain during one small controlled discharge: note whether the flow is slow from the start, becomes slow as the pipe fills, makes a gurgling or sucking sound at the AAV, or drains normally when another nearby fixture is unused. Do not run a large tank discharge or repeatedly cycle water.
Expected result: Gurgling or air noise occurs at the AAV while this fixture drains, the water stands or backs up, or the slow flow is unchanged by the nearby fixture state.
Next step: Use the matching branch. For backup or multi-fixture symptoms, stop water use and call a plumber. For isolated gurgling, provide the AAV layout and installation timing to the plumber rather than removing the valve yourself.
Stop if: Stop for backup, sewage, overflow, strong odor, water escaping outside the pipe, or any need to open the drain to observe it.
Why this matters
Why: Gurgling after the installation keeps valve admission, orientation, or local venting in focus; standing water or unchanged slow flow keeps a trap, branch, or downstream restriction in focus; nearby fixture interaction suggests a shared vent or drain condition.
-
Check 6
If the drain is slow with standing water or several fixtures are affected, stop adding water and check only accessible strainers, stoppers, and the visible fixture opening for loose debris. Do not pour chemical cleaner into a line that may contain another product or use a powered clearing tool as an AAV test.
Expected result: A loose visible obstruction is present, the local opening is clear but water still stands, or several fixtures have slow flow or backup.
Next step: Remove only loose visible debris if the fixture instructions permit it. Otherwise stop use and arrange plumbing service; tell the plumber that an AAV was installed before the slow flow began.
Stop if: Stop for sewage, chemical residue, an overflow, sharp fragments, water near electricity, or any need to open concealed piping or a cleanout.
Why this matters
Why: A near-opening obstruction may be local; clear visible flow with standing water or shared symptoms points toward a trap, branch, vent, or downstream restriction that an AAV replacement will not prove or repair.
-
Check 7
If the accessible AAV installation appears correct but the slow drain persists or returns, stop DIY changes and arrange a qualified plumbing inspection. Give the technician the exact valve instructions, local code or permit information if available, installation date, photos, fixture type, symptom timing, and whether the valve was ever removed or exposed to a chemical product.
Expected result: The valve is inaccessible or unapproved, the symptom continues after visible checks, the cause is concealed, or correcting the layout would require cutting, opening walls, or replacing pipe.
Next step: Keep the affected fixture out of use if it backs up or leaks and have the plumber verify the AAV, branch, trap, drainage gradient, venting, and blockage path under local requirements.
Stop if: Do not remove or shake-test the valve, cut pipe, mix chemicals, enter a confined space, open a pressurized system, or work near energized equipment and standing water.
Why this matters
Why: The remaining possibilities include a failed or unsuitable AAV, incorrect branch geometry, trap or vent defect, partial blockage, or a downstream/shared drain problem beyond a safe visual check.
Use your observations
Decision map
Find the observation that best matches what you see, then follow the next safe action.
-
PATH 01Next step
What you see
The drain became slow immediately after the AAV installation, affects only the served fixture, and gurgles at the new valve
Do this next
Stop altering the pipe and have a plumber compare the installation with the exact instructions and local code.
Why this path and its safety boundary
Why it matters: AAV orientation, clearance, access, seal, or local venting issue is more likely
-
PATH 02Next step
What you see
The AAV is tilted, permanently enclosed, obstructed, below the applicable branch clearance, or installed where local rules do not permit it
Do this next
Keep the fixture use limited and arrange qualified correction; do not cut or relocate the branch as a trial.
Why this path and its safety boundary
Why it matters: The installation may not provide usable venting or may not be compliant
-
PATH 03Next step
What you see
Water stands, rises, backs up, or remains slow even though the visible AAV is upright and accessible
Do this next
Reduce water input, clear only loose visible debris if permitted, and call a plumber if flow does not promptly return.
Why this path and its safety boundary
Why it matters: A trap, local blockage, branch, gradient, or downstream restriction is more likely
-
PATH 04Next step
What you see
Several fixtures become slow, gurgle, or back up together
Do this next
Stop using the affected fixtures and arrange plumbing service; do not repeatedly flush or pour chemicals.
Why this path and its safety boundary
Why it matters: A shared drain, vent, or downstream blockage is more likely than the single AAV alone
-
PATH 05Next step
What you see
A sewer odor appears near the AAV after installation, especially when the fixture is not draining
Do this next
Stop if the odor is strong or persistent and have a plumber inspect the valve, trap, and drainage ventilation; do not remove the valve as a home test.
Why this path and its safety boundary
Why it matters: A valve sealing, trap-seal, leak, or venting problem remains possible
-
PATH 06Next step
What you see
The symptom includes chemical residue, sewage, overflow, water near electricity, a pressurized line, or confined-space access
Do this next
Leave the hazard or keep clear, isolate only when safe, and obtain appropriate emergency, poison, electrical, or plumbing help.
Why this path and its safety boundary
Why it matters: Immediate safety boundary
Helpful context
Understand the symptom
A slow drain after an AAV install has two main paths
The timing makes the new air admittance valve and its installation worth checking, but it does not prove that the valve caused the restriction. An AAV admits air when negative pressure develops as water discharges; it does not remove solids or correct an undersized, poorly graded, kinked, or blocked drain. A valve that is tilted, enclosed, below the permitted position, or unable to draw air can be associated with slow flow or gurgling. A local trap or downstream blockage can begin at the same time and will often produce standing water or backup.
Keep the condition-specific checks conservative
The safe DIY boundary is visual and observational: identify the fixture, observe a small amount of clean water only when there is no backup, and check that the accessible valve is upright, open to room air, and not permanently concealed. Do not remove an AAV, cut solvent-welded pipe, force threaded fittings, or use a chemical cleaner to prove a theory. Requirements vary by jurisdiction and system design; a plumber or building official should resolve an installation that may not be approved.
Use symptoms to distinguish venting from restriction
A symptom that appears only while this fixture drains, with gurgling near the new valve, makes the local venting arrangement a reasonable lead. Water that rises, drains slowly even with the AAV visually correct, or affects multiple fixtures points more strongly to a trap, branch, vent, or downstream restriction. A sewer odor near the valve means the mechanical seal or surrounding installation needs professional attention; it is not a reason to keep opening the drain system.
Only after diagnosis
Potential parts
- air admittance valve
Consider only after a qualified inspection confirms that the installed valve is damaged, improperly sealing, unsuitable for the application, or not approved for the required configuration.
Confirm local code, vent load, pipe size, installation orientation, access, and the exact valve instructions before selecting a replacement. - AAV adapter or vent fitting
Consider only when inspection finds a cracked, leaking, incorrectly directed, or incompatible visible adapter or fitting.
Verify pipe material, diameter, fitting direction, seal method, access, and local requirements before replacement. - trap or drain branch component
Consider only when the AAV installation is sound but a qualified inspection identifies a damaged trap, branch restriction, or other drain component causing the slow flow.
Confirm the fixture, pipe layout, dimensions, drainage design, and local plumbing requirements before selecting a component.
Common questions
FAQ
Can an AAV cause a slow drain after installation?
It can be associated with slow flow when its orientation, clearance, access, airflow, or application is wrong, but a partial blockage or branch-layout problem can look the same. The installation timing is a lead, not proof of causation.
What should I check on a self-installed AAV?
From a safe accessible position, compare its vertical orientation, required height above the branch, airflow, accessibility, visible joints, and approved use with the exact instructions and local code. Do not cut pipe or remove the valve as a test.
Does gurgling prove the AAV is bad?
No. Gurgling can occur with inadequate air admission, but a partial blockage, poor venting elsewhere, or shared-line pressure can also cause it. A plumber should assess the complete branch when the symptom persists.
Should I use chemical drain cleaner after installing an AAV?
Do not use or mix drain chemicals to test the installation. If a product has already been used, stop and tell the plumber exactly what it was; follow the product label and local hazardous-waste guidance.
When should a plumber inspect the AAV installation?
Arrange service when the valve is inaccessible, tilted, damaged, unapproved or of uncertain fit, when flow backs up or affects multiple fixtures, when sewer odor appears, or when correction requires removing the valve, cutting pipe, opening a wall, or checking concealed venting.
Read the exact guide
Official sources
- Household Hazardous Waste (HHW)U.S. Environmental Protection Agency · General U.S. household hazardous-waste guidance; follow local disposal requirements.
- How to Install Secondary Venting Systems – Air Admittance Valves (AAV) InstallationOatey · Oatey project guidance; exact valve instructions and local plumbing code control other applications.
- Guidelines for Cleaning Safely After a DisasterCenters for Disease Control and Prevention · General public-safety guidance; local emergency and electrical instructions apply.
- DrainageLondon Borough of Redbridge · England and Wales local-authority guidance; exact requirements vary by jurisdiction and building.
- Approved Document H: Drainage and waste disposalMinistry of Housing, Communities and Local Government · England building-regulation guidance; other jurisdictions and local authorities may differ.
- Air Admittance Valves (AAV)Oatey · Oatey product guidance; do not generalize product ratings or dimensions to another valve.
Community feedback
Share a repair observation
Share a plain-text repair observation. Accepted observations are published automatically; this page may take a moment to update.