
On this page
Start here
Quick answer
If a faucet drips while the handle is off and the hot and cold supply stops work, close both stops gently, open the faucet to release residual pressure, and confirm that water has actually stopped before considering any disassembly. A drip from the spout usually points to a worn cartridge, stem, seat, or seal; moisture under the sink or at a supply connection points to a hose, fitting, or stop-valve leak instead. If a supply stop will not close, spins, leaks around its stem, or leaves water flowing, do not take the faucet apart: use the home's main shutoff only if you know it and can operate it safely, contain the water, and call a plumber. Never force a stiff stop or assume a closed handle has isolated the line.
Before you begin
Safety first
- Do not open the faucet with an unverified supply isolation, force a corroded stop, remove a pressurized valve, overtighten wet fittings, guess a replacement cartridge, or operate electrical equipment that has become wet.
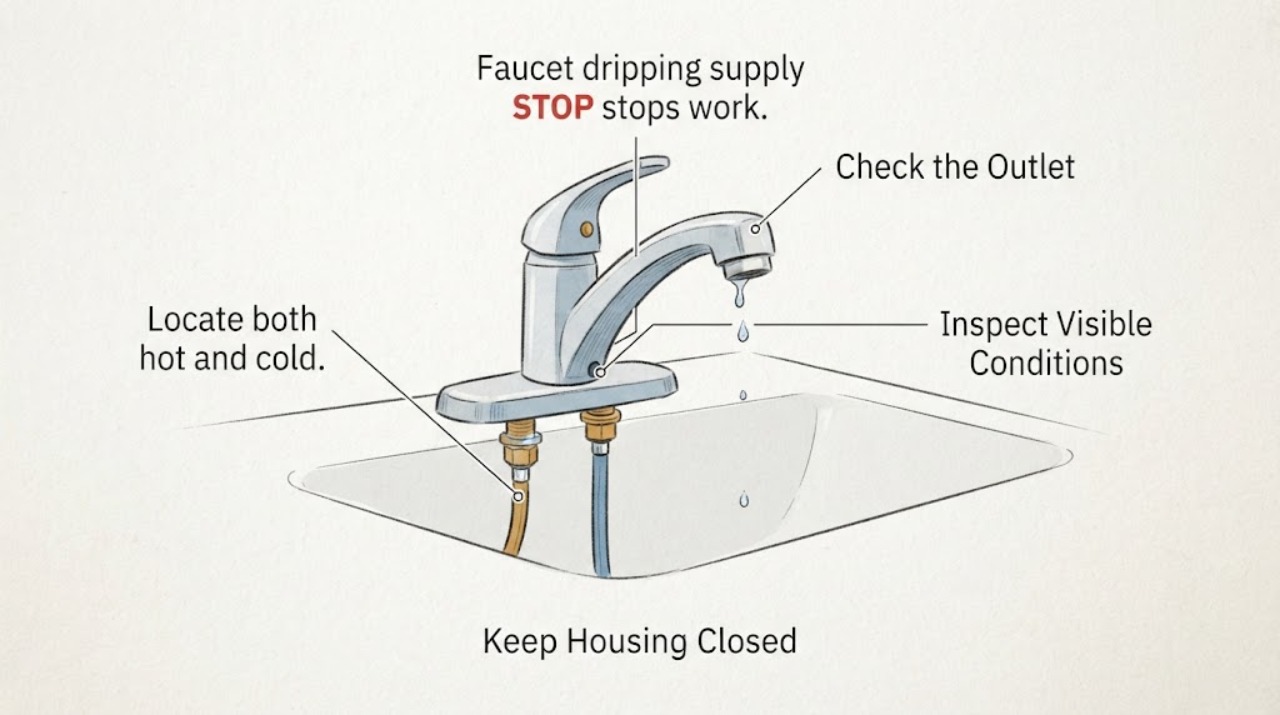
Work through in order
Diagnostic checks
Use only checks that match the exact appliance or system and its official guide.
-
Check 1
With the faucet handle or handles fully off, dry the spout, handle area, faucet base, flexible hoses, threaded fittings, and each supply stop with a paper towel and observe where the first new moisture appears; do not reach into energized appliances or use a tool on a wet connection.
Expected result: The first moisture forms at the spout, around a handle or base, at a hose or threaded fitting, or at the body or stem of a supply stop.
Next step: Photograph the location and continue with the isolation check. If water is accumulating under the sink, at a stop, or at a hose, keep the cabinet clear and arrange plumbing service rather than tightening blindly.
Why this matters
Why: A spout drip with the faucet off makes an internal cartridge, stem, seat, or seal issue more likely. Moisture under the sink or at a hose, fitting, or stop points to the supply side and may continue regardless of the handle position.
-
Check 2
Locate both hot and cold supply stops under the sink or at the accessible faucet connection, turn each clockwise gently to its closed position, then open the faucet handle to release pressure; do not force a corroded, seized, or leaking stop.
Expected result: The flow drops to a brief release and stops, only one side stops, or water continues steadily after both stops appear closed.
Next step: Proceed only with a model-specific faucet procedure after isolation is proven. If either stop fails to isolate the faucet, stop and use the main shutoff only if known and safely accessible, then call a plumber.
Why this matters
Why: A brief release followed by no flow supports that the fixture is isolated. Continued flow means a stop is not closing, the wrong valve was used, or another supply path remains; disassembly could cause an uncontrolled leak.
-
Check 3
With both supply stops closed and the faucet open, watch the spout and the under-sink connections for several minutes and note whether the drip ends, slows, or continues at the same rate; keep a container below the outlet without placing hands near a leaking connection.
Expected result: The spout stops after residual water drains, the spout continues to drip while the supply side stays dry, or the under-sink hose or stop continues to wet.
Next step: For a confirmed internal drip, record the faucet model and handle type before selecting a conditional repair part. For a supply-side leak, leave the stop closed if it holds and arrange service; if it does not hold, shut off the main supply and call a plumber.
Why this matters
Why: A short tail that ends is residual water. A continuing spout drip after verified isolation supports a faucet-internal sealing problem. Continued under-sink moisture identifies a supply-side leak that needs isolation and may need a stop, hose, or fitting repair.
-
Check 4
Identify whether the faucet is single-handle or two-handle and record its make, model, cartridge or stem markings, and whether the drip is from the spout, handle, or base; do not remove the handle or retaining parts until the supply is verified off.
Expected result: The model is known and the leak location matches the manufacturer's spout or base symptom, or the model is unknown and the visible design could accept several different internal assemblies.
Next step: Use the manufacturer's identification guide or a plumber to identify the correct part. If the model cannot be identified, keep the fixture isolated when practical and do not force a generic cartridge into the body.
Why this matters
Why: Faucet cartridges, stems, seats, and seals are not universal. A model-specific symptom and part diagram can narrow a replacement; a guessed part can leave the valve unable to close or create a new leak.
-
Check 5
Test each supply stop's behavior without disassembling it: observe whether the handle closes normally, stops at the end of travel, leaks around the stem, or leaves water flowing when the faucet is open; do not use pliers or a wrench to overcome resistance.
Expected result: Both stops close and remain dry, one stop is stiff or will not close, a stop leaks at its stem or connection, or the main shutoff is needed to stop the flow.
Next step: Leave a reliable stop closed if needed and arrange a plumber for a failed stop. If water cannot be controlled locally, use the known main shutoff and seek prompt help; do not remove the supply stop yourself while the line is pressurized.
Why this matters
Why: Working, dry stops support a controlled faucet repair. A stop that is seized, leaking, or unable to isolate the line is itself a plumbing fault and makes faucet disassembly unsafe until the water can be controlled upstream.
-
Check 6
After isolation is proven, inspect the cabinet and nearby wall or floor for swelling, staining, mildew, or water reaching electrical equipment, and note whether the drip rate changes when the faucet is moved; do not operate electrical equipment that has become wet.
Expected result: The cabinet is dry with a small spout drip, or there is cabinet damage, standing water, a supply leak, water near an outlet or appliance, or a drip that becomes a stream when the handle moves.
Next step: Keep the water isolated, remove only loose dry items from the area, and arrange prompt plumbing service. For water near electrical equipment, keep clear and have the appropriate electrical professional assess it before use.
Why this matters
Why: A small isolated spout drip can usually wait only for a controlled model-specific repair. Cabinet damage, a supply leak, uncontrolled flow, or water near electricity raises the chance of property damage or a shock hazard.
Use your observations
Decision map
Find the observation that best matches what you see, then follow the next safe action.
-
PATH 01Next step
What you see
Both supply stops close, the faucet releases a short amount of residual water and then stops, and the continuing leak was at the spout with the handles off.
Do this next
Record the faucet model and handle type, then use the manufacturer's model-specific procedure or a plumber to identify the correct repair part. Do not guess a universal cartridge.
Why this path and its safety boundary
Why it matters: The supply is isolated and a faucet-internal cartridge, stem, seat, or seal problem is more likely than a supply-stop failure.
-
PATH 02Next step
What you see
The spout continues dripping after isolation is proven, but the hoses, fittings, and supply stops stay dry.
Do this next
Keep the stops closed when practical and arrange a controlled repair. If any retaining part will be removed, verify isolation again and follow the exact faucet instructions.
Why this path and its safety boundary
Why it matters: Residual water is unlikely to explain the ongoing drip; the faucet's internal shutoff assembly is the leading path.
-
PATH 03Next step
What you see
One or both supply stops will not close, spin, leak around the stem, or leave steady flow when the faucet is open.
Do this next
Do not force or remove the stop. Close the known main shutoff if safe, protect the area from water, and call a plumber to restore a reliable fixture isolation.
Why this path and its safety boundary
Why it matters: The fixture is not safely isolated, so faucet disassembly could release pressurized water and worsen the leak.
-
PATH 04Next step
What you see
Moisture first appears at a flexible supply hose, threaded fitting, faucet mounting connection, or stop rather than at the spout.
Do this next
Keep the affected stop closed if it holds, avoid overtightening, and arrange plumbing service. Use the main shutoff if the local stop does not hold.
Why this path and its safety boundary
Why it matters: The supply-side connection or valve is more likely than an internal faucet cartridge, and the leak may continue with the handle off.
-
PATH 05Next step
What you see
Water reaches the cabinet floor, wall, outlet, appliance, or other electrical equipment, or the faucet changes from a drip to an uncontrolled stream.
Do this next
Keep clear of wet electrical equipment, isolate the water only if the shutoff is known and safe, and request prompt plumbing and electrical help as the observed condition requires.
Why this path and its safety boundary
Why it matters: The risk is now property damage or shock in addition to a faucet leak, and normal parts troubleshooting is no longer the priority.
-
PATH 06Next step
What you see
The faucet model is unknown, several internal parts appear worn, or a model-specific repair does not stop the drip while the supply stops work normally.
Do this next
Stop ordering or forcing generic parts and have a plumber or the manufacturer identify the faucet and decide between a correct internal repair and fixture replacement.
Why this path and its safety boundary
Why it matters: The internal assembly or body may be incompatible with the assumed repair part, damaged, or beyond a simple seal replacement.
Helpful context
Understand the symptom
Prove that the supply stops have isolated the faucet
The small valves under a sink or at a faucet are intended to isolate the fixture, but a closed handle is not proof that the line is depressurized. Close both hot and cold stops gently, then open the faucet and watch whether the flow falls to a brief release and stops. If water continues, the stop may be stuck open, the wrong valve may have been turned, or the main supply is still feeding the line. Do not begin cartridge or stem work until the flow is controlled.
The drip location determines whether the faucet or supply side is at fault
A drip from the spout with the handles off is different from water around the handle, faucet base, flexible supply hose, threaded fitting, or stop valve. A spout drip often involves an internal sealing component, but a leak under the sink can damage the cabinet and may continue even when the faucet handle is closed. Use a dry paper towel for a non-contact location check; do not tighten a wet fitting blindly or overtighten a connection.
A supply stop that will not close changes the repair boundary
If a stop valve will not turn, turns without stopping water, leaks at its stem, or cannot be trusted to isolate the faucet, the faucet should not be opened. Know where the main shutoff is before you need it; if you cannot safely stop the water, protect the area from further damage and call a plumber. Manufacturer repair instructions are model-specific, and replacement parts should be identified from the faucet model rather than guessed from appearance.
Safety boundary
Stop conditions
- Do not disassemble a faucet until both hot and cold supplies are actually isolated and opening the faucet confirms that flow has stopped.
- Do not force, clamp, remove, or replace a stuck or leaking supply stop while the line is pressurized; use a known main shutoff and call a plumber.
- Stop and keep clear when water reaches an outlet, appliance, or other electrical equipment; do not operate wet electrical equipment until it has been assessed.
- Do not overtighten wet fittings, guess a cartridge from appearance, or leave an uncontrolled stream running while searching for parts.
Only after diagnosis
Potential parts
- faucet cartridge
Consider this only when the drip is confirmed at the spout, both supply stops reliably isolate the faucet, and the manufacturer or a plumber identifies the faucet's cartridge as the matching internal assembly.
Confirm the exact faucet make, model, handle style, cartridge revision, orientation, and included seals from the manufacturer; cartridges that look similar may not interchange. - faucet repair kit
Consider a repair kit only after the leak location and faucet model support serviceable internal seals, seats, springs, or stems and the water supply can be safely isolated.
Use the model-specific parts diagram and installation instructions; do not assume a generic kit fits a different faucet body or valve design. - faucet O-ring kit
Consider O-rings only when moisture is traced to a serviceable handle, base, or spout seal and the manufacturer or plumber identifies the correct seal location.
Match the exact seal size, material, and faucet model, and replace only after water is isolated; an O-ring will not correct a failed supply stop or cracked faucet body.
When checks do not resolve it
Need a professional?
Request plumbing service for a failed or leaking supply stop, water that cannot be shut off locally, a leak under the sink, persistent dripping after isolation and a model-specific repair, or any water damage. Add electrical service when water has reached electrical equipment, and use emergency help for rapidly spreading water that cannot be controlled.
Safety scope: Do not open the faucet with an unverified supply isolation, force a corroded stop, remove a pressurized valve, overtighten wet fittings, guess a replacement cartridge, or operate electrical equipment that has become wet.
Have this ready
- Provide photos of the first wet location, faucet make and model, single- or two-handle style, spout versus base or supply leak, which hot or cold stop closes, whether flow stops when the faucet is opened, the main shutoff location if known, and any cabinet or electrical damage.
Common questions
FAQ
How do I know whether the faucet drip is from the faucet or the supply stop?
Dry the spout, handle, base, hoses, fittings, and each stop, then watch for the first new moisture. A spout drip with the handle off points toward an internal faucet seal or cartridge; water under the sink or around a stop points toward the supply side.
What should I do before replacing a faucet cartridge?
Close both hot and cold supply stops, open the faucet, and confirm that flow stops. If either stop spins, leaks, will not close, or leaves steady flow, do not remove the cartridge; use the known main shutoff if safe and call a plumber.
Why is my faucet still dripping after I close the supply stops?
A brief release can be residual water. If the spout keeps dripping after verified isolation while the hoses and stops stay dry, an internal cartridge, stem, seat, or seal is more likely. If water continues under the sink, the supply stop, hose, or fitting may not be isolated.
Can I force a stiff angle stop closed with pliers?
No. Forcing a stiff or corroded stop can damage the valve or create a larger leak. Do not disassemble the faucet until the line is controlled; use the main shutoff only if you know it and can operate it safely, then call a plumber.
Which faucet repair part should I buy for a drip?
Do not choose by appearance alone. Identify the faucet model, handle type, and leak location first. A cartridge, stem, seat, spring, repair kit, or O-ring may apply to different designs, and the manufacturer parts diagram or a plumber should confirm compatibility.
Read the exact guide
Official sources
- Fix a Leak WeekU.S. Environmental Protection Agency · Government WaterSense guidance used for checking faucet gaskets and pipe fittings for surface moisture, identifying dripping faucets as household leaks, and turning off the water line before repair.
- What do I do about water dripping from the spout of my two-handle lavatory faucet?Delta Faucet · Manufacturer guidance used to distinguish a spout drip from internal seat, spring, or stem wear and to reinforce shutting off the water before internal service.
- How To Turn Off The Water Supply To The FaucetMoen · Manufacturer guidance used for locating faucet shutoffs, turning off hot and cold supplies, opening the faucet to confirm water is off, and recognizing that repairs without isolation can cause flooding or injury.
- Find Parts and Identify Your ProductDelta Faucet · Manufacturer parts guidance used to keep cartridges, O-rings, repair assemblies, and other parts conditional on the exact faucet model and leak location.
Community feedback
Share a repair observation
Share a plain-text repair observation. Accepted observations are published automatically; this page may take a moment to update.