
On this page
Start here
Quick answer
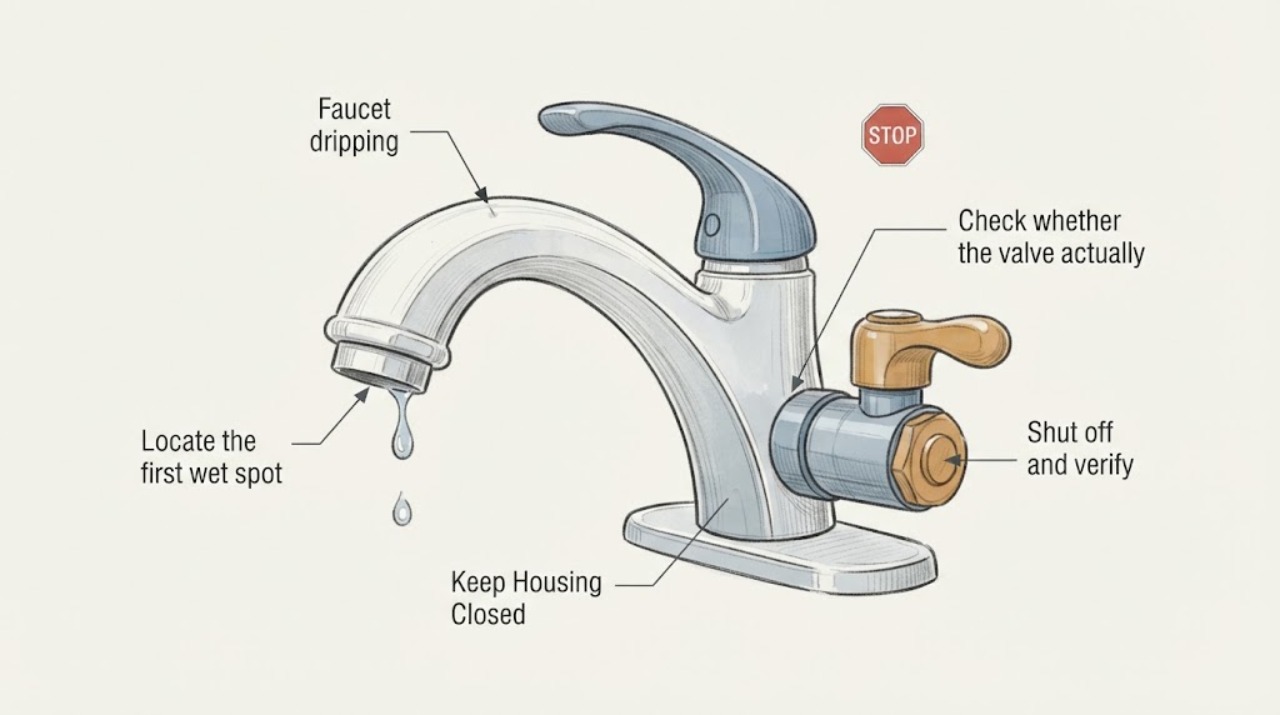
First identify where the water appears and whether the faucet still drips after its handle is fully closed. A drip from the spout usually points to a worn cartridge, stem, washer, or seat; water around the handle or base can instead point to an O-ring, retaining seal, or loose connection. Shut off the faucet's hot and cold supply valves before removing any handle or valve part. If the local valves do not stop the flow, use the main shutoff or call a plumber before disassembly.
Work through in order
Diagnostic checks
Use only checks that match the exact appliance or system and its official guide.
-
Locate the first wet spot
Dry the spout, handle, faucet base, and the supply connections under the sink with a towel, then leave the handle closed and watch for the first new drop.
Expected result: Water forms at the spout outlet, around the handle, at the base, or at a supply connection.
Stop if: Stop and arrange professional help if the wet spot is inside a wall, the faucet body is cracked, or a supply connection cannot be isolated without water continuing to run.
Why this matters
Why: A spout drip puts the internal valve or its sealing surfaces first on the list. A handle or base leak suggests an O-ring, cartridge seal, retaining area, or faucet-body joint. A supply-connection leak is downstream of the faucet valve and should be handled at the connection rather than by buying a cartridge.
-
Check whether the valve actually closes
Close the handle normally without forcing it, then wait briefly and check whether the spout continues to drip; on a two-handle faucet, test each handle separately.
Expected result: The drip stops, slows, or continues at the same rate; one handle may change the drip while the other does not.
Next step: If the spout stays dry after normal shutoff, monitor the base and connections instead; the visible leak may be external rather than a valve that is passing water.
Stop if: If water continues from the spout, continue to the shutoff and identification checks before opening the faucet.
Why this matters
Why: A continuing spout drip after normal shutoff makes a worn or dirty valve cartridge, stem, washer, or seat more likely. If the drip changes when one handle is moved, diagnose that handle's valve first. A handle that will not close or feels stripped is a handle/valve problem, not a reason to overtighten it.
-
Shut off and verify the water
Close both hot and cold faucet supply valves under the sink, or use the applicable access-panel valves; open the faucet to release pressure and confirm that flow has stopped before removing a handle.
Expected result: No water flows, a small amount drains and then stops, or water continues to run.
Next step: If water is fully off, cover the drain and photograph the handle, retaining nut or clip, and any visible brand mark before disassembly.
Stop if: If water cannot be stopped locally, close the main water shutoff only if you can identify it safely, or call a plumber before disassembly.
Why this matters
Why: No flow means the faucet is isolated for a low-risk inspection. A brief drain-down is expected. Continued flow means a local valve is not closed, the wrong valves were selected, or the faucet has no accessible local shutoffs; do not loosen the cartridge or retaining nut in that state.
-
Identify the valve before choosing a part
With the water isolated, remove only the handle cover and handle fastener that your faucet design exposes, then record the faucet brand/model and compare the visible cartridge, stem, clip, retaining nut, and seal arrangement with the manufacturer's parts diagram.
Expected result: The model and valve style are identifiable, or the part is unmarked, stuck, corroded, or different from the available diagrams.
Stop if: Do not pry against the faucet body, drill a retaining fastener, or keep applying force to a seized cartridge; stop and call a plumber when removal could damage the valve body or countertop.
Why this matters
Why: A confirmed model and matching parts diagram support a model-specific cartridge, repair kit, or O-ring choice. An unmarked or stuck part should be taken to a plumbing-supply counter for identification rather than replaced with a visually similar generic. If corrosion prevents safe removal, the faucet may need extraction or replacement by a professional.
Use your observations
Decision map
Find the observation that best matches what you see, then follow the next safe action.
-
PATH 01Next step
What you see
The drip is from the spout after the handle is fully closed
Do this next
Identify the faucet's valve type and use the matching cartridge, stem/washer, seat, or seal; do not assume a generic cartridge fits.
-
PATH 02Next step
What you see
The leak is around the handle or base but the spout stays dry
Do this next
Inspect the model-specific O-ring, packing, retaining area, or faucet-body joint; a cartridge-only purchase may not address this leak.
-
PATH 03Next step
What you see
The local shutoffs do not stop water or the valve part is seized
Do this next
Stop disassembly, isolate the water at the main only when safe, and arrange a qualified plumber to avoid flooding or damage.
Helpful context
Understand the symptom
What the drip location tells you
A faucet is not one universal valve. Single-handle and two-handle designs use different cartridges, stems, washers, seats, and seals, and a kitchen, bathroom, or tub faucet can use a different part even within the same brand. Treat the drip location as a triage clue, then identify the faucet by its brand and model or by the removed part before ordering anything.
Choose the next repair
If the drip is from the spout and the correct valve part is available, replace the matching cartridge or stem/washer assembly and any specified seal. If the leak is around the handle or base, inspect the seals and retaining area described by the faucet's parts diagram. Clean only accessible mineral debris with a suitable method for the faucet material, and do not substitute petroleum-based lubricant for a faucet-safe silicone lubricant. Reopen the supply valves slowly, check every joint and the spout, and stop if the leak moves into the wall or the new part does not seat correctly.
Only after diagnosis
Potential parts
- faucet cartridge
Only when the faucet design and model identify a cartridge as the spout or handle leak source.
Match the exact faucet model or the removed cartridge; similar-looking cartridges are not interchangeable by appearance alone. - faucet repair kit
When the identified valve uses replaceable washers, seats, springs, or seals rather than a complete cartridge.
Confirm the faucet's brand, handle configuration, and valve style before ordering. - faucet O-ring kit
When inspection places the leak at the handle, spout base, or another replaceable seal.
Use the size and material specified for the faucet; a universal assortment is not proof of compatibility.
When checks do not resolve it
Need a professional?
Call before disassembly if the local shutoff valves do not stop the flow. Call after inspection if removal could damage the valve body, if water is leaking inside a wall or cabinet, or if you cannot identify the replacement part.
Common questions
FAQ
Can I fix a dripping faucet without replacing the whole faucet?
Often, yes. A replaceable cartridge, stem/washer assembly, or seal can address a drip, but the correct repair depends on the faucet design and where the water appears. Replace the whole faucet only when the body is damaged, the valve cannot be serviced safely, or the correct parts are unavailable and replacement is the practical option.
Do I need to shut off both hot and cold water?
For a faucet with both supplies, shut off both before removing a handle or valve part. Open the faucet afterward to relieve pressure and verify that water is actually off. If either supply still flows, stop and isolate the correct valves or call a plumber.
How do I know which cartridge to buy?
Use the faucet brand and model, its parts diagram, and the old cartridge or valve assembly as identification evidence. Styles vary even within one brand, so do not choose a part solely because it looks similar or because a generic listing says it is universal.
Why is the faucet still dripping after a new cartridge?
The part may be the wrong model, not fully seated, installed with the wrong orientation, or affected by debris or a damaged valve body. Recheck the manufacturer's installation guidance and the retaining hardware; if the leak persists or the cartridge is difficult to remove, stop and have a plumber inspect it.
Read the exact guide
Official sources
- How To Turn Off The Water Supply To The FaucetMoen Solutions · The manufacturer instructs users to shut off the supply before repair, locate local or main shutoffs, close them, and open the handle to verify the water is off.
- Find Parts and Identify Your ProductDelta Faucet · The page maps drips from the spout, base, or under the handle to cartridge, stem, seal, or O-ring part categories and directs users to model parts diagrams.
- Tips for maintaining your Moen faucetMoen Incorporated · The manufacturer notes that cartridges vary, recommends carrying the old cartridge for matching, and describes shutting off and draining the tap before removal.
Community feedback
Share a repair observation
Share a plain-text repair observation. Accepted observations are published automatically; this page may take a moment to update.