
On this page
Start here
Quick answer
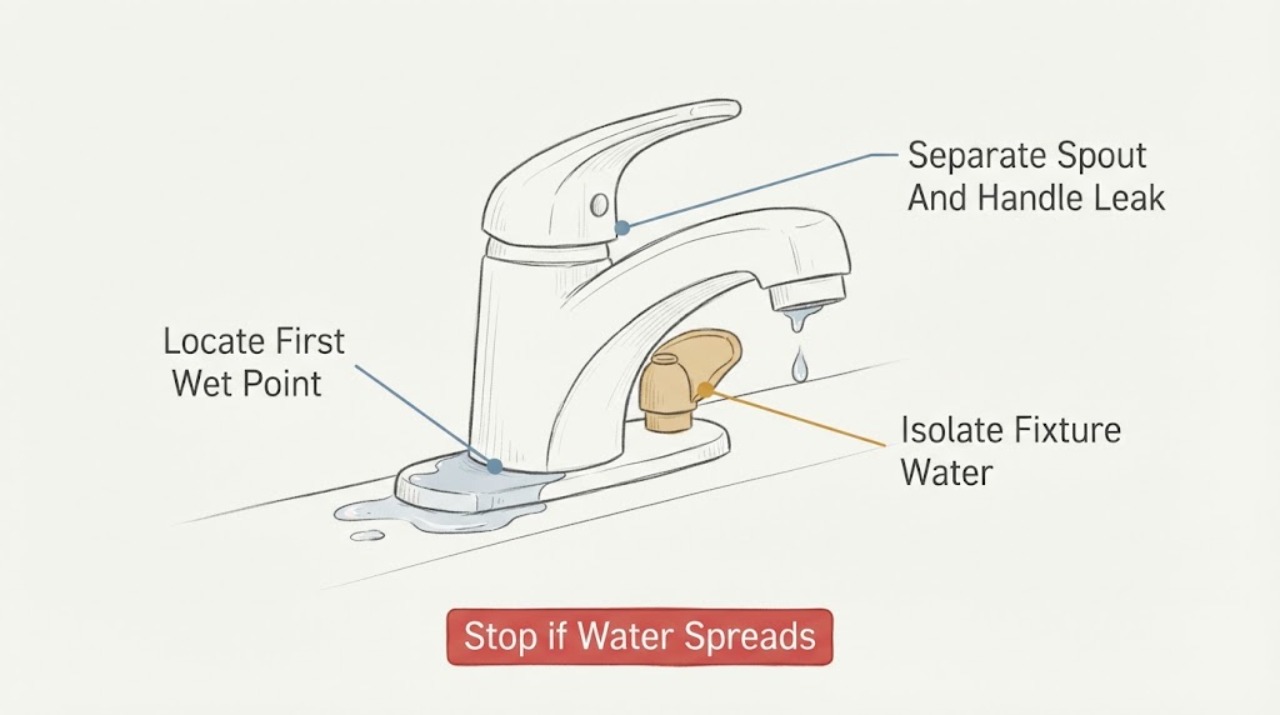
First dry the faucet and observe where water returns: the spout with the handles off, around a handle or base, at an under-sink supply connection, or from the faucet body and hose. Close the fixture shutoff valves, or the house main if the local valves cannot stop the flow, and use the leak location to decide whether a user-replaceable washer, O-ring, cartridge, or stem may apply; a leak that persists, reaches the cabinet or wall, or cannot be isolated needs a qualified plumber, and you should not overtighten, force corroded parts, or replace a part without identifying the faucet.
Work through in order
Diagnostic checks
Use only checks that match the exact appliance or system and its official guide.
-
Check 1
Dry the spout, handles, base, sink rim, visible supply connections, and the cabinet floor. With the drain open and hands clear, turn the faucet on briefly, then turn it off and watch from a dry position; use a paper towel only on accessible exterior surfaces to identify the first returning wet point.
Expected result: Water returns from the spout while the handles are off, appears around a handle or stem, pools around the base, or starts at a supply fitting, hose, or faucet body under the sink.
Next step: Record the location and whether it occurs with the faucet off or only while flowing, then shut off the fixture supply before any disassembly. If water is entering a wall, cabinet, or electrical area, isolate it and escalate.
Stop if: Stop the test for a spray, rapidly increasing flow, water near electrical equipment, a damaged hose, or a leak whose source cannot be observed without removing the cabinet or wall.
Why this matters
Why: The first wet point narrows the repair path: valve or cartridge for an off-state spout drip, handle or stem seal for a handle leak, base seal or body path for a base leak, and connection or hose service for an under-sink leak.
-
Check 2
Close the hot and cold fixture shutoff valves under the sink by their normal operating motion, then open the faucet briefly to confirm pressure is relieved. If the valves cannot be found or do not stop the flow, close the house main and leave the local valves untouched for a plumber.
Expected result: The faucet stops supplying water after the fixture valves close, or water continues because a valve is stuck, missing, inaccessible, or the leak is upstream of the fixture valves.
Next step: Place a towel or container below a small residual drip and proceed only after the fixture is isolated. Do not use pliers on a seized valve, remove a supply line under pressure, or reopen the water until the work area is secure.
Stop if: Stop for a valve that twists without stopping flow, a cracked valve or pipe, a burst or bulging hose, a continuous spray, or water that cannot be contained.
Why this matters
Why: A successful local shutoff contains the fixture for diagnosis; an unsuccessful shutoff increases water-damage risk and means the next step is isolation at the main and professional plumbing service.
-
Check 3
After isolation, dry the faucet again and make one controlled observation with the handles in the off position, then—only if the supply is safely controllable—observe the exterior handle and stem area during a brief flow. Do not remove a handle or retaining nut yet.
Expected result: A drip continues from the spout with the faucet off, or water appears at the handle, stem, or base only while that handle is operated; on a two-handle faucet, one side may be the source.
Next step: Identify the faucet style and model before selecting a cartridge, stem assembly, washer, O-ring, seat, or spring. If the leak path is unclear or the retaining hardware is corroded, arrange service instead of prying or forcing it.
Stop if: Stop for a handle that is loose at the body, a cracked finish or casting, a seized fastener, a valve that will not isolate, or water emerging from inside the wall or cabinet.
Why this matters
Why: An off-state spout drip suggests a valve seal, cartridge, seat, spring, or stem path; a handle or stem leak suggests a packing or O-ring path; one affected side may be repairable without changing the other.
-
Check 4
With the fixture valves closed and the cabinet dry, inspect the visible supply tubes, braided hoses, connection nuts, faucet mounting area, and hose joints using a light. Do not disconnect a line, put a wrench on two unrelated fittings, or overtighten a connection to test it.
Expected result: Water begins at a supply connection or hose, runs down from the faucet mounting area, appears at a sprayer connection, or the visible fittings remain dry while the leak is only at the spout or handle.
Next step: Keep the local valves closed and arrange plumbing service for a wet, damaged, corroded, or inaccessible connection. If the only issue is a clearly loose accessible fitting and the faucet instructions permit adjustment, use gentle hand pressure only and retest with the cabinet visible.
Stop if: Stop for a bulging or split hose, corrosion flakes, a fitting that turns with the pipe, water in the wall, a connection that cannot be held safely, or any leak that returns immediately after isolation.
Why this matters
Why: A connection or hose leak is separate from a valve-seal leak and may flood the cabinet; water from the mounting area can indicate a faucet-base or body seal, while dry connections support the upper-faucet branch.
-
Check 5
Read the faucet's exterior model information or compare its handle and valve arrangement with the manufacturer's identification guidance, without dismantling it. Record single-handle or two-handle design, room and faucet type, whether the leak is from the spout, handle, base, or connection, and which hot or cold side is implicated.
Expected result: The faucet design and model can be identified, or the design, model, valve type, or source side remains uncertain.
Next step: Use the manufacturer's instructions for the identified faucet or give the record to a plumber. Do not substitute a visually similar cartridge or use force to make a different part fit.
Stop if: Stop for missing identification, a discontinued or modified faucet, concealed valves, corroded hardware, or a need to remove the faucet body or supply lines to identify the repair.
Why this matters
Why: A confirmed design can point to a compatible repair family; uncertainty means a washer, O-ring, cartridge, seat, spring, or stem cannot be safely selected from the word leaking alone.
-
Check 6
After an appropriate repair has been completed under the faucet instructions, reopen the fixture supply valves slowly while keeping the cabinet, connections, handles, base, and spout visible. Operate hot and cold sides separately, then turn the faucet off and watch for residual dripping or a new wet path.
Expected result: The faucet remains dry with the water off and during flow, or a drip, spray, cabinet leak, or connection leak returns.
Next step: Close the fixture valves again and arrange service if any leak returns. Do not keep tightening, cycle a damaged valve, or leave the cabinet closed over a wet connection.
Stop if: Stop immediately for spray, rapid flow, water into the cabinet or wall, a loose faucet body, or a local valve that no longer shuts off.
Why this matters
Why: A dry controlled retest supports the repaired leak path; a returning or newly appearing leak means the repair did not isolate the cause, a second component is involved, or a fitting was disturbed.
Use your observations
Decision map
Find the observation that best matches what you see, then follow the next safe action.
-
PATH 01Next step
What you see
Water drips from the spout while the handles are fully off and the supply valves isolate the faucet.
Do this next
Identify the valve design and affected side. A washer, seat and spring, cartridge, or stem may apply depending on the faucet; use the exact manufacturer procedure or have a plumber handle an uncertain or seized valve.
-
PATH 02Next step
What you see
Water appears around a handle, stem, or faucet base, especially while that handle is operated.
Do this next
Dry and retest to distinguish handle water from a base path, then identify the faucet before considering a packing seal, O-ring, cartridge, or stem repair. Do not overtighten the handle or retaining hardware.
-
PATH 03Next step
What you see
A supply hose, connection, sprayer joint, mounting area, or faucet body under the sink is the first wet point.
Do this next
Keep the fixture valves closed and arrange plumbing service for a damaged, corroded, inaccessible, or recurring connection. Contain water and do not disconnect a pressurized line or force a fitting.
-
PATH 04Next step
What you see
The local shutoff valve cannot be located, will not stop the flow, or the leak is upstream of it.
Do this next
Close the house main if it is safely accessible, protect the area from water damage, and arrange urgent plumbing service. Do not use force or remove a supply line under pressure.
-
PATH 05Next step
What you see
The faucet model, handle type, valve design, or leak path is uncertain, or the suspected repair part is only visually similar.
Do this next
Do not order or force a part. Keep the water isolated as needed, preserve the identification and leak notes, and have the faucet identified by the manufacturer or a qualified plumber.
-
PATH 06Next step
What you see
The leak returns after a permitted repair or a new leak appears during the controlled retest.
Do this next
Close the fixture valves again and stop replacing parts by guesswork. The valve body, faucet body, hose, connection, or a second seal may need diagnosis and professional repair.
Helpful context
Understand the symptom
Classify the leak before choosing a part
Dry the faucet, handles, sink rim, and the visible supply connections, then watch where water first returns during a brief, controlled use. A drip from the spout with the faucet off points toward the valve or cartridge path; water that appears only while a handle is moved may be escaping around a stem or handle seal; water under the base or cabinet may be a connection, hose, or faucet-body leak. Water running along a surface can make the apparent location misleading, so trace from the highest wet point that can be seen safely.
Isolate water before touching the faucet
Use the small supply valves under the sink when they turn normally and stop the fixture. If a valve is missing, inaccessible, or will not shut off, use the house main and leave the faucet open briefly to relieve residual pressure. Protect the drain from small parts and keep the cabinet dry. A valve that will not isolate the leak, a burst hose, or water entering the wall is a containment and plumbing-service issue rather than a handle adjustment.
Repair only after the faucet design is known
Faucets use different valve designs. Portland's guide describes washers and O-rings for one style, while Delta's two-handle guidance uses seats, springs, and stem assemblies for a particular faucet family. Those examples do not establish a universal part or procedure. If the model, handle type, valve design, or leak path is uncertain, document the symptom and have the faucet identified before ordering a part or forcing a retaining nut.
Only after diagnosis
Potential parts
- faucet washer or O-ring
Consider this category only when the leak location and faucet instructions identify a washer or O-ring as the sealing element.
Confirm the faucet model, seal dimensions, material, and hot or cold application; do not assume a similar-looking seal fits. - faucet cartridge or stem assembly
Consider this category only when an identified faucet design and the leak path point to a worn cartridge or stem assembly.
Confirm the exact model, valve orientation, handle arrangement, and manufacturer's fit information before selection; designs are not interchangeable by appearance. - faucet supply hose or connection seal
Consider this category only when the first wet point is a damaged hose, connection, or seal and the fixture valves can safely isolate it.
Confirm connection type, length, thread or fitting standard, pressure rating, and installation instructions; replace a damaged hose rather than patching it.
When checks do not resolve it
Need a professional?
The leak is continuous, cannot be isolated at the fixture valves, or is upstream of those valves., Water reaches the cabinet, wall, floor, electrical equipment, or a concealed connection., A supply hose, valve, fitting, faucet body, or mounting area is cracked, corroded, bulging, or moving with the pipe., The faucet design, model, leak path, or replacement part cannot be confirmed., The leak returns after a permitted repair or the faucet requires force, cabinet removal, or concealed plumbing access.
Common questions
FAQ
Where should I look first when a faucet is leaking?
Dry the faucet and watch where water first returns: the spout, a handle or base, a supply connection under the sink, or the faucet body and hose. The location and whether the handles are off determine the next diagnostic path.
How do I stop a leaking faucet if the small valves do not work?
If the fixture valves cannot be found or will not stop the water, close the house main if it is safely accessible and arrange plumbing service. Do not remove a line or force a seized valve while water is flowing.
Is a dripping spout always fixed with a cartridge?
No. Depending on the faucet design, the sealing path may use a washer, seats and springs, a cartridge, or a stem assembly. Identify the model and valve style before choosing a part.
Why does water seem to leak from the faucet base?
Water from a handle or stem can run onto the base plate and look like a base leak. Dry the surfaces and observe the first wet point; if the faucet body or mounting area is the source, isolate the supply and arrange service if it cannot be safely identified.
When should a faucet leak be handled by a plumber?
Use a plumber for a continuous or inaccessible leak, water entering the wall or cabinet, a damaged hose or valve, corroded or seized hardware, an unconfirmed faucet design, or a leak that returns after repair. Keep the water isolated until the faucet is assessed.
Read the exact guide
Official sources
- What do I do about water dripping from the spout of my two-handle lavatory faucet?Delta Faucet Company · Delta official troubleshooting for a two-handle lavatory faucet dripping from the spout, including side isolation and valve-seal component distinctions
- How to fix a faucet leakCity of Portland Water Bureau · City government guidance on locating faucet leaks, shutting off supply, identifying faucet seals, and knowing when a repair is more complicated
- Locating & Operating Water Shut-Off ValvesCity of Hamilton, Ohio · City government emergency water-shutoff guidance for fixture valves and the house main
Community feedback
Share a repair observation
Share a plain-text repair observation. Accepted observations are published automatically; this page may take a moment to update.