
On this page
Start here
Quick answer
First turn off the affected hot and cold supplies from clearly identified, dry-to-reach valves, dry the faucet and cabinet, and find the first wet point during one short, supervised observation. A leak only while the faucet is open can be an incorrectly seated cartridge seal, retainer, aerator, spout O-ring, or connection; a drip that continues with the handle closed points toward a valve, cartridge, housing, supply, or pressurized connection. Use the exact faucet model instructions to verify cartridge orientation, seal/O-ring placement, retainer, and hot/cold side—do not assume a cartridge fits another faucet or force a bonnet or body. If water reaches the cabinet or electricity, the supply will not isolate, the body twists, or the leak is rapid, stop and arrange qualified plumbing service.
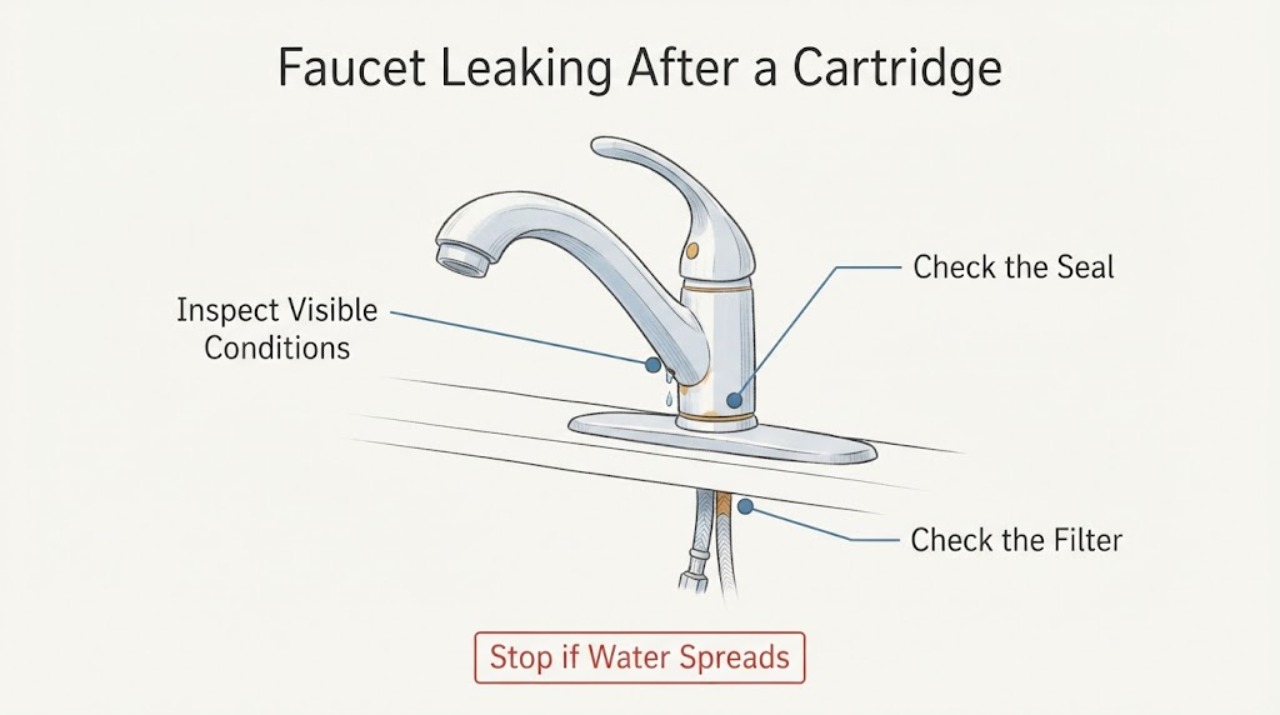
Work through in order
Diagnostic checks
Use only checks that match the exact appliance or system and its official guide.
-
Check 1
Before operating the repaired faucet, look for water near an outlet or powered appliance, cabinet pooling, a split tube, a cracked faucet or housing, an uncontrolled spray, or a supply valve that cannot be reached safely. Keep the area dry and clear.
Expected result: Water contacts electrical equipment, the cabinet is flooding, a housing or tube is damaged, the leak is rapid, or the supply cannot be isolated.
Next step: Stop using the faucet, close the identifiable supply only from a safe dry position, and arrange qualified plumbing or electrical help. Do not remove a pressurized cartridge, housing, or hose.
Stop if: Stop immediately for uncontrolled flow, water near electricity, a cracked pressure-containing part, a hot connection, or a valve that will not shut off.
Why this matters
Why: This is a water, electrical, or pressure hazard, not a routine cartridge-seating check.
-
Check 2
Close the faucet handle and dry the spout, handle, base, underside, cartridge-retainer area, supply connections, and any filter branch. If safe, open only the affected hot or cold side briefly, then close it and identify the first place that becomes wet.
Expected result: The first wet point is the spout, under the handle, at the base, at the cartridge retainer, at a hot or cold supply, or at a separate filter or tube connection; the leak stops or continues with the handle closed.
Next step: Follow the matching branch below. Keep the supply closed if the leak continues when the faucet is off; do not keep cycling the handle to reproduce it.
Stop if: Stop for a spray, rapid drip, cabinet flooding, water near electricity, or any need to access concealed or pressurized plumbing.
Why this matters
Why: Location and timing separate an outlet or internal-valve leak from a disturbed supply-side or continuously pressurized connection.
-
Check 3
If the first wet point is under the handle or at the cartridge retainer, turn off both supplies and relieve only the residual pressure using the exact faucet instructions. Compare the new cartridge's model, orientation, indexing tabs, seals, and retainer position with the manual or photos; do not force the handle, bonnet, retainer, or cartridge.
Expected result: The cartridge is a different model, reversed, not fully seated, missing or pinching a seal, contaminated with debris, or the retainer is not correctly engaged; alternatively, the assembly appears correct but still leaks.
Next step: Use only the exact model's correction and make one controlled leak check. If the part does not fit squarely, the body is damaged, or the leak returns, keep the water off and call a plumber.
Stop if: Stop if the faucet body turns, the retainer will not release, a seal is torn, the supply cannot isolate, or correction requires force, drilling, or concealed access.
Why this matters
Why: A model or seating mismatch can let pressure bypass the cartridge; a correctly assembled cartridge with a continuing leak points toward a damaged valve body, seat, cartridge, or another wet point.
-
Check 4
If the leak is from the spout with the handle closed, inspect only the visible aerator, screen, gasket, and spout outlet after supply isolation. If the spout is dry but the leak is under the handle or base, do not blame the aerator; use the model-specific cartridge or valve guidance.
Expected result: The aerator gasket is displaced, the screen contains debris, the spout continues to drip with a sound aerator, or moisture starts at the handle or base.
Next step: Clean or reseat only a visible screen or gasket when the manufacturer permits it. Arrange service for a persistent drip, damaged spout or base seal, or any internal valve work beyond the manual.
Stop if: Stop if the aerator or spout twists the faucet body, the fitting is seized, the leak increases, or the supply will not shut off.
Why this matters
Why: A gasket or screen can explain leakage at the outlet, while a continuing spout drip or handle/base leak can require a valve, cartridge, seat, or O-ring diagnosis.
-
Check 5
Check whether the leak occurs only on the hot side, only on the cold side, or on both, and whether it continues with the handle closed. Inspect only accessible hot/cold hoses, valves, mounting points, and any filter tubing for moisture, kinks, corrosion, or a tube pulled sideways; do not disconnect a pressurized line.
Expected result: One temperature side leaks, both sides leak, the leak continues while closed, or a supply/filter connection is the first wet point.
Next step: Close the safe branch valve and arrange plumbing service for persistent supply-side leakage. If the visible connections are dry, return to the faucet-body and cartridge branch rather than replacing parts by guesswork.
Stop if: Stop for a burst hose, corroded valve, rapid flow, water near electricity, or any need to work on concealed or pressurized plumbing.
Why this matters
Why: A temperature-specific leak can narrow the affected cartridge or supply path; a continuous leak with the faucet closed points toward a pressurized connection, valve, housing, or cartridge seal.
-
Check 6
If a filter or dedicated drinking-water branch was disturbed during the cartridge change, identify its exact instructions and check only the accessible adapter, tubing, filter housing seam, and cartridge seating after the supply is off. Confirm that the filter cartridge and fittings are the correct model and that water cannot bypass the filter.
Expected result: A tube, adapter, housing seam, or filter seal is wet; the cartridge is not seated; the filter path is bypassed; or the filter branch is dry while the faucet body leaks.
Next step: Keep the filtered outlet out of use and the supply isolated if safe. Follow only the model-specific filter procedure or call a qualified plumber or filter technician for a housing, adapter, or tubing fault.
Stop if: Stop for a cracked housing, uncontrolled spray, contaminated water, water near electricity, a valve that will not isolate, or any need to cut tubing or remove a pressurized housing.
Why this matters
Why: A separate filter connection can be the true leak source, and an ill-fitting cartridge or adapter can compromise both sealing and the drinking-water path; a dry filter branch shifts attention back to the faucet cartridge or valve.
-
Check 7
After a model-correct, safe external correction, perform at most one slow, supervised pressure check while watching every previously wet point. If the leak returns, the cartridge does not seat, or the faucet body or connection moves, stop and arrange a qualified plumbing inspection.
Expected result: No moisture appears during the one check, or the same drip or a new leak appears as pressure returns.
Next step: If any leak returns, close the supply and provide the technician with the model, cartridge information, first wet point, hot/cold side, and repair steps already taken. Do not keep tightening or re-pressurizing the faucet.
Stop if: Stop for any recurring drip, spray, cabinet moisture, body movement, water near electricity, or need to disassemble beyond the exact manual.
Why this matters
Why: A dry one-time check supports a corrected seal but does not prove long-term reliability; a returning leak indicates an unresolved cartridge, seal, valve body, supply, or filter issue.
Use your observations
Decision map
Find the observation that best matches what you see, then follow the next safe action.
-
PATH 01Next step
What you see
The leak begins at the spout or under the handle only when the faucet is open after the cartridge change
Do this next
Isolate both supplies, compare the cartridge assembly with the exact model instructions, and call a plumber if the part does not seat or the leak persists.
Why this path and its safety boundary
Why it matters: A cartridge seal, retainer, outlet gasket, or internal valve seating issue is more likely
-
PATH 02Next step
What you see
The faucet drips from the spout with the handle closed while the cartridge area is dry
Do this next
Use the exact faucet manual for one safe check; arrange service for a returning drip rather than forcing another cartridge.
Why this path and its safety boundary
Why it matters: An internal valve, cartridge, seat, or debris issue is more likely than a supply connection
-
PATH 03Next step
What you see
Water is first visible at the faucet base, hot/cold hose, shutoff, or filter tubing and continues when the handle is closed
Do this next
Close the safe branch supply and arrange plumbing service; do not disconnect or cut a pressurized connection.
Why this path and its safety boundary
Why it matters: A disturbed pressurized supply, fitting, filter housing, or tube seal is more likely
-
PATH 04Next step
What you see
The new cartridge is reversed, not seated, missing a seal, pinching an O-ring, or held by a misaligned retainer
Do this next
Keep water off and correct only under the exact model instructions; if the part or seal is uncertain, call a plumber.
Why this path and its safety boundary
Why it matters: The post-repair cartridge assembly is not sealing correctly
-
PATH 05Next step
What you see
A filter branch was disturbed and its housing, adapter, cartridge, or tubing is wet or does not fit correctly
Do this next
Keep the filtered outlet out of use, isolate the supply if safe, and have the exact filter system checked by a plumber or qualified technician.
Why this path and its safety boundary
Why it matters: The filter path is the likely leak source and its drinking-water path is unverified
-
PATH 06Next step
What you see
The leak recurs after one model-authorized correction or requires force, concealed access, or internal valve-body work
Do this next
Stop re-pressurizing the faucet and provide the model, cartridge, photos, first wet point, and hot/cold result to the technician.
Why this path and its safety boundary
Why it matters: A qualified plumbing diagnosis is required
-
PATH 07Next step
What you see
The cabinet floods, water contacts electricity, the body twists, the supply will not isolate, or a housing is cracked
Do this next
Keep clear, isolate only from a safe dry position, and obtain qualified plumbing, electrical, or emergency help.
Why this path and its safety boundary
Why it matters: Immediate water, electrical, or pressure boundary
Helpful context
Understand the symptom
A post-cartridge leak is not always the cartridge
Water can emerge at the spout, under the handle, around the faucet base, or beneath the counter even when the cartridge was the part changed. A cartridge may be the wrong model, reversed, not fully seated, missing a seal, pinched by a retainer, or contaminated by debris. A supply hose, filter branch, spout O-ring, or aerator can also be disturbed during the same repair. Trace the first wet point instead of tightening every visible nut.
Use the faucet model, not a generic cartridge diagram
Manufacturers use different cartridge shapes, indexing tabs, retainers, seals, and hot/cold orientations. Official faucet guidance commonly asks for the model number before selecting a replacement, and replacement parts may vary by model. Record the old and new cartridge markings, take photos before disturbing anything, and follow the exact manual. Do not force a part that does not seat squarely or use a wrench to overcome resistance.
Protect the cabinet and drinking-water path
Keep the cabinet dry and stop the supply if a connection continues to seep. If the faucet also feeds a filter or drinking-water branch, do not assume the water path is correctly sealed or filtered after the repair until the cartridge, adapters, and connections are verified. A one-time controlled check is enough; repeated pressurizing can turn a small seal leak into cabinet damage.
Only after diagnosis
Potential parts
- faucet cartridge or valve assembly
Consider only when the exact faucet model and inspection confirm a damaged, incorrect, or incorrectly sealing cartridge or valve assembly.
Verify the faucet model, handle style, hot/cold orientation, seals, retainer, and manufacturer fit information before selecting a part. - cartridge seal or O-ring
Consider only when the model instructions and inspection identify a displaced, pinched, damaged, or missing seal as the first leak point.
Confirm the exact faucet and cartridge model and approved seal material before replacement. - faucet supply hose or filter adapter
Consider only when a visible hot/cold supply or filter adapter connection is confirmed as the first wet point.
Verify connection type, water temperature, pressure conditions, faucet/filter model, and manufacturer instructions before replacement.
Common questions
FAQ
Why does a faucet leak after I changed the cartridge?
The cartridge may be wrong, reversed, incompletely seated, missing a seal, or held by a misaligned retainer, but a supply hose, faucet base, aerator, or filter connection may also have been disturbed. Find the first wet point before changing another part.
Does a drip with the handle off prove the cartridge is bad?
No. A drip with the handle closed can point toward a cartridge or valve seal, but it can also come from a pressurized connection or another wet point that travels along the faucet. Dry and trace the source safely.
Can I force the new cartridge or bonnet into place?
No. Cartridge orientation, seals, tabs, retainers, and dimensions are model-specific. If it does not seat squarely or the faucet body moves, stop and arrange qualified service.
What if the faucet also has a water filter?
Keep the filtered outlet out of use until the cartridge, adapter, housing, tubing, and fit are verified under the exact filter instructions. EPA says filter installation and compatibility depend on the make and model.
When should I call a plumber after a cartridge change?
Call when the leak returns, continues with the faucet closed, appears at the base or supply, floods the cabinet, involves a cracked housing, the supply will not isolate, the body twists, or repair requires concealed or pressurized access.
Read the exact guide
Official sources
- Leaking Under the HandleKohler Assist · Kohler faucet guidance and an example of model-specific cartridge troubleshooting; other faucet designs require their own instructions.
- INS12268B.inddMoen · Moen filtration-system instructions only; do not generalize its housing or component details to another system.
- Learn how to install your water filterU.S. Environmental Protection Agency · General water-filter guidance; exact filter instructions and local plumbing requirements control.
- Guidelines for Cleaning Safely After a DisasterCenters for Disease Control and Prevention · General public-safety guidance; local emergency and electrical instructions apply.
- What do I do if my single-handle kitchen faucet drips from the aerator?Delta Faucet · Delta faucet guidance only; use the exact faucet instructions for another design.
- Find Parts and Identify Your ProductDelta Faucet · Delta product-identification guidance; part applicability must not be generalized to another faucet.
Community feedback
Share a repair observation
Share a plain-text repair observation. Accepted observations are published automatically; this page may take a moment to update.