
On this page
Start here
Quick answer
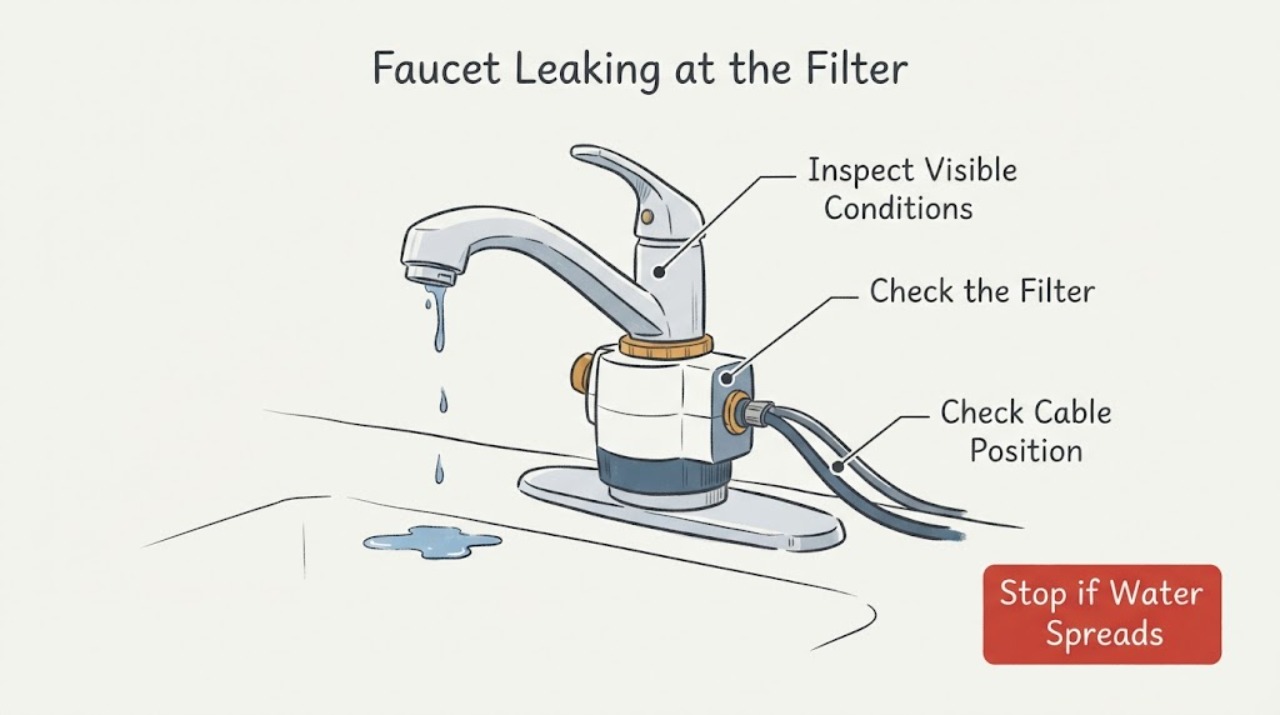
First identify which filter-related part is leaking: the aerator or screen at the spout, a dedicated filtered-water outlet, an under-sink filter housing, or its tubing and fittings. Dry the visible area, open only the affected hot or cold function briefly if safe, and find the first wet point; then turn off the appropriate supply before touching a filter or connection. A drip only while the faucet is on may be a screen, aerator gasket, cartridge, or connection issue, while a leak that continues with the faucet off points toward a supply, filter housing, tubing, or shutoff problem. For drinking-water systems, stop using the filtered outlet if water may bypass the filter or the housing is cracked, and use the exact filter instructions because designs differ. Stop for cabinet flooding, water near electricity, contaminated water, a damaged pressurized housing, or a valve that will not isolate, and call a qualified plumber.
Work through in order
Diagnostic checks
Use only checks that match the exact appliance or system and its official guide.
-
Check 1
Before opening the faucet or filter, look for water pooling in the cabinet, water near an outlet or powered appliance, a split housing or tube, contaminated or discolored water, an active spray, or a supply valve that cannot be reached safely.
Expected result: Water is near electricity, the cabinet is flooding, the housing or tube is damaged, the water is contaminated, or the flow cannot be isolated.
Next step: Stop using the faucet and filter. Close the identifiable supply only from a safe dry position, keep people away from the water, and arrange plumbing, electrical, or emergency help as appropriate. Do not remove a pressurized housing.
Stop if: Stop immediately for uncontrolled flow, water contacting energized equipment, a cracked or pressurized housing, sewage or contaminated water, or a valve that will not isolate.
Why this matters
Why: This is a water, electrical, contamination, or pressure event rather than a low-risk filter inspection.
-
Check 2
Dry the accessible faucet, filter, tubing, and cabinet surfaces, then identify the first wet point. If the area is safe, briefly operate only the affected faucet function and close it; compare the result for a leak at the spout aerator or filter, handle/base, housing seam, threaded fitting, push-fit tube, or supply side.
Expected result: The first wet point is at the spout screen, at the handle or base, between a housing and cap, at a tube or threaded fitting, or at a supply connection; the leak either stops or continues after the faucet is closed.
Next step: Use the matching branch. Keep a continuous supply leak isolated if safe and do not keep operating the faucet to make the drip easier to see.
Stop if: Stop for a spray, rapid leak, cabinet flooding, water near electricity, or any need to reach behind a concealed appliance or remove a pressurized fitting.
Why this matters
Why: Location and timing distinguish an outlet seal or faucet valve symptom from a filter-housing, tubing, or continuously pressurized supply leak.
-
Check 3
If the leak is at a faucet-mounted aerator or screen, shut off the applicable hot and cold supplies before loosening anything, then inspect only the visible gasket, screen, and threads for displacement, mineral buildup, cross-threading, or damage. Follow the exact faucet instructions and do not force a stuck aerator.
Expected result: The screen or gasket is dirty or out of position, the threads do not engage squarely, the aerator body is cracked, or the aerator appears sound but the spout still drips with the faucet off.
Next step: Clean or reseat only the visible screen or gasket when the manufacturer permits it, then make one controlled leak observation. Arrange service for a damaged part, persistent spout drip, or a stuck fitting.
Stop if: Stop if the fitting twists the faucet body, the leak increases, the supply will not shut off, or access requires opening the faucet body or disconnecting concealed plumbing.
Why this matters
Why: A screen, gasket, or adapter may explain leakage around the outlet; a spout that drips with a sound aerator can point toward the faucet's internal valve or cartridge, not the filter.
-
Check 4
If the leak is at an under-sink filter housing or dedicated filtered-water outlet, identify the filter model and instruction sheet before touching it. With the supply safely off and pressure relieved only as the instructions specify, inspect the accessible cap, cartridge seating, O-ring or gasket, tube entry, and housing for a visible defect; do not over-tighten or substitute parts.
Expected result: The cartridge is not seated, the O-ring is displaced or damaged, the cap or housing is cracked, a tube is kinked or not fully seated, or the visible assembly appears sound but leaks when pressurized.
Next step: Keep the filtered outlet out of use and the supply isolated if safe. Reassemble or replace only according to the exact instructions; call a plumber or qualified filter technician for a damaged housing, uncertain pressure, or persistent leak.
Stop if: Stop for a cracked housing, uncontrolled spray, water near electricity, a valve that will not isolate, or any need to remove a pressurized filter body or cut tubing.
Why this matters
Why: A seal or installation issue may explain a seam leak, while a cracked housing or persistent leak after correct model-specific assembly needs replacement or professional diagnosis; model designs are not interchangeable.
-
Check 5
Check whether the leak is limited to one hot or cold side and whether it continues with both faucet handles or filtered functions closed. Inspect only accessible supply valves, tubing, and fittings for moisture, kinks, corrosion, or a tube pulling sideways; do not disconnect a line while it is pressurized.
Expected result: Only one temperature or filtered path leaks, the leak continues when the faucet is off, a tube connection is wet, or the visible supply side is dry.
Next step: Close the safe branch valve and arrange service for persistent pressure-side leakage. If the visible supply is dry, return to the first-wet-point check rather than assuming the filter is responsible.
Stop if: Stop for a burst tube, corroded valve, rapid flow, water near electrical equipment, or any need to work on concealed or pressurized plumbing.
Why this matters
Why: A temperature-specific symptom can narrow the path to one valve or filter branch; a continuous drip with the faucet off points toward a supply-side, housing, or tubing seal rather than normal outlet flow.
-
Check 6
If the leak is at the spout and the filter is not involved, compare the symptom with the faucet manufacturer's leak guidance without assuming a brand-specific repair applies. If the filter is installed on the faucet and water flow is low or uneven, inspect the visible screen only after supply isolation and follow the exact cleaning or replacement instruction.
Expected result: The faucet drips from the spout with the handle closed, flow is reduced through the screen, or the leak remains at the valve body or base after the screen is clean.
Next step: Keep the faucet out of use if the leak reaches the counter or cabinet. Arrange service for an internal valve, cartridge, base, or connection issue rather than ordering an unverified filter part.
Stop if: Stop if the faucet body turns, the supply cannot be isolated, water enters the cabinet, or repair requires disassembling the valve body or concealed connection.
Why this matters
Why: A clogged screen can change flow but does not prove a filter-housing leak; a continuing spout, base, or handle leak can require a faucet cartridge, seal, or plumber.
-
Check 7
If the exact filter component or first wet point remains uncertain, stop changing parts and arrange a qualified plumbing inspection. Provide the faucet and filter model information, installation date, water path, temperature side, leak timing, photographs, and any cartridge or adapter that was changed.
Expected result: The leak recurs after a model-correct installation, affects the cabinet or wall, involves several connections, or diagnosis requires removing a housing, cutting tubing, or opening the faucet body.
Next step: Keep the affected supply isolated when safe and do not use the filtered outlet for drinking until the system is confirmed correctly assembled and leak-free.
Stop if: Do not repeatedly pressurize a leaking housing, mix cleaning chemicals, work near energized equipment and water, or open concealed or pressurized plumbing.
Why this matters
Why: The remaining fault may be a pressure-side leak, incompatible adapter, internal faucet valve, damaged housing, concealed tube, or installation defect beyond a safe visual check.
Use your observations
Decision map
Find the observation that best matches what you see, then follow the next safe action.
-
PATH 01Next step
What you see
The leak begins at the aerator or faucet-mounted filter only while that outlet is open and stops when the faucet closes
Do this next
Isolate the supplies, clean or reseat only the visible screen or gasket as instructed, and call a plumber for a stuck, cracked, or persistent fitting.
Why this path and its safety boundary
Why it matters: A screen, gasket, adapter, or outlet seal is more likely
-
PATH 02Next step
What you see
Water appears between an under-sink filter housing and cap or around its cartridge after the supply is restored
Do this next
Turn the supply off, keep the filtered outlet out of use, and follow the exact filter instructions or arrange qualified service; do not over-tighten a plastic housing.
Why this path and its safety boundary
Why it matters: A cartridge seating, O-ring, cap, housing, or model-specific assembly issue is more likely
-
PATH 03Next step
What you see
A tube or threaded connection is the first wet point and the leak continues with the faucet closed
Do this next
Close the safe branch valve and arrange plumbing service; do not disconnect or cut the line while pressurized.
Why this path and its safety boundary
Why it matters: A pressurized supply-side connection, tube seal, valve, or fitting is more likely
-
PATH 04Next step
What you see
The faucet drips from the spout with the handle closed but the filter and aerator are dry
Do this next
Keep the faucet out of use if water reaches the counter or cabinet and arrange service under the exact faucet instructions.
Why this path and its safety boundary
Why it matters: An internal faucet valve, cartridge, or seat issue is more likely than the filter
-
PATH 05Next step
What you see
Several filter connections leak, the filtered flow bypasses the cartridge, or the installation model and adapter are uncertain
Do this next
Stop using the filtered outlet, isolate the supply if safe, and have a plumber or qualified filter technician verify the model, adapter, tubing, seals, and drinking-water path.
Why this path and its safety boundary
Why it matters: An incompatible or incorrectly assembled filter system needs verification
-
PATH 06Next step
What you see
The cabinet floods, water contacts electricity, the housing is cracked, the supply cannot be isolated, or contaminated water is present
Do this next
Leave the hazard or keep clear, isolate only from a safe dry location, and obtain plumbing, electrical, emergency, or public-health help as appropriate.
Why this path and its safety boundary
Why it matters: Immediate water, electrical, pressure, or contamination boundary
Helpful context
Understand the symptom
“Filter leak” can mean several faucet locations
A faucet aerator or screen sits at the end of the spout and can leak around its gasket or restrict flow with debris. A faucet-mounted filter may use an adapter and cartridge at the spout. A separate filtered-water faucet or an under-sink housing has its own cap, O-rings, tubing, and shutoff. Do not assume that a leak seen near the faucet is coming from the filter: water can travel along the underside of the counter or tubing before it drips.
The first wet point matters more than the largest drip
Dry the faucet, filter body, tubing, and cabinet floor, then make one short, supervised observation if there is no electrical or flood hazard. Note whether the first moisture appears at the spout screen, handle or base, filter-housing seam, threaded fitting, push-fit tube, or supply connection, and whether it continues after the faucet is closed. A filter instruction normally requires the water supply to be turned off before installation or cartridge work; a branded instruction is not a universal fit or repair procedure.
Protect drinking water and the cabinet
If a cartridge is missing, not seated, cracked, expired, or bypassed by a poor adapter fit, do not treat the filtered outlet as verified drinking water. EPA guidance says filter installation depends on the make and model, and that faucet filters need a compatible adapter and proper fit. Keep the cabinet dry and stop the supply when a housing or connection continues to leak; do not repeatedly tighten a plastic housing or guess at a cartridge.
Only after diagnosis
Potential parts
- faucet aerator or filter screen
Consider only when the first wet point is the spout aerator or screen and inspection confirms a damaged, missing, or displaced gasket or screen.
Confirm the faucet make, model, thread, and exact manufacturer fit information before selecting a part. - filter housing seal or O-ring
Consider only when the leak is at the housing seam and model-specific inspection confirms a displaced or damaged seal rather than a cracked housing.
Verify the exact filter system, housing, water temperature, pressure conditions, and manufacturer instructions before replacement. - filter housing or adapter
Consider only when a qualified inspection confirms a cracked housing or incompatible adapter is the first wet point.
Confirm the faucet and filter models, connection type, drinking-water materials, pressure rating, and local requirements before selecting a component.
Common questions
FAQ
How do I tell whether the faucet filter or the faucet is leaking?
Dry the area and find the first wet point during one short, safe observation. The spout screen or housing seam suggests a filter-related path; a drip from the spout with the handle closed and a dry filter points toward the faucet valve or cartridge.
Should I shut off water before checking an under-sink filter leak?
Yes, but only from a clearly identified valve that is safe and dry to reach, and follow the exact filter instructions for pressure relief. Do not remove a pressurized housing or disconnect a tube that may still be under pressure.
Can a clogged faucet filter cause a leak?
A clogged aerator or flow restrictor primarily reduces or distorts flow; a leak around the screen may instead involve its gasket, threads, adapter, or faucet seal. Clean or reseat only the visible part under the exact instructions.
Is filtered water safe if the housing or adapter leaks?
Do not assume it is verified. Stop using the filtered outlet until the cartridge, housing, adapter, tubing, and fit are confirmed according to the model instructions; EPA notes that filter installation and compatibility depend on the make and model.
When should a plumber handle a faucet filter leak?
Call when the leak continues with the faucet closed, the cabinet floods, a housing or tube is cracked, the supply will not isolate, several paths leak, water reaches electricity, the first wet point is concealed, or the repair requires removing a pressurized housing or cutting tubing.
Read the exact guide
Official sources
- INS12268B.inddMoen · Moen filtration-system instructions only; do not generalize its housing or replacement interval to another system.
- Why does my faucet have low water pressure?Delta Faucet · Delta faucet guidance only; use the exact faucet instructions for another design.
- Guidelines for Cleaning Safely After a DisasterCenters for Disease Control and Prevention · General public-safety guidance; local emergency and electrical instructions apply.
- What do I do if my single-handle kitchen faucet drips from the aerator?Delta Faucet · Delta faucet guidance only; other faucet designs require their own instructions.
- Learn how to install your water filterU.S. Environmental Protection Agency · General filter guidance; the exact make, model, instructions, and local plumbing requirements control.
Community feedback
Share a repair observation
Share a plain-text repair observation. Accepted observations are published automatically; this page may take a moment to update.