
On this page
Start here
Quick answer
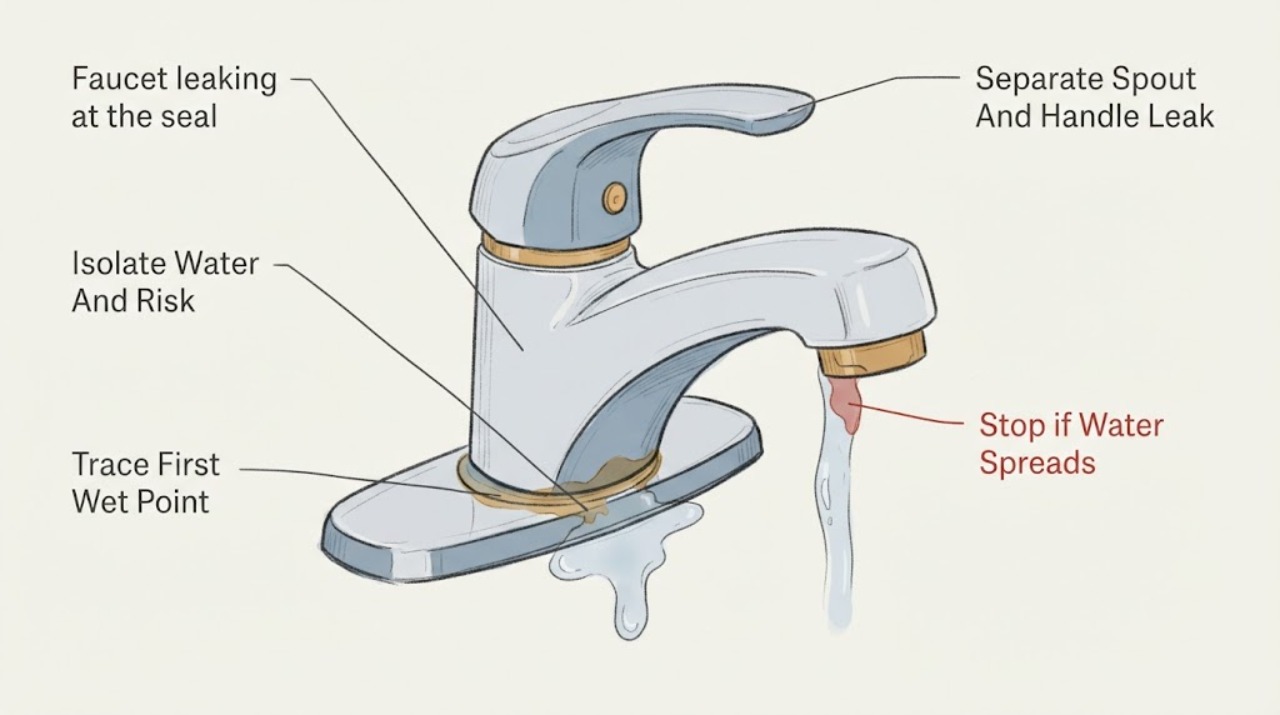
A faucet leak assigned to the seal is diagnosed by the first place that becomes wet, not by choosing a replacement part from the drip location alone. Turn off the faucet and, if the leak is more than a small controlled drip, close the hot and cold shutoff valves under the fixture. Dry the spout, handle, faucet base or deck, and visible supply connections, then operate the faucet briefly only when the area is safe so you can see where water first returns. A drip from the spout with the handles off can point to an internal cartridge, stem, washer, or valve seal; water around a handle or rotating spout base can point to an O-ring or cartridge seal; water under the cabinet can come from a supply connection or body seal. The exact faucet model and valve design must be identified before any seal or cartridge is ordered. Stop for cabinet flooding, a stuck shutoff, damaged tubing, contaminated drinking water, or any repair that requires concealed access, and call a qualified plumber.
Before you begin
Safety first
- This article supports isolation, drying, and non-contact or ordinary-access leak tracing only. Do not work on a pressurized fixture, disconnect supply lines, force fittings, alter a valve body, open concealed plumbing, or use electrical tools in a wet area.
Work through in order
Diagnostic checks
Use only checks that match the exact appliance or system and its official guide.
-
Check 1
Stop using the faucet and inspect the area from a dry position; close the hot and cold fixture shutoffs if they turn normally and are safely reachable, without forcing a corroded valve.
Expected result: Record whether flow stops, slows, or continues; note cabinet water, a soaked wall or floor, a stuck shutoff, damaged tubing, unusual odor or color, and whether electrical equipment is in the wet area.
Next step: Use the home's main shutoff only if safely accessible when the fixture valves do not stop flow, keep the cabinet and floor dry, and call a plumber for uncontrolled or concealed leakage.
Stop if: Stop for flooding, a stuck or leaking shutoff, damaged braided tubing, wet electrical equipment, contaminated water, or any need to reach into standing water.
Why this matters
Why: A controllable small leak can be mapped safely after isolation. Continued flow, flooding, damaged connections, or water near electricity is a containment and service problem, not a seal replacement exercise.
-
Check 2
With water isolated and surfaces dry, place separate dry towels at the spout outlet, handle or stem area, faucet base or deck, and visible supply connections; do not wrap tape around a leak to hide its origin.
Expected result: Restore only a small normal flow when the area is safe and watch which towel or surface becomes wet first: spout, handle, rotating spout base, deck or mounting area, supply connection, or faucet body.
Next step: Shut the water off again after the observation, photograph the first wet point, and use it to select the matching diagnostic branch rather than ordering a generic seal.
Stop if: Do not run the test if water could reach electricity, the leak is rapidly spreading, the supply connection moves, or the water is hot enough to burn.
Why this matters
Why: The first wet point is the useful location. Spout or handle moisture can indicate an internal valve seal or cartridge; a rotating base can indicate a body O-ring; deck or supply moisture can indicate mounting or connection sealing. Water that appears elsewhere may have traveled.
-
Check 3
After the faucet is dry, compare the spout outlet and handle area with the handles fully off, then with a brief normal flow, without removing the handle or cartridge.
Expected result: Record whether the spout drips while off, water rises around the handle only while running, or both areas stay dry while the base or cabinet becomes wet.
Next step: Provide the result and exact faucet model to the manufacturer or plumber; do not remove an internal cartridge unless the model instructions and safe shutoff procedure specifically support that work.
Stop if: Stop for a hot-water spray, a handle that will not shut off, a cracked body, exposed wiring, or any need to work on a pressurized or unidentified valve.
Why this matters
Why: A continuous spout drip with water off supports an internal valve seal or cartridge path. A handle-only leak while running supports a handle or cartridge seal path. A dry top with water below shifts attention to the base, mounting, supply, or body.
-
Check 4
From inside the cabinet and above the counter, inspect only visible dry surfaces around the faucet base, mounting area, supply hoses, compression or threaded connections, and body; do not tighten a fitting that is already wet or corroded.
Expected result: Classify the first wet point as base or deck, supply connection, hose, faucet body, or still unknown; note whether the leak occurs only when the faucet runs or continues with the handles off.
Next step: Close the fixture valves, keep the cabinet dry, and call a plumber when a supply, body, or concealed connection is wet, corroded, or still unidentified.
Stop if: Do not force nuts, use unapproved sealant, disconnect a supply hose, or touch plumbing or electrical equipment in a wet cabinet.
Why this matters
Why: A base or deck leak can involve a mounting seal or spout O-ring; a supply or hose leak is a connection problem; a body leak can require faucet replacement or professional repair. A leak that continues with handles off may be upstream of the controls.
-
Check 5
Record the faucet maker, model marking, number of handles, spout style, and whether the fixture has a pull-down hose, filter, sensor, or other special path before considering a seal, O-ring, washer, or cartridge.
Expected result: Compare the marking and photos with the manufacturer's parts diagram or instructions and classify the proposed item as exact-model confirmed, similar-looking only, or unknown.
Next step: Use the model information to ask the manufacturer or plumber for the correct procedure and part class; keep the water isolated if the leak continues.
Stop if: Do not order or install a seal based only on appearance, brand name, handle shape, or leak location, and do not disassemble the faucet to identify a part while water is connected.
Why this matters
Why: Only an exact-model match supports a compatible seal decision. Similar-looking cartridges and O-rings can differ in dimensions or sealing surfaces, and the same leak location can have different causes across designs.
-
Check 6
Use the first wet point, off-versus-running behavior, shutoff result, cabinet condition, and model record to choose a safe next step rather than repeating the leak test.
Expected result: Choose a model-directed seal or cartridge procedure only when the exact instructions, compatible part class, dry workspace, and working shutoffs are confirmed; choose plumbing service for a supply or body leak, concealed moisture, recurring leak, unknown model, or any unsafe access.
Next step: Leave the fixture isolated or unused, provide photos and model information to a qualified plumber, and request a leak-source and seal-compatibility assessment.
Stop if: Stop all further work for uncontrolled water, cabinet or wall damage, contaminated water, a failed shutoff, concealed access, or any electrical hazard.
Why this matters
Why: The observed location narrows the repair scope but does not prove which seal failed. A professional may need to isolate the fixture, inspect the valve body, protect drinking-water quality, and check for cabinet or wall damage.
Use your observations
Decision map
Find the observation that best matches what you see, then follow the next safe action.
-
PATH 01Safety boundary
What you see
The first wet point is the spout outlet and dripping continues while the handles are fully off.
Do this next
Keep the shutoffs closed when practical, identify the exact model, and follow only its manufacturer procedure or ask a plumber to assess the internal seal.
Why this path and its safety boundary
Why it matters: An internal valve seal, stem, washer, or cartridge path is plausible, but the faucet design determines which part applies.
Safety stop: Do not remove a cartridge or valve part without model-specific instructions, working shutoffs, and a dry safe workspace.
-
PATH 02Safety boundary
What you see
Water first appears around the handle or stem while the faucet is running, while the spout outlet and base remain dry.
Do this next
Record the handle style and model, isolate the water, and use the exact manufacturer repair path or qualified plumbing service.
Why this path and its safety boundary
Why it matters: A handle mechanism, stem O-ring, or cartridge seal is plausible; the visible leak does not identify an interchangeable part.
Safety stop: Do not keep operating a handle that sticks, sprays, or cannot shut off, and do not force the handle or retaining hardware.
-
PATH 03Safety boundary
What you see
Water first appears at the rotating spout base, faucet base, or deck while the visible supply connections remain dry.
Do this next
Stop use, dry the counter and cabinet, photograph the first wet point, and request model-specific or plumber assessment before removing the spout or mounting hardware.
Why this path and its safety boundary
Why it matters: A spout O-ring, mounting seal, body seal, or water traveling from above may be involved.
Safety stop: Do not overtighten mounting hardware, force the spout, inject sealant, or use the faucet while water can enter the cabinet or wall.
-
PATH 04Safety boundary
What you see
Water first appears at a supply hose, shutoff connection, faucet body, or inside the cabinet, or the source remains unknown after drying.
Do this next
Close the fixture or main shutoff as safely possible, protect the cabinet and floor, and call a qualified plumber for isolation and repair.
Why this path and its safety boundary
Why it matters: This is not established as a replaceable faucet seal; a connection, hose, body, or concealed leak may cause water damage.
Safety stop: Do not disconnect hoses, tighten corroded fittings, enter standing water, or operate electrical equipment in the wet area.
-
PATH 05Safety boundary
What you see
Water has unusual color or odor, a filter or special water path is involved, the shutoff will not work, or repair requires concealed access.
Do this next
Do not drink or use water from the affected path until its safety is established, isolate the fixture if safe, and arrange qualified plumbing service.
Why this path and its safety boundary
Why it matters: The leak has a drinking-water, containment, or access boundary that a generic seal procedure cannot safely resolve.
Safety stop: Do not improvise a seal, mix cleaning chemicals, open walls, or continue testing an unsafe or contaminated fixture.
Helpful context
Understand the symptom
The first wet point matters more than the largest puddle
Water can travel along a faucet body, counter, hose, or cabinet surface, so the place you notice a puddle may be downstream of the failed seal. Dry the area, place a clean dry towel under visible connections, and trace the first returning moisture. Separate a spout drip with the handles off from a leak that appears only while water is running; they lead to different checks.
Use shutoffs before touching a seal or cartridge
Turn off the hot and cold fixture shutoffs before a repair attempt and relieve pressure only as the exact faucet instructions direct. If the valves will not close, the tubing is corroded, or water continues to flow, use the home's main shutoff if it is safely accessible and call a plumber. Do not disassemble a pressurized fixture or guess at a seal size.
A component name is not proof of compatibility
Washers, O-rings, stem seals, cartridges, mounting seals, and supply connectors vary by faucet design. Official manufacturer parts tools group leaks by spout, base, and under-handle symptoms but still require product identification. Record the maker, model marking, handle style, and leak location before a part is considered; a plumber should handle concealed body or connection leaks.
Safety boundary
Stop conditions
- Close the fixture shutoffs, or the main shutoff when safely accessible, for uncontrolled flow, flooding, or a shutoff that will not stop the leak.
- Do not work on a wet electrical area, enter standing water, touch exposed wiring, or use electrical tools near cabinet water.
- Do not disassemble a pressurized faucet, force corroded fittings, disconnect supply hoses, or open concealed plumbing as a user test.
- Do not select a washer, O-ring, cartridge, or other seal from appearance alone; confirm the exact faucet model and manufacturer procedure first.
- Stop for unusual water color or odor, filter or special water-path concerns, cabinet or wall damage, hot-water burn risk, or any uncertainty about drinking-water safety.
- Do not use the faucet while a persistent leak reaches the cabinet, wall, floor, electrical equipment, or a structural surface; call a qualified plumber.
Only after diagnosis
Potential parts
- faucet cartridge or stem seal
Consider this category only when the exact faucet model and leak pattern support an internal valve seal or cartridge diagnosis, especially a spout drip with the handles off or a handle-area leak while running.
Confirm the exact model, valve design, dimensions, and manufacturer instructions; similar-looking cartridges and seals are not automatically interchangeable. - spout O-ring or base seal
Consider this category only when the first wet point is the rotating spout base or faucet base and a model-specific diagram confirms a replaceable seal.
Confirm the exact faucet model, seal profile, material, and safe access procedure; do not force the spout or compensate with unapproved sealant. - faucet mounting seal or supply connection seal
Consider this category only after the first wet point is confirmed at the deck or a visible connection and a qualified or model-directed inspection identifies the sealing interface.
Confirm the exact faucet, connection type, material, and installation requirements; a new washer does not repair a cracked body, hose, or shutoff.
When checks do not resolve it
Need a professional?
Call a qualified plumber when the leak is uncontrolled, reaches the cabinet or wall, comes from a supply connection or faucet body, persists after a safe model-directed check, recurs, involves a stuck shutoff or concealed access, or has unusual color or odor. Keep the fixture isolated when practical and provide the first wet point, off-versus-running result, photos, faucet model, and any filter or special water-path details.
Safety scope: This article supports isolation, drying, and non-contact or ordinary-access leak tracing only. Do not work on a pressurized fixture, disconnect supply lines, force fittings, alter a valve body, open concealed plumbing, or use electrical tools in a wet area.
Common questions
FAQ
How do I find the source of a faucet leak?
Close the fixture shutoffs if safe, dry the spout, handle, base, cabinet, and visible connections, then observe a brief normal flow only when water cannot reach electricity. The first returning wet point is more useful than the largest puddle.
Does a drip from the spout always mean the cartridge needs replacing?
No. A spout drip with the handles off can involve a cartridge, stem, washer, or valve seal depending on the design. Identify the exact faucet model and follow its instructions or ask a plumber before selecting a part.
What causes water around the faucet handle?
Water around the handle while the faucet runs can indicate a handle mechanism, stem seal, or cartridge seal, but water can also travel from the base. Dry the fixture, trace the first wet point, isolate the water, and confirm the model before repair.
What if the faucet leaks underneath the sink?
Close the fixture or main shutoff as safely possible, keep electrical items and standing water separated, and inspect only visible dry surfaces. A supply connection, hose, mounting seal, faucet body, or concealed leak may be involved; call a plumber if the source is not immediately clear.
Can I use a universal faucet O-ring or cartridge?
Do not assume compatibility. Faucet seals and cartridges vary by model, dimensions, valve design, and sealing surface. Use the exact manufacturer parts information or have a plumber identify the correct component.
Read the exact guide
Official sources
- Fix a Leak WeekU.S. Environmental Protection Agency · EPA WaterSense household leak guidance used for safe leak identification and water isolation; it does not identify a specific faucet model or part.
- Home MaintenanceU.S. Environmental Protection Agency · EPA WaterSense home-maintenance guidance used for visual inspection around faucet connections and cabinet areas; it does not authorize concealed plumbing work.
- Find Parts and Identify Your ProductDelta Faucet · Official Delta parts guidance used as a manufacturer example of why model identification and leak location matter; it does not establish compatibility with an unspecified faucet.
- Fixture leaks from the end of the spoutMoen Solutions · Official Moen guidance used as a brand-specific example only; the leak mechanism and replacement part may differ on an unspecified faucet.
- MT016BMoen · Official Moen instruction sheet used only for the general pressure-isolation principle and model-specific boundary; it is not a procedure for an unspecified faucet.
Community feedback
Share a repair observation
Share a plain-text repair observation. Accepted observations are published automatically; this page may take a moment to update.