
On this page
Start here
Quick answer
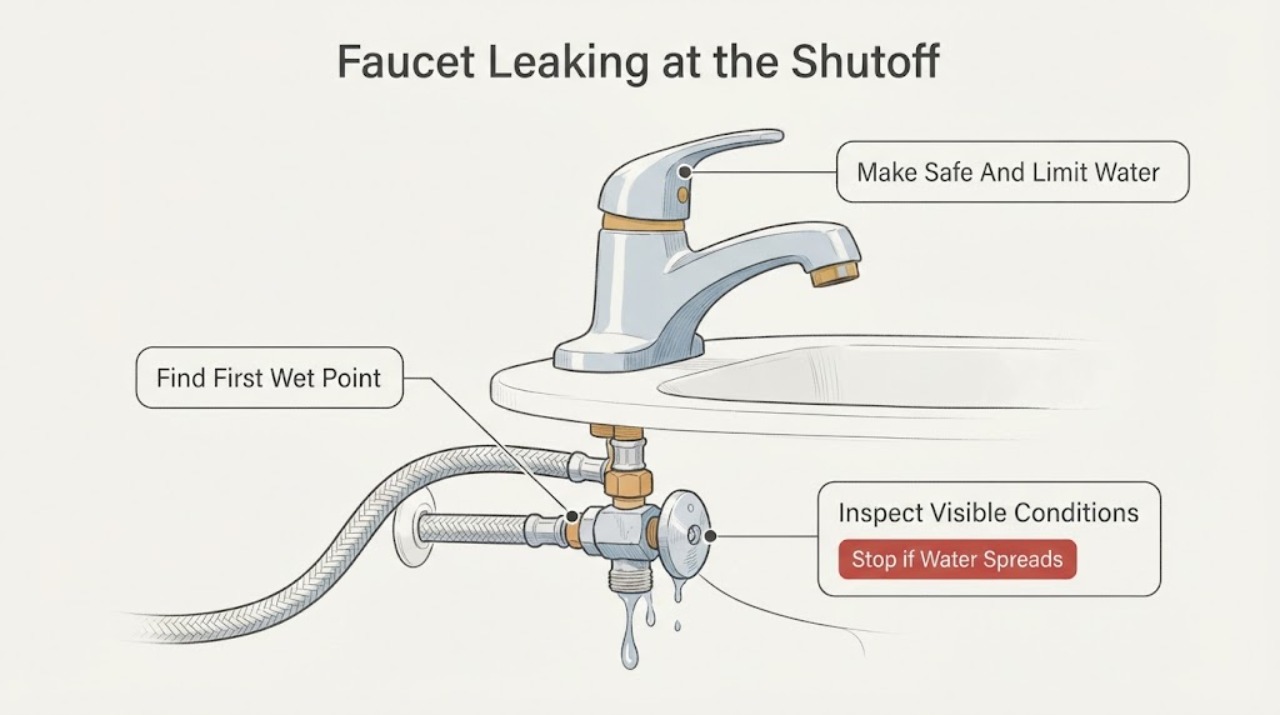
A faucet leak reported at the shutoff valve can actually begin at the valve stem or packing area, the valve body, the compression or threaded connection, the supply hose, or the wall/floor pipe and only run down to the valve. Dry the area, watch for the first new wet point, and note whether the faucet-side shutoff stops the flow. Turn the valve only with gentle, normal hand force; do not force a stuck valve or tighten a leaking connection while it is under pressure. If the valve will not stop the leak, water is entering a wall or ceiling, the cabinet is flooding, or water is near electrical equipment, shut off the house supply only if it is safely accessible and call a plumber or emergency service. Do not remove the valve or guess its size or replacement parts from appearance alone.
Before you begin
Safety first
- This article supports drying, visual source tracing, gentle normal shutoff operation, and safe isolation only. It does not authorize forcing or removing a valve, loosening pressurized fittings, cutting pipe or walls, touching wet electrical equipment, or selecting replacement parts without exact compatibility and pipe assessment.
Work through in order
Diagnostic checks
Use only checks that match the exact appliance or system and its official guide.
-
Check 1
Move people and stored items away from the wet area, place a towel or container to catch drips without reaching through unsafe water, and identify whether water is near an outlet, appliance, light, or other electrical equipment. If there is rapid flow, flooding, or unsafe electrical contact, stop investigating.
Expected result: The leak is a slow, contained drip away from electrical equipment, or water is spreading, hidden in a wall or ceiling, entering a cabinet, or contacting electrical equipment.
Next step: For a serious or electrical-risk leak, close the nearest safe water shutoff or house main without touching wet electrical equipment and call a plumber or emergency service. Otherwise dry the area and locate the first wet point.
Stop if: Do not step into water near energized equipment, touch wet plugs or outlets, remove electrical covers, or continue if water cannot be controlled safely.
Why this matters
Why: A contained drip allows a short visual isolation check. Rapid, hidden, or electrically hazardous water damage can worsen before a fitting repair and needs immediate isolation and professional response.
-
Check 2
With the faucet off, dry the shutoff valve, supply hose, visible connections, cabinet base, and wall or floor opening. Watch for the first fresh drop, then briefly run the faucet from a safe dry position and watch again without placing hands on pressurized joints.
Expected result: The first wet point is at the valve stem or packing area, valve body, compression or threaded connection, supply hose, faucet connection, or wall/floor source; or the source remains unclear.
Next step: Record the location and whether usage changes the rate. Do not tighten or remove a joint yet; proceed to the gentle shutoff observation and use the result to decide whether a plumber is needed.
Stop if: Do not use tissue, tools, or a finger to probe a corroded joint, disturb a pipe entering a wall or floor, or continue if the leak becomes a spray or rapid flow.
Why this matters
Why: The first wet point separates a valve-component leak from a connection, hose, faucet, or upstream pipe leak. Water that appears only when the faucet runs can indicate a pressurized connection or faucet-side path; a continuous drip with the faucet off can be upstream.
-
Check 3
If the local shutoff handle is dry and plainly accessible, turn it in its normal closing direction with gentle hand force only; stop as soon as it resists, feels seized, begins to deform, or the leak changes unexpectedly. Do not use a cheater bar or force a quarter-turn or multi-turn valve.
Expected result: The valve closes normally and the faucet flow stops, the valve closes but the faucet still passes water, the valve will not turn, or the valve itself begins leaking or spraying.
Next step: Leave a successfully isolated valve closed and arrange a repair for the valve or faucet. If it fails to isolate, will not turn, or leaks at the stem/body, use the house main only if safely accessible and call a plumber.
Stop if: Do not force a stuck valve, loosen its packing nut under pressure, remove the handle, or continue turning a valve that is corroded, cracked, spraying, or connected to a moving pipe.
Why this matters
Why: A normal shutoff that stops faucet flow isolates the downstream fixture. Continued flow means the valve may not be sealing or the leak may be upstream; resistance, deformation, or spray makes the valve unsafe to operate further.
-
Check 4
After the local supply is safely isolated, inspect visually whether the first wet point is around the shutoff stem/packing area, the valve body or seam, or the connection where the supply line attaches; do not loosen a packing nut or fitting as a test.
Expected result: Water beads at the stem, emerges from the valve body, appears at a compression/thread connection, or runs down from above the valve.
Next step: Keep the valve isolated and provide the first wet point to a plumber. If the source is above, trace only visually to the hose or faucet without disturbing the joint.
Stop if: Do not tighten blindly, remove a compression nut, apply sealant over an active leak, or open a wall or floor to chase a hidden source.
Why this matters
Why: A stem drip, body failure, connection leak, and water traveling from above are different repair scopes. A body crack or corrosion can worsen if the valve is manipulated, while an apparent connection leak may originate higher on the hose or faucet.
-
Check 5
Inspect the visible supply hose and the point where the pipe enters the wall or floor without bending, twisting, or pulling it. Compare the leak rate with the faucet both on and off, and check nearby cabinet surfaces for a higher fresh wet mark.
Expected result: The hose or its connection wets only when the faucet runs, the valve leaks continuously with the faucet off, or water appears from the wall/floor or a higher hidden path.
Next step: Keep the local valve closed if it isolates the faucet. If the valve does not isolate, shut the house supply from a safe location and call a plumber; report whether the source is concealed or continuous.
Stop if: Do not pull the cabinet, cut drywall, bend the supply line, or disturb a corroded fitting to expose a hidden leak.
Why this matters
Why: A use-dependent hose or connection leak is downstream of the shutoff; a continuous valve leak can be the shutoff itself or upstream; a wall/floor source may involve concealed piping and should not be opened as a casual repair.
-
Check 6
When the local valve has closed normally, open the faucet briefly to release downstream pressure and then close it; observe whether the shutoff valve remains dry and whether water continues to appear. Do this only with a contained, cool-water leak and a dry safe work area.
Expected result: The faucet stops and the valve stays dry, a small amount of residual water drains then stops, or water continues from the valve or hidden source.
Next step: Leave the valve closed and arrange faucet or shutoff repair. If isolation fails, use the house main only when safe and call a plumber promptly.
Stop if: Do not open the valve again to retest repeatedly, disconnect a hose, or proceed if the water is hot, rapidly flowing, or reaching electrical equipment.
Why this matters
Why: A short residual flow can be trapped downstream. Continuing water after isolation indicates a valve that does not seal or a source upstream of it; persistent wetting is not solved by waiting or tightening randomly.
-
Check 7
If the fixture valve cannot be found, will not close, or does not stop the flow, identify the house main shutoff from a dry, safe location and close it only according to the utility or property instructions; do not force a seized meter valve or operate a valve in unsafe flooding.
Expected result: The house supply stops the leak, the main valve is inaccessible or stuck, or water continues despite the attempted safe isolation.
Next step: Keep the area clear, document where water is emerging, and call a plumber or appropriate local emergency water service. Do not reopen the main until the source is repaired or a professional instructs you.
Stop if: Do not force a stuck main or meter valve, enter a flooded electrical area, remove utility covers, or attempt a concealed-pipe repair under pressure.
Why this matters
Why: A working main can limit damage when the local shutoff fails. An inaccessible or stuck main requires a plumber, utility, or emergency responder rather than force; continued flow may be a larger supply or concealed-pipe emergency.
-
Check 8
Prepare a service note with the faucet location, first wet point, whether the leak occurs with the faucet off or on, whether the local valve closes, valve style if obvious, water temperature, photos taken from a dry safe position, and any wall, floor, cabinet, or electrical exposure.
Expected result: The leak path and isolation result are clear, or the first wet point or shutoff status remains uncertain.
Next step: Keep the safest available shutoff closed and call a qualified plumber for any failed isolation, body leak, hidden leak, corrosion, or repeated drip. Provide the note without ordering a guessed part.
Stop if: Do not buy a replacement valve, washer, O-ring, cartridge, or hose based only on appearance; do not open the wall, remove the shutoff, or solder/cut pipe as a first check.
Why this matters
Why: A timed observation and isolation result help a plumber distinguish a stem or packing repair from a valve-body replacement, connection or hose repair, or concealed-pipe response. Unknowns are safer than an assumed valve size or part.
Use your observations
Decision map
Find the observation that best matches what you see, then follow the next safe action.
-
PATH 01Safety boundary
What you see
Water is spraying or rapidly spreading, flooding a cabinet or floor, entering a wall or ceiling, or contacting an outlet, appliance, light, or other electrical equipment.
Do this next
Avoid wet electrical equipment and close the nearest safe water shutoff or house main without entering unsafe water. Leave the area if needed and call a plumber or emergency service.
Why this path and its safety boundary
Why it matters: The damage or shock risk exceeds a contained faucet observation.
Safety stop: Do not step into electrically hazardous water, touch wet plugs or switches, force a valve, or open walls or cabinets to find the pipe.
-
PATH 02Safety boundary
What you see
The fixture shutoff turns normally, the faucet flow stops, and no water continues at the valve or upstream source.
Do this next
Leave the valve closed, label or document it, and arrange a plumber if the valve stem/body or faucet connection leaks. Do not assume the valve is repairable without model, material, and pipe-condition checks.
Why this path and its safety boundary
Why it matters: The downstream faucet or its connection can be repaired without the whole house remaining pressurized, provided the isolated area stays dry and stable.
Safety stop: Stop if the valve begins leaking, the pipe moves, corrosion flakes, or water reappears from a wall or floor.
-
PATH 03Safety boundary
What you see
The local shutoff is stuck, damaged, sprays, will not close, or the faucet still flows after it appears closed.
Do this next
Do not manipulate it further. Close the house main only if safely accessible and arrange prompt plumbing service.
Why this path and its safety boundary
Why it matters: The valve cannot be trusted to isolate the fixture and further force can turn a drip into a larger leak.
Safety stop: Do not force, remove, loosen, or replace the shutoff under pressure, and do not operate a meter valve in a flooded or unsafe area.
-
PATH 04Safety boundary
What you see
The first fresh wet point is at the valve stem or packing area, while the body and upstream pipe remain dry.
Do this next
Keep the valve isolated and have a plumber assess whether the valve can be serviced or must be replaced based on its construction and pipe condition.
Why this path and its safety boundary
Why it matters: The leak is localized to the valve's operating area, but corrosion and pressure make blind tightening or disassembly an avoidable risk.
Safety stop: Do not tighten the packing nut by guesswork, remove the handle, or continue operating a corroded valve.
-
PATH 05Safety boundary
What you see
Water emerges from the shutoff body, seam, compression/thread connection, or visible supply hose rather than the stem.
Do this next
Keep the fixture isolated or use the house main if required, dry the area, photograph the connection, and call a plumber.
Why this path and its safety boundary
Why it matters: A body or connection leak may worsen when disturbed and cannot be safely matched to a replacement by appearance alone.
Safety stop: Do not tighten blindly, disconnect the hose, apply tape over an active pressurized leak, or cut the pipe.
-
PATH 06Safety boundary
What you see
Water continues with the faucet off and local valve closed, or the first wet point is above the valve, at a wall, floor, ceiling, or concealed pipe.
Do this next
Use the house main only when safely accessible, limit water damage, and call a plumber for concealed-pipe diagnosis.
Why this path and its safety boundary
Why it matters: The shutoff may be upstream of the visible collection point or may not be sealing; the apparent faucet leak is not a simple washer or stem repair.
Safety stop: Do not open walls, pull cabinets, force a valve, or re-pressurize the system to reproduce a hidden leak.
Helpful context
Understand the symptom
A wet shutoff valve is not always the leak source
Water can travel along a supply hose, valve body, cabinet surface, or pipe and collect at the lowest point. Portland's public guide begins by watching the leak and distinguishing the handle, stem, and faucet body. For a shutoff-valve problem, use the same principle: dry the area, place a towel below it, and watch for the first fresh drop while the faucet is idle and then while it is briefly used. Do not rely on the lowest wet point alone.
Use the fixture valve only to isolate water
If the local valve turns normally and safely, closing it can stop water to the faucet. If it is stuck, damaged, sprays, or continues to pass water, stop applying force and use the house main only when it is safely reachable. Municipal guidance warns that forcing a valve can cause damage; a plumber should handle a failed shutoff, a hidden leak, or a connection that needs to be disturbed.
Separate a faucet repair from a supply-pipe emergency
A drip at a stem or packing area may be different from water at a compression nut, hose, wall opening, or floor. A leak that continues with the faucet closed or after the local shutoff is closed points upstream or to a failed shutoff. Water in a wall or ceiling, rapid flow, cabinet flooding, or water near an outlet requires isolation and professional help rather than disassembly under pressure.
Safety boundary
Stop conditions
- Stop immediately for rapid flow, flooding, water entering a wall or ceiling, cabinet damage, water near electrical equipment, a spraying or cracked valve, or an inaccessible or failed main shutoff.
- Do not force a stuck shutoff, use a cheater bar, loosen a packing nut or compression fitting under pressure, remove the valve, or disconnect a supply hose as a diagnostic test.
- Do not step into water near energized equipment, touch wet plugs or switches, open electrical covers, or enter an unsafe flooded area.
- Do not cut walls or floors, pull cabinets, bend pipes, solder, or re-pressurize the system to chase a hidden leak.
- Keep the safest available shutoff closed and call a qualified plumber when the valve leaks at the body, fails to isolate, remains stuck, the source is upstream or concealed, or the leak returns after a visual check.
When checks do not resolve it
Need a professional?
Call a qualified plumber when the shutoff valve will not turn normally, does not stop faucet flow, leaks from its body or connection, the first wet point is upstream or concealed, the leak returns after isolation, or any pipe must be disturbed. Use emergency water or plumbing response for rapid flow, flooding, water entering a wall or ceiling, or a failed main shutoff. Keep away from wet electrical equipment and use the house main only when it is safely accessible.
Safety scope: This article supports drying, visual source tracing, gentle normal shutoff operation, and safe isolation only. It does not authorize forcing or removing a valve, loosening pressurized fittings, cutting pipe or walls, touching wet electrical equipment, or selecting replacement parts without exact compatibility and pipe assessment.
Common questions
FAQ
Why is the shutoff valve wet when the faucet is leaking?
Water may be starting at the valve stem, valve body, compression or threaded connection, supply hose, faucet connection, or a higher wall or floor source and running down. Dry the area and watch for the first new wet point rather than diagnosing from the lowest puddle.
Should I tighten a leaking shutoff valve?
Do not tighten blindly. If the valve is stuck, corroded, spraying, or under pressure, forcing or loosening it can worsen the leak. Close it only with gentle normal force if it is plainly operable, then keep it isolated and call a plumber.
What if the shutoff valve will not stop the faucet?
Treat the local valve as failed. Do not force or remove it. If the house main is safely accessible, close it to limit water and call a qualified plumber; use local emergency water service for rapid or uncontrolled flow.
Can I replace the shutoff valve myself?
Not from appearance alone. Valve type, connection, pipe material, corrosion, access, and pressure determine the safe method. Keep the water isolated and have a plumber assess it, especially when the valve body or pipe entering a wall is leaking.
When is a faucet leak an emergency?
Use an emergency plumbing response for rapid flow, flooding, a leak inside a wall or ceiling, a failed main shutoff, or water near electrical equipment. Do not enter electrically hazardous water or touch wet switches, plugs, or outlets.
Read the exact guide
Official sources
- Home MaintenanceU.S. Environmental Protection Agency WaterSense · Official EPA WaterSense home-maintenance guidance for household water leaks.
- Instructions for Turning Off and On WaterCity of Tigard, Oregon · Official municipal water-shutoff guidance; valve style and local utility rules vary.
- Troubleshooting an after-hours leak or burst pipeCity of Jersey Village, Texas · Official municipal emergency leak guide; local valve locations and utility procedures vary.
- Homeowner Technical Training CourseHenrico County, Virginia · Official county homeowner plumbing-training material; actual valve and pipe construction controls repair.
- How to Shut Off Your WaterSeattle Public Utilities · Official utility guidance; customers should follow their own water utility's meter and main-valve rules.
- How to fix a faucet leakCity of Portland, Oregon · Official municipal water-efficiency guide for common faucet leaks; the valve and pipe construction in a specific installation controls the safe repair.
Community feedback
Share a repair observation
Share a plain-text repair observation. Accepted observations are published automatically; this page may take a moment to update.