
On this page
Start here
Quick answer
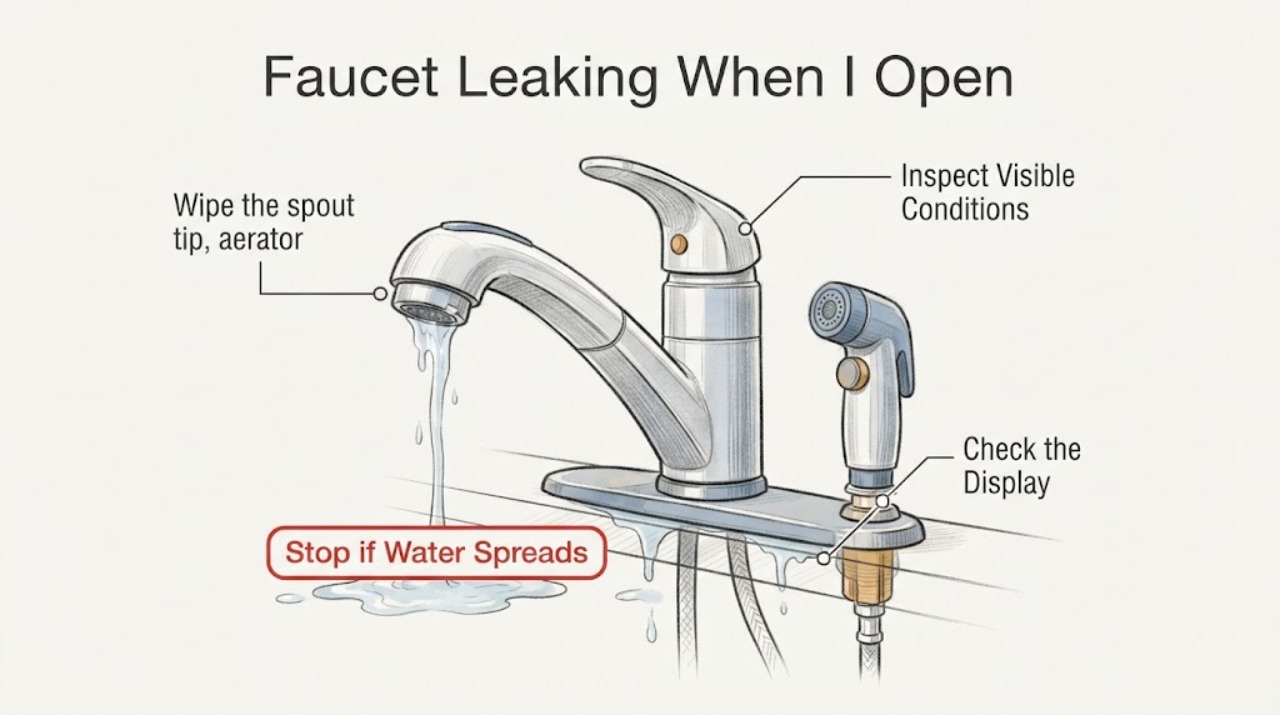
Turn the faucet off, wipe it completely dry, and open it briefly while watching the first place that becomes wet. Water at the outlet tip or aerator points to the outlet or its seal; water around a handle or the base points to a valve, cartridge, or body seal; water under the sink points to a hose, shutoff, or connector. Compare hot and cold operation without touching hot water. If water is rapid, cannot be isolated, reaches an electrical item, or the source is hidden, close the accessible water isolation valve if safe and call a plumber.
Work through in order
Diagnostic checks
Use only checks that match the exact appliance or system and its official guide.
-
Check 1
Turn the faucet off, remove items from the wet area, dry the visible surfaces, and observe from a dry position while opening the faucet for only a brief moment.
Expected result: Record whether water appears only while the handle is open, continues after closing, forms a spray, or becomes a stream. Record whether the amount is slow, steady, or getting faster.
Next step: For rapid flow, an inaccessible handle, or any water near electricity, stop testing and use the accessible water isolation valve only if it turns gently from a dry position; otherwise call a plumber.
Why this matters
Why: A leak that follows opening is pressurized; a drip that continues after closure suggests a valve or cartridge is not sealing. A rapid or growing flow can exceed the faucet handles' ability to isolate it.
-
Check 2
Wipe the spout tip, aerator, handle, deck, faucet base, and visible under-sink connections dry. Place separate dry tissue pieces at each location, then open the faucet and watch which piece becomes wet first.
Expected result: Water at the outlet tip or aerator is different from water rising around the handle or base. Water first appearing at a hose nut, shutoff, or connector under the sink is a separate path even if it later runs toward the cabinet floor.
Next step: Follow the matching branch below and do not tighten or dismantle a connection merely because it is wet; first isolate water if a repair may be needed.
Why this matters
Why: The first wet point identifies the area that needs the next check: outlet, valve/body seal, or supply and mounting connection. A downstream puddle does not prove that the puddle's edge is the source.
-
Check 3
Compare hot and cold operation one at a time using the normal controls, keeping hands away from hot water and stopping if the leak becomes more than a controlled observation.
Expected result: The leak may occur with both temperatures, only hot, only cold, or only when the handle is moved through a particular position. Note whether the water temperature or flow changes when the leak begins.
Next step: Use the result to tell the plumber or to select the relevant manual; do not assume that a universal cartridge or seal will fit without the exact faucet identity.
Why this matters
Why: A single-temperature result narrows the pressurized path to that side of a two-handle faucet or to the corresponding side of a mixing valve. A leak in every position points more toward a shared body, outlet, hose, or mounting path.
-
Check 4
If the outlet tip or aerator is the first wet point, check from outside for scale, a loose screen, a split outlet, or water escaping at a swivel or sprayer joint. Clean only a removable aerator or screen if the faucet instructions allow it and the water is isolated first.
Expected result: A drip from the tip after closing differs from water spraying around the aerator threads or outlet body while open. A leak that changes when the spout or sprayer is moved points to that joint rather than the handle.
Next step: Reassemble only parts covered by the exact manual. If the outlet body is cracked, the leak remains under pressure, or the screen cannot be removed without force, stop and call a plumber.
Why this matters
Why: Scale or a damaged washer can disturb the outlet seal, while a leak at a joint or body may need a seal or fixture service. A tip drip alone does not prove which internal valve design is present.
-
Check 5
If water first appears around the handle, stem area, deck, or faucet base, dry it again and watch whether the moisture rises from the handle or emerges below the mounting surface while the faucet is open.
Expected result: Moisture at the handle or stem that increases with handle movement differs from moisture under the deck. Mineral deposits, a loose-looking trim surface, or water tracking from the spout are useful observations but are not proof of a specific replacement part.
Next step: Use the exact model manual to decide whether a simple external cleaning is permitted. Isolate the water before any disassembly; if the valve is stuck, corroded, or the source is below the deck, use a plumber.
Why this matters
Why: The likely repair class is a valve, cartridge, washer, stem seal, body seal, or mounting seal, depending on the faucet design. A leak below the deck can damage the cabinet even when the top looks nearly dry.
-
Check 6
If the first wet point is under the sink, dry the hose ends, shutoff area, faucet mounting connection, and any visible sprayer hose. Open the faucet briefly while watching from outside the cabinet.
Expected result: Water may first appear at the supply hose end, shutoff, connector, mounting stem, or optional sprayer hose. A connection that is dry with the faucet closed but wets as soon as it opens is under pressure.
Next step: If the local isolation valve turns gently and the area is dry, close it and leave the connection untouched for a plumber. Do not reach into standing water, use tools on a pressurized joint, or tilt the faucet or cabinet.
Why this matters
Why: The faucet body may be sound while a hose, connector seal, shutoff, or mounting connection leaks. Water running down a hose can make a higher connection look dry, so the first wet point matters.
-
Check 7
If the faucet has a pull-out or pull-down sprayer, test the main outlet and sprayer separately only after the outside surfaces are dry and only for a short observation. Watch the hose entry, spray head connection, and diverter area without pulling hard on the hose.
Expected result: Water that appears only while using the sprayer, at the hose entry, or when switching between outlet paths differs from a leak that appears at the main spout in every mode.
Next step: Stop if the hose is damaged, the spray head will not seat, the diverter leaks inside the cabinet, or water approaches an electrical item; isolate water from a dry position and call a plumber.
Why this matters
Why: The optional hose, spray-head seal, diverter, or shared valve path may be involved. These assemblies vary widely, so a generic seal or hose cannot be declared compatible from the symptom alone.
-
Check 8
Write down the faucet type, known brand and model, hot or cold result, operating position, first wet point, flow pattern, and whether the leak continues after closing. Take photos only from a dry, safe position.
Expected result: A repeatable location and condition gives a plumber or the manufacturer manual a usable starting point; an uncertain or changing location suggests hidden water travel or a worsening connection.
Next step: If the source remains uncertain, the leak returns after a permitted external check, or the isolation valve cannot be operated gently, stop using the faucet and schedule plumbing service.
Why this matters
Why: The symptom is ready for a targeted repair decision only when the first wet point and isolation status are known. A replacement part search without that identity risks an incompatible repair.
Use your observations
Decision map
Find the observation that best matches what you see, then follow the next safe action.
-
PATH 01Next step
What you see
Water first appears at the outlet tip or aerator
Do this next
Check for scale, a loose screen, a split outlet, or a joint leak. A continuing drip after closure needs a valve or cartridge assessment; do not infer a part fit without the model manual.
-
PATH 02Next step
What you see
Water first appears around the handle, stem, deck, or faucet base
Do this next
Treat it as a valve, cartridge, stem seal, body seal, or mounting-seal path. Isolate water before any permitted repair and use a plumber for a stuck, corroded, or below-deck source.
-
PATH 03Next step
What you see
Water first appears at a hose, shutoff, connector, or mounting point under the sink
Do this next
Stop the test, keep hands out of pooled water, and close the local isolation valve only from a dry position if it turns gently. Leave the pressurized connection for a plumber.
-
PATH 04Next step
What you see
Only a pull-out or pull-down sprayer path leaks
Do this next
Inspect externally for a hose-entry, spray-head, or diverter path without pulling hard. If the leak is inside the cabinet or changes unpredictably, isolate water and arrange service.
-
PATH 05Next step
What you see
Only hot or only cold operation produces the leak
Do this next
Record the side and handle position, avoid hot surfaces, and use the exact faucet manual or a plumber to identify the side-specific valve or shared mixing path.
-
PATH 06Next step
What you see
The leak is rapid, hidden, near electrical equipment, or cannot be isolated
Do this next
Stop using the faucet. From a dry position isolate the household water only if the valve operates gently; do not force it or touch wet electrical equipment. Call a plumber and follow local electrical safety guidance.
Helpful context
Understand the symptom
Start with a safe, dry observation
A leak that appears when the faucet is opened is a pressurized leak until proven otherwise. Stop using it, move anything that can be damaged by water, and dry the visible surfaces. Do not reach into pooled water near a powered appliance or outlet. The useful finding is the first wet point, not the largest puddle: water can run along the deck or cabinet before it drips.
Use a dry paper towel or cloth to make separate small test areas around the outlet, handle, faucet base, hose connection, and shutoff area. Open the faucet only long enough to observe from a dry position. Keep a note of whether the leak starts with hot water, cold water, the main outlet, or a pull-out sprayer.
What the first wet point usually means
A wet outlet tip can be a normal residual drip after closing, a blocked or scaled aerator, or a valve that is not sealing. A wet handle or deck while water is running is more consistent with a valve, cartridge, stem seal, or body seal. Water under the sink may come from a supply hose, shutoff connection, faucet mounting connection, or an optional sprayer hose. The location and timing are more reliable than guessing a part from the faucet shape.
When a plumber should take over
Do not force a stuck isolation valve, loosen a pressurized connection, remove a faucet valve, or keep testing a fast leak. If the leak is inside the cabinet, behind a wall, at the supply line, or near electrical equipment, isolate the water only from a safe dry position and arrange plumbing service.
Safety boundary
Stop conditions
- Stop immediately for a rapid stream, a leak that reaches the floor or a wall cavity, or water that cannot be contained.
- Do not touch powered outlets, appliances, plugs, or wiring from a wet area. Keep clear and use qualified help for the electrical hazard.
- Do not force a stuck isolation valve, loosen a pressurized connector, tilt the cabinet, or continue testing a hidden leak.
- Stop if the faucet body, glass-like trim, hose, or shutoff shows cracking, corrosion, movement, or visible damage.
Only after diagnosis
Potential parts
- faucet cartridge or valve insert
A continuing outlet drip or a leak that changes with handle position can involve the internal valve, but faucet designs differ.
Confirm the exact brand and model in the manufacturer manual or have a plumber identify it before sourcing a part. - handle, stem, or body seal
Moisture around a handle, stem, deck, or base can come from a seal or mounting surface rather than the outlet.
Do not treat a generic seal as compatible without the faucet identity and an isolated water supply. - supply hose or connector seal
Water first appearing under the sink at a hose end or connector points to this repair class.
Connection type, length, and local plumbing requirements must be confirmed before replacement. - sprayer hose, spray-head seal, or diverter seal
A leak limited to an optional sprayer or mode change can involve its hose, spray head, diverter, or shared valve.
Use only the exact model instructions; many faucets use different hose and diverter arrangements.
When checks do not resolve it
Need a professional?
Call a plumber when the first wet point is under the sink, at a supply or shutoff connection, below the deck, inside a wall, or remains uncertain after a safe external observation. Arrange prompt service for a rapid leak, a valve that will not isolate water, recurring moisture, or any leak near electrical equipment.
Common questions
FAQ
Why does the faucet leak only when I open it?
Opening the faucet puts pressure through the valve, body, outlet, hose, and supply connections. Dry each area and watch the first wet point to separate those paths.
Is a drip from the tip the same as a leak under the sink?
No. A tip drip may involve the outlet or a valve that does not seal, while water under the sink may come from a supply hose, shutoff, connector, mounting point, or optional sprayer path.
Can I tighten the wet connection under the sink?
Do not tighten a pressurized or corroded connection as a first response. Isolate water from a dry position if the valve turns gently and have a plumber handle a persistent or inaccessible connection.
Should I replace a cartridge or seal now?
Only after the faucet identity and first wet point are confirmed. Cartridge, stem, body, mounting, hose, and diverter arrangements vary, so the exact manual or a plumber should establish fit.
What if water is near an outlet or powered appliance?
Stop the faucet test and keep away from wet electrical equipment. From a dry position isolate water if safe, and use qualified plumbing and electrical help as needed.
Read the exact guide
Official sources
- Fix a Leak WeekU.S. Environmental Protection Agency WaterSense · household faucet leak detection, faucet gaskets, worn washers, aerators, and water isolation before repair
- Home MaintenanceU.S. Environmental Protection Agency WaterSense · routine faucet inspection under sinks, pipe connections, puddling, water spots, scale, and aerator maintenance
- How to Stop a Dripping TapWaterSafe Register · tap leak causes, washers, single-lever cartridges, limescale, water isolation, and plumber escalation
- What should I do if a pipe bursts?WaterSafe Register · urgent water isolation, water near electrical equipment, drying, and qualified plumber escalation
- What should I do if I find a leak in or around my home or business?WaterSafe Register · home water leak isolation, stop tap location, non-forcing boundary, and plumber escalation
Community feedback
Share a repair observation
Share a plain-text repair observation. Accepted observations are published automatically; this page may take a moment to update.