
On this page
Start here
Quick answer
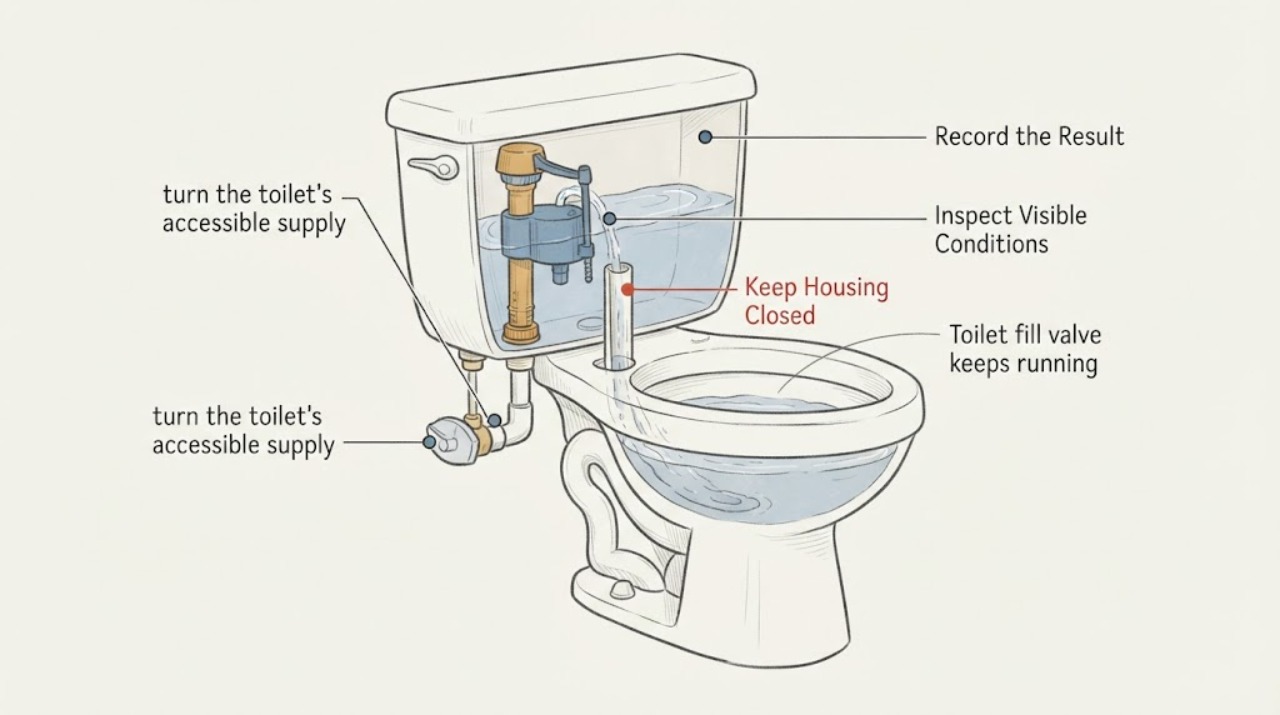
A Glacier Bay toilet that keeps running is not always a failed fill valve. Remove the tank lid and compare the water with the marked waterline on the flush-valve overflow tube. If water is above the line or entering the overflow, lower the fill-valve float only as the exact model instructions allow. If the water is at the line, close the supply valve for 30 minutes: a falling tank level points to the flapper or flush-valve seal, while a stable level with continued valve noise points more toward debris or a fill valve that is not closing. The manufacturer procedures cited here are model-specific (single-flush 340-995/686-826 and dual-flush 215-583), so use the manual for another Glacier Bay design. Shut off the supply before an uncontrolled overflow, and stop for leaks at the floor, a rocking base, sewage, a seized fitting, or work that requires internal or unfamiliar disassembly.
Before you begin
Safety first
- A qualified plumber should diagnose a failed shutoff, concealed supply or drain leak, cracked ceramic, flush-valve assembly, recurring seal failure, or any repair that requires force, unfamiliar disassembly, or work beyond accessible tank components.
Work through in order
Diagnostic checks
Use only checks that match the exact appliance or system and its official guide.
-
Check 1
If water is rising uncontrollably, turn the toilet's accessible supply valve clockwise until the flow stops, keep towels away from electrical equipment, and do not keep flushing while the tank or floor is overflowing.
Expected result: The local valve stops the flow, does not turn, leaks at the connection, or water has already reached the floor, wall, or electrical equipment.
Next step: If the supply cannot be safely stopped or water is reaching building materials or electrical equipment, leave the supply off if safe and arrange plumbing service. Otherwise continue with the tank-lid checks.
Why this matters
Why: A controllable toilet allows a visual diagnosis; a seized or leaking shutoff or uncontrolled water creates a water-damage and service risk.
-
Check 2
Remove the tank lid and compare the resting water level with the marked line on the flush-valve overflow tube; look for a visible stream entering the tube.
Expected result: The level is above the mark and water enters the overflow, the level is at the mark, or the level is below the mark with the valve still running.
Next step: For an above-line level, use the exact model's float adjustment. For a level at or below the line, close the supply and perform the 30-minute level test before replacing parts.
Why this matters
Why: Above-line water supports overfill or a fill valve set too high. A level at the line requires a leak-versus-valve test. A low level with continued running can reflect a tank leak or a valve that cannot reach shutoff.
-
Check 3
For the specified single-flush Glacier Bay models, lower the float cup with the fill-valve adjustment rod as directed, then refill and observe whether the valve shuts at the marked line.
Expected result: The valve stops at the line, still fills above the line, or the adjustment rod, float, or valve layout does not match the cited model procedure.
Next step: Repeat only the model-approved small adjustment if needed. If it still overfills, or the model is not 340-995/686-826, stop using this procedure and follow the exact manual or arrange service.
Why this matters
Why: Stopping at the line supports an incorrect float setting as the cause. Continued overfill or a different valve layout means adjustment alone has not established a safe repair.
-
Check 4
When the water is at the line, close the supply valve, mark or remember the tank level, and wait 30 minutes without flushing.
Expected result: The tank level drops, or it remains at the same level while the supply is off.
Next step: If the level drops, inspect the flapper and chain slack or use the specified food-coloring bowl test for an existing installation. If stable, reopen the supply and proceed to the exact-model fill-valve inspection.
Why this matters
Why: A drop means water is escaping through the flapper or flush-valve seal. A stable level makes a tank-to-bowl leak less likely and supports a fill-valve shutoff or debris issue when the supply is reopened.
-
Check 5
If the 30-minute level stays stable and the toilet is one of the specified single-flush models, shut the supply off, unlock the fill-valve cap as directed, check for loose debris, and briefly flush with a plastic cup over the valve to limit spray before reassembling.
Expected result: Debris is present and the valve shuts after cleaning, no debris is visible, or the cap will not unlock smoothly or the valve remains running.
Next step: Turn the supply off before locking the cap back in place and retest. If the issue persists, the model procedure points toward fill-valve replacement or service; do not force the cap or generalize this step to another model.
Why this matters
Why: Debris can prevent the fill valve from opening or closing properly. No improvement, a seized cap, or damage means cleaning has not proven a safe repair.
-
Check 6
For a dual-flush 215-583, check the flush-valve washer and seal only through the model-specific procedure, with the water off; for any model, reopen the supply slowly and inspect the bowl, overflow, supply connection, floor, and base through a full refill.
Expected result: The dual-flush seal is bubbled or warped, the valve shuts cleanly with no bowl flow or floor leak, or running or leakage returns.
Next step: Replace or service a damaged assembly only with exact model instructions. If running returns, the base leaks or rocks, or water appears outside the tank, shut the supply off if safe and arrange service.
Why this matters
Why: A damaged dual-flush seal can require the complete flush-valve assembly, while a clean stable retest supports a resolved adjustment or debris issue. Recurrence or external leakage needs a broader diagnosis.
Use your observations
Decision map
Find the observation that best matches what you see, then follow the next safe action.
-
PATH 01Next step
What you see
The tank is above the marked line and water is visibly entering the overflow tube.
Do this next
Use the exact model's float adjustment and retest at the line. If it still overfills, stop the supply and arrange service or model-specific replacement.
Why this path and its safety boundary
Why it matters: Overfill or a fill valve set too high is more likely than a bowl-side flapper leak.
-
PATH 02Next step
What you see
The tank starts at the line but drops during the 30-minute supply-off test.
Do this next
Check that the flapper closes fully and its chain has slack; for an existing installation use the specified color-in-tank/bowl test. Escalate if the seal or flush valve is damaged.
Why this path and its safety boundary
Why it matters: A flapper, chain position, or flush-valve seal leak is more likely; the fill valve is refilling to replace lost water.
-
PATH 03Next step
What you see
The level stays stable with the supply off, but the fill valve keeps running after the supply is reopened.
Do this next
Use the debris procedure only for the cited single-flush models. If cleaning does not restore shutoff, use the exact replacement procedure or arrange service.
Why this path and its safety boundary
Why it matters: A fill-valve obstruction or failed shutoff is more likely than a tank-to-bowl leak.
-
PATH 04Next step
What you see
The toilet is dual-flush model 215-583 and the flush-valve seal is bubbled, warped, or obstructed.
Do this next
Follow the 215-583 procedure only; a warped or bubbled seal calls for complete flush-valve assembly service or replacement with exact model guidance.
Why this path and its safety boundary
Why it matters: The dual-flush valve washer or seal may be preventing a proper close; this is a different assembly from the cited single-flush fill-valve procedure.
-
PATH 05Next step
What you see
The supply cannot be stopped, water reaches the floor or wall, the toilet base rocks, the tank or bowl is cracked, sewage backs up, or the repair requires unfamiliar disassembly.
Do this next
Stop using the toilet, isolate the supply if safe, and arrange a qualified plumber. Provide the model number, tank-level result, supply-off result, and where water was observed.
Why this path and its safety boundary
Why it matters: The fault may involve a shutoff, tank or bowl, drain, seal, or building plumbing rather than a simple fill-valve adjustment, and continued testing can worsen damage.
Helpful context
Understand the symptom
First find where the water is going
Lift the tank lid without reaching into moving parts. A thin stream into the overflow tube means the tank is overfilled or the fill valve is shutting off too high. A tank that reaches its line but slowly empties into the bowl makes the fill valve refill repeatedly; that pattern shifts attention to the flapper or flush valve. A stable tank with a valve that continues hissing is a different branch, often a fill-valve adjustment or debris issue.
Use the marked waterline as the first diagnostic
The waterline is marked on the flush-valve overflow tube in the Globe Union instructions for the specified Glacier Bay single- and dual-flush models. Water above that mark can run into the overflow and keep the fill valve operating. Adjust only the accessible float or adjustment screw described by the exact model; do not assume the same screw direction or valve layout on another Glacier Bay toilet.
Separate a tank leak from a fill-valve problem
When the water is at the line, close the toilet's supply valve and wait 30 minutes. A lower tank level means water is escaping past the flapper or flush-valve seal. On an existing installation, a small amount of food coloring in the tank followed by a 15-minute bowl check can help reveal that leak; keep the dye out of the tank if the exact model instructions prohibit it. If the level stays put but the valve still runs, debris may be interfering with the fill valve's shutoff.
Model-specific cleaning has a stop point
Globe Union's debris procedure for the cited single-flush models starts with the supply off, raises the float cup, unlocks the cap, and checks for debris; a cup held over the valve can limit spray during a brief flush. Reassemble only when the cap and valve are familiar and undamaged. The dual-flush 215-583 has a different flush-valve assembly and seal check. Do not substitute one procedure for the other or force a cap, button rod, or valve housing.
Retest for both water waste and damage
After an allowed adjustment or cleaning, open the supply slowly and watch the tank, overflow tube, bowl, shutoff connection, floor, and toilet base through a complete refill. The valve should stop at the marked line and the bowl should not continue receiving water. A recurring run, floor leak, rocking base, cracked tank, or water that cannot be controlled is a service boundary rather than a reason to keep cycling the handle.
Safety boundary
Stop conditions
- Stop and arrange plumbing service if the local supply valve will not shut off, leaks while being operated, or the toilet cannot be prevented from overflowing.
- Stop if water reaches the floor, wall, ceiling below, electrical equipment, or the toilet base rocks; do not keep flushing to test it.
- Do not force a fill-valve cap, float, flush-valve housing, push-button rod, or seized fitting, and do not apply chemical drain or tank cleaners to solve a running toilet.
- Do not use the cited Globe Union cleaning or adjustment steps when the Glacier Bay model or valve layout does not match; use the exact manual or a professional instead.
- Arrange service when the tank level remains stable but the valve still runs after the exact-model debris check, or when a recurring flapper, flush-valve, seal, or supply leak is suspected.
Only after diagnosis
Potential parts
- toilet fill valve
Consider this only when the tank level remains stable with the supply off, the exact-model debris check does not restore shutoff, and the valve still runs after correct adjustment.
Match the exact Glacier Bay model, valve height, connection, refill-tube arrangement, and installation instructions; do not infer fit from a similar-looking valve. - toilet flapper or flush-valve seal
Consider this only when the tank level drops with the supply off or the specified bowl color test indicates water is passing the flapper or flush-valve seal.
Some Glacier Bay assemblies use a model-specific flush valve rather than a separately replaceable flapper; verify the exact model before selecting a part. - dual-flush flush-valve assembly
Consider this only for the specified dual-flush 215-583 procedure when the washer or seal is obstructed, bubbled, or warped and cleaning does not restore a proper close.
Match the exact dual-flush model, button alignment, seal design, and housing before replacement; do not substitute a single-flush component.
When checks do not resolve it
Need a professional?
Call a plumber for an uncontrollable or external leak, a seized or leaking shutoff, a rocking or cracked toilet, sewage or drain-backup symptoms, an unknown valve design, or a running condition that returns after the model-approved checks.
Safety scope: A qualified plumber should diagnose a failed shutoff, concealed supply or drain leak, cracked ceramic, flush-valve assembly, recurring seal failure, or any repair that requires force, unfamiliar disassembly, or work beyond accessible tank components.
Common questions
FAQ
Why does my Glacier Bay toilet keep running even though the tank looks full?
Check whether the water is above the marked line or whether the tank level falls when the supply is closed. Above-line water can enter the overflow; a falling level points more toward a flapper or flush-valve seal leak, while a stable level with continued running points toward the fill valve or debris.
How long should I wait with the toilet supply turned off?
For the specified Glacier Bay single-flush models, Globe Union directs a 30-minute supply-off observation. A drop in level supports a tank-to-bowl leak; a stable level supports a different fill-valve branch.
Can I clean debris from a Glacier Bay fill valve?
Only when the valve and model match the manufacturer's procedure. For the cited single-flush models, the supply is turned off before the cap is unlocked and debris is checked; a plastic cup can limit spray during a brief flush. Stop if the cap is seized, the parts are unfamiliar, or the problem persists.
Is a dual-flush Glacier Bay toilet repaired the same way?
No. Globe Union gives a separate procedure for dual-flush model 215-583, including checking the dual-flush valve washer and seal. A bubbled or warped seal may require the complete flush-valve assembly, so do not use a single-flush procedure by assumption.
When should I stop troubleshooting a running toilet?
Stop for an uncontrollable or external leak, a seized shutoff, a rocking or cracked toilet, sewage or drain-backup symptoms, unfamiliar disassembly, or a recurrence after the exact-model checks. Isolate the water if safe and arrange plumbing service.
Read the exact guide
Official sources
- What should I do if the water continuously runs or ghost flushes for my Single Flush Glacier Bay Made in Mexico Toilets 340-995 or 686-826?Globe Union · Exact models 340-995 and 686-826 only; other Glacier Bay toilets may use different valves and procedures
- Troubleshooting, Help and SupportNiagara Conservation Corporation · The page lists model families and topics; exact videos and procedures vary by model
- What should I do if my Glacier Bay Made in Mexico Dual Flush Toilet 215-583 is having a flushing performance issue?Globe Union · Exact model 215-583 only; the flush-valve and button arrangement differs from other toilets
Community feedback
Share a repair observation
Share a plain-text repair observation. Accepted observations are published automatically; this page may take a moment to update.