
On this page
Start here
Quick answer
Start by locating exactly where the Kohler faucet drips and whether it stops shortly after the handle closes. A few drips from the spout for a minute or two can be water draining through an aerator; a drip that continues all day after shutoff points more toward a worn or contaminated valve or cartridge. Water under a handle while the faucet is on points toward seals or O-rings, while water at the base of a swiveling spout points toward body seals, O-rings, bearings, or—on some models—a check valve or spacer. Dry the area, close the faucet's water supplies before any inspection, identify the exact model, and use Kohler's model-specific parts diagram. Do not keep using a faucet that sprays, leaks into a cabinet or wall, or cannot be isolated; arrange plumbing service if the leak persists after the external checks or if access to the shutoff or cartridge is uncertain.
Before you begin
Safety first
- This article covers drying and locating the leak, closing working local supplies, identifying the exact Kohler model, cleaning an accessible aerator, and observing for leaks from a safe position. Do not work on pressurized fittings, force seized parts, disassemble the faucet body, or work near energized electrical equipment and water.
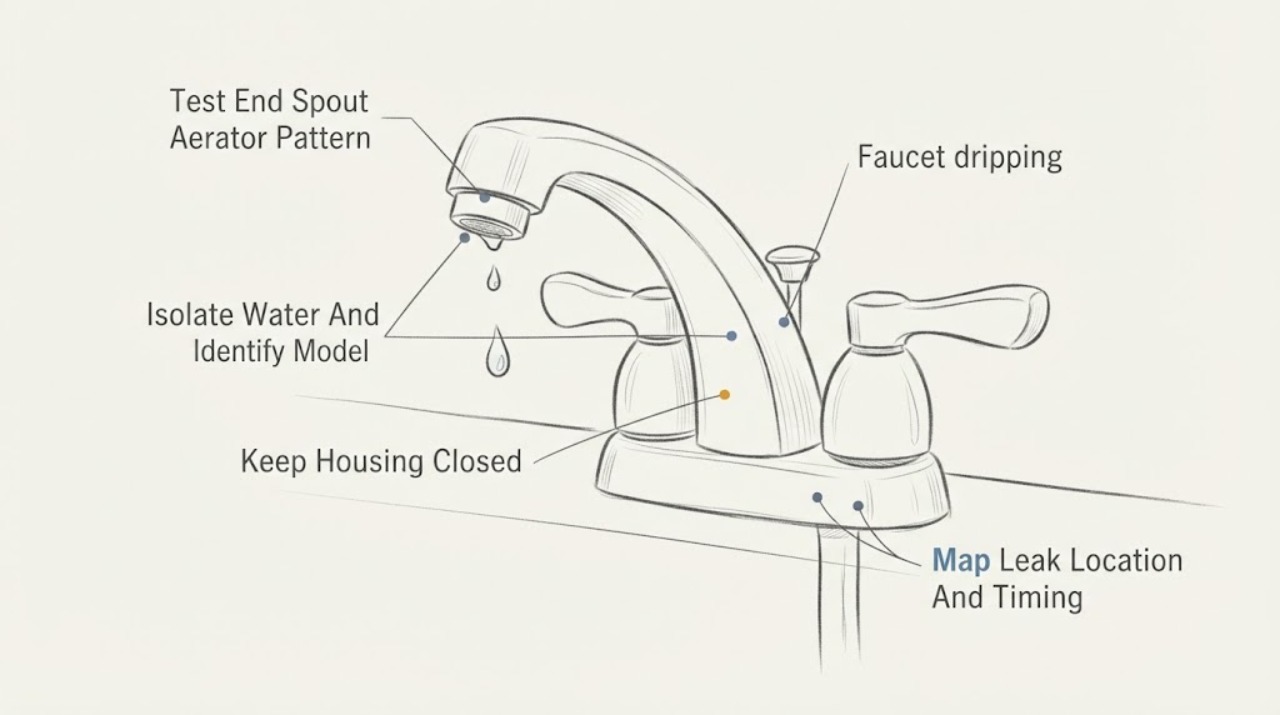
Work through in order
Diagnostic checks
Use only checks that match the exact appliance or system and its official guide.
-
Check 1
Dry the Kohler faucet and surrounding counter, open and close the handle once, then observe whether the first water appears at the spout tip, under the handle, around the spout base, at a supply connection, or below the counter; time how long an end-of-spout drip continues.
Expected result: Record the exact wet point, whether water appears only while flowing or also after shutoff, and whether the spout tip stops after a short residual drip or continues steadily.
Next step: Use the matching location branch below and identify the faucet model before selecting a repair part; if water is reaching the cabinet, wall, or electrical equipment, isolate the supplies and arrange plumbing service.
Stop if: Do not remove a handle, cartridge, hose, or fitting while the faucet remains pressurized.
Why this matters
Why: A short spout drip can be aerator debris or residual water. A continuous spout drip after shutoff makes the valve or cartridge more likely. Under-handle leakage points toward seals or O-rings or the cartridge, while base leakage points toward body seals, O-rings, bearings, or a model-dependent check valve/spacer.
-
Check 2
Close the hot and cold supply stops serving the faucet, confirm that flow has stopped, and record the Kohler model marking from the faucet, packaging, installation literature, or product record before opening any faucet part.
Expected result: Note whether each stop closes fully, whether water continues to flow or seep under pressure, and whether the model marking is complete and readable.
Next step: Keep the faucet isolated and arrange plumbing service if a stop will not close or the model cannot be identified; otherwise use the exact Kohler model's parts diagram and instructions for the next check.
Stop if: Do not force a seized supply stop, loosen a pressurized connection, or rely on a generic cartridge procedure.
Why this matters
Why: A supply stop that will not isolate the faucet makes cartridge or seal work unsafe and can turn a small drip into uncontrolled water. An incomplete model identity prevents reliable selection of a Kohler valve, cartridge, seal, bearing, or check-valve part.
-
Check 3
If the drip is only from the end of the spout and the local supplies are isolated, inspect the aerator at the spout tip for visible mineral or debris buildup and clean or soak it only as the Kohler model guidance permits before reinstalling it.
Expected result: Record whether the drip lasted only briefly after shutoff, whether the aerator contained debris, and whether the faucet remains continuously wet at the spout after cleaning.
Next step: If the aerator check does not stop a continuous drip, leave the water isolated and use the exact model's valve/cartridge diagnosis or arrange plumbing service; do not keep flushing the faucet to hide the leak.
Stop if: Do not force a seized aerator, scratch the finish with tools, or open the valve body while the supplies are pressurized.
Why this matters
Why: Kohler treats a brief post-shutoff drip as consistent with debris in the aerator. A continuous leak that remains after the aerator is clear is more consistent with the valve or cartridge beneath the handle.
-
Check 4
With the supplies still closed, dry the faucet and inspect the handle joint, spout base, escutcheon or countertop, and any visible weep opening; reopen the supplies only for a brief visual observation if the area is dry and safe, then close them again.
Expected result: Note whether water appears under the handle only while the faucet is running, from the handle area while off, at the spout base during movement, or from a body weep opening or supply connection.
Next step: Photograph the wet location and use the model-specific Kohler troubleshooting path; arrange service when the leak is at a concealed connection, a weep opening, or a part that requires handle or body disassembly.
Stop if: Do not probe a weep hole, tighten body hardware, or disassemble the faucet as a substitute for identifying the leak path.
Why this matters
Why: Kohler associates under-handle leakage during operation with seals or O-rings, and leakage while off with a valve/cartridge or model-dependent spacer/check valve. Base-of-spout leakage can involve seals, O-rings, or bearings during use, while continuous leakage can involve the valve/cartridge or check valve/spacer.
-
Check 5
Inspect accessible supply hoses, stop valves, mounting area, cabinet floor, and the underside of the countertop for fresh moisture or a spray path while keeping hands clear of pressurized joints.
Expected result: Record a leak at a supply hose or stop, water tracking from the faucet body into the cabinet, dampness that appears only when the handle is moved, or no moisture below the counter.
Next step: Leave the local supplies closed for any active or concealed leak and arrange plumbing service; if the connections stay dry, continue with the model-specific faucet component diagnosis.
Stop if: Do not loosen supply nuts, remove the faucet from the counter, or work where water can contact electrical equipment without professional guidance.
Why this matters
Why: A supply or mounting leak is not diagnosed by replacing the cartridge, and a hidden body leak can damage the cabinet even when the spout drip looks small. No below-counter moisture makes an end-of-spout, handle, or spout-base path more likely but does not prove its cause.
-
Check 6
After an exact model-specific seal, valve, cartridge, aerator, or check-valve procedure has been completed—or after a technician's repair—open the supplies slowly and observe the faucet from above and below the counter through a full on/off cycle.
Expected result: Check whether the spout, handle, spout base, supply connections, and cabinet remain dry after shutoff and whether the original drip returns continuously or only briefly.
Next step: Close the supplies again for any continuing leak and provide the model, part category, leak location, and verification result to a plumber or Kohler service technician rather than substituting another part.
Stop if: Stop immediately for spray, flooding, a supply stop that will not close, or water near electrical equipment.
Why this matters
Why: A dry faucet after shutoff supports that the identified leak path was corrected. A continuing drip, a new base leak, or moisture under the counter means the part, seal, model fit, or another leak path remains unresolved.
Use your observations
Decision map
Find the observation that best matches what you see, then follow the next safe action.
-
PATH 01Safety boundary
What you see
Water appears only at the spout tip and stops after a short residual period, with no handle, base, or below-counter moisture.
Do this next
Clean or soak the aerator according to the exact Kohler guidance, rinse it, reinstall it without damaging the finish, and recheck the timing of the drip.
Why this path and its safety boundary
Why it matters: Kohler's temporary end-of-spout pattern makes aerator debris or water retained in the spout more likely than a continuously open valve.
Safety stop: Arrange service if the drip becomes continuous, the aerator is seized or damaged, or water appears anywhere other than the spout tip.
-
PATH 02Safety boundary
What you see
The spout continues dripping for a long period after the handle is off and cleaning the aerator does not change the flow.
Do this next
Keep the supplies closed when unattended, identify the model, and use its parts diagram or arrange a plumber/technician to confirm the valve or cartridge before replacement.
Why this path and its safety boundary
Why it matters: A worn or contaminated valve/cartridge beneath the handle is more likely than an aerator-only issue; the correct replacement varies by Kohler model.
Safety stop: Do not remove the handle or cartridge while pressurized or force a corroded retaining nut.
-
PATH 03Safety boundary
What you see
Water appears under the handle or around the spout base, especially while operating the faucet, while the spout tip is not the first wet point.
Do this next
Keep the area dry, photograph the leak path, and use the exact Kohler model guidance or professional service for seal, cartridge, bearing, or check-valve diagnosis.
Why this path and its safety boundary
Why it matters: Seals, O-rings, body bearings, a valve/cartridge, or a model-dependent check valve/spacer are more likely than an aerator problem; location and whether the handle is on or off narrow the path.
Safety stop: Do not tighten the handle or spout indiscriminately, probe a weep opening, or use sealant to mask an internal leak.
-
PATH 04Safety boundary
What you see
Water appears at a supply hose, stop valve, faucet mounting area, cabinet floor, wall opening, or concealed path rather than at the spout or handle.
Do this next
Close the local supply stops if they work, protect the area, and arrange prompt plumbing service to isolate and repair the connection; use the main shutoff only if the local stops cannot control the leak and it is safe to do so.
Why this path and its safety boundary
Why it matters: The faucet's supply, mounting, body, or plumbing connection is more likely than a cartridge-only end-of-spout problem, and continued water can cause cabinet or wall damage.
Safety stop: Do not loosen a pressurized connection, remove the faucet, or work near energized electrical equipment or water inside a wall.
-
PATH 05Safety boundary
What you see
The exact model part was cleaned or replaced, but the drip returns, a second location becomes wet, or the faucet still leaks after reassembly.
Do this next
Close the supplies, stop further disassembly, and have a qualified plumber or Kohler service technician inspect the model and leak path with the part and verification history.
Why this path and its safety boundary
Why it matters: The original diagnosis may have been incomplete, the model-specific seal or cartridge may not be seated correctly, or another body, check-valve, supply, or plumbing path may be involved.
Safety stop: Do not stack replacement parts, use generic sealant, or leave the faucet pressurized while it leaks.
Helpful context
Understand the symptom
The drip location changes the diagnosis
A Kohler faucet dripping from the end of the spout is a different problem from water under the handle, around a swivel base, or at a supply connection. Wipe the faucet dry, close the handle, and watch the first place that becomes wet. Also time the drip: a short residual drip and a continuous drip carry different meanings in Kohler's guidance. Do not assume a cartridge is at fault until the leak location and timing fit that pattern.
Model identity matters for Kohler parts
Kohler faucets share visual features but do not share one universal cartridge, seal kit, or check-valve assembly. Find the model marking on the faucet, packaging, installation literature, or product record, then use the model's parts diagram. The service-part catalog is useful for locating the correct category, but it does not make a similarly shaped part compatible.
Keep cabinet and wall damage from growing
A slow drip can wet the countertop, cabinet floor, escutcheon, or wall opening. Place a container or towel under the leak after the water is isolated, check accessible supply connections for fresh moisture without tightening blindly, and leave the local supplies closed if the leak continues. A leak that reaches electrical equipment, cannot be isolated, or appears inside a wall needs prompt plumbing service.
Safety boundary
Stop conditions
- Close the faucet's local supplies and arrange prompt plumbing service for a leak under the counter, inside a wall, near electrical equipment, or from a supply connection that will not isolate.
- Do not loosen a cartridge, hose, nut, or body fitting while the faucet is pressurized; do not force seized parts or use sealant to conceal an internal leak.
- Do not choose a Kohler cartridge, valve, seal, bearing, or check-valve assembly by appearance alone. Identify the exact faucet model and use its model-specific parts diagram.
- Stop immediately for spray, flooding, structural damage, or water near energized electrical equipment; use the main water shutoff only when the local supply stops cannot control the leak and it is safe to access.
Only after diagnosis
Potential parts
- Kohler faucet valve or cartridge
Consider this class only when a continuous end-of-spout drip or leakage while the faucet is off matches Kohler's valve/cartridge pattern and the exact model diagnosis confirms it.
Match the exact Kohler model and handle/faucet family using the model-specific parts diagram; part numbers vary by model. - Kohler faucet seals or O-rings
Consider this class only when water is confirmed under the handle while running or at the spout base and the exact model diagnosis identifies a seal or O-ring path.
Confirm the exact model, location, material, and finish requirements; do not substitute a generic seal for a model-specific part. - Kohler faucet check valve or spacer assembly
Consider this class only when the exact Kohler faucet model supports it and a technician or model-specific troubleshooting path connects persistent leakage to that assembly.
Check the exact faucet model and body arrangement before ordering; this assembly is not universal across Kohler faucets. - Kohler faucet aerator
Consider this class only when the drip is limited to the spout tip, the aerator is damaged or cannot be cleaned, and the exact model identifies the correct aerator.
Match the exact spout, thread, flow, and finish requirements from the Kohler model information; do not force a similar-looking aerator.
When checks do not resolve it
Need a professional?
Arrange plumbing service when the local supply stops will not close, water is entering a cabinet or wall, the leak is at a concealed connection, the faucet sprays or floods, the model cannot be identified, or a continuous drip remains after the model-specific aerator and valve/cartridge checks. A leak under the handle or at the spout base may require seal, O-ring, bearing, check-valve, spacer, or cartridge work that should be diagnosed before a part is ordered.
Safety scope: This article covers drying and locating the leak, closing working local supplies, identifying the exact Kohler model, cleaning an accessible aerator, and observing for leaks from a safe position. Do not work on pressurized fittings, force seized parts, disassemble the faucet body, or work near energized electrical equipment and water.
Common questions
FAQ
Why does my Kohler faucet drip for a minute after I turn it off?
Kohler treats a brief end-of-spout drip as potentially caused by water retained in or debris within the aerator. Clean the accessible aerator according to the exact model guidance and see whether the drip remains brief. A leak that continues all day points toward the valve or cartridge instead.
Why is my Kohler faucet leaking under the handle?
If water appears under the handle while the faucet is running, Kohler points to seals or O-rings. If it leaks there while off, the valve or cartridge—or, on some models, a spacer/check-valve assembly—is more likely. Identify the model before selecting a part and isolate the supplies before any repair.
What causes a Kohler faucet to leak at the spout base?
A base leak can involve body seals, O-rings, or bearings during use, or a valve/cartridge or check valve/spacer when the leak continues after shutoff. The faucet model and whether the leak appears only while running determine the next diagnosis; a concealed or persistent leak is a service issue.
How do I choose the replacement cartridge for a Kohler faucet?
Do not choose by appearance. Find the exact Kohler faucet model, open that model's interactive parts diagram, and verify the valve or cartridge category. If the model cannot be identified or the supply stops will not isolate the faucet, arrange plumbing service.
Read the exact guide
Official sources
- Leaking from End of Spout | Kitchen Faucets | Kohler AssistKohler Assist · Kohler kitchen faucets; exact faucet model controls aerator, valve, cartridge, and service-part selection.
- Replace the Valve in a Single Handle Faucet | Kitchen Faucets | Kohler AssistKohler Assist · Kohler K-10412 Forte example only; the guide is not a universal procedure for all Kohler faucets.
- Leaking at Base of Faucet Spout | Kitchen Faucets | Kohler AssistKohler Assist · Kohler kitchen faucets; two-handle, remote-handle, and sidespray configurations can require different parts.
- KOHLER® Genuine Service PartsKohler · Kohler service-parts support page; identify the exact faucet before selecting any part.
- Leaking Under the Handle | Kitchen Faucets | Kohler AssistKohler Assist · Kohler kitchen faucets; model-dependent body and check-valve arrangements apply.
- Leaking from End of Spout | Bathroom Faucets | Kohler AssistKohler Assist · Kohler bathroom faucets including centerset, single-hole, wall-mount, and widespread sink faucets; exact model instructions control.
Community feedback
Share a repair observation
Share a plain-text repair observation. Accepted observations are published automatically; this page may take a moment to update.