
On this page
Start here
Quick answer
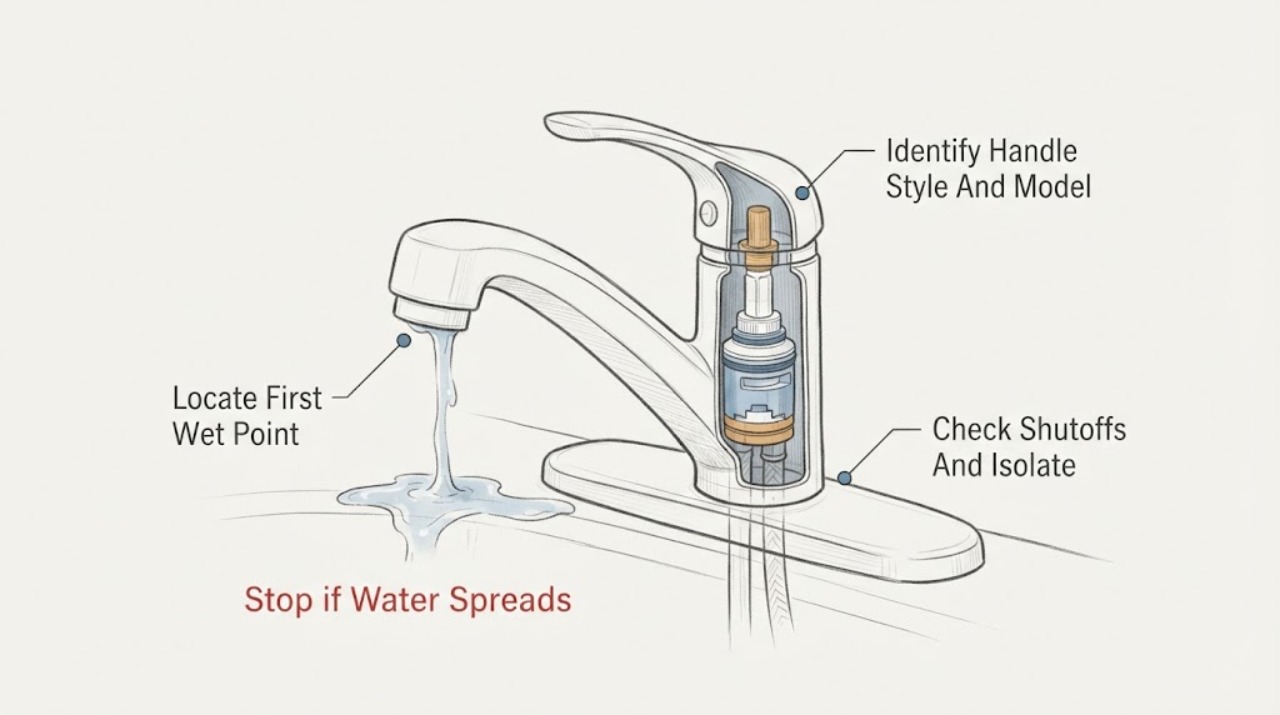
Water coming from a Moen faucet handle is usually a cartridge or handle-seal problem, but first confirm where the water starts. Dry the handle, spout, and base, wrap a paper towel around the handle, and turn the faucet on briefly. If the towel gets wet first at the handle, use the exact Moen model and the single-handle or two-handle design to identify the cartridge or handle assembly; Moen says its cartridges are not interchangeable. If the base or escutcheon gets wet first, the water may be running down from the handle or may be a separate spout or body leak. For any disassembly, close both hot and cold supplies, open the faucet to release pressure, and follow the model-specific Moen procedure. Stop for a shutoff that will not hold, a corroded or pressurized connection, a seized retaining part, a cracked valve body, uncontrolled water, or a leak that remains after the exact model-directed repair, and arrange plumbing service.
Work through in order
Diagnostic checks
Use only checks that match the exact appliance or system and its official guide.
-
Check 1
Dry the Moen faucet, handle, spout base, escutcheon, and nearby supply connections. Wrap a paper towel around the handle, turn the faucet on briefly, and watch without touching a wet fitting.
Expected result: The towel wets first around the handle; water appears first at the spout base or escutcheon; water leaks from a hose or shutoff; or the faucet leaks with the handle off.
Next step: Continue with the handle-style and model check only when the first wet point is the handle or the leak clearly travels from it. For a supply, body, or uncertain leak location, isolate the water if safely possible and arrange plumbing diagnosis.
Stop if: Stop if water sprays, reaches an electrical outlet, the faucet body is cracked, or a pressurized supply connection is wet or moving.
Why this matters
Why: Water starting at the handle supports a cartridge or handle-seal path. Water reaching the base first can be a spout or body leak, or water traveling down from the handle. A supply connection leak is outside the handle repair, while a leak with the handle off points to an internal valve or cartridge seal rather than only a loose handle.
-
Check 2
Record the Moen faucet model from its documentation or identification marking and note whether it has one handle, two handles, a pullout or pulldown spout, or a shower-style valve. Compare the model with Moen's product-identification and cartridge guidance before removing trim.
Expected result: The faucet is single-handle, two-handle, pullout or pulldown, shower-style, the model is known, or the model cannot be identified.
Next step: Use the exact Moen model instructions and parts diagram for the observed style. If the model is unknown, stop before ordering a cartridge or removing a retaining part and obtain model identification or plumbing help.
Stop if: Do not infer a cartridge from color, handle shape, or a partial visual match, and do not force trim that does not release using the documented procedure.
Why this matters
Why: Handle count and product family change the cartridge or seal path. Moen uses several cartridge families that are not interchangeable, and shower or specialty valves may use a different repair procedure than a kitchen or lavatory faucet.
-
Check 3
From a dry position, locate the faucet's hot and cold shutoffs and observe whether they are accessible, intact, and able to close without force. If both hold, close them and open the faucet briefly to release residual pressure before any model-directed disassembly.
Expected result: Both shutoffs close and hold; one is seized or leaks; a supply connection is corroded; pressure remains after opening the faucet; or the faucet cannot be isolated.
Next step: Proceed only when both supplies are isolated and pressure is relieved. If a shutoff will not hold or a connection moves or leaks, leave the faucet untouched and call a plumber to isolate and repair the supply.
Stop if: Do not use pliers on a seized shutoff, loosen a supply fitting under pressure, or continue if water pools or sprays in the cabinet.
Why this matters
Why: A repair cannot be safely contained when the faucet cannot be isolated. A seized valve, corroded connection, or persistent pressure raises the chance of flooding or a failed fitting, independent of the cartridge diagnosis.
-
Check 4
With both supplies isolated and only if the exact Moen procedure is available, remove the handle or accessible trim and inspect the handle screw, connector, retaining nut or clip, cartridge stem, and visible seals. Keep parts in order and compare them with the model diagram.
Expected result: The retaining hardware is loose or damaged; a cartridge or seal is scratched, torn, mineral-coated, or incorrectly seated; the handle mechanism is broken; or the assembly looks normal.
Next step: Use the model instructions to clean only permitted accessible surfaces or replace a confirmed component. If the retainer, cartridge, or valve body is stuck, damaged, or uncertain, stop with the supplies off and arrange service.
Stop if: Do not pry against the faucet body, drill or hammer a retainer, scrape sealing surfaces aggressively, or open the assembly while either supply is pressurized.
Why this matters
Why: A damaged cartridge, seal, or handle mechanism can allow water up through the handle. A loose or incorrectly seated component can leak after installation. A normal-looking assembly does not rule out an internal cartridge or valve-body fault, and a seized retainer can turn a small leak into a damaged faucet.
-
Check 5
Before selecting a cartridge, O-ring, seal, or handle mechanism, match the complete Moen model and the observed part with the official model-specific parts or installation guidance. Do not substitute a visually similar cartridge.
Expected result: The model diagram identifies an exact cartridge or seal; the part differs from the old one; the model is missing; or the replacement seats incorrectly.
Next step: Use only the part and orientation documented for the model. If the model or fit is uncertain, return the faucet to a safe isolated state and obtain Moen or plumber assistance rather than modifying the part.
Stop if: Do not mix cartridge families, shave seals, force an incompatible part, or leave the faucet partly assembled with the supplies on.
Why this matters
Why: Moen's cartridge families and seal sizes vary, so an apparent match can leak or damage the valve. A wrong part or incomplete seating leaves the original leak cause unresolved and can make reassembly unsafe.
-
Check 6
After complete model-directed reassembly, keep the cabinet and floor visible, reopen the hot and cold supplies slowly, and operate the handle normally while checking the handle, spout base, body, and supply connections for new moisture.
Expected result: The handle remains dry; water still starts at the handle; a leak appears at the spout base or supply; the handle binds; or water escapes from an incomplete joint.
Next step: Close the supplies again for any leak, binding, or incomplete assembly. Record the model, part used, first wet point, and test result for a plumber; do not keep cycling a leaking faucet.
Stop if: Stop immediately for an uncontrolled leak, a joint that will not seal, water near electrical equipment, or a faucet that cannot be fully reassembled.
Why this matters
Why: A dry handle after a controlled test supports a successful repair. Persistent handle leakage suggests the cartridge, seal, retaining hardware, valve body, or installation remains faulty. A new base or supply leak may be a separate issue, while binding can signal incorrect seating or a damaged component.
Use your observations
Decision map
Find the observation that best matches what you see, then follow the next safe action.
-
PATH 01Next step
What you see
The paper towel wets at the handle when the faucet is turned on, while the supply connections remain dry.
Do this next
Identify the model and isolate both supplies before a model-directed cartridge or handle inspection. Stop for a seized retainer or damaged valve body.
Why this path and its safety boundary
Why it matters: A cartridge, handle seal, retaining component, or handle mechanism is more likely than a supply-line leak. Moen's handle guidance treats the cartridge as the usual cause, but the exact part depends on the model and handle count.
-
PATH 02Next step
What you see
The base or escutcheon gets wet, but the handle towel stays dry at first or water appears from the spout-body junction.
Do this next
Repeat the dry-and-towel test and inspect only the visible source. Use the model-specific Moen path for spout, O-ring, or cartridge diagnosis; do not order a handle cartridge solely from water on the base.
Why this path and its safety boundary
Why it matters: The leak may be from the spout O-rings, cartridge, or faucet body rather than the handle. Water that travels down from the handle can still make the base look like the source.
-
PATH 03Next step
What you see
Water starts at a supply hose, shutoff, valve connection, or below the faucet body rather than at the handle.
Do this next
Close the affected shutoff or main supply only if it operates safely and protects the area from water. Call a plumber for isolation, fitting, hose, or body repair.
Why this path and its safety boundary
Why it matters: This is a pressurized supply or body-connection problem, not a simple handle-cartridge diagnosis. Disturbing a corroded or seized connection can increase the leak.
-
PATH 04Next step
What you see
Other leak points are dry, the exact model is known, and inspection finds a damaged, scratched, torn, incorrectly seated, or stuck cartridge or seal.
Do this next
Use the exact model procedure with supplies isolated. Replace only the confirmed component, and stop for seized hardware, body damage, or a part that does not match the diagram.
Why this path and its safety boundary
Why it matters: The cartridge or seal path is a supported repair direction, but a model-specific part and documented orientation are required. Moen says its cartridge varieties are not interchangeable.
-
PATH 05Next step
What you see
The leak continues after a complete model-directed repair, the shutoffs will not isolate the faucet, the valve body is cracked, the handle or retainer is seized, or the source remains uncertain.
Do this next
Close the supplies or main shutoff if safely accessible, leave the faucet out of service, and arrange a plumber. Provide the model, handle style, first wet point, isolation result, parts inspected, and test outcome.
Why this path and its safety boundary
Why it matters: A valve-body, connection, cross-leak, wrong part, or hidden plumbing fault remains possible. Repeated part replacement or testing can worsen water damage.
Helpful context
Understand the symptom
Find the first wet point before buying a part
Water can travel along the handle, spout, or escutcheon and make a different location look like the source. Dry the faucet completely, wrap a paper towel around the handle, and turn the water on briefly. A wet towel at the handle supports a handle or cartridge path; water that appears first at the spout base, hose, or supply connection needs a different diagnosis. Moen's own guidance treats this location distinction as the first step.
Model and handle style determine the repair
A single-handle Moen faucet generally has one cartridge, while a two-handle faucet has two. Moen lists multiple cartridge families and says they are not interchangeable, so appearance alone is not enough to select a replacement. Record the model or use Moen's product-identification resources before removing the handle or ordering a cartridge.
Make pressure isolation part of the repair
Before removing a handle, retaining nut, cartridge, stem, or seal, close the faucet's hot and cold supplies, then open the faucet briefly to release residual pressure. Keep a container and towel ready for trapped water. If the shutoffs are seized, corroded, leaking, or cannot isolate the faucet, do not force the repair; have a plumber isolate the line and protect the cabinet from water.
Safety boundary
Stop conditions
- Stop before disassembly if the faucet cannot be isolated, a shutoff is seized or leaking, a hose or fitting is corroded or moving, water sprays or reaches electrical equipment, the faucet body is cracked, or the model and part are uncertain. Do not open a pressurized valve, force a cartridge or retainer, mix Moen cartridge families, scrape or modify seals, or keep testing after a leak. Arrange professional service for a persistent handle leak after model-directed repair, a body or supply-connection leak, an incomplete assembly, or any uncontrolled water release.
Only after diagnosis
Potential parts
- Moen faucet cartridge
Consider this only when the leak starts at the handle, the supplies isolate safely, and the exact Moen model guidance identifies a damaged, worn, or incorrectly sealing cartridge.
Moen uses multiple cartridge families that are not interchangeable. Confirm the complete faucet model, handle style, and official parts or installation guidance before selection. - Moen handle seal or O-ring service kit
Consider this only when the model-specific inspection identifies a damaged handle seal, cartridge O-ring, or spout O-ring as the first leak path rather than a supply connection or cracked body.
Seal count, size, material, and location vary by Moen model and faucet style. Confirm the official model diagram and use only the documented service procedure. - Moen faucet handle mechanism or retaining hardware
Consider this only when the model-specific inspection finds a broken handle connector, damaged retaining nut or clip, or hardware that cannot hold the confirmed cartridge correctly.
Handle mechanisms and retaining parts are model-specific; confirm the complete faucet identity and installation instructions before selection.
When checks do not resolve it
Need a professional?
Call a plumber when a shutoff will not hold, a supply hose or fitting leaks, the valve body is cracked, the cartridge or retainer is seized, the model-specific part is uncertain, the handle mechanism is damaged, or the leak remains after correct reassembly. Use urgent plumbing service for an uncontrolled leak, flooding, water near electrical equipment, or a main shutoff that cannot stop the flow.
Have this ready
- Provide the Moen model or collection, kitchen, lavatory, or shower location, single- or two-handle style, first wet point, whether the leak occurs only when on or also when off, shutoff behavior, parts inspected, and the result of the controlled reassembly test.
Common questions
FAQ
Why is my Moen faucet leaking around the handle?
Moen says a leak around the handle is usually related to the cartridge, but a handle seal or mechanism can also be involved. Confirm that the handle is the first wet point, identify the faucet model and handle count, and use the matching repair guidance before selecting a part.
Why is water pooling at the base of my Moen faucet?
Water at the base or escutcheon may have traveled down from a handle leak, or it may start at the spout O-rings, faucet body, or a connection. Dry the area and use a paper towel around the handle while turning the faucet on briefly to find the first wet point.
Do I need to identify my Moen model before replacing the cartridge?
Yes. Moen uses several cartridge families and says they are not interchangeable. Record the model or use Moen's product-identification resources, then confirm the single-handle or two-handle parts diagram before ordering or removing a cartridge.
Should I shut off the water before opening a Moen faucet handle?
Yes. Close both hot and cold supplies and open the faucet briefly to release residual pressure before removing a handle, retaining hardware, cartridge, or seal. If a shutoff is seized, corroded, or leaking, stop and have a plumber isolate the faucet.
Can I use a similar-looking Moen cartridge?
No. Moen states that its cartridge varieties are not interchangeable. A visual match is not enough; confirm the complete faucet model, handle style, cartridge family, and installation orientation in the official model guidance.
What if the Moen faucet still leaks after I replace the cartridge?
Close the supplies again and check that the model-specific cartridge, retaining hardware, orientation, and seals match the official instructions. Persistent leakage can indicate a damaged valve body, spout O-ring path, handle mechanism, supply connection, or wrong part. Do not keep substituting cartridges; arrange plumbing service.
When should I call a plumber for a Moen handle leak?
Call when the faucet cannot be isolated, a shutoff or hose is seized or leaking, a retaining part or cartridge is stuck, the body is cracked, the model or part is uncertain, water reaches electrical equipment, or the leak remains after a complete model-directed repair. Use urgent service for flooding or uncontrolled water.
Read the exact guide
Official sources
- Bathroom Faucet: Leaking Around the Base of the FaucetMoen Solutions · Official Moen article explaining that a handle leak can puddle on the base plate and recommending a paper-towel test around the handle, followed by model-dependent cartridge or O-ring guidance.
- Replacing the cartridge for two-handle faucets.Moen · Official Moen instruction PDF advising users to turn off water at the faucet or main shutoff and release line pressure before cartridge work, while describing model- and handle-dependent cartridge replacement.
- Kitchen Faucet: Leaking Around The HandleMoen Solutions · Official Moen troubleshooting article stating that water leaking around the handle is usually related to the cartridge, with one cartridge in a single-handle faucet, two in a dual-handle faucet, and non-interchangeable cartridge varieties.
- Kitchen faucet leaks between the spout and the handleMoen Solutions · Official Moen troubleshooting article distinguishing scratched or torn cartridge or spout O-rings and directing users to identify the faucet model before selecting a service kit or cartridge.
Community feedback
Share a repair observation
Share a plain-text repair observation. Accepted observations are published automatically; this page may take a moment to update.