
On this page
Start here
Quick answer
If water is leaking underneath a Moen sink, first protect the cabinet and identify whether the leak is steady or appears only while the faucet, sprayer, drain, or disposal is used. Dry the area, place a towel or container below the suspected connection, and use a dry tissue to trace the first wet point without reaching around energized disposal wiring. A steady leak can come from a shutoff valve, house supply line, or faucet supply line; a leak that appears only during use can come from a faucet hose connection, spout or sprayer hose, drain, trap, or sink flange. Moen specifically recommends using leak frequency and visible location to direct troubleshooting, and says water must be shut off before faucet repair to avoid flooding or injury. Close the local faucet shutoffs gently if they work and arrange plumbing service if a valve will not stop the leak, a hose is split, water reaches electrical equipment, the leak is inside a wall or cabinet floor, or the source cannot be safely localized. Do not overtighten plastic fittings, pull on quick-connect hoses, open a disposal electrical compartment, or replace a Moen cartridge, hose, O-ring, drain, or valve without identifying the exact faucet and connection.
Before you begin
Safety first
- Homeowner checks should remain limited to drying and tracing the first wet point, gently closing a functioning local shutoff, checking visible faucet and drain connections, and documenting frequency and model. A qualified plumber should replace pressurized lines or valves, repair concealed leaks, address drain or cabinet damage, and handle faucet disassembly when model fit or access is uncertain.
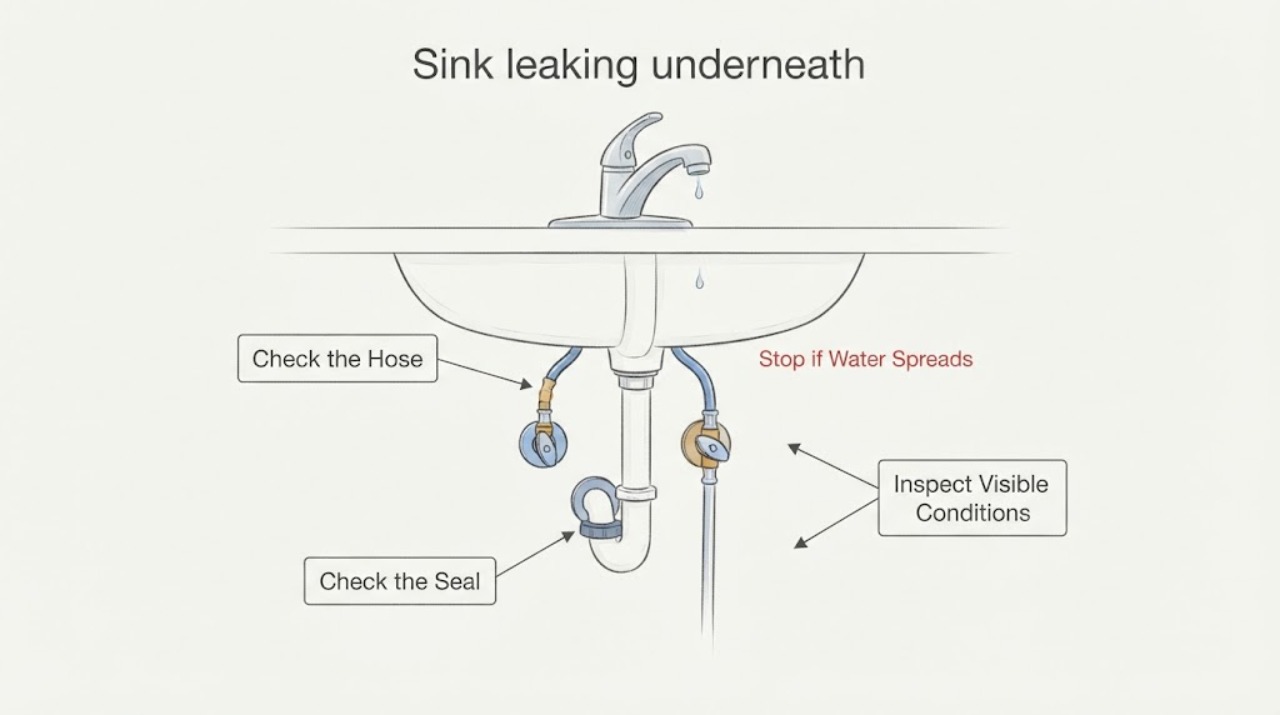
Work through in order
Diagnostic checks
Use only checks that match the exact appliance or system and its official guide.
-
Check 1
Move stored items away, place a container or towel under the drip, and stop using the sink if water is spraying, the cabinet floor is collapsing, water reaches a disposal or outlet, or a valve or hose is visibly split; do not touch wet electrical equipment.
Expected result: The leak is a small isolated drip away from electrical equipment, or water is spreading, pressurized, damaging the cabinet, or near electricity.
Next step: For a spreading or electrical hazard, keep away from the wet equipment, shut off water at a safe upstream valve if possible, and arrange emergency plumbing/electrical help. Otherwise dry the area before tracing the first wet point.
Why this matters
Why: A contained drip may allow a brief source-tracing check, while a pressurized, spreading, structural, or electrical situation can cause flooding, shock, or property damage.
-
Check 2
With the cabinet dry, use a dry tissue or paper towel to touch the shutoff valves, house supply tubes, faucet supply lines, hose connections, drain joints, trap, and sink underside one area at a time; do not tighten anything yet.
Expected result: The tissue first wets at a shutoff, supply line, faucet hose or quick connection, faucet mounting area, drain or trap joint, or nowhere during the dry inspection.
Next step: Mark the first wet point and whether it is under pressure or only follows use. If the source is hidden or no point is wet, continue with one controlled test rather than disassembling the cabinet.
Why this matters
Why: The first wet point is more useful than the puddle location. Moen distinguishes shutoff and supply-line leaks from intermittent faucet-supply leaks, while drain-side moisture follows a different path.
-
Check 3
Wait with the faucet and drain unused, then observe whether a new drop forms; if the local shutoffs are clearly labeled and turn normally, close them gently and open the faucet briefly to relieve pressure, following Moen's water-shutoff guidance.
Expected result: Water continues with the faucet untouched, stops after the faucet shutoffs are closed, or does not change when the shutoffs are closed.
Next step: Leave a leaking or unreliable valve closed and arrange plumbing service. Do not force a seized stop, remove a supply line under pressure, or close the main water supply unless needed to contain an active leak and it is safely accessible.
Why this matters
Why: A continuous leak supports a pressurized valve or supply-line problem. If closing the faucet shutoffs stops it, the faucet-side lines are implicated; if it continues, the house supply, shutoff, drain, or another upstream source remains possible.
-
Check 4
After the area is dry, run a small amount of water through the faucet without using the sprayer, then repeat with the sprayer or pullout/pulldown wand if fitted; keep hands clear of wet electrical equipment and stop at the first drip.
Expected result: The leak appears only when the faucet runs, only when the wand or side spray is used, at a hose or quick connection, around the faucet base or handle, or not at the faucet at all.
Next step: Close the faucet and record the exact location and faucet style. Tighten only a visibly loose, model-approved hand connection if the instructions permit; otherwise close the shutoffs and arrange Moen-qualified plumbing service. Do not pull quick-connects apart or replace seals by guesswork.
Why this matters
Why: Use-related moisture points toward a faucet supply connection, hose, wand, handle, base seal, or spout issue rather than a continuously pressurized house line. Moen notes that handle water can mimic a base leak and that wand connections vary by model.
-
Check 5
If the faucet test is dry, add a small controlled amount of water to the basin and watch the strainer, sink underside, trap, dishwasher/disposal branch, and cabinet floor; do not run the disposal or reach into its compartment while wet.
Expected result: The leak starts during basin draining, at the strainer or sink underside, at a trap or drain joint, at a dishwasher/disposal connection, or the drain test remains dry.
Next step: Stop using the sink if a drain or trap joint leaks and arrange plumbing service, especially for a corroded or moving connection. Do not overtighten plastic nuts, remove a disposal, or use chemical drain cleaner to address a leak.
Why this matters
Why: A drain-side leak is more likely when water appears only during draining, while a dry drain test keeps the faucet supply, shutoff, or concealed source in consideration.
-
Check 6
Record whether the leak is steady, begins after faucet use, begins after draining, comes from above or below the counter, and whether the faucet is single-handle, two-handle, side-spray, pullout, or pulldown; photograph only dry external labels or fittings.
Expected result: The leak is 24/7, intermittent during use, model-specific at a hose or base, associated with a shutoff, or impossible to localize from below.
Next step: Use the model information to select the manufacturer's instructions or give it to a qualified plumber. Do not order a cartridge, hose, O-ring, or valve solely from the description ‘leaks underneath.’
Why this matters
Why: Frequency and faucet style narrow the likely connection and part family. Moen states that hose styles and replacement parts vary by faucet generation and model.
-
Check 7
After containment, check the cabinet floor, wall, countertop underside, and adjacent dishwasher or disposal area for swelling, staining, mold-like odor, or a leak that tracks from outside the sink cabinet; do not open walls or flooring.
Expected result: The cabinet is damaged, moisture appears from a wall or floor, the leak returns after shutoffs are closed, or the source is localized to an accessible faucet or drain connection.
Next step: Arrange prompt plumbing service for concealed or structural moisture and dry the cabinet safely. For an identified faucet connection, provide the model, leak frequency, first wet point, and shutoff behavior to the technician.
Why this matters
Why: Structural damage or a concealed supply leak can continue even when the visible faucet area is dry. An accessible connection may be repairable, but it still requires the correct shutoff and model-specific part.
Use your observations
Decision map
Find the observation that best matches what you see, then follow the next safe action.
-
PATH 01Next step
What you see
Water appears continuously with the faucet untouched and is first wet at a shutoff valve, house supply line, or faucet supply line.
Do this next
Close the affected local shutoff if it operates normally, place a container under the connection, and arrange plumbing service. Do not remove the line or force a corroded valve.
Why this path and its safety boundary
Why it matters: A pressurized supply or shutoff leak is more likely than a drain or handle leak.
-
PATH 02Next step
What you see
The leak appears only while the Moen faucet, side spray, pullout, or pulldown is used and starts at a hose or quick connection.
Do this next
Stop using the faucet, close its shutoffs, and identify the faucet model before repair. Arrange qualified service if the connection does not stop with a permitted gentle hand check or if the hose is damaged.
Why this path and its safety boundary
Why it matters: A faucet supply hose, wand connection, or model-specific under-deck connection is more likely than a continuously pressurized house line.
-
PATH 03Next step
What you see
The cabinet stays dry until water is poured into the basin or drained, and the first wet point is at the strainer, trap, sink underside, or disposal/dishwasher branch.
Do this next
Stop using the sink and arrange plumbing service for a leaking drain or trap, particularly if the joint is corroded, moving, or near electrical equipment. Do not overtighten plastic fittings.
Why this path and its safety boundary
Why it matters: A drain-side gasket, joint, or branch connection is more likely than the Moen faucet supply.
-
PATH 04Next step
What you see
Water runs down from the faucet handle, spout, or deck and appears below the counter, while under-sink supply connections remain dry.
Do this next
Dry the deck and trace the first wet point during one controlled use. Identify the exact Moen model before considering an O-ring, hose, diverter, or other service kit; arrange service if the leak continues.
Why this path and its safety boundary
Why it matters: An above-deck handle, base, spout, wand, or seal leak is more likely than an under-sink supply leak.
-
PATH 05Next step
What you see
The leak cannot be stopped, water is near a disposal or outlet, the cabinet or wall is damaged, a supply line is split, or the source is hidden.
Do this next
Keep people away from wet electrical equipment, shut off water at the safest accessible upstream valve, and arrange qualified plumbing/electrical service. Do not open walls or continue using the sink.
Why this path and its safety boundary
Why it matters: Flooding, electrical, and concealed-water damage risks outweigh further source tracing.
Helpful context
Understand the symptom
A wet cabinet does not identify the source
Water can travel along a hose, cabinet wall, sink underside, drain pipe, or floor before it drips. Moen's own troubleshooting starts with two observations: how often the leak occurs and where it first appears. Dry everything, then watch one controlled faucet or drain event so the first wet point—not the lowest drip—is recorded.
Separate a supply leak from a use-related leak
A leak that continues with the faucet untouched points toward a shutoff valve, house supply line, or faucet supply line under pressure. A leak only while the faucet runs points toward a faucet hose, quick connection, sprayer, spout, drain, or trap. Close the local shutoffs if they operate normally; do not force a corroded valve or rely on a towel for a pressurized leak.
A faucet-base leak may begin above the counter
Water from a handle, spout, pullout wand, or pulldown connection can run over the deck and down beneath the sink. Moen recommends checking the handle and hose areas rather than assuming an under-sink supply line is at fault. Keep the cabinet dry while tracing and identify the faucet style before considering an O-ring, hose, or diverter service kit.
Drain leaks need a different test
If the cabinet stays dry until water is poured into the basin, the source may be the strainer or drain flange, trap, dishwasher or disposal connection, or a drain-side gasket—not the Moen faucet supply. Run only a small controlled amount of water after the supply side is dry, and stop if water reaches an electrical connection or the cabinet floor is swelling.
Match any part to the exact faucet
Moen has used different connection-hose styles across faucet generations, and O-ring or vacuum-breaker arrangements vary by model and spout style. A generic hose or seal may not fit or may leave the leak unchanged. Record the model or use the manufacturer's identification process before ordering anything, and leave internal faucet disassembly to a qualified repairer if the shutoffs or connections are uncertain.
Keep water and electricity apart
If water is near a disposal, dishwasher outlet, under-cabinet receptacle, powered pump, or other electrical equipment, do not reach into the wet area. Shut off water if safe, keep people away, and use qualified plumbing or electrical service. A persistent leak can damage the cabinet floor and adjacent materials even when the drip appears small.
Safety boundary
Stop conditions
- Shut off water at the safest accessible valve and arrange prompt plumbing service for a split supply line, uncontrollable flow, damaged cabinet or wall, or water near an outlet, disposal wiring, dishwasher connection, or powered equipment.
- Do not force a corroded shutoff, remove a pressurized hose, pull apart a quick-connect, overtighten plastic drain fittings, or rely on caulk or tape as a repair for a pressurized leak.
- Do not open an electrical disposal compartment, reach into wet wiring, open walls or flooring, use chemical drain cleaner to address a leak, or keep using the sink to reproduce an active leak.
- Arrange qualified service when the first wet point is hidden, the leak continues after a local shutoff is closed, the faucet model or connection style is unknown, or a replacement hose, seal, valve, or drain part cannot be verified for the exact installation.
Only after diagnosis
Potential parts
- faucet supply or quick-connect hose
Consider replacement only when tracing confirms the Moen faucet hose or quick connection leaks during use or is split; a steady leak may instead be a shutoff or house supply line.
Match the exact faucet model, generation, connector style, hose routing, and approved installation instructions; Moen has used multiple hose styles. - faucet O-ring or base seal
Consider only when water is traced to the faucet handle, spout, base, or deck seal and the model-specific instructions identify an O-ring or seal; an under-sink hose leak needs a different remedy.
Match the exact Moen faucet, spout/handle style, seal count and dimensions, and approved lubricant or installation method; do not substitute a generic seal by appearance. - sink shutoff valve or supply line
Consider replacement only when a steady leak is confirmed at the valve body, valve seal, or house supply line and the water can be isolated safely.
Match the pipe, connection, material, valve orientation, and local plumbing requirements; a corroded or inaccessible valve should be handled by a qualified plumber. - sink drain or trap gasket
Consider only when water appears during draining and the first wet point is a drain flange, trap, or branch connection rather than the Moen faucet supply.
Match the sink, drain assembly, trap material and dimensions, and dishwasher/disposal configuration; do not overtighten or use chemical cleaner to compensate for a leaking joint.
When checks do not resolve it
Need a professional?
Safety scope: Homeowner checks should remain limited to drying and tracing the first wet point, gently closing a functioning local shutoff, checking visible faucet and drain connections, and documenting frequency and model. A qualified plumber should replace pressurized lines or valves, repair concealed leaks, address drain or cabinet damage, and handle faucet disassembly when model fit or access is uncertain.
Common questions
FAQ
Why is water leaking under my Moen sink only when the faucet is used?
A faucet supply hose, quick connection, wand or sprayer hose, faucet base, or handle leak may be sending water into the cabinet. Dry the area and trace the first wet point during one controlled use before selecting a part.
What if the leak continues when the Moen faucet is turned off?
A shutoff valve, house supply line, or faucet supply line under pressure is more likely. Close the local shutoff if it operates safely and arrange plumbing service for a split line or unreliable valve.
Could a leak below the sink actually start at the faucet base?
Yes. Moen notes that water from a handle can puddle on the base plate and run below the counter. Check above and below the deck, and identify the faucet model before considering O-rings or other seals.
Do I need to shut off water before repairing a Moen faucet?
Yes. Shut off the faucet supply before any repair to reduce flooding and injury risk. If the local shutoffs are seized, leaking, or inaccessible, use the safest upstream valve and call a qualified plumber.
Read the exact guide
Official sources
- Kitchen Faucet: Leaking Around The BaseMoen Solutions · Moen explains that handle water can appear as a base leak and that faucet style, O-rings, wand connections, and model identification determine the next repair path.
- How To Turn Off The Water Supply To The FaucetMoen Solutions · Moen says water should be shut off before faucet repair to avoid flooding or injury and describes local and main shutoff locations.
- Bathroom Faucet: Leaking Under The Sink BaseMoen Solutions · Moen distinguishes steady under-sink leaks at shutoffs or supply lines from intermittent leaks in faucet supply connections and directs users to identify the connection style.
Community feedback
Share a repair observation
Share a plain-text repair observation. Accepted observations are published automatically; this page may take a moment to update.