
On this page
Start here
Quick answer
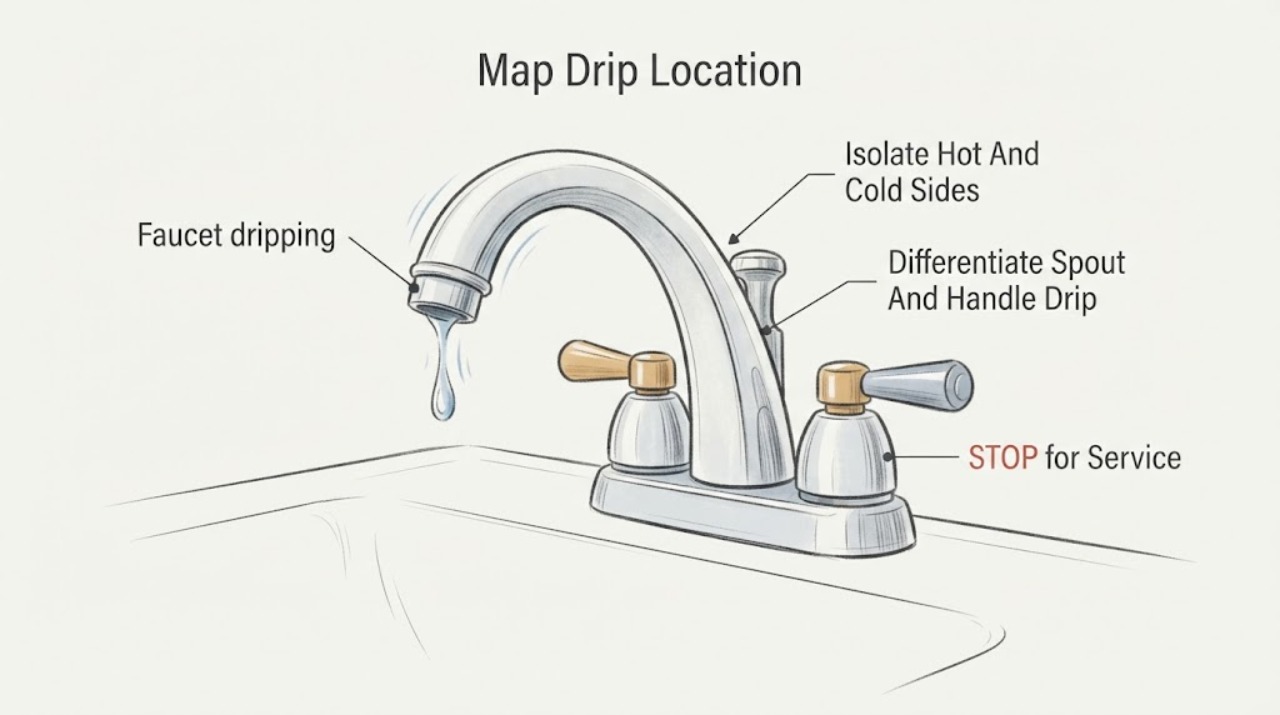
Start by identifying where the Pfister faucet is dripping: from the spout after shutoff, beneath a handle, around the base or under the counter, at a supply connection, or from a pull-down spray hose. Close the appropriate hot and cold angle stops before disassembly, dry the area, and reopen one side at a time only when it is safe to test. A spout drip usually points toward a cartridge or gasket; a leak under the handle can involve the retainer or cartridge; a wet hose or supply connection needs a connection, washer, or hose diagnosis; and a leak from the faucet body or valve area may require service. Pfister's own guidance says to identify the exact model and use its maintenance guide before selecting a replacement cartridge or other part. Do not keep a leak running, overtighten fittings, work over a wet electrical area, or assume every Pfister faucet uses the same cartridge.
Before you begin
Safety first
- This article supports identifying the leak location, closing clearly identified angle stops, drying the area, reading the model label, and following the exact Pfister guide for a permitted, isolated cartridge or connection check. A qualified plumber should handle failed stops, pressurized or concealed plumbing, cracked bodies, internal valve work, wet electrical areas, and uncertain repairs.
Work through in order
Diagnostic checks
Use only checks that match the exact appliance or system and its official guide.
-
Check 1
With the faucet handles closed, dry the visible faucet and look for the first new drop at the spout, handle, base, sprayhead or hose, underbody, supply line, angle stop, drain, or countertop.
Expected result: The drip may start at the spout, beneath one handle, at a hose connection, from the faucet base or underbody, at a supply connection, or from the drain rather than the faucet.
Next step: Take a photo and label whether the faucet is single-handle, two-handle, pull-down, pull-out, kitchen, or bathroom before closing the relevant stops for further checks.
Stop if: Stop for a split supply line, uncontrolled flow, a cracked faucet body, a leak inside the wall, water near electrical equipment, or a stop that cannot safely isolate the faucet.
Why this matters
Why: The first wet point determines whether a cartridge, gasket, retainer, spray hose, supply connection, angle stop, drain, or faucet body is the likely path. Water at the lowest point is not necessarily the source.
-
Check 2
Close the appropriate hot and cold angle stops beneath the sink or at the faucet supply, then open the faucet briefly to release residual pressure; for a two-handle faucet, isolate one side at a time only when the stop is clearly identified and operable by hand.
Expected result: The drip may stop when the cold stop closes, stop only when the hot stop closes, continue with both stops closed, or continue because a stop is not actually isolating the faucet.
Next step: Leave the isolated side closed, dry the area again, and proceed to the specific spout, handle, hose, or connection check; arrange plumbing service if the stop will not close or the source is not isolated.
Stop if: Do not force a stuck angle stop, loosen a pressurized connection, or remove a handle or cartridge while water remains active.
Why this matters
Why: A stop that ends the drip identifies the supplied side and narrows a two-handle cartridge or valve-body diagnosis. Continued dripping can be residual water, a stop or supply-line leak, or a faucet that is not fully isolated.
-
Check 3
After the faucet is isolated and the exact model is recorded, compare a spout drip with water that appears under or around a handle; do not remove the cartridge unless the model's maintenance instructions match the faucet and the area is fully dry.
Expected result: Water may emerge from the spout with the handles off, appear only beneath the handle while the faucet is open, or wet the body without a visible spout drip.
Next step: Use Pfister's model-specific maintenance guide to identify the correct cartridge, gasket, retainer, and removal method; if the leak persists after an approved cleaning or repair, arrange service.
Stop if: Do not substitute a cartridge by appearance, force a stuck handle or retainer, or continue when the valve cavity, countertop, or cabinet cannot stay dry.
Why this matters
Why: Pfister identifies spout dripping as a cartridge or gasket path and handle leakage as a retainer, cartridge, or handle-area path. Water on the body may be traveling from a connection and needs source mapping rather than an assumed cartridge replacement.
-
Check 4
For a kitchen pull-down or pull-out faucet, inspect the spray hose and sprayhead connection; for an under-counter leak, inspect the angle-stop-to-supply and supply-to-faucet connections after the water is shut off and the surfaces are dry.
Expected result: The hose may leak at its lining or sprayhead connection, a supply nut may be wet, the faucet underbody may leak, or all visible connections may remain dry.
Next step: Correct only an obviously loose, correctly aligned connection according to the model instructions; replace a confirmed damaged hose or supply line with the exact compatible part, or arrange service for an underbody or internal leak.
Stop if: Do not overtighten a connection, twist the faucet body, pull on a hose under pressure, or remove a supply line when the angle stop is not fully closed.
Why this matters
Why: Pfister treats a spray-hose connection, a leaking hose lining, a supply-line seal, and the faucet underbody as separate fault paths. A dry exterior with water emerging from the faucet body can require internal service.
-
Check 5
Record the Pfister model number, faucet configuration, leaking side or location, part history, and whether an approved cleaning, retainer adjustment, washer, cartridge, hose, or supply-line correction was made; restore water slowly only for a safe, brief leak check.
Expected result: The drip may stop, return immediately, move to another seam, or remain unchanged after the model-specific correction.
Next step: Close the stops again if the leak returns, photograph the result, and arrange Pfister or licensed plumbing service rather than repeating adjustments or ordering another unverified part.
Stop if: Do not leave the faucet pressurized unattended after a repair, continue if the leak worsens, or use a part without confirming exact model compatibility.
Why this matters
Why: A stopped drip supports a correctly matched and seated seal or connection, but a returning or moved leak suggests another cartridge, valve-body, hose, supply, or installation problem. The model number is needed to identify the correct Pfister parts and instructions.
Use your observations
Decision map
Find the observation that best matches what you see, then follow the next safe action.
-
PATH 01Safety boundary
What you see
Water drops from the spout after the faucet is turned off, while the supply connections and underbody remain dry.
Do this next
Use the Pfister model and maintenance guide to identify the correct cartridge or gasket and follow its safe cleaning or replacement procedure; arrange service if the drip remains.
Why this path and its safety boundary
Why it matters: A cartridge, cartridge gasket, or two-handle valve cartridge is more likely than a supply-line leak; the affected hot or cold side can be isolated on a two-handle model.
Safety stop: Do not install a cartridge based only on shape, force a seized retainer, or work without closing the angle stops.
-
PATH 02Safety boundary
What you see
Water appears under or around a handle when the faucet is opened, but the supply lines and angle stops remain dry.
Do this next
Close the faucet's stops, identify the exact model, and follow only the model-specific Pfister handle and cartridge instructions; use service if the retainer or valve body is damaged.
Why this path and its safety boundary
Why it matters: A retainer, cartridge seal, cartridge, or handle-area connection is more likely than a wall-side plumbing leak.
Safety stop: Do not keep tightening a retainer, crack the decorative cap, or remove the valve with water still connected.
-
PATH 03Safety boundary
What you see
A pull-down or pull-out faucet leaks at the sprayhead connection or along the spray hose while the faucet body and supply connections are dry.
Do this next
With water isolated, follow the Pfister model instructions for the connection; if the hose or sprayhead remains wet or damaged, replace the exact part or arrange service.
Why this path and its safety boundary
Why it matters: A loose sprayhead connection, damaged hose lining, or sprayhead problem is more likely than a cartridge drip.
Safety stop: Do not stretch, kink, patch, or pull the spray hose against its connection, and do not leave the cabinet pressurized while it leaks.
-
PATH 04Safety boundary
What you see
Water appears at an angle stop, supply-line nut, faucet underbody, or supply line beneath the counter rather than at the spout.
Do this next
Close the affected stop, dry the connection, and arrange plumbing service or replace only a confirmed compatible supply line according to the installation instructions; recheck slowly while attended.
Why this path and its safety boundary
Why it matters: A supply-line seal, angle-stop connection, faucet underbody, or damaged supply line is more likely than a spout cartridge issue.
Safety stop: Do not force a stuck stop, loosen a pressurized nut, or use the sink when water is entering the cabinet or wall.
-
PATH 05Safety boundary
What you see
The faucet continues to release water after both hot and cold angle stops are closed, or an angle stop does not actually isolate the faucet.
Do this next
Keep the area dry and arrange a plumber to isolate the branch at a safe point; do not remove the faucet or supply line under pressure.
Why this path and its safety boundary
Why it matters: Residual water, a leaking or failed stop, a connection upstream of the stops, or a misidentified leak source is possible; a normal cartridge diagnosis is not yet established.
Safety stop: Stop immediately for uncontrolled flow, a leaking wall connection, cabinet or wall saturation, or water near an electrical receptacle.
-
PATH 06Safety boundary
What you see
The faucet and supply connections remain dry, but water appears at the drain, sink rim, wall, or another nearby pipe, or only after the sink drains.
Do this next
Keep the cabinet protected and arrange plumbing diagnosis; do not replace the cartridge or faucet based on the puddle location alone.
Why this path and its safety boundary
Why it matters: A drain, sink, household plumbing, or concealed leak is more likely than a Pfister faucet fault.
Safety stop: Do not use the sink if water is entering the wall, cabinet base, or electrical area, or if the source cannot be safely contained.
Helpful context
Understand the symptom
The leak location chooses the repair path
A drop from the spout after the handle is off is different from water under a handle or a puddle in the cabinet. Before removing anything, dry the faucet and watch the first place that becomes wet. Pfister's troubleshooting pages use this location—spout, hose, handle, or under-counter connection—to select the next check.
A cartridge is model-specific
Many Pfister spout drips are related to a cartridge or cartridge gasket, but single-handle, two-handle, kitchen, bathroom, discontinued, and specialty faucets do not necessarily share the same part. Record the model from the faucet or its paperwork and use the model's maintenance guide or parts diagram before buying or installing a cartridge.
Under-counter leaks need a dry, staged test
For a leak below the counter, close both angle stops, dry the faucet body, supply lines, drain, and connections, then test one side at a time only if the area is safe. This prevents residual water from sending you toward the wrong repair and helps distinguish a supply-line leak from the faucet underbody or drain.
Do not make a small drip a cabinet leak
A slow faucet drip can damage the sink cabinet or countertop over time. Keep the affected stops closed when the faucet is not needed, protect the cabinet, and stop DIY work if a stop will not close, the faucet body is cracked, the leak is inside the wall, or the source remains unclear.
Safety boundary
Stop conditions
- Close the appropriate hot and cold angle stops when the Pfister faucet is dripping and do not leave the faucet pressurized unattended while the source is unknown.
- Do not force a stuck angle stop, loosen a connection under pressure, remove a cartridge without isolating water, or work in a wet cabinet near electrical equipment.
- Do not select a Pfister cartridge, gasket, hose, or valve by appearance alone. Confirm the exact faucet model and use its maintenance guide or parts diagram.
- Do not overtighten retainers or supply connections, cross-thread fittings, or use sealant where the Pfister instructions call for a washer or direct valve connection.
- Arrange licensed plumbing or Pfister service for a cracked faucet body, failed angle stop, internal valve leak, concealed leak, recurring drip after an approved repair, or any source that cannot be safely isolated.
Only after diagnosis
Potential parts
- Pfister model-specific cartridge or cartridge gasket
Consider this only when a spout or handle drip is confirmed and the exact faucet model and maintenance guide identify the cartridge or gasket.
Pfister single- and two-handle cartridges can differ by model and side; match the parts diagram and do not force or overtighten the retainer. - Pfister pull-down or pull-out spray hose or sprayhead
Consider this only when the sprayhead connection or hose lining is the first wet point and the connection correction does not resolve it.
Match the faucet model, hose routing, connection style, weight, and sprayhead interface; do not stretch or kink the hose. - faucet supply line or connection washer
Consider this only when a supply-line connection or its seal is confirmed to leak after the angle stop is safely closed.
Match thread, connection, length, and seal type; a failed or corroded angle stop should be handled by a plumber rather than forced. - Pfister faucet valve body or complete faucet assembly
Consider this only when a technician confirms an internal valve-body or faucet-body leak that a cartridge, gasket, hose, or connection cannot correct.
Model, mounting, supply connections, finish, handle configuration, and available maintenance parts must be confirmed before replacement.
When checks do not resolve it
Need a professional?
Arrange Pfister or licensed plumbing service when the faucet body or valve leaks, a cartridge or retainer repair does not stop the drip, an angle stop will not isolate the faucet, a supply line or spray hose is damaged, water enters the cabinet or wall, or the leak source is uncertain. Close the stops and seek urgent plumbing help for uncontrolled flow, a burst supply line, structural water damage, or water near electrical equipment.
Safety scope: This article supports identifying the leak location, closing clearly identified angle stops, drying the area, reading the model label, and following the exact Pfister guide for a permitted, isolated cartridge or connection check. A qualified plumber should handle failed stops, pressurized or concealed plumbing, cracked bodies, internal valve work, wet electrical areas, and uncertain repairs.
Common questions
FAQ
Why is my Pfister faucet dripping from the spout when it is off?
Pfister's troubleshooting guidance treats a spout drip as a cartridge or cartridge-gasket path, but the exact model and handle configuration determine the part. Close the angle stops, identify the model, and follow its maintenance guide; replace or clean a cartridge only when that guide matches your faucet.
Why is my Pfister faucet leaking under the handle?
Water under a handle can involve the retainer, cartridge seal, or cartridge rather than the spout. Close the water stops before disassembly and use the exact Pfister model guide. If the body or valve is damaged or the drip returns, arrange service.
Can I tighten a Pfister faucet connection to stop the leak?
Only correct an obviously loose, correctly aligned connection after the water is isolated and according to the model instructions. Do not force a stop, cross-thread a fitting, or overtighten a retainer or supply connection; a damaged hose, washer, or valve needs the correct repair.
How do I choose a replacement Pfister cartridge?
Use the faucet model number and Pfister's maintenance guide or parts diagram. A cartridge that looks similar may not fit or may belong on the other handle. If the model is unknown or the faucet is still leaking after an approved repair, arrange Pfister or plumbing service.
Read the exact guide
Official sources
- Bathroom — Faucet is Leaking or DrippingPfister Faucets · Opened Pfister's official bathroom troubleshooting page used for two-handle and under-counter leak patterns; access and parts differ by faucet model.
- I Have a Leak (kitchen)Pfister Faucets · Opened Pfister's official kitchen troubleshooting page used for leak-location and cartridge or hose decision patterns; the user's exact faucet model and maintenance guide control the repair.
Community feedback
Share a repair observation
Share a plain-text repair observation. Accepted observations are published automatically; this page may take a moment to update.