
On this page
Start here
Quick answer
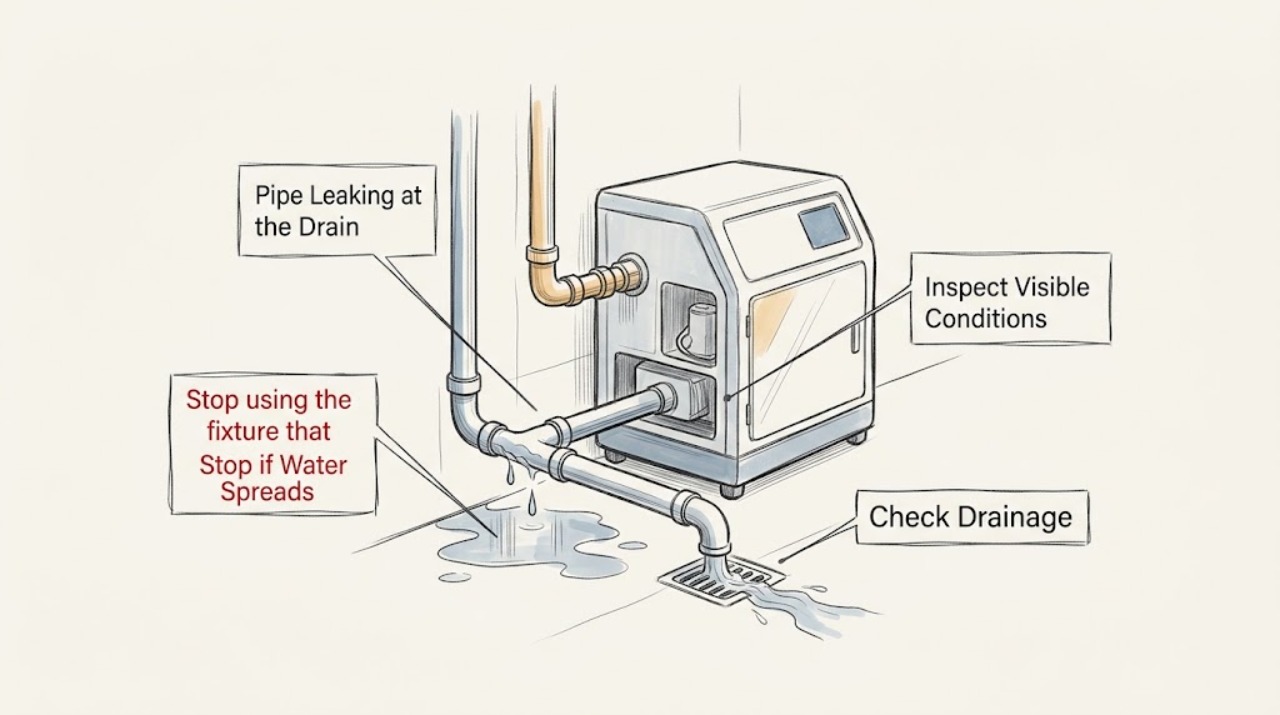
Stop using the fixture served by the leaking drain line and identify the first wet point before tightening or replacing anything. A joint or trap that leaks only while water discharges is different from a supply-side leak, a continuous leak, an upstream fixture, or wastewater backing up through the line. Keep people away from sewage, do not use a fixture that feeds the leaking line, and keep electricity away from standing water. If water is flowing quickly, near outlets or appliances, hot, contaminated, reaching a ceiling or wall, or the source cannot be isolated, stop and use emergency help or a licensed plumber. Do not open a drain joint after chemical cleaner was used, over-tighten plastic connections, dig, move structural materials, or work in standing water.
Before you begin
Safety first
- A plumber should determine whether the issue is a fixture joint, trap, branch drain, shared sewer, supply source, or concealed building leak and follow applicable local licensing and permit requirements.
Work through in order
Diagnostic checks
Use only checks that match the exact appliance or system and its official guide.
-
Check 1
Stop using the fixture that drains through the suspected line. From a dry, safe position, note whether the water is clear, hot, cloudy, foul-smelling, or mixed with debris, and whether the flow is a drip, seep, spray, or rapid stream.
Expected result: Clear water may be a supply or condensate source; cloudy or foul-smelling water suggests wastewater. A rapid flow, hot discharge, or sewage exposure is more urgent than a small contained seep.
Next step: If the water is hot, sewage-contaminated, flowing rapidly, or near electricity, stop and keep people away. Otherwise continue without running the fixture again until the first wet point is known.
Why this matters
Why: Water type and flow rate determine whether the line can be observed safely or must be isolated and escalated immediately.
-
Check 2
Place dry paper towels or a clean cloth at separate points along the exposed drain route: each threaded joint, the trap or bend, the wall or floor penetration, and the cabinet or floor below. Do not reach behind a hot appliance or into a wet electrical area.
Expected result: The first towel to become wet identifies the upstream source more reliably than the largest puddle. Moisture at a wall, ceiling, or floor penetration may indicate concealed pipework or water arriving from another area.
Next step: If the first wet point is concealed, overhead, structural, or not safely reachable, stop and arrange a plumber or building professional. Keep the fixture isolated.
Why this matters
Why: A joint leak, trap leak, concealed leak, and an unrelated overhead source need different service decisions; do not tighten the lowest visible point automatically.
-
Check 3
Only when the line is cool, dry around electricity, free of sewage backup, and the leak is small and contained, observe whether the joint becomes wet only when the connected fixture discharges. Do not deliberately create a large flow; if testing is unsafe, use the timing already observed.
Expected result: A leak that starts during discharge supports a drain-line, trap, or connection problem. A leak that continues when no fixture is used suggests a pressurized supply, stored water, or another source. Water appearing after an upstairs or neighboring fixture runs suggests a shared or upstream path.
Next step: Keep all fixtures on the affected branch unused if any seep returns. Do not run repeated tests, especially where water may reach electrical equipment or a ceiling.
Why this matters
Why: Leak timing separates drain discharge from continuous or cross-fixture sources and helps the plumber choose the first isolation point.
-
Check 4
Inspect an exposed threaded drain connection, trap, or slip joint without disassembling it. Look for a shifted washer, a cross-threaded nut, rust, a crack, a missing cap, or a pipe that slopes uphill or is under strain. Do not use a wrench on plastic or force a corroded joint.
Expected result: A loose-looking plastic compression joint may respond to gentle hand tightening, while a cracked fitting, distorted washer, corrosion, misalignment, or uphill pipe indicates a repair rather than a force problem.
Next step: If the joint is clearly accessible, cool, and only gently loose, use the hand-tightening limit described by the applicable maintenance guidance once. If it still leaks, isolate the fixture and call a plumber.
Why this matters
Why: Over-tightening can distort a plastic sealing washer and make a leak worse; a damaged or poorly supported drain line needs the fitting and alignment assessed together.
-
Check 5
Check whether nearby fixtures share the same drain route. Without using the leaking fixture, note gurgling, slow drainage, backup, odor, or water appearing when a different sink, tub, toilet, or appliance discharges. Do not open a cleanout or remove a trap if wastewater or chemical cleaner may be present.
Expected result: Several fixtures affected together, recurring foul odor, slow flow, or wastewater returning at a low fixture suggests a branch or main drain problem rather than one loose joint.
Next step: Stop using the affected fixtures and arrange prompt plumbing service. Tell the plumber whether wastewater backed up and whether any chemical drain product was used.
Why this matters
Why: Multiple-point symptoms increase the chance of a shared blockage, broken sewer line, or backflow condition and raise the health and property risk.
-
Check 6
Check the surrounding wall, ceiling, cabinet base, and floor for spreading dampness, staining, soft material, peeling finish, mold odor, or a bulge. Look from a safe standing position only; do not cut into the building or climb to inspect a high area.
Expected result: Persistent moisture, a ceiling stain or bulge, soft structural material, mold, or water traveling from another room can mean a concealed or building-related leak rather than an exposed drain fitting.
Next step: Stop the relevant water use, keep clear of a sagging or damaged ceiling, and arrange plumbing and building assessment. Treat water near electrical equipment as an emergency isolation issue.
Why this matters
Why: Hidden water can damage structure and may reach wiring; the visible pipe may not be the source.
-
Check 7
Prepare the service record: first wet point, water appearance and odor, fixtures involved, whether the leak is discharge-related or continuous, photos from a dry position, any visible crack or joint movement, and whether chemical drain cleaner was used. Do not remove or replace the line before the plumber sees the evidence.
Expected result: A repeatable timing pattern, multiple fixtures, sewage odor, concealed moisture, or a failed gentle hand check gives the plumber useful triage information without requiring hazardous disassembly.
Next step: Arrange a licensed plumber for persistent, concealed, wastewater, structural, or inaccessible leaks. Follow local requirements for regulated drainage work and do not attempt excavation or shared-sewer repair.
Why this matters
Why: Drain-line responsibility, permits, and the correct repair depend on whether the problem is a fixture joint, private branch, shared sewer, or building penetration.
Use your observations
Decision map
Find the observation that best matches what you see, then follow the next safe action.
-
PATH 01Next step
What you see
Water is clear, slow, contained, and the first wet point is a plainly exposed threaded drain joint.
Do this next
If it still seeps, the washer is damaged, the fitting is cracked, or the line is under strain, isolate the fixture and call a plumber.
Why this path and its safety boundary
Why it matters: Keep the fixture unused and inspect the joint without disassembly; a plastic connection may tolerate one gentle hand check, never force.
-
PATH 02Next step
What you see
The leak appears only when the connected fixture discharges.
Do this next
Do not keep cycling the fixture. Arrange plumbing service if the first wet point is not an accessible joint or if any seep returns.
Why this path and its safety boundary
Why it matters: Treat the trap, branch pipe, connection, or downstream drain as the likely path, while recognizing that water can travel from upstream.
-
PATH 03Next step
What you see
The leak is continuous when no fixture is used, or the water is hot or clearly clean under pressure.
Do this next
If safely reachable, isolate the affected water supply and call a plumber. Do not loosen a pressurized connection or work around hot water.
Why this path and its safety boundary
Why it matters: Do not assume the drain line is the source; a supply fitting, appliance, tank, or another water source may be wetting the drain route.
-
PATH 04Next step
What you see
Several fixtures drain slowly, gurgle, back up, smell foul, or trigger water at the same location.
Do this next
Stop using affected fixtures, avoid contact with wastewater, and arrange prompt licensed plumbing assessment. Tell the plumber about any chemical cleaner.
Why this path and its safety boundary
Why it matters: Treat this as a shared branch or sewer-line concern rather than a single loose joint.
-
PATH 05Next step
What you see
The first wet point is inside a wall, ceiling, floor, cabinet void, or other concealed or structural area.
Do this next
Isolate relevant water use, keep away from damaged or sagging material, and arrange plumbing and building assessment.
Why this path and its safety boundary
Why it matters: Do not cut, pry, excavate, or move building materials to chase the leak.
-
PATH 06Next step
What you see
The exposed joint is cracked, corroded, repeatedly leaking, over-tightened, or cannot be gently sealed.
Do this next
Keep the fixture out of use and have a plumber identify the correct fitting, washer, support, alignment, and local compliance requirements.
Why this path and its safety boundary
Why it matters: Treat the fitting or drain-line section as needing repair, not more torque.
-
PATH 07Next step
What you see
Water flows rapidly, reaches electrical outlets or appliances, is contaminated or very hot, the ceiling or structure is damaged, or the source cannot be isolated.
Do this next
Use appropriate emergency water, electrical, fire, or building support from a safe position, then arrange qualified plumbing service.
Why this path and its safety boundary
Why it matters: Stop all troubleshooting and keep people away from the hazard.
Helpful context
Understand the symptom
A puddle under a drain line does not prove that the nearby joint is the source. Water can travel along a pipe, cabinet base, wall, or floor before it appears. First stop the fixture and observe whether the wet point is at a connection, trap, branch pipe, cleanout, ceiling, wall, or floor. Then compare the timing: only during discharge, only after another fixture runs, or continuously.
The checks below are limited to safe visual observation, fixture isolation, and a plainly accessible connection. They do not require opening a drain line, removing a concealed fitting, using a chemical cleaner, entering sewage, working near live electricity, or disturbing a ceiling, wall, or floor.
A clean-water leak and a wastewater leak have different risks. Wastewater, foul odor, backup, or water near electrical equipment should end do-it-yourself testing. If a simple hand check does not stop a visible joint leak, the next step is a plumber, not more force.
Safety boundary
Stop conditions
- Stop immediately for rapid flow, uncontrolled water, wastewater or sewage, foul odor, hot water, or water near electrical outlets, switches, appliances, or wiring.
- Stop if the source cannot be isolated, if a ceiling bulges or sags, if a wall or floor is soft, or if water is entering a concealed structural space.
- Do not open a drain joint, trap, cleanout, or pipe after chemical drain cleaner was used; tell the plumber what product and timing apply.
- Do not over-tighten plastic connections, loosen pressurized or hot-water fittings, use a wrench on a corroded joint, excavate, or work in standing water.
- Do not use a fixture that feeds the leaking line, repeatedly discharge water to reproduce the leak, or handle sewage without appropriate professional guidance.
- Stop and arrange licensed plumbing service if a gentle accessible check does not stop the leak, multiple fixtures are affected, or the line is concealed, shared, cracked, or structurally unsupported.
Only after diagnosis
Potential parts
- drain-line compression washer or slip-joint seal
Consider only when a plumber or safe inspection confirms a damaged seal at an exposed compatible joint.
Confirm the pipe material, joint dimensions, and local requirements before selecting a seal. - trap or exposed drain fitting
Consider only when the first wet point is a cracked or failed exposed trap or fitting and the replacement is identified for the existing line.
A plumber should verify alignment, slope, material, and connection type before replacement. - drain-line section or cleanout repair
Consider only for a confirmed damaged, concealed, shared, or inaccessible drain section after plumbing assessment.
Drain-line work may require permits, inspections, access planning, and local code compliance; do not infer a repair from the puddle location.
When checks do not resolve it
Need a professional?
A drain-line leak persists after safe observation, the source is inaccessible or concealed, several fixtures are affected, wastewater is present, or any stop condition occurs.
Safety scope: A plumber should determine whether the issue is a fixture joint, trap, branch drain, shared sewer, supply source, or concealed building leak and follow applicable local licensing and permit requirements.
Have this ready
- First wet point, water appearance and odor, discharge timing, fixtures involved, photos from a dry position, visible joint or pipe condition, ceiling or wall signs, and any chemical drain-cleaner history.
Common questions
FAQ
How do I find where a drain pipe is leaking?
Stop the connected fixture and place dry paper towels at each exposed joint, trap, wall or floor penetration, and the area below. The first wet point is more useful than the largest puddle. Do not run repeated tests if water is near electricity, hot, contaminated, or entering a concealed space.
Why does a drain-line leak appear only when water goes down the pipe?
That timing supports a trap, joint, branch pipe, or downstream drain problem, although water can travel from upstream. Keep the fixture unused and arrange a plumber if the source is not a clearly accessible, gently loose joint.
Should I tighten a leaking plastic drain connection?
Only a plainly accessible, cool, clean connection may tolerate one gentle hand check. Over-tightening can distort the washer and worsen the leak. A cracked, corroded, misaligned, or repeatedly leaking joint needs plumbing service.
What if several fixtures cause water or a sewage smell at the drain line?
Stop using the affected fixtures and treat it as a shared branch or sewer concern. Avoid contact with wastewater and tell the plumber about any drain-cleaner product used before they open the line.
When is a leaking drain line an emergency?
Treat rapid flow, hot or contaminated water, water near outlets or appliances, uncontrolled leakage, a bulging ceiling, structural damage, or an unisolated source as urgent. Keep people away and use appropriate emergency water, electrical, fire, building, or plumbing support from a safe location.
Read the exact guide
Official sources
- Broken Sewer and Drain Lines- Guide to Repairs, Permits and InspectionsCity of Portland Bureau of Development Services · Sewer and drain-line break or leak signs, raw sewage hazards, private versus public line context, qualified work, permits, and inspections
- Basic Home Maintenance – Home Occupants’ GuideCanada Mortgage and Housing Corporation · Basic household waste-plumbing maintenance, traps, compression washers, gentle hand tightening, leak limits, and chemical-cleaner disclosure
- Plumbing work in your homeGovernment of Western Australia, Building and Energy · Residential plumbing-work boundaries, licensed plumber requirements, drainage work, and professional compliance context
- Problems with your water supply and leaksOxford City Council · Household leak-source identification, emergency leaks near electricity, water isolation, appliance leaks, drain blockage, and plumber escalation
- Detect and Chase Down Leaks ChecklistU.S. Environmental Protection Agency · Household leak detection, first-source observations, pooling at pipe connections, appliance leaks, and hidden moisture or mold clues
Community feedback
Share a repair observation
Share a plain-text repair observation. Accepted observations are published automatically; this page may take a moment to update.