
On this page
Start here
Quick answer
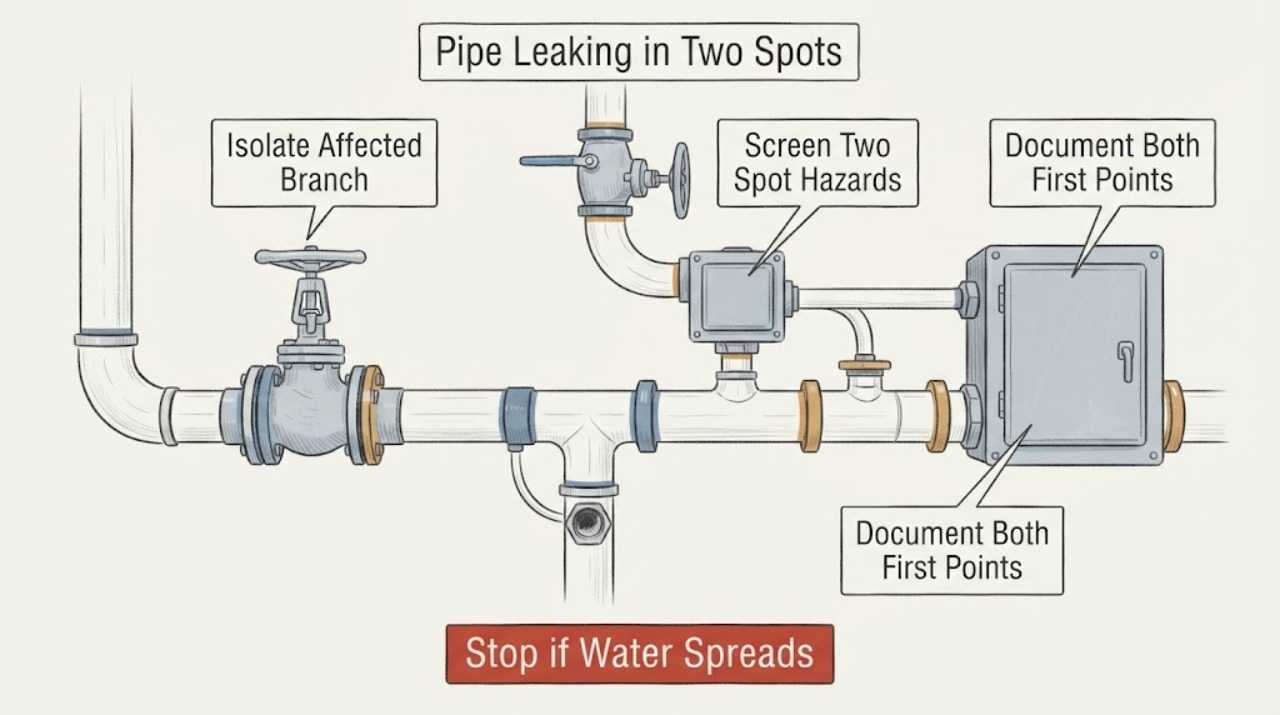
Two wet spots after a pipe repair are not proof of two unrelated faults: water can travel from one pressurized joint, or the repair may involve two leaking connections. Stop using the affected branch, close the nearest safe shut-off or the house main if needed, and keep water away from electrical equipment. Mark and document both first wet points, then compare whether each spot appears while all fixtures are idle or only when one fixture drains or uses hot water. Do not tighten, disconnect, or reopen the repaired work while pressurized, and do not open a wall or floor to chase water. Leave the branch isolated and ask the original plumber to inspect the repair; use emergency plumbing help for rapid flow, hot or contaminated water, structural damage, or a valve that will not isolate.
Work through in order
Diagnostic checks
Use only checks that match the exact appliance or system and its official guide.
-
Check 1
Stop using the repaired fixture or branch. From a dry safe position, close its clearly identified shut-off valve; if both spots continue or the local valve is unavailable, close the house main valve only when it is safely accessible.
Expected result: Both spots stop, only one spot stops, flow continues until the main valve closes, the valve will not turn, or water is spreading too rapidly to approach.
Next step: Keep the affected branch isolated and contact the original plumber for a post-repair inspection. Use emergency plumbing service for rapid flow, structural damage, or an unavailable isolation valve.
Stop if: Do not force a stuck valve, reopen the branch, or enter standing water near electrical equipment.
Why this matters
Why: Both spots stopping at one branch supports a shared repaired path or adjacent connections. One spot continuing suggests another supply or traveling-water path. A valve that cannot isolate the branch needs professional attention.
-
Check 2
From a safe position, check both locations for water near outlets, wiring, appliances, a water heater, or a ceiling; note hot or contaminated water, slipping risk, bulging material, smoke, sparks, or a burning odor.
Expected result: Either spot threatens electrical equipment or structure, contains hot or contaminated water, or has smoke or a burning odor; alternatively both spots are contained in a dry accessible area.
Next step: Keep people clear and use the appropriate emergency or qualified service. Isolate power only from a dry safe position if possible without touching water or damaged equipment; otherwise wait for qualified help.
Stop if: Do not touch wet plugs, panels, wiring, hot connections, bulging ceilings, or unknown water, and do not use water on an energized electrical fire.
Why this matters
Why: The priority may be electrical shock, fire, scalding, contamination, or structural damage rather than leak tracing. Two small visible spots can still conceal a larger wet area.
-
Check 3
Photograph and mark the outline of each visible wet area without wiping away the first drip. Trace each exposed pipe upward and backward from the spot using only visual inspection or a clean dry tissue on accessible dry surfaces.
Expected result: Both spots begin below the same repaired joint, each spot has a separate wet joint, one spot is lower along the pipe or floor, or neither first point is visible.
Next step: Give both marked locations and the suspected highest wet point to the original plumber. Arrange professional leak detection when either source is hidden or water travels through a wall, ceiling, or floor.
Stop if: Do not remove insulation, open a wall, drill, scrape sealant, or use a tool to probe the pipe.
Why this matters
Why: A shared upstream wet point can explain two spots through traveling water; two separate wet joints may indicate two repair interfaces or stress on adjacent fittings. An unseen source raises a concealed-line possibility.
-
Check 4
Record the repaired pipe or fixture, the date and scope of work, whether each spot appeared immediately or later, whether both spots appear together, and which valves were closed. Keep the invoice, work order, and before-and-after photos.
Expected result: The two spots began immediately after restoration, appeared after a delay, occur together, or one appears only after a fixture is used.
Next step: Send the record to the original contractor and request a return inspection within the repair scope. Keep the branch isolated while waiting.
Stop if: Do not apply tape, sealant, or wrench force before the repair is inspected, and do not discard wet materials that document damage.
Why this matters
Why: Immediate paired leakage supports the repaired section or adjacent connections; delayed or use-triggered leakage can indicate pressure, drain discharge, thermal change, or water traveling from elsewhere. Timing does not identify a part by itself.
-
Check 5
Only when both areas are dry, isolated, and free of electrical or structural risk, observe whether each spot changes while all fixtures are idle and, if a plumber directs it, during one limited use of the affected fixture. Do not run a full appliance cycle.
Expected result: Both spots seep while idle, appear only during discharge, appear only with hot water, or remain dry during the limited observation.
Next step: Report the trigger for each spot and keep the water path out of service until the plumber confirms the cause. Stop the observation if either spot grows or water travels.
Stop if: Do not test a pressurized joint by hand, use hot water that could scald, or operate an appliance in a wet area.
Why this matters
Why: Idle seepage supports a pressurized supply or valve path; discharge-only moisture supports a drain or outlet path; hot-only moisture points to a hot-water branch. A dry interval does not prove the repair is sound.
-
Check 6
With all indoor and outdoor water use stopped, observe the water-meter leak indicator or reading only if it can be accessed safely. Then compare it after the house valve is closed, without opening the repaired branch.
Expected result: The meter moves with all use stopped, stops after the house valve closes, continues after the house valve closes, or stays quiet while one spot appears during draining.
Next step: Give the result to a licensed plumber or leak-detection professional. Keep the branch or main supply isolated when either spot is active.
Stop if: Do not enter a flooded meter area, lift a heavy cover, excavate, or open a structure to follow the line.
Why this matters
Why: Meter movement confirms ongoing flow but not the exact source. Stopping after the house valve closes points toward an indoor branch; continued movement can indicate a line between the meter and house valve or another unisolated path. A quiet meter is consistent with a drain-triggered leak.
-
Check 7
After the original plumber or another qualified professional has inspected and corrected the work, restore water only under their direction and watch both marked locations from a dry safe position while the supply is opened as instructed.
Expected result: Neither spot returns, one spot seeps immediately, both spots return together, or a spot appears only when the fixture is discharged.
Next step: Close the safe valve again if any spot returns and contact the original contractor for corrective work. Record which spot returned and when instead of tightening the joint.
Stop if: Do not stand under a wet ceiling, remain in a wet electrical area, or leave the property while a repaired connection is being observed.
Why this matters
Why: A returning spot is evidence that the repair or an adjacent path still needs correction. Paired return supports a shared path or two unresolved interfaces; discharge-only return supports the drain side.
-
Check 8
Prepare a service handoff with the original repair scope, both spot locations, highest wet point, idle-versus-use timing, valve and meter behavior, pipe material if known, water temperature, photos, and any ceiling, wall, floor, electrical, or contamination impact.
Expected result: The leak is within the original contractor's scope, the source is concealed, a valve cannot isolate it, the two spots follow different triggers, or damage extends beyond the repair area.
Next step: Keep the affected water path isolated until qualified service confirms the repair and the surrounding area is dry and safe. Escalate structural or electrical damage separately.
Stop if: Do not resume normal use because the puddle dried, and do not conceal staining or discard evidence before inspection.
Why this matters
Why: A precise handoff lets the original contractor assess workmanship and lets a new plumber or leak-detection professional distinguish one traveling leak from two separate failures without unsafe access.
Use your observations
Decision map
Find the observation that best matches what you see, then follow the next safe action.
-
PATH 01Next step
What you see
Either spot flows rapidly, reaches electrical equipment, involves hot or contaminated water, causes a bulging ceiling or wall, or is accompanied by smoke or a burning odor.
Do this next
Keep clear, isolate water only from a safe dry position, and use emergency plumbing, electrical, fire, building, or remediation services as appropriate. Do not reopen or retest the repair.
-
PATH 02Next step
What you see
One local valve stops both spots and the area is dry and safe.
Do this next
Leave that branch isolated, mark both spots, preserve the repair record, and contact the original plumber for a post-repair inspection.
-
PATH 03Next step
What you see
The local valve stops one spot but the other continues, or the main valve is needed to stop both.
Do this next
Treat the spots as potentially separate or as a shared line with another unisolated path. Keep the main or correct branch closed and arrange qualified plumbing service; do not force a valve.
-
PATH 04Next step
What you see
Both spots seep while all fixtures are idle.
Do this next
Treat the repaired area, adjacent pressurized joints, or an unisolated supply branch as active until a plumber confirms the source. Keep the water off and do not tighten either joint under pressure.
-
PATH 05Next step
What you see
One or both spots appear only while the affected fixture or appliance discharges.
Do this next
Stop using that fixture, keep the branch isolated, and tell the plumber the exact discharge trigger and first wet point. A drain or appliance connection may be involved.
-
PATH 06Next step
What you see
The two spots have different triggers, such as one leaking while idle and the other only during discharge or hot-water use.
Do this next
Keep both affected paths out of service and report each trigger separately. Do not assume one adjustment will repair two different leak paths.
-
PATH 07Next step
What you see
Neither exposed joint is wet, the meter shows ongoing flow, or staining appears away from the repaired area.
Do this next
Do not open the wall, floor, or ceiling. Keep water isolated and arrange professional leak detection; the visible spots may be downstream from one hidden source.
-
PATH 08Next step
What you see
A qualified professional confirms the repair, both spots remain dry during controlled restoration, and no structural, electrical, hot-water, or contamination warning remains.
Do this next
Resume use gradually as directed, retain the repair record, and monitor both locations for delayed or intermittent return. Isolate again if either spot reappears.
Helpful context
Understand the symptom
Two spots can share one source
Water may run along a pipe, cabinet, wall, or floor before it drips, so the lowest puddle is not always the leak point. Two spots can also mean two disturbed joints, an old adjacent connection stressed during the repair, or a supply leak plus a drain leak. The timing of each spot and the first wet point are more useful than simply counting puddles.
Keep the repair evidence intact
Because the leak began after pipe repair, preserve the original scope, fittings, photos, and date. Do not add sealant or wrench force before the original contractor sees the work. A second intervention can hide whether the repaired joint, an adjacent connection, or a concealed line caused the two spots.
Separate supply, drain, and hidden-line behavior
A pressurized supply leak can continue while every fixture is idle. A drain-side leak may appear only during discharge, while water from a hot branch may be hot and hazardous. A meter can show ongoing flow with all intended water use stopped, but a quiet meter does not rule out a drain leak.
Only after diagnosis
Potential parts
- pipe joint seal or connector
Consider only when qualified diagnosis confirms that one or both post-repair spots originate at a specific joint or connector and identifies the correct repair method.
Pipe material, joining method, pressure, temperature, and local code affect fit; two puddles do not establish that one generic connector will solve both. - branch shut-off valve
Consider only when the existing valve cannot isolate the repaired branch or qualified service identifies valve failure.
Confirm pipe size, material, connection type, access, and code requirements with the plumber; never force a stuck valve. - water service valve or pressure regulator
Consider only after qualified diagnosis finds a pressure or service-line cause instead of two local repair interfaces.
Pressure and service-line components require site-specific assessment and qualified installation; flow or two wet spots alone do not establish fit.
When checks do not resolve it
Need a professional?
Contact the original plumbing contractor promptly because the two spots appeared after pipe repair. Use emergency plumbing service for rapid flow, a valve that will not isolate, a concealed line, a ceiling or wall impact, hot or contaminated water, or water threatening a lower level. Use qualified electrical, building, or remediation help when water reaches electrical equipment or structural materials.
Have this ready
- Provide the original repair scope and date, both marked spot locations, first wet point for each, photos, idle-versus-use timing, valve and meter behavior, pipe and fixture identity, water temperature, and any wall, floor, ceiling, electrical, or contamination signs.
Common questions
FAQ
Do two wet spots mean I need two new pipe repairs?
Not necessarily. Water can travel from one upstream joint, but two disturbed or stressed connections can also leak separately. Mark both spots, find each highest accessible wet point, and let the original plumber inspect before changing anything.
Should I tighten both fittings to stop the leaks?
No. Keep the affected branch isolated and contact the original plumber. Tightening a pressurized or incorrectly joined fitting can worsen the leak and erase evidence of the post-repair cause.
Why does only one of the two spots leak when the fixture is used?
A use-triggered spot may be on a drain or outlet path, while an idle spot may be on a pressurized supply path. Record the trigger for each spot and do not keep testing if water spreads or reaches an unsafe area.
What if both spots are lower than the repaired pipe?
Water may be traveling along a pipe, wall, floor, or cabinet. The lowest puddles are not always the source. Avoid opening the structure and arrange professional leak detection if no exposed first wet point is visible.
Can I leave the water on if each spot is only a drip?
Do not assume a drip is stable. Isolate the affected branch when safe, or use the main valve if necessary, and arrange a prompt inspection. A delayed increase can damage hidden materials.
Read the exact guide
Official sources
- How to check for leaksCity of Portland Water Bureau · General residential water-leak guidance; local valve locations and plumbing rules vary.
- Water LeaksAustin Water · General leak-location principles; local ownership and response routes are specific to Austin.
- Checking for Water Leaks on Your PropertyCity of San Diego Public Utilities · General residential leak-detection guidance; local service responsibility and valve design differ.
- Home MaintenanceU.S. Environmental Protection Agency WaterSense · General household maintenance guidance; local emergency and plumbing requirements control.
- Finding and Fixing Water LeaksCity of San José Environmental Services · General residential leak guidance; local water-retailer and permit arrangements differ.
- What to do if water pipes freeze, leak, or burst as temperatures riseCity of Portland Water Bureau · Emergency-response principles for residential pipe leaks; follow local utility and emergency procedures.
Community feedback
Share a repair observation
Share a plain-text repair observation. Accepted observations are published automatically; this page may take a moment to update.