
On this page
Start here
Quick answer
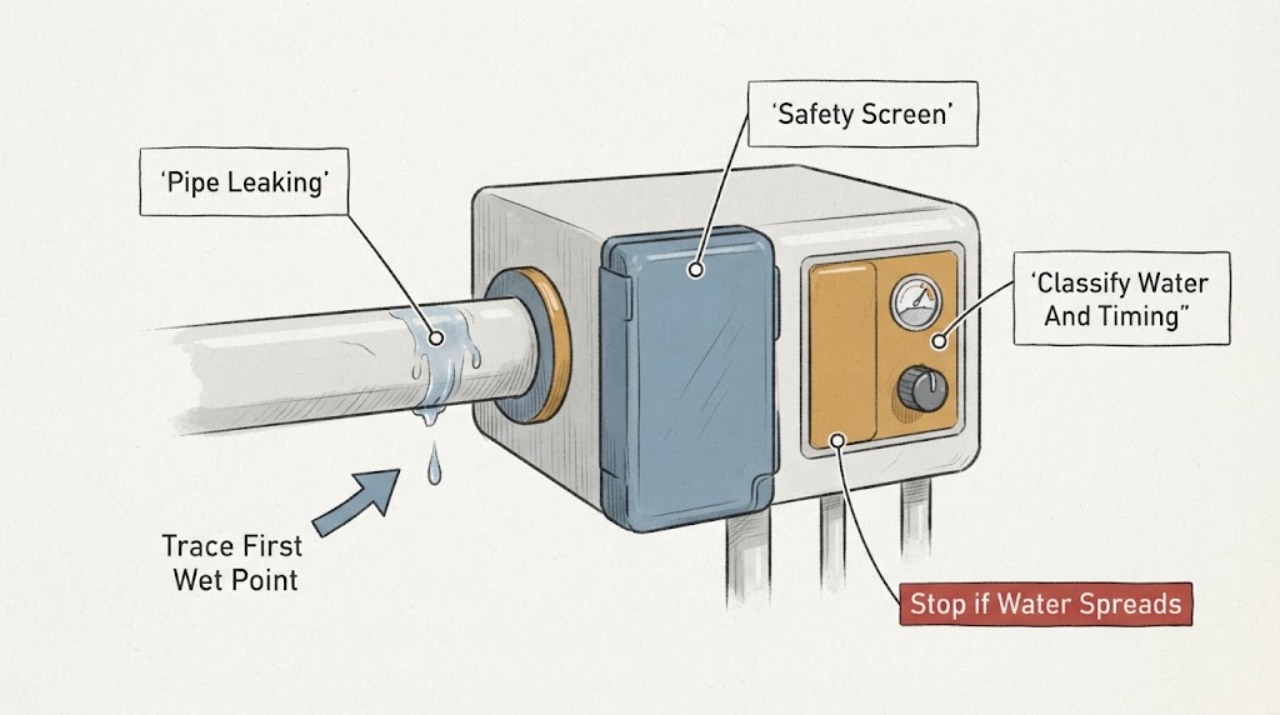
A leaking pipe seal is not identified by the seal alone: first find the highest or first wet point, stop the water source, and determine whether the pipe carries pressurized supply water, drain water, or a nearby source. Close the nearest safe shutoff, or the main valve if the leak is active or the local valve is inaccessible. With water isolated and the area dry, inspect only reachable joints for a displaced washer, corrosion, cracked fitting, or failed seal; do not take a pipe apart under pressure, over-tighten a connection, or use chemicals where a drain may contain them. Hot water, sewage, water near electricity, a hidden-wall or ceiling leak, structural damage, uncontrolled flow, or a leak that returns after a careful external check needs a plumber.
Work through in order
Diagnostic checks
Use only checks that match the exact appliance or system and its official guide.
-
Check 1
Stop using the affected fixture and observe the leak from a dry, stable position without touching water near an outlet, appliance, panel, or exposed wiring.
Expected result: Record uncontrolled flow, hot water or steam, sewage or foul contaminated water, water entering a wall or ceiling, pooling near electricity, smoke, burning odor, structural sagging, or a failed shutoff.
Next step: Keep people clear, close water only from a safe dry position, isolate affected electrical equipment only if it can be done without entering water, and arrange emergency plumbing or electrical help as applicable.
Stop if: Do not touch wet electrical equipment, enter a flooded area, open a pressurized connection, or keep using the fixture after a hazard appears.
Why this matters
Why: These conditions can create shock, burn, contamination, structural, or property-damage hazards beyond a replaceable seal.
-
Check 2
Without dismantling anything, note whether the pipe leaks continuously, only while a faucet or appliance supplies water, or only while a fixture drains.
Expected result: Continuous dripping with all fixtures idle supports a pressurized supply path; flow only during use supports a supply fitting under demand or a drain connection; a leak that starts above the pipe suggests another source.
Next step: Stop water use, mark the first wet point with a dry towel or tissue, and continue only with safe external observations.
Stop if: Do not run repeated tests when flow is increasing, water is entering a wall or ceiling, or contamination is suspected.
Why this matters
Why: Timing narrows the path without assuming that the visible seal is the source.
-
Check 3
With water use stopped, dry the exposed pipe and inspect upward and upstream from the drip, including nearby valves, fittings, hoses, cabinets, ceilings, and appliance connections.
Expected result: The first new wet ring identifies a more useful source than the lowest puddle; a dry pipe with a wet cabinet or ceiling indicates an upper, concealed, or unrelated source.
Next step: Photograph and mark the first wet point, then select the local-shutoff or concealed-leak branch rather than replacing a seal by assumption.
Stop if: Do not open walls, ceilings, flooring, or insulation to chase a leak as a homeowner repair.
Why this matters
Why: Water can travel along framing or pipe surfaces and appear away from the failed joint.
-
Check 4
Close the clearly identified local valve for the affected fixture or branch; if it is inaccessible, unknown, or ineffective, close the main water valve only from a safe dry location.
Expected result: Flow stopping at a local valve supports that branch; continued flow means the valve may be wrong or failed; a meter or leak indicator that continues after the main shutoff suggests a leak before the house valve or another source.
Next step: Keep the affected fixture unused and arrange a plumber when the valve fails, the leak is forceful, or isolation cannot be confirmed.
Stop if: Do not force a seized valve, disconnect the valve, or reopen water to test an uncontrolled leak.
Why this matters
Why: Isolation limits damage and distinguishes the affected plumbing zone, but it does not prove the seal is the only fault.
-
Check 5
After the line is isolated and pressure has safely relieved, inspect only the exposed joint from outside for a displaced washer, mineral buildup, corrosion, cracked fitting, split hose, or damaged threads.
Expected result: A visible worn washer or gasket at a clean, accessible connection supports a seal-related repair; a split pipe, cracked fitting, damaged threads, glued joint, or hidden wet area requires professional diagnosis.
Next step: If a manual for the exact fitting authorizes a user-accessible seal replacement, follow it with the line isolated; otherwise leave the joint intact for a plumber.
Stop if: Do not take apart a pressurized joint, use chemical drain products in a line with unknown contents, wrap slip joints with filler, or over-tighten a nut.
Why this matters
Why: Different joint types use different assembly methods; a symptom cannot select a universal sealant or replacement.
-
Check 6
Identify whether the leaking pipe is a supply line, a drain line or trap, an appliance hose, or a pipe near a water heater or other equipment, without removing it.
Expected result: Supply leaks can occur while fixtures are idle; drain joints often show water only during discharge; a trap or appliance connection may contain standing or contaminated water; a water-heater area may involve hot water or a relief component.
Next step: Use the branch matching the observed system and give the plumber the pipe material, joint type, timing, and first wet point.
Stop if: Do not handle hot, sewage, or chemically contaminated water, and do not disconnect appliance or heater plumbing without model and safety instructions.
Why this matters
Why: The water type and pressure change the safe isolation and service path, so a seal from one system is not automatically suitable for another.
-
Check 7
When every fixture is off and it is safe to access the meter, observe the leak indicator or dial, then compare it after the house valve is closed; replace the meter-box lid when finished.
Expected result: Movement with the house valve closed points toward the service line or a leak before the valve; a stopped indicator points toward a leak inside the house or a source that stopped during the check.
Next step: Arrange leak detection or plumbing service for underground, wall, ceiling, slab, or persistent unexplained moisture.
Stop if: Do not enter a flooded meter area, lift a heavy or unsafe cover, excavate, or open structural surfaces to find the pipe.
Why this matters
Why: A meter check can separate an indoor plumbing leak from an upstream or underground leak, but it cannot locate a concealed joint by itself.
-
Check 8
After the leak is isolated and only if the water is clean and the area is electrically safe, remove standing water and record wet cabinets, flooring, ceilings, insulation, or wall finishes.
Expected result: Rapidly drying a small clean wet area can limit damage; sewage, mold, porous-material saturation, staining that spreads, or dampness that persists after isolation needs specialized cleanup or building assessment.
Next step: Keep the source isolated and arrange appropriate water-damage, mold, or remediation help alongside the plumber when indicated.
Stop if: Do not clean sewage or suspected contaminated water as ordinary household water, mix cleaning chemicals, or energize wet equipment.
Why this matters
Why: Fixing the pipe does not automatically fix moisture damage or contamination.
-
Check 9
Prepare a service record with pipe location, fixture, supply or drain identity, first wet point, timing, water temperature or contamination, valve behavior, pipe material, joint or seal appearance, and nearby damage.
Expected result: A precise record distinguishes a reachable seal or washer from a cracked pipe, failed shutoff, concealed leak, drain-trap problem, heater connection, or upstream service-line issue.
Next step: Keep water isolated or the fixture unused until the cause is repaired and a controlled leak check is completed by the responsible professional.
Stop if: Do not order a seal, pipe fitting, clamp, or replacement section from the word leaking alone; compatibility depends on pipe and joint type.
Why this matters
Why: The plumber can choose a safe repair path without exploratory pressurized disassembly or a guessed sealant.
Use your observations
Decision map
Find the observation that best matches what you see, then follow the next safe action.
-
PATH 01Safety boundary
What you see
Water is uncontrolled, hot, contaminated with sewage or chemicals, near electricity, entering a wall or ceiling, causing structural sagging, or the shutoff fails.
Do this next
Keep clear, close the main valve only if safely reachable, isolate power only from a dry safe position, and arrange emergency plumbing or electrical help.
Why this path and its safety boundary
Why it matters: The leak presents flooding, burn, contamination, shock, or structural risk.
Safety stop: Do not enter water, touch wet electrical equipment, open the pipe, or restore water for another test.
-
PATH 02Safety boundary
What you see
The pipe drips or sprays with every fixture off.
Do this next
Close the local valve or main valve safely and have a plumber assess the seal, fitting, pipe, and shutoff.
Why this path and its safety boundary
Why it matters: A pressurized supply path or failed isolation valve is more likely than a drain-only leak.
Safety stop: Do not loosen or over-tighten a pressurized connection.
-
PATH 03Safety boundary
What you see
Water appears only while a sink, shower, appliance, or other fixture drains.
Do this next
Stop using that fixture, contain only clean reachable water, and arrange plumbing service if the joint is not explicitly user-serviceable.
Why this path and its safety boundary
Why it matters: A drain joint, trap, hose, downstream blockage, or discharge connection is possible.
Safety stop: Do not handle sewage, open a trap after chemicals were used, or disconnect a drain into an uncontrolled area.
-
PATH 04Safety boundary
What you see
The first wet point is an exposed connection with a clearly displaced or worn washer or gasket, no crack, and water safely isolated.
Do this next
Follow the exact fitting or fixture instructions, or have a plumber replace the seal and verify the joint under controlled pressure.
Why this path and its safety boundary
Why it matters: A seal-related repair may be appropriate, but the exact joint type and part must be confirmed.
Safety stop: Do not substitute sealants, wrap slip joints with filler, over-tighten, or disassemble an unknown connection.
-
PATH 05Safety boundary
What you see
The first wet point is a cracked pipe or fitting, stripped or corroded threads, a split hose, or a visibly distorted joint.
Do this next
Keep the line isolated and arrange a plumber to identify compatible materials and make the repair.
Why this path and its safety boundary
Why it matters: Replacing or rebuilding the damaged section may be required; a seal alone is unlikely to solve it.
Safety stop: Do not clamp, glue, solder, cut, or heat an unknown pipe as a permanent repair.
-
PATH 06Safety boundary
What you see
The visible drip is downstream from a dry pipe, or moisture comes from a wall, ceiling, cabinet back, slab, or another fixture.
Do this next
Stop nearby water use, use safe isolation, and arrange leak detection or plumbing service; do not open the structure yourself.
Why this path and its safety boundary
Why it matters: Water is traveling from an upstream, concealed, or unrelated source.
Safety stop: Do not remove wall, ceiling, flooring, or insulation to chase the source.
-
PATH 07Safety boundary
What you see
The local valve does not stop flow, is seized, or the main valve is inaccessible or ineffective.
Do this next
Keep people away from the leak and contact the responsible plumbing or property emergency service for isolation and repair.
Why this path and its safety boundary
Why it matters: Water cannot be safely isolated by the expected control.
Safety stop: Do not force, remove, or repair the valve while the line is pressurized.
-
PATH 08Safety boundary
What you see
The water is hot, foul, sewage-like, or may contain drain chemicals.
Do this next
Avoid contact, keep the area isolated, and arrange qualified plumbing and appropriate cleanup help.
Why this path and its safety boundary
Why it matters: Burn, exposure, and chemical-reaction hazards change the task from an ordinary seal check.
Safety stop: Do not open the trap, mix cleaners, or use bare hands to contain the water.
-
PATH 09Safety boundary
What you see
The leak indicator or dial continues moving after all fixtures are off and the house valve is closed.
Do this next
Arrange utility or qualified leak-detection and plumbing service rather than excavating or opening the house structure.
Why this path and its safety boundary
Why it matters: A service-line, underground, or upstream leak may remain.
Safety stop: Do not dig, excavate, or restore full flow to locate the leak.
-
PATH 10Safety boundary
What you see
The pipe is isolated but cabinets, floors, walls, or ceilings remain damp, stained, moldy, or structurally affected.
Do this next
Keep the area dry and arrange qualified water-damage or mold assessment in addition to plumbing repair.
Why this path and its safety boundary
Why it matters: Water damage or hidden moisture remains after the plumbing source is controlled.
Safety stop: Do not paint, seal, or conceal damp or moldy materials before the moisture source and damage are addressed.
Helpful context
Understand the symptom
Find the first wet point, not just the dripping point
Dry the outside of the pipe and fittings with a towel, then watch from a safe position while water is used only if doing so will not increase damage. Water can run along a pipe, cabinet, joist, or ceiling before it drips, so the lowest wet spot may be downstream from a seal or joint. Note whether the leak appears only when a fixture runs, only while a drain is flowing, or continuously with every fixture off. That timing separates a pressurized supply leak from a drain joint or an unrelated upper-level source.
Isolate water before inspecting a seal
Close the nearest accessible fixture valve only when it is clearly the valve for the affected line and can be reached without entering water. If the leak continues, is forceful, or the local valve is unknown, close the main water valve if it is safely accessible. A shutoff that does not stop flow is itself a reason to call a plumber. Do not loosen a threaded, slip, compression, or glued connection while pressurized, and do not treat tape, putty, or extra force as a universal seal repair.
A seal can fail for different reasons
At a reachable connection, look for a wet ring, mineral trail, corrosion, cracked washer, displaced gasket, loose nut, split flexible hose, or a fitting that is visibly damaged. A drain trap or slip joint may leak only when water is flowing; a supply connection can drip even when a fixture is idle. A crack in the pipe, a joint inside a wall, or a leak that returns after a gentle model-appropriate adjustment is not a seal-only diagnosis. Keep the pipe isolated and arrange the appropriate plumbing repair.
Drying and contamination are part of the repair
Remove standing water only if the area is safe and the water is clean; do not handle sewage or chemically contaminated water as ordinary cleanup. Dry wet materials promptly and watch nearby cabinets, floors, ceilings, and outlets for spreading damage. Persistent dampness can support mold, and concealed wet building materials may need a qualified water-damage or mold professional after the plumbing source is fixed.
Safety boundary
Stop conditions
- Stop for uncontrolled flow, hot water or steam, sewage or chemical contamination, water near electricity, hidden-wall or ceiling water, structural sagging, or a failed shutoff.
- Do not dismantle a pressurized pipe, trap, hose, valve, or fitting; do not enter standing water or energize wet electrical equipment.
- Do not over-tighten, apply a universal sealant, wrap slip joints with filler, or choose a replacement seal without confirming the joint type and exact fit.
- Do not use chemical drain products where their presence is unknown, open a contaminated trap, or mix cleaning chemicals.
- Do not open walls, ceilings, floors, or underground surfaces; concealed, upstream, cracked, or recurring leaks require a plumber or leak-detection professional.
Only after diagnosis
Potential parts
- replacement washer or gasket
Only consider this class when the first wet point is a safely isolated, exposed joint and the exact fitting instructions identify a worn or displaced seal.
Confirm pipe material, connection type, dimensions, temperature and pressure use, and exact manufacturer or code requirements before selecting a seal. - compatible pipe fitting or coupling
Only relevant when inspection confirms a cracked or damaged fitting rather than a seal-only failure.
A plumber must confirm material, joining method, size, application, and local requirements; do not assume a universal coupling is suitable. - local shutoff valve
Only relevant when the correct branch valve is seized, leaking, or unable to isolate the affected line.
Valve selection and replacement depend on pipe material, size, connection, pressure, access, and code; replacement is normally professional plumbing work.
When checks do not resolve it
Need a professional?
Call a plumber when the leak is continuous, forceful, hot, contaminated, concealed, recurring, or not stopped by the correct valve; when the pipe or fitting is cracked, corroded, or pressurized; or whenever the safe seal and joint type cannot be confirmed. Add electrical or water-damage professionals when water reaches wiring, outlets, appliances, walls, ceilings, or structural materials.
Common questions
FAQ
How do I know whether a pipe seal is the source of the leak?
Stop water use, dry the exposed area, and watch for the first new wet point. Water can travel along pipe surfaces or framing, so the lowest drip may be downstream. A continuously wet supply joint, a drain-only wet joint, or moisture from a wall or ceiling leads to different service paths.
Should I tighten the leaking pipe connection?
Do not tighten a pressurized or unknown connection aggressively. First isolate the correct line and inspect only from outside. Over-tightening can damage threads, washers, plastic fittings, or the pipe; use the exact fitting instructions or a plumber when the joint type is not clear.
Can I use tape or sealant on any leaking pipe seal?
No. Threaded, compression, slip, glued, soldered, and other joints use different assembly methods. A universal sealant can hide a crack or make the next repair unsafe. Confirm the connection type and approved material before any user-accessible seal replacement.
What if the leaking pipe is part of a drain or trap?
A drain or trap may leak only while the fixture discharges and may contain standing or contaminated water. Stop using the fixture, avoid chemical exposure and uncontrolled disassembly, and arrange plumbing service if the trap or drain joint is not explicitly user-serviceable.
When is a leaking pipe an emergency?
Treat uncontrolled flow, hot water, sewage or chemical contamination, water near electricity, a failed shutoff, a concealed wall or ceiling leak, structural sagging, and persistent flooding as urgent. Keep clear, isolate water and power only when safely reachable, and obtain qualified plumbing or electrical help.
Read the exact guide
Official sources
- Leak Detection and Water UseCity of Greensboro Water Resources · Indoor leak detection and visible plumbing connection guidance
- What to do if water pipes freeze, leak, or burst as temperatures riseCity of Portland Water Bureau · Emergency response to leaking or burst residential water pipes
- How to check for leaksCity of Portland Water Bureau · Residential water-leak detection, meter checks, and house shutoff guidance
- 24 CFR § 3280.605 - Joints and connectionsElectronic Code of Federal Regulations via Legal Information Institute · Plumbing joint and connection assembly requirements
- 24 CFR § 3280.610 - Drainage systemsElectronic Code of Federal Regulations via Legal Information Institute · Drainage trap and water-seal requirements
- A Brief Guide to Mold, Moisture and Your HomeU.S. Environmental Protection Agency · Indoor moisture, plumbing leaks, drying, mold, and contaminated-water cleanup guidance
Community feedback
Share a repair observation
Share a plain-text repair observation. Accepted observations are published automatically; this page may take a moment to update.