
On this page
Start here
Quick answer
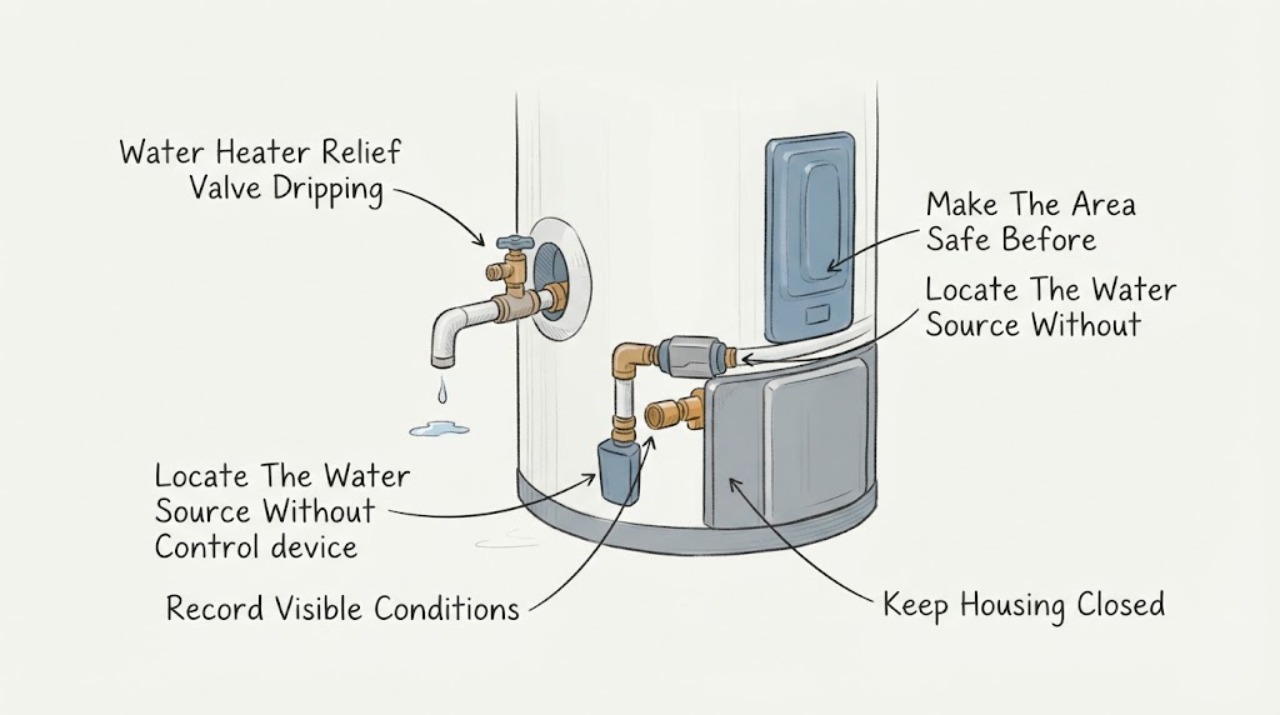
A drip from a Rheem water heater's temperature-and-pressure (T&P) relief valve or its discharge pipe is a safety signal, not a fitting to cap. Keep people away from the outlet because the water may be scalding, and do not lift the lever, remove the valve, or work on the heater while it is hot. From a safe position, confirm whether water exits the discharge pipe or comes from the valve body or another connection, and note whether it happens continuously or only during heating. Periodic discharge can result from thermal expansion in a closed water system, while a valve that keeps leaking can also have a seat, temperature, pressure, or installation problem. Rheem says repeated thermal-expansion discharge is not corrected by simply replacing the valve and directs owners to a plumbing contractor or water supplier. Have a qualified professional measure pressure, check expansion control and temperature, verify the exact Rheem-rated valve and unobstructed discharge path, and correct the cause. Treat steam, a strong flow, very hot water, a burst connection, water near electrical parts, smoke, or gas odor as an urgent stop-use condition.
Work through in order
Diagnostic checks
Use only checks that match the exact appliance or system and its official guide.
-
Check 1
Keep children and others away from the water heater and the end of the relief discharge pipe. From a dry position, observe without touching whether the outlet is dripping, flowing steadily, or releasing steam, and whether water could reach electrical parts or the floor. If the equipment has a normal user-level off control and the discharge is active or scalding, stop the heater only as the model instructions permit; do not reach into the cabinet.
Expected result: The pipe is producing a strong flow, steam, or very hot water; the drip is slow and cool; or water is entering the cabinet, drain pan, wiring area, or living space.
Next step: For steam, a strong stream, scalding water, a burst connection, smoke, gas odor, or water near electrical parts, leave the area as appropriate and use local emergency, utility, or qualified plumbing help. Otherwise keep the heater undisturbed and continue only with safe external observations before arranging service.
Stop if: Do not lift the relief lever, place a hand under the outlet, remove covers, adjust a thermostat or gas control, disconnect wiring, or attempt to contain a discharge by plugging it.
Why this matters
Why: Hot discharge and active flow can indicate a temperature or pressure event and create a scald or water-damage hazard. A slow drip is still an unresolved safety issue, even if it does not look urgent. Water near electrical parts or an actively worsening leak needs immediate isolation by a qualified person.
-
Check 2
Once the area is safe to view, use a flashlight from a distance to identify whether water is emerging from the end of the discharge pipe, around the T&P valve body or threads, or from a nearby tank connection, drain valve, or supply fitting. Compare the dry exterior of nearby surfaces only when they are cool and reachable without contact with the valve or pipe.
Expected result: Water is clearly exiting the discharge pipe; the valve body or threaded connection appears wet; another fitting is wet; or the origin cannot be distinguished.
Next step: Photograph the source from a safe distance and arrange qualified plumbing service. Tell the technician whether the water came from the outlet or another connection; do not tighten, remove, seal, or disassemble any relief-valve connection.
Stop if: Do not touch the discharge line while hot, loosen the valve, apply tape or sealant, or place any shutoff, cap, plug, or restriction between the valve and its outlet.
Why this matters
Why: Discharge from the pipe suggests the safety valve has opened, but it does not prove that the valve itself is defective. Wetness at the valve body, threads, or another connection points toward a valve, seal, tank, or piping leak that requires model-specific inspection. An uncertain source should not be guessed at while the assembly is hot or pressurized.
-
Check 3
Record when the drip occurs relative to a heating or recovery cycle: continuously, only while the burner or elements are heating, shortly after several hot-water uses, or after a water-supply change. Also note recent installation, a pressure-reducing valve or check valve, an expansion tank, unusually hot water, and any change in household water pressure. Do not remove panels or attach a gauge unless a qualified person provides the safe procedure.
Expected result: The drip repeats during every heating cycle, continues when the heater is not heating, follows a recent closed-system or pressure change, or occurs with unusually hot water.
Next step: Give the timing and installation history to a plumber or water-heater technician. Have the professional measure incoming and heated-system pressure, check expansion control and temperature, and determine whether the relief valve has been damaged by repeated operation.
Stop if: Do not raise the temperature setting, defeat a high-limit control, alter the pressure-reducing valve, precharge an expansion tank, or perform live gas or electrical tests as a homeowner.
Why this matters
Why: A repeatable heat-cycle pattern is consistent with thermal expansion or a pressure-control problem, especially where a check valve or pressure-reducing device creates a closed system. Continuous discharge when the heater is not heating, or unusually hot water, can point to a valve-seat, over-temperature, pressure, or control fault. Timing alone cannot identify which part is at fault.
-
Check 4
Read the water heater rating plate from a safe position and photograph the model and serial information for service. Visually follow the relief discharge pipe without touching it: it should lead to a suitable open drain, remain at least the valve outlet size, and have no visible cap, plug, shutoff valve, restriction, or concealed termination. Check only for obvious obstruction or damage at the visible end.
Expected result: The model information is available; the pipe is open and visibly routed to a drain; or the pipe is capped, blocked, reduced, disconnected, damaged, or aimed at people or electrical equipment.
Next step: Do not modify a questionable discharge path. Keep clear of the outlet and have a qualified plumber correct the routing and verify the valve, drain, and local-code requirements. Provide the model photograph so the professional can use the exact Rheem documentation.
Stop if: Do not cap or plug the pipe, add a valve or reducer, reroute it temporarily, remove insulation around a hot valve, or substitute a valve based only on appearance or a generic pressure rating.
Why this matters
Why: The rating plate is needed to select the correct valve and installation requirements. Rheem guidance requires an unobstructed discharge path that can drain by gravity and cannot be isolated from the tank. A blocked, missing, or unsafe path can prevent a safety discharge from being handled safely and is not a cosmetic defect.
-
Check 5
From outside the cabinet, note any user-visible display warning, unusually hot tap water, hissing or popping, a full drain pan, tank bulging or corrosion, or water touching electrical components. For gas models, note only an odor or visible abnormal condition; do not open the burner area or test the gas system. Do not repeatedly reset a control to see whether the drip stops.
Expected result: There is a safety warning, water that is hotter than expected, abnormal noise with discharge, visible tank damage, a full pan, wet electrical parts, gas odor, smoke, or none of these signs.
Next step: Stop using the heater and obtain urgent qualified service for any gas odor, smoke, abnormal exhaust, damaged tank, wet electrical area, unexpectedly hot water, or immediate safety warning. For a continuing drip without those signs, schedule plumbing service promptly and provide the observations and timing.
Stop if: Do not operate a heater that appears damaged or unsafe, open a gas or electrical compartment, bypass a safety device, or continue resetting a control while the relief valve is discharging.
Why this matters
Why: These signs raise the possibility of an over-temperature, pressure, tank, combustion, or electrical hazard beyond a routine valve inspection. No visible warning does not make recurring relief-valve discharge acceptable; it only means the cause is not identifiable from external observation.
Use your observations
Decision map
Find the observation that best matches what you see, then follow the next safe action.
-
PATH 01Next step
What you see
The relief outlet releases a strong stream, steam, or scalding water, or water is reaching electrical parts or living space.
Do this next
Keep everyone clear, stop the heater only through a safe normal control when possible, and obtain urgent qualified plumbing or emergency assistance. Do not approach the outlet or try to block it.
Why this path and its safety boundary
Why it matters: This is an active temperature, pressure, plumbing, or water-damage hazard rather than a minor nuisance drip.
-
PATH 02Next step
What you see
A small discharge appears during heating or recovery and then stops, especially after a check valve or pressure-reducing device was installed.
Do this next
Have a professional measure system pressure and inspect the expansion-control arrangement and valve. Do not assume a new relief valve alone will fix the pattern.
Why this path and its safety boundary
Why it matters: Thermal expansion in a closed water system is more likely. Rheem and DOE describe expansion as a cause of intermittent T&P operation, and the relief valve is not intended to relieve expansion continuously.
-
PATH 03Next step
What you see
The drip continues when the heater is not heating, or water remains at the valve body, threaded connection, or discharge outlet after the event.
Do this next
Arrange qualified service for pressure and temperature testing and model-specific valve and connection inspection. Do not lift the lever as a cleaning attempt or tighten the assembly yourself.
Why this path and its safety boundary
Why it matters: A valve seat or connection may be leaking, but an unresolved pressure or temperature condition can also keep causing discharge. Visual wetness cannot distinguish those causes.
-
PATH 04Next step
What you see
The discharge pipe is capped, plugged, reduced, disconnected, concealed, or directed where hot water could contact a person or electrical equipment.
Do this next
Keep the heater off or unused as appropriate and have a qualified plumber restore the exact open, gravity-draining route and verify the valve and tank installation. Do not make a temporary modification.
Why this path and its safety boundary
Why it matters: The relief system cannot safely route water as designed, creating a serious installation and safety concern even if the valve is only dripping.
-
PATH 05Next step
What you see
The discharge outlet stays dry while water comes from a drain valve, supply fitting, tank seam, pan, or another location.
Do this next
Keep the source and floor safe, avoid touching hot or wet components, and arrange qualified plumbing service. Provide the location, model, and photographs instead of replacing the relief valve by assumption.
Why this path and its safety boundary
Why it matters: The symptom may be a separate plumbing or tank leak rather than relief-valve operation; a tank seam or electrical-area leak can still be urgent.
Helpful context
Understand the symptom
What a dripping relief valve can mean
Rheem defines the T&P relief valve as a safety device that opens when tank temperature or pressure exceeds normal limits and releases water through a pipe. A recurring drip therefore does not identify one failed part by itself. It may follow pressure growth as water heats in a closed system, an excessive temperature or pressure condition, debris or wear at the valve seat, or an incorrect or restricted discharge installation. The pattern, temperature, source of the water, and a pressure measurement are needed to separate those possibilities.
Why replacing the valve alone may not solve it
Rheem's installation guidance says thermal expansion can operate the relief valve during each heating cycle and can cause premature valve failure; it specifically notes that replacing the valve does not correct the underlying expansion problem. A replacement valve must also match the water heater's required rating and must not be isolated from the tank. That is why a professional should diagnose pressure, expansion control, temperature, and the discharge path before selecting a part.
Only after diagnosis
Potential parts
- Rheem temperature-and-pressure relief valve
Consider this category only when qualified diagnosis confirms the valve is leaking or no longer resetting after pressure, temperature, expansion, and discharge-path causes are checked.
The replacement must match the exact water-heater model, required temperature and pressure rating, capacity, certification, and local installation requirements; do not choose by appearance or install it without qualified service. - thermal expansion tank or other expansion-control component
Consider this category only when pressure testing confirms a closed system and thermal expansion is causing repeated relief-valve discharge.
Sizing, precharge, location, and plumbing requirements depend on system pressure, water-heater capacity, and local code. A plumber should select and install the control after measuring the system. - water-heater discharge pipe and drain connection
Consider this category only when inspection finds a missing, damaged, restricted, or incorrectly routed discharge path.
The pipe material, size, termination, gravity drainage, freezing protection, and clearances must follow the exact Rheem manual and local code; it must not be capped or isolated.
When checks do not resolve it
Need a professional?
Arrange qualified plumbing or water-heater service for any recurring relief-valve drip, continuous discharge, wet valve body or connection, uncertain source, blocked or unsafe discharge pipe, unusual water temperature, or a pattern tied to every heating cycle. Request pressure and temperature testing, closed-system and expansion-control checks, discharge-path verification, and model-specific valve diagnosis rather than an automatic valve swap. Stop using the heater and seek urgent help for steam, a strong or rapidly worsening flow, scalding water, a burst tank or fitting, water near electrical parts, smoke, abnormal exhaust, or gas odor. Do not cap the outlet, remove or bypass the T&P valve, adjust gas or electrical controls, or perform internal repairs.
Common questions
FAQ
Why is my Rheem water heater relief valve dripping?
The T&P valve may be responding to pressure or temperature, thermal expansion in a closed water system, or a valve-seat or installation problem. A recurring heat-cycle drip does not prove the valve alone is bad. Have a professional measure pressure and temperature, inspect expansion control and the discharge path, and then decide whether the exact valve needs replacement.
Can I cap or plug the Rheem relief-valve discharge pipe?
No. Rheem and DOE instructions prohibit capping, plugging, restricting, or removing the T&P relief valve or its discharge path. The pipe must be able to release hot water safely to a suitable drain. Have a qualified plumber correct an unsafe route instead of containing the drip.
Why does the relief valve drip only while the water heater is heating?
Heating makes water expand. In a closed system created by a check valve or pressure-reducing device, that expansion can raise pressure enough to open the relief valve. The professional should test system pressure and expansion control; replacing the valve without correcting the cause may not stop the pattern.
Should I pull the relief-valve lever to stop the drip?
Do not use the lever as a casual cleaning or repair step while the heater is hot or the outlet is unsafe; discharged water can scald, and a valve may fail to reseat. Keep clear, record the pattern, and have qualified service inspect the valve and the pressure and temperature conditions. If a specific Rheem manual calls for a test, follow its safety warnings or have a professional perform it.
When is a dripping Rheem relief valve an emergency?
Treat steam, a strong or rapidly worsening flow, scalding water, a burst tank or fitting, water near electrical parts, smoke, abnormal exhaust, or gas odor as urgent. Keep people away, do not block the discharge, and obtain local emergency, utility, or qualified plumbing help. A slow recurring drip without those signs still needs prompt professional diagnosis.
Read the exact guide
Official sources
- Installing the water heaterRheem · Rheem residential water-heater relief-valve and discharge-line installation requirements
- Care and cleaning of the water heaterRheem · Rheem heat-pump water-heater care, relief-valve discharge, thermal expansion, scald warnings, and qualified-service instructions
- Water Heating Plumbing Terminology 101Rheem · Rheem water-heating terminology, including the temperature-and-pressure relief valve and its safety purpose
- DOE Water Heater Meeting 111612U.S. Department of Energy · Water-heater temperature-and-pressure relief function, thermal expansion, closed systems, expansion tanks, and safety warnings
- Best Management Practice #7: Faucets and ShowerheadsU.S. Department of Energy · Water-system pressure, expansion tanks, pressure-reducing valves, and reducing relief-valve discharge
Community feedback
Share a repair observation
Share a plain-text repair observation. Accepted observations are published automatically; this page may take a moment to update.