
On this page
Start here
Quick answer
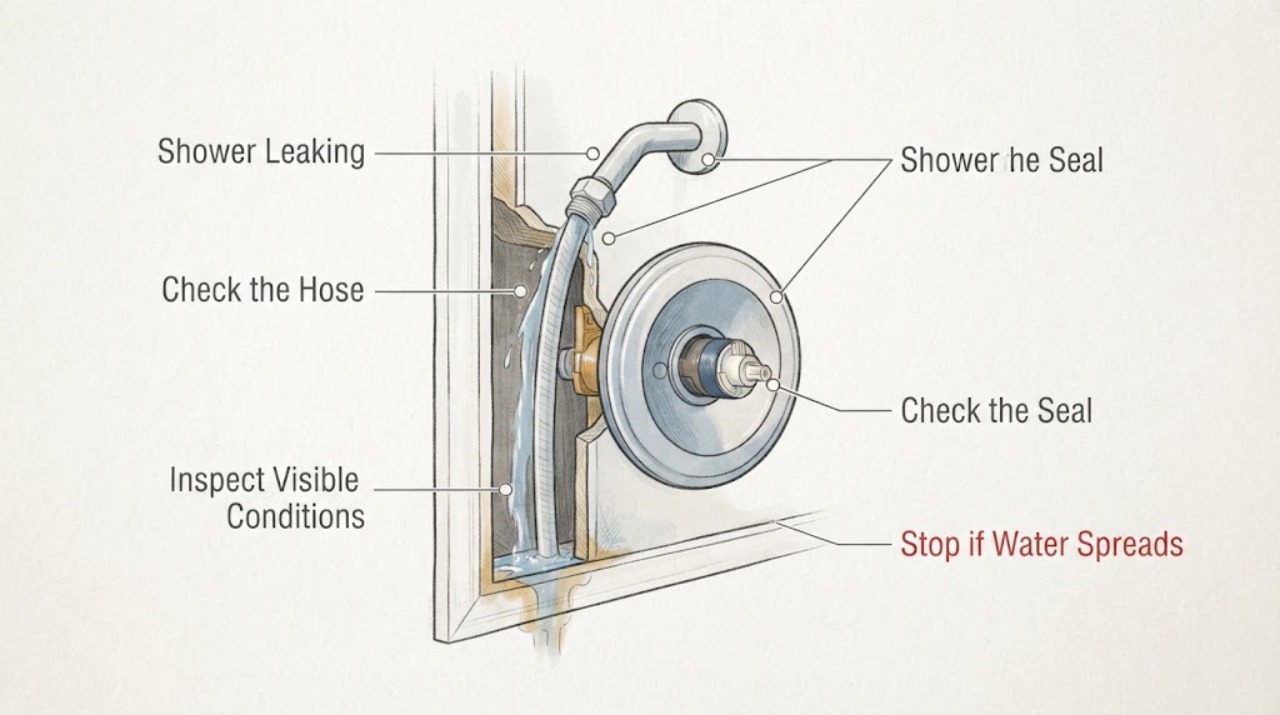
A wet shower trim or wall does not by itself prove that the valve is leaking: water can splash onto the escutcheon, run along the handle, or condense on a cool surface. Dry the area, note exactly where moisture first returns, and test only from a safe position. Water that returns around the handle or escutcheon while the shower is running, appears behind the trim, continues with the control off, or causes wall/ceiling staining is more consistent with a valve, cartridge, seal, supply connection, or concealed leak than with surface splash. Do not pry trim, loosen a cartridge nut, or open the wall without the exact valve instructions and a safe shutoff. If water is entering the wall or ceiling, the flow is continuous, the trim is hot, or the supply cannot be isolated safely, shut off the local or household water supply if safe and arrange a licensed plumber.
Work through in order
Diagnostic checks
Use only checks that match the exact appliance or system and its official guide.
-
Check 1
Dry the handle, escutcheon/trim, wall around the valve, shower arm, hose, and tub ledge with separate towels. From a dry position outside the spray path, run the shower briefly and watch the first place that becomes wet; do not touch hot trim or place hands behind the plate.
Expected result: Water lands on the front of the trim, tracks along the handle, beads at the escutcheon edge, appears at a threaded connection, or emerges from behind the trim or wall.
Next step: If moisture emerges from behind the trim or wall, stop the test, limit use, and isolate the local or household supply if safe. If the source is a reachable shower-arm or hose connection, document it and follow only the exact fixture instructions without forcing the fitting.
Stop if: Stop immediately for a continuous stream, water entering the wall or ceiling, visible swelling or staining, water near electrical equipment, scalding risk, or any need to pry trim or open the wall.
Why this matters
Why: Front-face droplets can be splash or condensation. A repeatable first wet point at the handle, escutcheon edge, connection, or wall makes a pressurized joint, valve seal, cartridge, or concealed leak more likely.
-
Check 2
With the control fully off and the area dry, observe the trim and wall for several minutes without reopening the shower. Note whether moisture returns while the shower is unused, whether water drips continuously, and whether the wet area is limited to the spray path.
Expected result: The area stays dry when unused, becomes wet only during showering, returns with the control off, or develops a steady drip or stream.
Next step: Monitor a dry-off-only area while checking splash direction. For moisture that returns while off, leave the valve unused, isolate the supply if safe, and arrange model-specific repair or a licensed plumber.
Stop if: Stop testing after a clear off-position stream, fast-growing wet area, wall/ceiling damage, or inability to isolate the water safely.
Why this matters
Why: Dry-off-only moisture is more consistent with splash or condensation, although a joint can leak only under pressure. Moisture that returns while off or flows continuously points toward a cartridge, valve seal, supply connection, or concealed leak.
-
Check 3
Check the accessible showerhead-to-arm, hand-shower hose, and tub-spout area visually for a loose-looking joint, damaged washer, seam, or water coming from a non-selected outlet. Do not use force, a sharp tool, or a wrench on a concealed connection.
Expected result: The wetness begins at an exposed showerhead or hose joint, comes from a showerhead seam/nozzle, appears from the handle or escutcheon instead, or comes from both a tub spout and showerhead unexpectedly.
Next step: For an exposed joint, follow the fixture's model instructions and check for leaks without overtightening. For a seam, handle/escutcheon, wall, or simultaneous-outlet leak, stop DIY diagnosis and arrange manufacturer-specific service or a licensed plumber.
Stop if: Stop if the connection twists the wall fitting, the head or hose is cracked, water reaches the wall, the diverter must be forced, or the leak is continuous.
Why this matters
Why: An exposed joint or head seam is different from a wall/trim leak; a handle/escutcheon leak makes the valve or cartridge more likely. Simultaneous outlets can involve a diverter, back-pressure, installation, or internal valve problem.
-
Check 4
Identify the valve configuration from safe, visible information: one handle or multiple handles, rotate-only or pull/push operation, brand/model marking, and visible escutcheon screw layout. Do not remove the handle or plate just to identify a valve unless the exact manual and a safe shutoff are available.
Expected result: The model and valve family are known, the system is a single-control or multi-handle arrangement, or the valve is unknown/concealed and the trim is wet behind its edge.
Next step: Use the exact manufacturer service instructions only when the supply can be isolated safely. Otherwise keep the area dry, limit shower use, record the model and wet location, and arrange a licensed plumber.
Stop if: Stop if identification requires disturbing caulk or trim, the shutoff is unavailable, the valve body moves in the wall, or you cannot confirm the correct model-specific procedure.
Why this matters
Why: Cartridges, seals, retaining hardware, and access steps vary by valve family. Moen's guides distinguish standard, M-Core, and other systems by operation and trim details; a generic part or procedure may damage the valve or fail to stop the leak.
-
Check 5
If the manufacturer instructions explicitly support service and the supply is isolated, inspect only the accessible trim area for a loose or displaced seal, retaining hardware, or visible water path; protect the drain and keep small parts contained. Reassemble and test only as the instructions specify.
Expected result: The exact instructions identify a model-specific seal or cartridge issue, moisture is found behind the escutcheon, no leak is visible after a safe reseat, or water continues after the specified check.
Next step: Stop disassembly and arrange a licensed plumber for a continuing leak, wall moisture, damaged valve body, unknown path, or any repair requiring pressure adjustment or opening the wall. Restore trim only when the manual confirms the seal and fasteners are correctly seated.
Stop if: Stop for damaged O-rings or threads, a moving valve body, water behind the wall, a failed shutoff, unexpected hot water, or any need to improvise a part or sealant.
Why this matters
Why: A documented model-specific fault can guide the repair part, but no visible leak does not rule out a connection or wall-cavity leak. Continued wetness after a correct check makes concealed piping or valve-body leakage more likely.
Use your observations
Decision map
Find the observation that best matches what you see, then follow the next safe action.
-
PATH 01Safety boundary
What you see
Does the wetness occur only while the shower is running and begin on the exposed front surface or in the spray path, then stop after drying?
Do this next
Treat splash, condensation, or an exposed showerhead/hose joint as more likely. Redirect the spray and inspect the accessible joint without forcing it; continue monitoring for a first wet point at the trim edge.
Why this path and its safety boundary
Why it matters: Timing and first wet location distinguish surface moisture from a leak that remains pressurized or drains through the wall.
Safety stop: If moisture returns while the control is off, appears behind the escutcheon, or forms a continuous flow, treat it as a valve, connection, or concealed leak and isolate the supply if safe.
-
PATH 02Next step
What you see
Does water first appear around the handle, escutcheon edge, or behind the trim rather than on the showerhead face?
Do this next
Stop removing trim, keep the supply off if safe, and arrange model-specific service or a licensed plumber. Document the valve identity and whether the wetness occurs with the control on, off, or both.
Why this path and its safety boundary
Why it matters: This pattern makes a cartridge, valve seal, retaining hardware, supply connection, or concealed leak more likely than nozzle splash. Moen specifically lists handle/escutcheon and behind-wall water as concealed-leak symptoms.
-
PATH 03Next step
What you see
Is the water limited to an exposed showerhead, hose, or shower-arm joint, with no moisture at the handle or wall?
Do this next
Use the exact fixture instructions to clean or reseat the accessible part without overtightening. A head seam, damaged hose, wall-side leak, or leak that returns after the check needs service.
Why this path and its safety boundary
Why it matters: An exposed connection, gasket, debris screen, nozzle, or head seam is more likely than a concealed valve leak, but a cracked fitting or wall-side connection still needs caution.
-
PATH 04Next step
What you see
Is the valve unknown, the trim wet on its back side, the leak continuous with the control off, or there is visible wall/ceiling damage?
Do this next
Isolate the local or household supply if safe, protect the area, limit use, and arrange a licensed plumber. Do not open the wall or keep retesting the valve.
Why this path and its safety boundary
Why it matters: The repair is model-specific or concealed, and continued pressure can worsen water damage. Generic cartridge, seal, caulk, or pressure adjustments are not a safe diagnosis.
Helpful context
Understand the symptom
Find where the water starts, not where it ends
Dry the trim, handle, wall, and nearby ledge, then watch from outside the spray path during a brief test. Splash can make the lower edge of an escutcheon wet even when the valve is sound. Moisture that first appears at the handle stem, around the escutcheon, at a shower-arm connection, or from behind the plate follows a different repair path. Moen identifies water around the handle or escutcheon and water behind the wall as concealed-leak symptoms; Delta likewise separates off-position valve leaks from showerhead connection and nozzle leaks.
Separate spray, condensation, and a pressurized leak
A wet surface that appears only during showering may be splash, a joint leak under pressure, or condensation. A surface that becomes wet while the control is off, grows when no one is using the shower, or leaves a continuous stream is more concerning for a valve, connection, or concealed supply leak. Do not infer the source from the lowest wet spot: water can travel behind trim or along a wall before emerging.
Trim and valve parts are not interchangeable
The escutcheon is the visible plate; the valve body and cartridge are behind it. Moen's identification guide uses handle operation, handle count, installation age, and escutcheon screw location to distinguish valve families, and its leak guides assign different cartridges to different systems. If the wet area is behind the plate or the model is unknown, keep the supply isolated when safe and use the exact manufacturer instructions or a licensed plumber. Avoid tightening a retaining nut or selecting a replacement cartridge by appearance alone.
Safety boundary
Stop conditions
- Stop and isolate the water supply if safe for a continuous leak, water entering a wall or ceiling, visible swelling or staining, water near electrical equipment, or a flow that cannot be controlled; use local emergency guidance for immediate hazards.
- Do not pry the escutcheon, loosen a cartridge nut, twist the valve body, or open the wall without the exact valve instructions and a safe shutoff.
- Do not use a generic cartridge, seal, caulk, chemical cleaner, pressure adjustment, or sharp tool to force a repair; valve and trim designs are model-specific.
- Stop testing after the first clear persistent leak, sudden increase in flow, unexpected hot water, or evidence that moisture is traveling behind the wall.
Common questions
FAQ
Why is the wall around my shower trim wet?
Dry the area and watch where moisture first returns. Splash or condensation may wet the front of the trim during use, but water that begins at the handle, escutcheon edge, or behind the trim suggests a valve, seal, connection, or concealed leak. Stop and isolate the supply if safe for continuous flow or wall damage.
How can I tell if water is leaking behind the shower wall?
A growing wet area behind the escutcheon, moisture that returns while the shower is off, wall or ceiling staining, swelling, or a leak that stops only when the household supply is isolated are warning patterns. Do not open the wall or keep the valve pressurized; arrange a licensed plumber.
Can a loose shower trim cause water behind the wall?
It can be one possible path, but wet trim does not identify the cause by itself. Check only from the outside for a repeatable first wet point and follow the exact fixture instructions. Do not overtighten, pry the escutcheon, or assume a generic seal will fit; trim and valve systems vary.
Why does my shower leak from the handle when it is off?
Manufacturer troubleshooting associates continuous off-position flow or water from the handle with a valve cartridge or internal seal problem, although a concealed connection can produce similar moisture. Identify the valve model, isolate the supply if safe, and use the exact repair instructions or a licensed plumber.
Should I remove the escutcheon to find the leak?
Only if the exact valve instructions support it and you have a safe way to isolate the water. Removing trim can disturb seals or expose a pressurized connection, and the valve body or cartridge may be model-specific. If the trim is wet behind its edge, the valve is unknown, or the wall is damaged, stop and call a licensed plumber.
Read the exact guide
Official sources
- How to Fix a Leaky Shower HeadDelta Faucet Blog · Delta shower leak guidance distinguishing exposed showerhead connections and seams from off-position handle, tub-spout, or showerhead leaks that may involve the valve cartridge
- Shower Faucet: Leaking-M-Core 4 Series ValveMoen Solutions · Moen M-Core 4 Series guidance on continuous off-position leaks, handle/escutcheon seepage, concealed leaks, supply isolation, and model-specific service
- Rite-Temp Valve Dripping from Showerhead or SpoutKohler Assist · Kohler single-control valve guidance on internal seals, simultaneous outlets, pressure/back-pressure, and model-specific valve service
- Shower Faucet: Leaking- Standard ValveMoen Solutions · Moen Standard valve symptom guidance for continuous off-position leaking and water from the handle
- Can I Replace My Shower Trim?Moen Solutions · Moen valve and trim identification by handle operation, handle count, installation information, and escutcheon screw location
- K-304 Rite-Temp® Valve - CleaningKohler Assist · Kohler guidance on supply isolation, pressure relief, mineral cleaning, O-ring placement, and leak testing after valve service
Community feedback
Share a repair observation
Share a plain-text repair observation. Accepted observations are published automatically; this page may take a moment to update.