
On this page
Start here
Quick answer
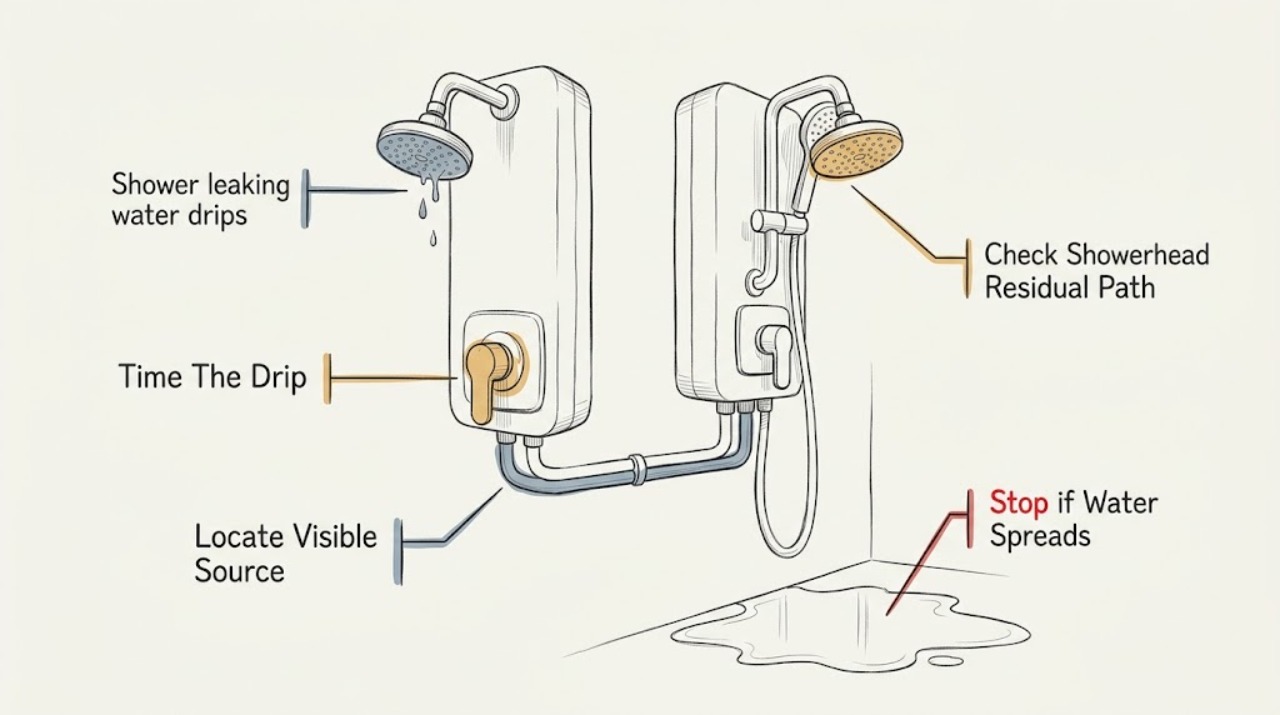
A shower that keeps dripping after the valve is closed may only be draining water left in the showerhead, but a steady or recurring drip can indicate a worn cartridge, internal seal, valve, diverter, or a concealed leak. First note where the water appears and whether it stops within roughly 90 seconds. Do not open the trim or remove a cartridge until the hot and cold supplies or the home water supply are shut off and pressure is relieved; if the isolation valve is missing, stuck, or the leak is behind the wall, call a licensed plumber. Protect the room from water damage and do not force a handle or valve.
Work through in order
Diagnostic checks
Use only checks that match the exact appliance or system and its official guide.
-
Check 1
Dry the showerhead and nearby trim, close the shower valve normally, and watch from a safe position without repeatedly moving the handle. Note when the first drip appears and how long it continues.
Expected result: Record no drip, a brief drain-down that stops within about 90 seconds, intermittent drips that restart, or a continuous stream or drip that does not stop.
Next step: If the water stops and does not return, monitor after the next use. If it continues or returns while the valve remains closed, protect the drain area and proceed only with external source checks; arrange plumbing service before disassembly.
Stop if: Stop if the flow increases, the handle will not close, water is entering the wall, or the drip is accompanied by staining, bulging drywall, or water near electrical equipment.
Why this matters
Why: A brief drain-down can be residual water in the showerhead or riser. A persistent or repeatedly restarting drip makes a valve seal, cartridge, pressure-balancing component, diverter, or concealed leak more likely; elapsed time alone cannot identify the failed part.
-
Check 2
With the valve closed, dry the showerhead, tub spout if present, handle, escutcheon, and exposed shower arm. Observe from where the next water appears without removing trim or reaching behind the wall.
Expected result: Record water from the showerhead or spout, from the handle or escutcheon, from the showerhead-to-arm connection, from a wall or ceiling, or no new water after drying.
Next step: Use the location to describe the issue to a plumber. Do not caulk over an active leak, pull the escutcheon, or assume a visible trim gasket will fix water inside the wall.
Stop if: Stop and shut off the accessible water supply if water is pooling, the wall or ceiling is wet, or the leak is concealed or worsening.
Why this matters
Why: Outlet dripping can reflect residual water or an internal valve component. Moisture at the handle, escutcheon, wall, or ceiling can indicate a trim seal, valve connection, or concealed piping problem. A connection leak may be separate from the valve's shutoff seal.
-
Check 3
If the drip is only from the showerhead, note whether it is spaced apart and fades after the valve is closed. Clean only the visible spray nozzles according to the fixture instructions; do not use cleaning as a substitute for valve diagnosis.
Expected result: Record a short, slowing drip that ends; a continuous drip from the outlet; a high-pressure or hissing sound; a clogged or irregular spray; or water leaking from the showerhead body or threaded connection.
Next step: If the drip is continuous or the fixture body leaks, stop treating it as normal drain-down and arrange service or manufacturer-specific repair. Do not remove the valve cartridge or shower trim without isolating hot and cold water first.
Stop if: Do not force the showerhead, use excessive wrench force, open the wall, or continue testing if water is escaping behind the fixture or wall.
Why this matters
Why: A short, slowing drip is consistent with residual water. A continuous outlet drip makes the internal valve seal or cartridge more relevant. A clogged showerhead can contribute to noise or altered flow, while a body seam or connection leak is a fixture problem rather than proof that the wall valve is leaking.
-
Check 4
Record whether the shower is newly installed, recently serviced, or an established installation that only recently began dripping, and observe whether the handle reaches its normal closed position without force or slipping.
Expected result: Record a new-installation drip, a drip that began after service, a sudden drip on an established shower, a handle that stops normally, or a loose, stiff, slipping, or incomplete-closing handle.
Next step: Use the exact model instructions or a plumber to verify calibration and the cartridge or valve. Do not remove the handle, adjust the cartridge, or open the trim until hot and cold supplies are shut off and pressure is relieved.
Stop if: Stop if the handle is seized, the escutcheon moves, the wall flexes, the leak is behind the trim, or the water cannot be isolated reliably.
Why this matters
Why: A new or recently serviced valve can have a calibration, installation, retaining, or seal issue; a previously sound valve that begins leaking makes cartridge or internal seal wear more likely. A handle that does not reach its normal stop may not be closing the cartridge fully, but forcing it can damage the control.
-
Check 5
Without opening the valve, locate the shower's accessible hot and cold stops or the home's main shutoff and confirm which valve controls the fixture. Turn a shutoff only if it moves normally and is clearly identified; then observe the drip, nearby surfaces, and any water meter movement with all other water use stopped.
Expected result: Record that the drip stops after isolation, that it slows but continues, that the shutoff will not move or does not isolate the shower, that the wall or ceiling remains wet, or that the meter continues to indicate water use.
Next step: Leave the isolated supply off if safe, protect the area, and arrange a licensed plumber for any persistent leak, failed isolation, concealed moisture, or meter movement. Do not force a shutoff or remove valve parts while water remains pressurized.
Stop if: Stop for a seized or leaking shutoff, a sudden increase in flow, wet electrical equipment, structural water damage, or inability to identify the correct valve.
Why this matters
Why: A stopped drip after a reliable isolation confirms that pressurized supply was feeding the leak, not which internal seal or valve part failed. A valve that will not isolate, continued water movement, or hidden moisture can indicate an upstream, concealed, or separate plumbing leak and needs professional help.
-
Check 6
Prepare the service request with the shower and valve brand or model if visible without removing trim, single- or two-handle arrangement, drip location, timing, installation or service history, isolation-valve result, wall or ceiling moisture, and any water-meter observation.
Expected result: Confirm that the record contains external observations only and that no handle, cartridge, escutcheon, valve body, wall, or supply connection was disturbed while pressurized.
Next step: Request licensed plumbing diagnosis when the drip persists beyond drain-down, returns after use, appears at the handle or wall, or cannot be isolated. Tell the plumber whether the water was shut off and whether the leak stopped.
Stop if: Stop homeowner troubleshooting when the next step requires trim or cartridge removal, pressure testing, work inside the wall, soldering, or replacement of a valve or supply connection.
Why this matters
Why: This information helps a plumber distinguish residual outlet water from a cartridge or internal seal leak, a trim or connection leak, and concealed piping or isolation problems without guessing at a replacement part.
Use your observations
Decision map
Find the observation that best matches what you see, then follow the next safe action.
-
PATH 01Next step
What you see
The showerhead produces a short, slowing drip that ends within about 90 seconds, with no moisture at the handle, escutcheon, wall, or ceiling.
Do this next
Monitor after the next shower. Arrange service if the duration increases, the drip becomes continuous, or water appears anywhere other than the outlet.
Why this path and its safety boundary
Why it matters: Residual water in the outlet or riser is more likely than a valve that is continuously passing water.
-
PATH 02Next step
What you see
Water continues from the showerhead or tub spout after drain-down, or it repeatedly restarts while the control remains closed, with no visible wall leak.
Do this next
Isolate the hot and cold supply before any valve service and arrange a plumber or follow only exact model instructions. Do not force the handle or open the trim while pressurized.
Why this path and its safety boundary
Why it matters: An internal cartridge, seal, pressure-balancing component, or diverter is more likely than residual water; the exact cause depends on the valve design and model.
-
PATH 03Next step
What you see
Water appears around the handle or escutcheon, behind the trim, in the wall or ceiling, or the wall remains wet after the outlet is dry.
Do this next
Shut off the accessible water supply if it can be identified and moved safely, protect the area, and call a licensed plumber promptly. Do not caulk over or open the wall to chase the leak.
Why this path and its safety boundary
Why it matters: A trim seal, valve connection, concealed supply, or piping leak is more likely; an outlet cartridge alone may not explain the damage.
-
PATH 04Next step
What you see
The drip began immediately after installation or service, or the handle does not reach its normal closed position without slipping or force.
Do this next
Use the exact manufacturer instructions or have a plumber verify the installation with water isolated. Do not remove or recalibrate the cartridge under pressure.
Why this path and its safety boundary
Why it matters: Calibration, installation orientation, retaining, or seal seating is more likely than ordinary residual drain-down, but the valve must be identified before parts or adjustments are chosen.
-
PATH 05Next step
What you see
The shutoff is seized, does not isolate the shower, the drip increases, the meter still indicates flow, or water damage is spreading.
Do this next
Stop using the shower, shut the main water supply only if it is clearly identified and can be operated safely, and obtain urgent plumbing help. Use emergency assistance for active flooding or water near electrical equipment.
Why this path and its safety boundary
Why it matters: The leak may involve an upstream or concealed section, a failed isolation valve, or a separate plumbing path; continued DIY valve work could release uncontrolled water.
Helpful context
Understand the symptom
Separate leftover shower water from a valve that is passing water
A showerhead can release water trapped in its body or riser after the control is closed. Kohler says residual drips can continue for up to about 90 seconds, and changes in household water pressure can make a short drain-down more noticeable. A drip that keeps restarting or never stops is a different pattern: the valve may not be sealing, or water may be escaping around the handle or behind the trim.
The place where water appears narrows the next safe step
A drip from the showerhead or tub spout after shutoff points toward residual water, a cartridge, a pressure-balancing or mixer component, or a diverter depending on the valve design. Moisture around the handle or escutcheon, a wall stain, or water that continues when the outlet is dry raises concern about the trim seal, valve connection, or concealed piping. Do not assume the visible trim is the source of a leak inside the wall.
Cartridge work is model-specific and requires water isolation
Manufacturer guidance commonly ties a continuous off-position drip to a cartridge or internal seal, but the correct part and procedure depend on the valve model and whether the installation is new or established. Delta states that diagnosing an off-position leak requires disassembly and that the model determines the cartridge; its guidance also recommends turning off the hot and cold supply before valve work. If the supply cannot be isolated, the handle is seized, or water is entering the wall, stop and use a plumber.
Safety boundary
Stop conditions
- Shut off the hot and cold supplies or the home main before removing shower trim, servicing a cartridge, or opening any pressurized valve path.
- Do not force a handle or shutoff, remove a cartridge under pressure, open the wall, caulk over an active leak, or guess at a replacement part from appearance alone.
- Stop and obtain urgent help for uncontrolled flow, concealed or spreading water damage, a seized isolation valve, flooding, or water near electrical equipment.
Only after diagnosis
Potential parts
- shower cartridge
Consider this only if the valve model and a plumber or exact manufacturer diagnosis indicate that a continuous off-position outlet drip is caused by the cartridge or its seals.
Confirm the exact valve model, cartridge style, temperature and pressure-balancing features, and manufacturer fit before selecting a replacement. - shower valve repair kit
Consider this only when the identified valve design and leak location call for a model-specific seal, mixer, pressure-balancing, seat, or spring kit after water isolation.
Match the exact valve series and revision; a generic-looking kit may not seal or function correctly in another valve. - shower trim gasket
Consider this only when inspection confirms water is escaping at the trim-to-wall interface rather than continuously passing through the closed valve or leaking behind the wall.
Confirm the trim and valve model, wall opening, gasket profile, and installation instructions; a trim gasket cannot repair a concealed pipe or cartridge leak.
When checks do not resolve it
Need a professional?
Call a licensed plumber when a drip continues beyond normal drain-down, returns repeatedly with the valve closed, appears around the handle or behind the wall, follows recent installation or service, or cannot be isolated. Use urgent help for active flooding, spreading wall or ceiling damage, a failed main or fixture shutoff, or water near electrical equipment.
Have this ready
- Provide the shower and valve brand or model if visible without removing trim, handle arrangement, drip location, time to stop, installation or service history, supply-isolation result, wall or ceiling moisture, and any meter observation. State whether any trim or valve component was disturbed.
Common questions
FAQ
How long can a showerhead drip after the valve is closed?
A short, slowing drain-down can be residual water. Kohler says some showerheads may drip for up to about 90 seconds, but a drip that continues or repeatedly restarts should be treated as a possible valve or seal leak rather than normal drain-down.
Why does my shower drip continuously when it is turned off?
A cartridge, internal seal, pressure-balancing component, diverter, calibration issue, or concealed leak may be involved. The valve model and the place where water appears matter; isolate the water before valve service and arrange plumbing diagnosis.
Is a leak around the shower handle the same as a showerhead drip?
No. Water at the handle or escutcheon can indicate a trim seal, valve connection, or concealed leak, while water from the showerhead or tub spout can reflect residual water or an internal shutoff problem. Dry the surfaces and record the first place that becomes wet.
Can I replace the shower cartridge without shutting off the water?
No. Do not remove trim or a cartridge while the valve is pressurized. Shut off the hot and cold supplies or the home main, relieve pressure according to the exact manufacturer instructions, and use a plumber if the supply cannot be isolated or the valve model is unclear.
What should I tell a plumber about an off-position shower leak?
Tell them where the water appears, how long it drips after shutoff, whether it stops within about 90 seconds, whether the shower is newly installed or recently serviced, how the handle feels, whether isolation stopped the drip, and whether any wall, ceiling, or meter movement was observed.
Read the exact guide
Official sources
- Rite-Temp Valve Dripping from Showerhead or SpoutKohler · Kohler Rite-Temp valve guidance used for general distinction between residual outlet water and continuing valve leakage; exact valve design controls applicability.
- Shower Faucet: Leaking-M-Core 4 Series ValveMoen · Moen M-Core 4 Series guidance used to illustrate why installation history and exact valve model change the diagnostic path; its specific cartridge number is not generalized.
- Find Parts and Identify Your ProductDelta Faucet · Delta's parts-identification guidance supports model-first part selection; no Delta part number or compatibility is inferred for an unbranded shower.
- How to Fix a Leaky Shower HeadDelta Faucet · Delta shower guidance used for general symptom location and the model-specific/professional boundary; it is not a universal repair procedure for every valve.
- How to check for leaksCity of Portland Water Bureau · Municipal leak-check guidance used for safe external isolation and meter observations; it does not diagnose a shower valve component.
Community feedback
Share a repair observation
Share a plain-text repair observation. Accepted observations are published automatically; this page may take a moment to update.