
On this page
Start here
Quick answer
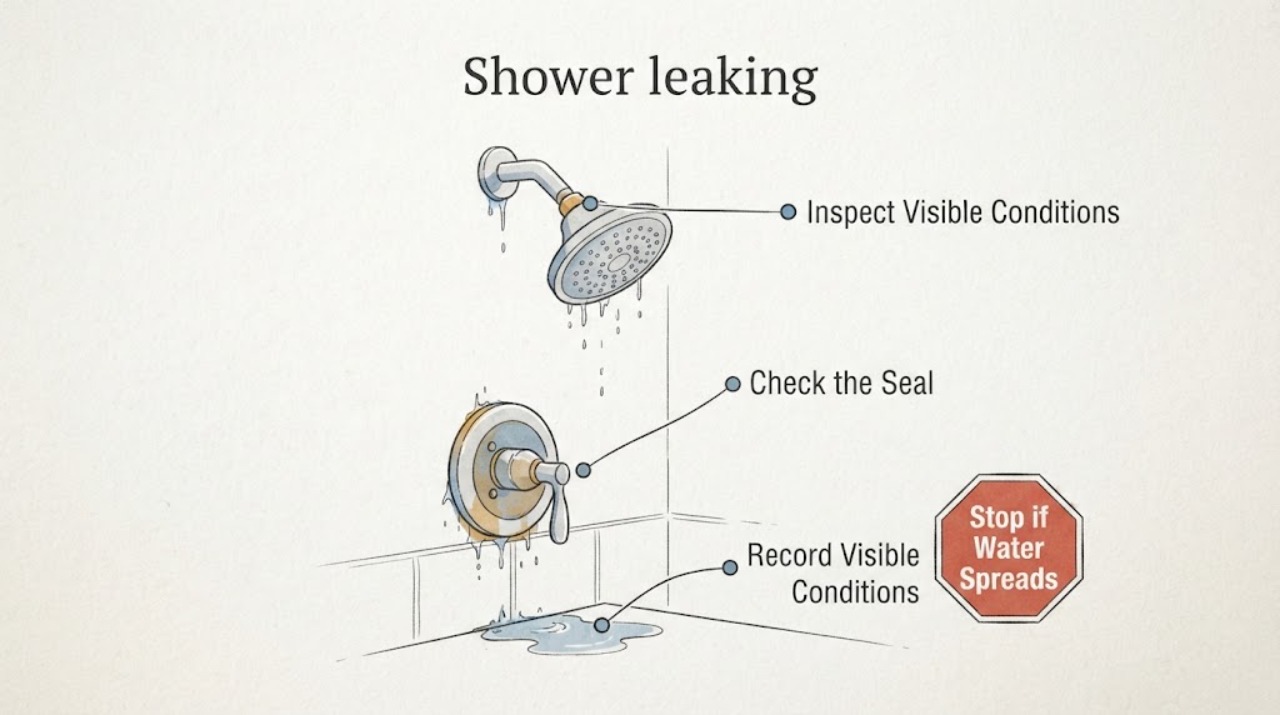
First identify where and when the water appears: from the showerhead while the handle is off, around the handle or trim, from the tub spout while diverted, or behind the wall or onto the floor. A few visible drips can have a different cause from continuous flow or hidden moisture. Keep people away from slippery water, avoid removing trim or opening the wall, and if the shower will not stop or water is entering a wall, floor, ceiling, or electrical area, use a safe accessible water shutoff if known and arrange prompt plumber service.
Before you begin
Safety first
- Do not remove trim, open walls, probe plumbing, force shutoffs, mix chemicals, use pressurized methods, or touch wet electrical equipment; keep water away from slips and electrical hazards.
Work through in order
Diagnostic checks
Use only checks that match the exact appliance or system and its official guide.
-
Check 1
From a dry, stable standing position, observe the shower during one ordinary use and again after the handle is placed in its normal off position; do not force a stiff control or continue running water to reproduce a leak.
Expected result: Record whether water comes from the showerhead with the handle off, only while running, from the handle or escutcheon, from the tub spout during diversion, or from an area outside the fixture.
Next step: Photograph the source and give the plumber the exact on/off timing and whether the shower is shower-only or tub-and-shower; do not choose a part from the symptom alone.
Stop if: Stop the observation for continuous flow, a rapidly spreading wet area, a slippery floor, or water near electrical equipment; use a known safe shutoff if needed and call a plumber.
Why this matters
Why: A continuous off-position drip points toward a valve or cartridge branch, while a leak only during flow may involve a visible connection or showerhead. Water from a wall, floor, or ceiling requires concealed-leak assessment rather than a surface patch.
-
Check 2
Inspect visible dry surfaces around the showerhead connection, handle, trim plate, tub spout, caulk line, and nearby wall or floor without removing trim, scraping sealant, probing joints, or opening the wall.
Expected result: Note droplets at a threaded connection, water tracking from the handle or trim, a gap in a visible seal, staining, swelling, soft-looking finish, peeling paint, or no visible source despite moisture elsewhere.
Next step: Keep the area dry and send close and wide photos to a plumber or qualified water-damage professional; ask them to identify the source before resealing or replacing trim.
Stop if: Stop if the wall, floor, or ceiling is sagging, rapidly wetting, moldy, or close to an outlet or light; keep clear and request prompt professional help.
Why this matters
Why: A visible surface drip may be serviceable at the fixture, but water that disappears behind trim or appears at a wall, floor, ceiling, or adjacent room can indicate concealed plumbing or enclosure failure. A dry-looking surface does not rule out a hidden leak.
-
Check 3
Record the handle and fixture identity from visible markings and shape only: single or multiple handles, push/pull or rotate action, tub-and-shower versus shower-only, and any readable brand or model label that can be seen without dismantling anything.
Expected result: Mark the identity as known, partially known, or unknown and record whether the leak began after installation, after a repair, or after normal operation had previously been stable.
Next step: Provide the identity notes, photos, and start date or change in symptoms to the plumber or manufacturer support channel for model-specific guidance.
Stop if: Stop if identifying the model would require removing a handle, escutcheon, cover, or concealed access panel.
Why this matters
Why: Valve families can use different cartridges and seals. An exact visible identity and installation history help the professional select a compatible diagnostic path; guessing from a similar-looking trim can produce the wrong part or damage the valve.
-
Check 4
If the shower is part of a tub-and-shower setup, observe the tub spout while diverting water to the shower once; do not insert tools, remove the spout, or use chemicals to clear it.
Expected result: Record whether a small amount of water continues from the tub spout, whether water reaches the showerhead normally, and whether the leak is present only during diversion.
Next step: Include this observation in the service request and avoid repeated tests that wet the floor or wall; ask the plumber to assess the diverter and any flow restriction.
Stop if: Stop if water sprays beyond the enclosure, the floor becomes slippery, the spout or diverter is loose, or water enters a wall or floor.
Why this matters
Why: EPA explains that a diverter can allow water to leak from the tub spout while water is directed to the showerhead. A large or persistent flow, poor shower flow, or a leak elsewhere needs plumbing assessment rather than an assumed diverter replacement.
-
Check 5
After the area is dry and no unsafe water condition is present, check accessible adjacent walls, ceilings, floors, and the room below for new dampness, stains, odor, peeling finish, or pooling without drilling, lifting flooring, or entering a concealed space.
Expected result: Record whether moisture is confined to the fixture, appears outside the enclosure, grows after a shower, or remains when the shower has not been used.
Next step: Keep the shower out of service if the wet area is spreading, document the pattern, and arrange professional assessment before concealing or repainting the affected area.
Stop if: Stop for sagging drywall, active ceiling leakage, sewage odor, visible mold growth, standing water near electricity, or any unsafe access condition.
Why this matters
Why: Moisture that persists or appears away from the fixture raises concern for a concealed supply, drain, valve, or enclosure leak. The extent and timing determine whether a plumber, building professional, or water-damage specialist must be involved before cosmetic repair.
Use your observations
Decision map
Find the observation that best matches what you see, then follow the next safe action.
-
PATH 01Safety boundary
What you see
The showerhead drips after shutoff but no wall, floor, ceiling, or electrical area is wet.
Do this next
Request a plumber or model-specific manufacturer diagnosis; a cartridge or valve-side issue may be involved, but do not order a part until the valve family is identified.
Why this path and its safety boundary
Safety stop: Do not remove the handle or valve trim as a first check.
-
PATH 02Safety boundary
What you see
Water appears around the handle or escutcheon, disappears behind trim, or returns after the wall dries.
Do this next
Treat it as a possible concealed or valve leak and arrange prompt plumbing assessment before resealing the visible edge.
Why this path and its safety boundary
Safety stop: Do not caulk over a wet path or open the wall without professional planning.
-
PATH 03Safety boundary
What you see
Water continues from the tub spout while the diverter sends water to the showerhead.
Do this next
Document the amount and timing and ask a plumber to assess the diverter and flow path; EPA notes this can be a recognized diverter leak condition.
Why this path and its safety boundary
Safety stop: Stop if flow is substantial, water escapes the enclosure, or the floor becomes unsafe.
-
PATH 04Safety boundary
What you see
Moisture or staining appears on an adjacent wall, ceiling, floor, or room below.
Do this next
Keep the shower out of service and arrange plumber and, when needed, water-damage assessment to locate and dry the source before cosmetic work.
Why this path and its safety boundary
Safety stop: Do not probe, drill, remove finishes, mix chemicals, or enter a crawlspace or ceiling solely to chase the leak.
-
PATH 05Safety boundary
What you see
The shower will not stop, the leak is rapidly spreading, or water is near electricity.
Do this next
Use a known, accessible fixture or main water shutoff if it can be operated safely, keep clear, and request urgent plumbing service; isolate electrical power only through safe, known controls when water creates an electrical hazard.
Why this path and its safety boundary
Safety stop: Do not force a seized shutoff, touch wet electrical equipment, or continue running the shower.
Helpful context
Understand the symptom
A shower leak is diagnosed by location and timing before anyone chooses a cartridge, gasket, or repair kit. Observe the fixture during one normal use only if the area is safe, then record whether water continues after the handle is off, appears only when running, escapes around the handle or escutcheon, remains at the tub spout during diversion, or reaches a wall, floor, ceiling, or cabinet. Do not assume a visible drip identifies the concealed valve.
Use a towel or container to keep a small, accessible drip from creating a slip hazard, but do not wedge objects against the handle or force a stiff valve. Do not mix drain or cleaning chemicals, use pressurized methods, remove the shower trim, or open a wall to find a hidden leak. If water is continuous, spreading, or near electrical equipment, stop ordinary testing and isolate the water only through a known, safe shutoff.
Manufacturer guidance shows why the same symptom can map to different parts on different valve families: a continuous off-position drip or water around a handle may be associated with a cartridge, while a tub spout leak during shower diversion can be a diverter or stacking issue. Those are diagnostic categories, not a universal part recommendation.
Moisture outside the shower enclosure deserves separate attention. EPA leak guidance recommends looking for pooling water and signs of moisture or mold on walls, ceilings, and floors because a pipe can be leaking behind the scenes. Keep the area dry where possible and give the plumber photos, timing, and the suspected path rather than probing the wall or floor.
Only after diagnosis
Potential parts
- shower cartridge
Consider this only if a plumber or model-specific manufacturer diagnosis identifies the valve family and confirms that the cartridge is the leak source.
Match the exact valve series, handle configuration, and manufacturer fit information; do not infer compatibility from trim appearance alone. - shower valve repair kit
Consider this only when the valve type, leak location, and serviceable seals or internal components are confirmed and a repair is appropriate instead of concealed plumbing work.
Confirm valve family, water shutoff requirements, and manufacturer instructions with the plumber; a kit cannot correct a damaged rough-in or hidden pipe leak. - shower trim gasket
Consider this only if a professional confirms that water is entering around a stable, accessible trim interface and the underlying valve and wall are dry and sound.
Match the trim geometry and material guidance; never use a gasket or sealant to conceal ongoing moisture, movement, or a leak behind the wall.
When checks do not resolve it
Need a professional?
Call a plumber promptly for continuous dripping or flow, water around the handle or trim, a leak that returns after drying, a tub diverter leak, or any moisture outside the shower enclosure.
Safety scope: Do not remove trim, open walls, probe plumbing, force shutoffs, mix chemicals, use pressurized methods, or touch wet electrical equipment; keep water away from slips and electrical hazards.
Have this ready
- Provide the exact leak location, whether it occurs on or off, timing after a shower, fixture and handle type, visible brand or model information, photos, and any wall, ceiling, floor, odor, or moisture changes.
Common questions
FAQ
Why does my shower drip after I turn it off?
A brief residual drip can differ from continuous flow, but a continuing off-position drip can indicate a valve or cartridge issue. Record how long it continues and where the water emerges, then get model-specific plumbing advice rather than assuming one cartridge fits.
Is water from the tub spout while the shower is running always a pipe leak?
Not necessarily. A tub-and-shower diverter can allow water to continue from the tub spout during diversion. Document the amount and timing; substantial or persistent flow should be assessed by a plumber.
Should I caulk around the shower handle if water is getting behind it?
Do not use caulk to hide an active or concealed leak. Water around the handle or escutcheon can require valve or behind-wall assessment, and the area should be dry and sound before any professional chooses a trim gasket or seal.
Read the exact guide
Official sources
- Detect and Chase Down Leaks ChecklistU.S. Environmental Protection Agency WaterSense · Used for safe observation of shower leaks, pooling, and moisture signs without concealed access.
- Shower Faucet: Leaking- Standard ValveMoen Solutions · Used to reinforce that continuous off-position or handle leaks may map to a cartridge only for the identified valve family, not as a universal diagnosis.
- Shower Faucet: Leaking-M-Core ValveMoen Solutions · Used as a manufacturer example that off-position, handle, and behind-wall symptoms can require different professional paths; it is not generalized to non-Moen valves.
- Bath and Shower DivertersU.S. Environmental Protection Agency WaterSense · Used only for the tub-spout-versus-showerhead branch; it does not diagnose this unspecified shower’s valve or trim.
Community feedback
Share a repair observation
Share a plain-text repair observation. Accepted observations are published automatically; this page may take a moment to update.