
On this page
Start here
Quick answer
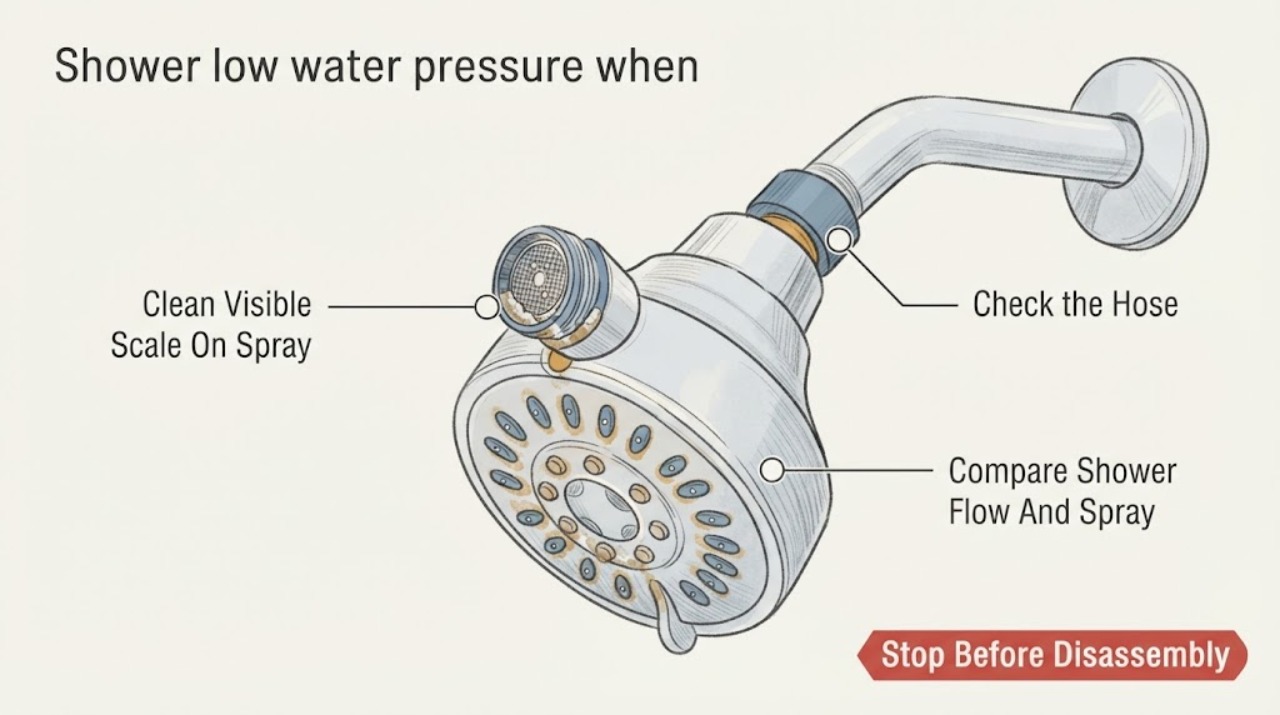
Scale or other mineral debris can narrow the shower head spray holes, inlet screen, or flow path and make the shower feel weak. First compare this shower with another fixture and note whether every spray hole is affected or only a few. Clean a wipeable spray face, or remove and soak a compatible shower head in a 50/50 mixture of distilled white vinegar and water, then rinse and reinstall the gasket and screen without overtightening. If flow is still low, the screen or flow control may be blocked, the hose or valve may be restricting flow, or the home's supply pressure may be low. Stop before opening the wall, altering the flow restrictor, or testing plumbing pressure and arrange qualified plumbing service if cleaning does not restore flow, several fixtures are affected, the connection leaks, or the shower valve or supply needs access.
Before you begin
Safety first
- This article supports comparing fixtures, wiping or soaking a compatible removable head, inspecting accessible parts, and checking for leaks after hand-tight reinstallation. It does not authorize concealed valve or pipe access, pressure-regulator or pump adjustment, flow-restrictor removal, chemical treatment of hidden plumbing, or forcing seized connections.
Work through in order
Diagnostic checks
Use only checks that match the exact appliance or system and its official guide.
-
Check 1
Run the affected shower at its normal setting and compare it with a nearby sink or another shower, if available. Look at the spray face and note whether the weakness is across the whole head, limited to some nozzles, or accompanied by a kinked hose or visible leak.
Expected result: Record whether other fixtures have normal flow, whether all spray holes are weak or only some are blocked, whether the symptom changes between spray settings, and whether water escapes at the head-to-arm or hose connection.
Next step: Use the local-scale branch when only this head is affected; otherwise document the comparison and arrange plumbing diagnosis after the safe head and hose checks.
Stop if: Do not remove wall trim, open a concealed valve, or continue if water is entering the wall, the connection is damaged, or the leak cannot be controlled.
Why this matters
Why: One shower with spotty or uneven spray makes scale or debris in the head or inlet screen more likely. Low flow at several fixtures makes a local spray-face blockage less likely and raises a supply, valve, or broader plumbing issue. A leak or kink can divert flow before it reaches the spray face.
-
Check 2
With the water off, clean the visible spray face using the method specified for the head. For soft rubber or Touch-Clean nozzles, wipe or gently flex the outlets. For a compatible removable head, place it in a 50/50 mixture of distilled white vinegar and water, then gently rub the spray face with a soft cloth or toothbrush.
Expected result: Look for softened white or chalky deposits coming away, previously blocked holes reopening, and an even spray pattern after rinsing. If the finish changes, the nozzles deform, or deposits do not loosen, stop the cleaning method.
Next step: Rinse the head thoroughly, preserve any gasket and screen, and continue to the controlled reinstallation check. Follow the product manual instead of extending the soak or using a stronger chemical.
Stop if: Do not use abrasive pads, sharp tools on plated surfaces, bleach, harsh acids, or a cleaning method that the product instructions prohibit.
Why this matters
Why: Improved spray after surface cleaning supports a local mineral restriction. No improvement means scale may be inside the inlet screen or flow path, the restriction may be elsewhere, or the head may be designed for a lower flow than expected.
-
Check 3
If the head is designed to come off and you can do so without twisting the shower arm, protect the finish with a cloth, hold the arm steady, and remove the head according to its instructions. Check the nut for the gasket and debris screen, and inspect a hand-shower hose for kinks or a visible leak. Clean only an accessible screen as the manufacturer directs and do not remove a flow restrictor.
Expected result: Note a screen covered with scale or rust particles, a missing or displaced gasket, a blocked inlet, a kinked hose, or a hose leak. With the head off, observe whether the supply from the arm is still weak, without spraying water into the wall or leaving the connection unattended.
Next step: Clean or reseat only the accessible screen and gasket, replace a visibly damaged hose with a correctly matched part if appropriate, then flush the exposed connection briefly and proceed to careful reinstallation. Call a plumber if the arm flow is weak, the arm moves in the wall, or the connection leaks.
Stop if: Do not pry out an unidentified insert, alter a flow-control device, force a seized connection, or continue if the shower arm twists, the wall moves, or water appears behind the trim.
Why this matters
Why: A blocked screen or damaged hose can restrict flow before it reaches the spray holes. If flow is still weak from the shower arm with the head removed, cleaning the spray face cannot solve the main restriction; the valve, pipe, or supply pressure needs further diagnosis.
-
Check 4
Rinse the cleaned head with fresh water, put the original gasket and screen back in their intended positions, and hand-tighten the head onto the shower arm. Turn the shower on gradually and check both the spray pattern and the connection for drips.
Expected result: Record whether flow is stronger and more even, whether droplets appear at the threaded connection, whether the spray is still weak with a clear face, and whether a hand-shower hose leaks or restricts movement.
Next step: If there is a leak, shut the shower off and correct only gasket placement or gentle hand-tightness according to the product instructions. If flow remains low or the connection cannot seal, stop and arrange plumbing service.
Stop if: Do not use pliers to force a plastic nut, keep tightening against a leak, run the shower with a missing screen or gasket, or let water run into an open wall connection.
Why this matters
Why: Restored, leak-free flow confirms that the accessible scale or debris was the main restriction. A leak after reassembly points to gasket placement, damaged threads, or overtightening rather than a pressure problem. Persistent weak flow after a clean head shifts attention to the screen, valve, hose, or supply.
-
Check 5
Arrange qualified plumbing service when cleaning and a careful reinstallation do not restore flow, when the shower arm supply is weak, when multiple fixtures are affected, or when the valve, concealed piping, or pressure equipment needs inspection. Give the plumber the before-and-after comparison and what was found in the head.
Expected result: Provide the fixture comparison, spray pattern, screen and gasket condition, hose condition, leak location, whether the head was cleaned, and whether flow was weak with the head removed. Do not dismantle concealed components to collect more evidence.
Next step: Leave the fixture in a safe, leak-free state and have the plumber test the relevant valve and supply path, identify the correct replacement components, and verify flow after repair.
Stop if: Do not open the wall, change the home's pressure regulator or pump settings, drill out a restrictor, or use chemical descaler in concealed plumbing without qualified advice.
Why this matters
Why: The remaining possibilities include a shower-valve restriction, supply-side debris, a broader low-pressure condition, or a model-specific flow-control problem. These cannot be identified safely from scale on the spray face alone.
Use your observations
Decision map
Find the observation that best matches what you see, then follow the next safe action.
-
PATH 01Safety boundary
What you see
Only this shower is weak, the spray face or inlet has visible scale, and the pattern becomes stronger or more even after a compatible wipe or soak.
Do this next
Keep the cleaned head, gasket, and screen installed correctly, check for leaks, and periodically wipe or clean the head using the product instructions.
Why this path and its safety boundary
Why it matters: A local mineral restriction in the shower head or screen is more likely than a whole-home pressure problem.
Safety stop: Do not intensify chemicals or disassemble internal flow controls just to increase flow.
-
PATH 02Safety boundary
What you see
The head is visibly cleaner and the gasket and screen are in place, but flow remains weak or the shower arm supplies weak flow with the head removed.
Do this next
Stop modifying the head and arrange a plumber to diagnose the valve and supply path; report whether other fixtures are also weak.
Why this path and its safety boundary
Why it matters: The restriction is more likely at the inlet screen or flow-control area, hose, shower valve, supply pipe, or broader water-pressure system than at the spray-face scale.
Safety stop: Do not remove unidentified inserts, alter a restrictor, open the wall, or adjust a pressure device without qualified guidance.
-
PATH 03Safety boundary
What you see
Flow improves or stays similar after cleaning, but water drips from the head-to-arm or hose connection after reassembly.
Do this next
Turn off the shower, verify that the original gasket and screen are seated, and make only the gentle, manufacturer-approved adjustment. Arrange service if the leak persists or the arm moves.
Why this path and its safety boundary
Why it matters: The immediate problem is a seal, gasket, thread, or overtightening issue; adding cleaning time will not correct it.
Safety stop: Do not keep tightening a cracked nut or moving shower-arm trim to reach concealed piping.
-
PATH 04Safety boundary
What you see
The shower remains weak after a clean head, and another shower or sink also has reduced flow, or the home's supply fluctuates noticeably.
Do this next
Arrange qualified plumbing diagnosis and provide the fixture comparison. Keep the affected head assembled and leak-free while waiting.
Why this path and its safety boundary
Why it matters: A single scaled shower head is less likely to be the primary cause; supply pressure, a valve, service-line debris, or another whole-plumbing condition is more likely.
Safety stop: Do not alter a pressure regulator, well pump, booster, or concealed valve based only on the shower symptom.
Helpful context
Understand the symptom
Scale is a plausible restriction, not proof that the whole plumbing system is weak
A crusted or uneven spray face can reduce the useful flow from one shower head even when the rest of the home has normal pressure. Deposits can also collect at the inlet screen or flow-control area, while a kinked hand-shower hose, partially closed valve, or upstream supply issue can produce a similar symptom. Comparing another fixture and cleaning only the accessible head helps separate a local restriction from a plumbing problem.
Clean the accessible spray path before changing parts
Start with the least invasive method that matches the head. Rubber or Touch-Clean nozzles may be wiped or flexed as the manufacturer directs. For a removable compatible head, a 50/50 distilled white vinegar and water soak can loosen mineral buildup; rinse thoroughly and preserve the gasket and screen. Do not assume every finish, cartridge, hose, or internal restrictor tolerates the same cleaner, so follow the product instructions when they differ.
Know when the restriction is beyond the shower head
If the cleaned head has a clear inlet but flow remains weak, the next suspect may be the screen or flow-control component, a hand-shower hose, the shower valve, or water supply to the home. Removing a screen or changing a flow-control device can damage the assembly or violate its instructions. A plumber should handle concealed valve work, pressure diagnosis, persistent leaks, or a problem affecting more than one fixture.
Safety boundary
Stop conditions
- Do not use stronger chemicals, abrasive tools, bleach, or a prohibited cleaner on the shower head finish or internal components.
- Do not remove or drill out an unidentified flow restrictor, change the flow-control assembly, or assume a higher flow setting is compatible with the fixture.
- Stop if the shower arm twists, the wall moves, a connection cannot be controlled, or water appears behind the trim or inside the wall.
- Arrange plumbing service when cleaning does not restore flow, the arm supply is weak, multiple fixtures are affected, or the shower valve or concealed piping needs access.
- If a leak is active and cannot be stopped safely, shut off the appropriate water supply and obtain prompt plumbing help.
Only after diagnosis
Potential parts
- shower head inlet screen and gasket
Consider this category only if the accessible screen is damaged, missing, or cannot be restored after cleaning and the product documentation identifies it as replaceable.
Match the exact fixture model and dimensions; keep the flow-control arrangement unchanged unless the manufacturer specifies otherwise. - hand-shower hose
Consider this only when a hand-shower hose is visibly kinked, leaking, or internally restricted and the hose is the confirmed local cause of reduced flow.
Confirm connection type, length, seals, and fixture instructions before selecting a replacement. - shower head
Consider replacing the head only when cleaning cannot restore its spray, the assembly is damaged, or its rated flow does not meet the user's needs after the plumbing supply is confirmed adequate.
Confirm connection, approved flow characteristics, finish-care requirements, and local rules; do not treat replacement as proof that the home's pressure problem is solved.
When checks do not resolve it
Need a professional?
Call a qualified plumber when the shower remains weak after a compatible head and screen cleaning, when flow is weak with the head removed, when multiple fixtures are affected, or when the shower arm, valve, concealed piping, pressure equipment, or a persistent leak needs diagnosis. Stop immediately for a loose or twisting shower arm, water entering the wall, or a connection that will not seal.
Safety scope: This article supports comparing fixtures, wiping or soaking a compatible removable head, inspecting accessible parts, and checking for leaks after hand-tight reinstallation. It does not authorize concealed valve or pipe access, pressure-regulator or pump adjustment, flow-restrictor removal, chemical treatment of hidden plumbing, or forcing seized connections.
Common questions
FAQ
Can scale on a shower head cause low water pressure?
Yes. Mineral deposits can narrow spray holes and collect in an inlet screen or flow path, reducing the useful flow from that head. If other fixtures are normal and cleaning restores the spray pattern, the restriction was likely local to the head. Persistent low flow needs plumbing diagnosis rather than a stronger cleaner.
What is the safest way to descale a shower head?
Use the head's care instructions. Delta recommends wiping Touch-Clean rubber outlets and, for more difficult deposits on compatible heads, soaking in a 50/50 mixture of distilled white vinegar and water, then rinsing. Avoid abrasive or prohibited chemicals and stop if the finish or material is not approved for that method.
Should I remove the flow restrictor to get more shower pressure?
No. Do not remove or drill out an unidentified flow-control device. A low-flow shower can have a blocked screen, valve restriction, hose problem, or low supply pressure, and changing an internal control can damage the fixture or defeat its intended operation. Have a plumber diagnose persistent low flow.
Why is the shower still weak after cleaning the spray face?
Scale may remain at the inlet screen or flow-control area, or the restriction may be in a hand-shower hose, shower valve, supply pipe, or the broader water system. Compare another fixture and, if the head is designed for it, assess whether the shower arm itself supplies weak flow. Arrange plumbing service before opening concealed components.
Why did my shower head start leaking after I cleaned it?
The gasket or screen may be missing or out of position, the connection may be cross-threaded or overtightened, or the nut may be damaged. Turn off the water, verify the original gasket and screen are seated, and make only the gentle reinstallation adjustment specified for the head. Persistent leaks or a moving shower arm need a plumber.
Read the exact guide
Official sources
- How to Fix Low Pressure in Your ShowerDelta Faucet · Delta's general shower troubleshooting guidance; flow-control and product details vary by model.
- How can I clean and/or remove mineral deposits from my shower head?Delta Faucet · Delta's general cleaning guidance; use the exact product instructions when a head's finish or construction differs.
- How to Clean a Shower HeadDelta Faucet · Delta's consumer cleaning procedure; exact removal and care instructions vary by shower head.
- MASTERSHOWER LINE SHOWERHEADS/ARMS K-9505, K-9506, K-9507, K-9511, K-9512Kohler Co. · Kohler instructions for the listed MastersShower models; other heads may use different tools and internal parts.
Community feedback
Share a repair observation
Share a plain-text repair observation. Accepted observations are published automatically; this page may take a moment to update.