
On this page
Start here
Quick answer
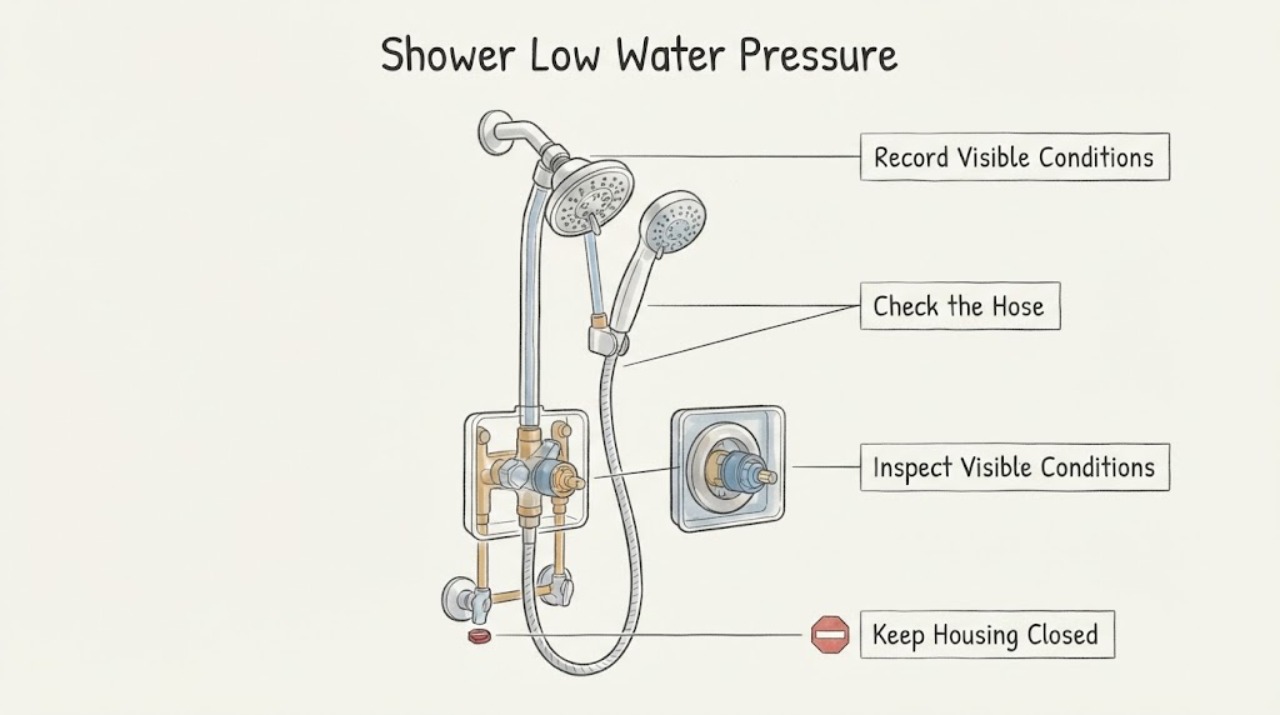
If sinks and other fixtures have normal flow but the shower is weak, start at the shower device and the shower's own valve path rather than assuming the whole house has low pressure. Compare the showerhead, handheld, or body spray one at a time; inspect only accessible screens and nozzles according to the manufacturer's instructions; and, where the model instructions permit, briefly test flow with the shower device removed. Normal flow at the arm points to the head, screen, hose, or device. Weak flow at the arm points farther upstream to a stop, mixing or transfer valve, cartridge, blockage, or a configuration-specific restriction. Do not remove a flow-control component, force a diverter, or disassemble a concealed valve by guesswork. If the shower is the only affected fixture but the valve is unknown, the supply cannot be isolated safely, hot/cold flow differs, or service requires trim or wall access, stop and arrange a licensed plumber.
Work through in order
Diagnostic checks
Use only checks that match the exact appliance or system and its official guide.
-
Check 1
Compare the shower's flow with another fixture, then operate each shower outlet separately. Record whether the showerhead, handheld, body spray, or tub spout is weak, and whether the reduction affects hot water, cold water, or both; do not run multiple outlets together as the first test.
Expected result: Only one shower device is weak, all shower devices are weak, only hot or only cold is weak, or both hot and cold are reduced while other fixtures remain normal.
Next step: Continue with the affected device's accessible inspection when only one outlet is weak. If every outlet or one temperature side is affected, identify the valve and use its instructions or arrange plumbing service rather than replacing a showerhead at random.
Stop if: Stop if the flow is suddenly absent, the control becomes hot or unstable, water leaks at the trim or wall, or changing an outlet requires forcing a diverter or opening concealed plumbing.
Why this matters
Why: One-device weakness makes a device or transfer/diverter path more likely. Weakness across devices makes the shared mixing-valve or local supply path more likely; a temperature-specific change narrows attention to that side of the valve or supply.
-
Check 2
Inspect the accessible showerhead face, handheld screen, hose ends, and any visible inlet screen for debris, mineral buildup, kinks, or a partially closed accessible stop. Follow the fixture's care instructions; do not drill nozzles, remove a flow-control component, or use a sharp tool in the valve.
Expected result: The affected device has visible deposits or debris, the hose is kinked, an accessible stop is not fully open, or the device looks clear but the flow remains weak.
Next step: Clean or straighten only the accessible part using the manufacturer's instructions and retest the same outlet. If the weakness remains, continue to a controlled device-removal test only when the exact instructions allow it.
Stop if: Stop for a seized fitting, damaged screen or hose, a cracked outlet, water at the wall connection, or any need to use force or modify a flow-control part.
Why this matters
Why: Debris in a shower device or a restricted hose/stop can reduce flow without affecting other fixtures. A clear device and fully open accessible stop make an upstream valve, diverter, cartridge, or line restriction more likely.
-
Check 3
For a showerhead or handheld that the model instructions allow you to remove, shut the control off, protect the drain, remove only the device, and briefly observe flow from the shower arm or hose connection. Keep clear of hot water and do not remove the wall-side arm or valve trim.
Expected result: Flow is normal with the device removed, or it is still weak with the device removed; the result may differ between hot and cold.
Next step: Rinse and reinstall the device according to its instructions if upstream flow is normal. If upstream flow is weak, stop replacing showerheads and identify the valve or arrange a licensed plumber for model-specific diagnosis.
Stop if: Stop if the flow is scalding, water sprays from the wall connection, the arm or fitting moves in the wall, the shutoff does not work, or the device cannot be removed without force.
Why this matters
Why: Normal flow upstream of the removed device makes a clogged or failed device, screen, or hose more likely. Weak flow at the arm or connection points toward a stop, mixing/transfer valve, cartridge, blockage, or supply path rather than the showerhead face.
-
Check 4
If the shower has multiple outlets, test the diverter or transfer positions exactly as marked, one position at a time. Note whether one outlet is weak, two outlets together cause a drop, or the valve position does not fully select an outlet; do not force a stiff control.
Expected result: A specific outlet is weak or absent, all positions are weak, flow changes only when two outlets run, or water appears from an unintended outlet.
Next step: Use the exact valve instructions for any transfer or diverter service. If the valve is concealed, the control is stiff, the pattern began after installation/service, or the issue persists after accessible cleaning, arrange a licensed plumber.
Stop if: Stop for a control that binds, water escaping behind trim, an unknown valve, visible wall moisture, or any attempt to adjust pressure or dismantle a diverter without model instructions.
Why this matters
Why: A single-device pattern is consistent with a transfer/diverter path or device blockage. A system-wide pattern is more consistent with the mixing valve or shared supply. Simultaneous or unintended flow can involve back-pressure, a diverter, installation, or internal valve parts.
-
Check 5
Identify the shower valve and local shutoff from safe visible information: brand/model marking, handle count and operation, shower-only versus tub-and-shower layout, and any accessible supply stops. Do not remove trim merely to guess the valve family, and do not close a stop whose function you cannot identify.
Expected result: The exact valve and instructions are known, the shower was recently installed or serviced, the issue affects one temperature, or the valve/stop is unknown and the shower remains weak.
Next step: If the instructions support it and the supply can be isolated safely, follow only the model-specific check or cleaning procedure. Otherwise limit use and arrange a licensed plumber with the flow comparison, outlet test, model information, and any recent work history.
Stop if: Stop if access requires removing trim or a cartridge, the valve body moves, the supply cannot be isolated, hot/cold pressure is unstable, or the repair would require opening the wall.
Why this matters
Why: Valve cartridges, check stops, balancing components, and transfer cartridges are model-specific. A recent service can leave a stop or internal component mispositioned, but that cannot be confirmed safely by a generic procedure.
Use your observations
Decision map
Find the observation that best matches what you see, then follow the next safe action.
-
PATH 01Safety boundary
What you see
Is only one shower device weak while another shower outlet or the tub spout has normal flow?
Do this next
Treat the affected device, hose, screen, or transfer/diverter path as more likely. Inspect the accessible device and use the exact transfer-valve guidance before considering parts.
Why this path and its safety boundary
Why it matters: The number of affected shower devices separates a local outlet restriction from a shared valve or supply problem.
Safety stop: If every shower outlet is weak, continue toward the shared mixing valve, cartridge, stop, or local supply path; normal sinks do not exclude a shower-side restriction.
-
PATH 02Next step
What you see
Does flow become normal when the showerhead or handheld is removed, with the model instructions permitting that test?
Do this next
Clean or replace the device only according to its model guidance when upstream flow is normal. If the arm flow is weak, stop changing devices and arrange model-specific valve diagnosis.
Why this path and its safety boundary
Why it matters: Normal flow at the arm makes debris, a screen, hose, or shower device fault more likely; weak flow at the arm moves the diagnosis upstream to the valve or supply path.
-
PATH 03Next step
What you see
Is the reduction limited to hot or cold water, or did it begin after installation or valve service?
Do this next
Check only visible, clearly identified stops using the exact instructions. If the component or valve is unknown, do not adjust pressure or disassemble it; arrange a licensed plumber.
Why this path and its safety boundary
Why it matters: A temperature-specific or post-service change makes a supply stop, balancing component, cartridge, or valve-path issue more likely than a showerhead-only blockage.
-
PATH 04Next step
What you see
Do multiple outlets run together unexpectedly, or does a diverter position cause delayed, weak, or redirected flow?
Do this next
Stop forcing the diverter and use the exact valve instructions or arrange a licensed plumber, especially when the valve is concealed or the condition followed installation/service.
Why this path and its safety boundary
Why it matters: A transfer/diverter issue, back-pressure, outlet restriction, or installation condition is more likely; this is not established by cleaning the showerhead alone.
Helpful context
Understand the symptom
Normal sinks do not rule out a shower-side restriction
A shower can have weak flow while sinks and other fixtures remain normal because the shower device, hose, diverter, mixing valve, or a local stop is on a separate path. Moen separates a reduction affecting one showering device from an overall reduction across devices and treats them as different diagnostic branches. First compare each shower outlet and whether the weakness affects hot water, cold water, or both.
The showerhead-versus-arm test changes the next step
For a shower-only system, the manufacturer's troubleshooting sequence may allow removing the showerhead and observing flow through the shower arm. Good flow at the arm makes debris or a blocked shower device more likely; poor flow at the arm keeps the valve, cartridge, stop, or line restriction in view. This is a diagnostic observation, not permission to remove a concealed fitting or alter a flow regulator.
One outlet versus the entire shower system
If a showerhead is weak but a handheld or body spray is strong, a device or transfer-valve path is more likely. If every shower device is weak, a shared mixing valve, cartridge, check stop, or supply path is more likely. Kohler also documents that a configuration-specific diverter channel can collect sediment, while back-pressure or installation conditions can create unusual flow behavior; those possibilities need the exact valve and piping instructions rather than a generic repair.
Safety boundary
Stop conditions
- Stop and isolate the local or household water supply if safe for sudden loss of control, water at the wall or ceiling, a continuous leak, unstable/scalding temperature, or visible damage; use local emergency guidance for immediate hazards.
- Do not drill nozzles, remove flow-control components, force a diverter, alter pressure settings, or turn an unidentified stop; the result can create unsafe temperature or water conditions.
- Do not remove concealed trim, cartridge, balancing unit, or valve parts without the exact model instructions and a safe, confirmed shutoff.
- Stop the diagnostic sequence after a device-removed test points upstream, after the same outlet remains weak following accessible cleaning, or whenever the valve body moves or the repair path is uncertain.
Common questions
FAQ
Why is my shower pressure low when other faucets are normal?
The restriction may be local to the shower: a clogged showerhead or screen, kinked hose, transfer path, mixing valve, cartridge, or local stop. Compare each shower outlet and, when the exact instructions permit, observe flow with the showerhead removed to separate the device from the valve path.
How do I know whether the showerhead or valve is causing low flow?
If flow is normal at the shower arm with the head removed, the head, screen, or hose is more likely restricted. If flow remains weak at the arm, the valve, cartridge, stop, blockage, or supply path is more likely. Do not remove a concealed fitting or force the head to perform the test.
Why is only the handheld shower weak?
A single weak outlet points toward that device, its hose or screen, or the transfer/diverter path that feeds it. Clean only accessible parts according to the model instructions; if the outlet remains weak or the diverter binds, arrange model-specific service.
Why is only hot or only cold shower flow weak?
A temperature-specific reduction makes a supply stop, balancing component, cartridge, or one side of the mixing valve more likely than a showerhead-only blockage. Identify the valve and follow its exact instructions; do not adjust an unidentified stop or disassemble the cartridge by guesswork.
Can a diverter cause low shower pressure?
Yes, when one outlet is weak, absent, or flow changes unexpectedly between outlets. Manufacturer guidance also describes sediment in a model-specific diverter channel and back-pressure or installation conditions that can affect outlet flow. Do not force the control; use the exact valve instructions or call a licensed plumber.
Read the exact guide
Official sources
- Delayed Flow, Dripping or Back Pressure from Shower Head and/or Tub SpoutKohler Assist · Kohler guidance on configuration-specific back-pressure, simultaneous outlet flow, and delayed flow from piping and valve installation conditions
- Shower Faucet: Low Flow-Standard ValveMoen Solutions · Moen Standard valve troubleshooting for hot/cold low flow and testing flow through the shower arm with the showerhead removed
- Shower Faucet: Low Flow- Independent Transfer ValvesMoen Solutions · Moen distinction between one-device transfer-valve flow reduction, all-device mixing-valve reduction, temperature-specific flow, device blockage, and model-specific valve service
- Low flow from the shower (K-305 Rite-Temp Diverter Valve)Kohler Assist · Kohler K-305 diverter guidance identifying sediment or debris buildup in the channel as a model-specific low-flow cause
Community feedback
Share a repair observation
Share a plain-text repair observation. Accepted observations are published automatically; this page may take a moment to update.