
On this page
Start here
Quick answer
First determine whether no water affects the whole sink, only hot or cold water, or only a dedicated filtered faucet. Confirm the local shutoff valves are open and dry, compare another fixture, and identify whether the under-sink tank is an actual reverse-osmosis storage tank or a different device. A storage tank can supply treated water on demand, while tankless systems have no storage tank; neither should be assumed from the word tank alone. Check only visible valves, tubing, filter indicators, and leaks. If the tank or housing is leaking, the water path is contaminated or unknown, the supply will not open, or the sink remains without water after safe visible checks, isolate it and call a plumber or the water-treatment manufacturer.
Before you begin
Safety first
- Do not open a pressurized housing, adjust an unknown tank, disconnect tubing, force valves, handle wet electrical equipment, or consume water from an unverified treated path.
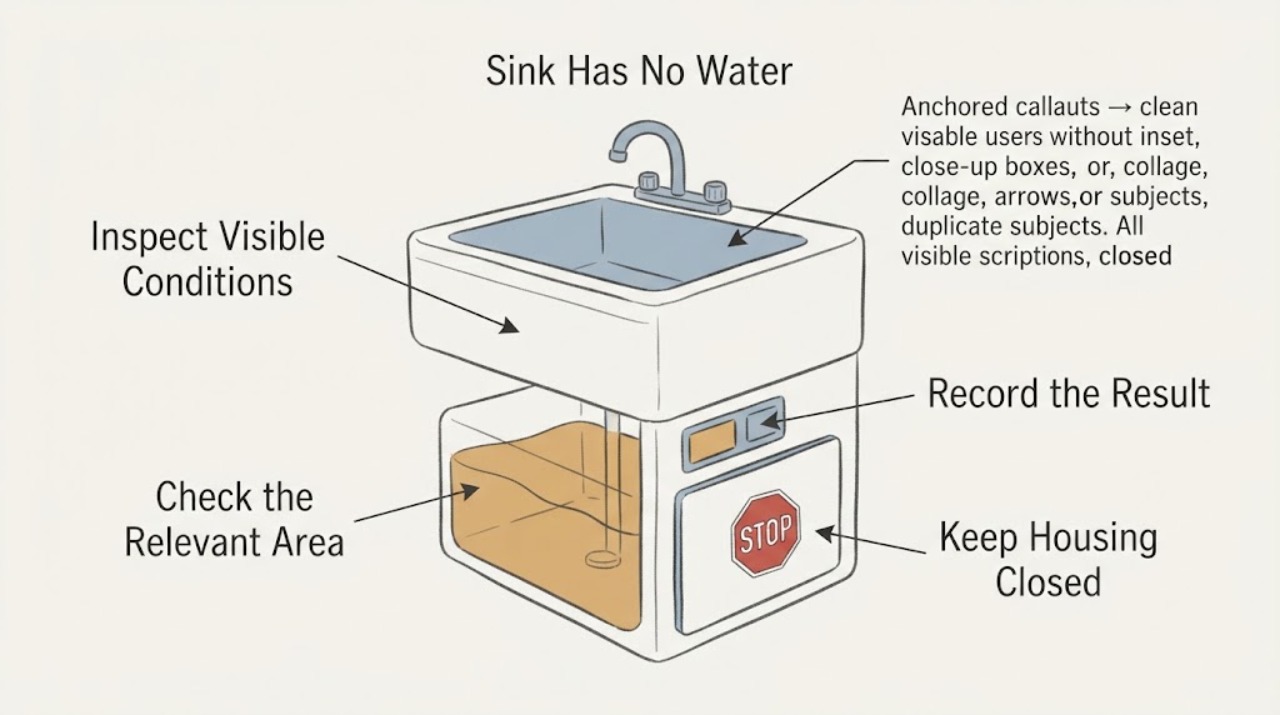
Work through in order
Diagnostic checks
Use only checks that match the exact appliance or system and its official guide.
-
Check 1
Keep the floor and hands dry, then identify which outlet has no water: the normal faucet, the dedicated filtered faucet, the sprayer, or only one side of a two-handle faucet. Look for a visible leak under the sink before operating any valve.
Expected result: The whole sink is dry, only hot or cold water is absent, only the filtered outlet is dry, or water is already pooling around the tank or pipes.
Next step: Keep the affected outlet unused, photograph the visible layout, and continue only if there is no water or electrical hazard. Do not assume the tank is involved until the outlet and leak pattern match it.
Stop if: Stop for uncontrolled water, standing water near electrical equipment, a cracked tank or housing, or a shock sensation.
Why this matters
Why: A whole-sink or single-temperature failure points toward the building supply, shutoff, or faucet. A filtered-only failure points toward the point-of-use path or its tank if one exists. Pooling changes the priority to leak isolation.
-
Check 2
From a dry, safe position, open the local sink supply valves only if they are clearly identified and already in a normal accessible position; observe whether the cold and hot supply hoses, valves, and faucet connections remain dry. Compare flow at another nearby fixture without changing its plumbing.
Expected result: Other fixtures have water while the sink does not, the sink valves are closed or partly closed, only one supply side lacks flow, or the whole area has weak or absent water.
Next step: Restore a clearly closed local valve only once and without force if the area is dry and the valve works normally. If no flow returns, leave the valve unchanged and call a plumber; do not remove hoses or fittings.
Stop if: Stop for a seized or spinning valve, spray, damaged hose, wet electrical equipment, or water that cannot be safely isolated.
Why this matters
Why: Other fixtures with a dry sink narrows the problem to local shutoffs, hoses, faucet, or treatment path. A wider outage points upstream of the sink. A closed valve can explain no flow, but a valve that will not operate safely needs service.
-
Check 3
Identify the under-sink device from its label and tubing layout without opening it. Look for a dedicated filtered-water faucet, a labeled storage tank, a tankless treatment unit, filter-life indicator, inlet valve, and drain connection; do not infer the device from its shape alone.
Expected result: There is a separate treated-water faucet and storage tank, a tankless unit, a simple faucet-mounted filter, or no verified treatment device connected to the sink.
Next step: Record the product name, model, indicator state, and which tubing leads to the dry outlet. Use the exact manual before changing a cartridge, opening a housing, or interpreting a tank condition.
Stop if: Stop if the label is missing, the tubing is crossed or damaged, the unit is wet, or identification would require moving a pressurized assembly.
Why this matters
Why: A storage tank can provide treated water after the treatment process has filled it, while a tankless unit has no storage tank. A faucet-mounted or integrated filter has a different flow path, so a tank may be unrelated.
-
Check 4
Inspect the visible inlet valve, filter indicator, tubing ends, tank exterior, and dedicated faucet connection for a closed valve, kink, wet joint, cracked housing, or expired indicator. Do not loosen a filter housing, disconnect tubing, or adjust a tank setting.
Expected result: The inlet is visibly closed, a tube is kinked, the filter indicator requests service, the tank or connection is wet, or all visible parts look normal.
Next step: If the manual confirms the visible valve position and filter procedure, follow that procedure once. Otherwise keep the treatment path isolated and call the manufacturer or a plumber; do not substitute a cartridge or force a housing.
Stop if: Stop for a crack, active leak, bulging or unstable tank, water near electricity, or any pressurized connection that needs force.
Why this matters
Why: A closed inlet or kink can stop a point-of-use path. A service indicator may mean the device needs its model-specific procedure, while a wet or cracked assembly can make both operation and drinking-water safety uncertain.
-
Check 5
If the cabinet is dry and the device is identified, make one brief flow observation at the affected faucet from a safe position. Note whether there is no flow, sputtering, a short release followed by no flow, or a slow stream; do not leave the faucet open unattended.
Expected result: The normal faucet flows but the filtered faucet does not, both faucets have no flow, the filtered faucet sputters, or flow is slow while the tank is visibly dry and the inlet is open.
Next step: Close the affected faucet, record the result, and follow the exact product instructions or arrange plumbing and water-treatment service. Do not repeatedly run the faucet to force a refill or prove a diagnosis.
Stop if: Stop for a leak, contaminated-looking water, unusual odor, sudden spray, or flow that reaches electrical equipment.
Why this matters
Why: Normal faucet flow with a dry filtered outlet isolates the treatment or dedicated-faucet path. Sputtering can reflect air or an empty storage path, while slow flow can reflect restricted treatment or supply, but the exact cause is device-specific.
-
Check 6
Check the sink's visible drain and treatment drain connection only from outside the cabinet, looking for a kinked reject line, standing water, backup, or a dislodged connection. Do not pull on the line or pour chemicals into the sink.
Expected result: The sink drains normally, the treatment drain is blocked or kinked, the basin backs up, or water appears at the drain connection.
Next step: Stop using the treatment system and sink if there is backup or leakage, keep the cabinet dry, and call a plumber. Use the device manual for any model-specific drain procedure.
Stop if: Stop for sewage odor, dirty backup, standing water near electricity, a hidden wall leak, or a drain connection that is not safely accessible.
Why this matters
Why: A treatment system may use a drain path, but a clogged sink drain does not by itself explain every no-water symptom. Backup or a loose drain connection can stop safe operation or create a leak and needs separation from the supply diagnosis.
-
Check 7
Protect drinking-water use while the tank and treatment path are uncertain. Record the cartridge and device identity, installation or service date if known, and whether the dry outlet is filtered or unfiltered; use a known-safe alternative for drinking and cooking until the exact instructions are checked.
Expected result: The tank or cartridge is unknown, the housing leaked, the treated outlet may have contacted cabinet or drain water, or the device identity and treatment claims are confirmed.
Next step: Do not consume water from the affected treated outlet until the manufacturer or a water-treatment professional confirms the correct cartridge, seals, flush or replacement procedure, and safe path. Call a plumber if the supply or drain installation is involved.
Stop if: Stop using the affected treated outlet for drinking, cooking, ice, or brushing teeth while its identity, seal, or clean-water path is uncertain.
Why this matters
Why: No flow does not prove contamination, but an unknown or altered treatment path cannot be assumed safe. EPA notes that treatment technologies and contaminant claims vary by system.
Use your observations
Decision map
Find the observation that best matches what you see, then follow the next safe action.
-
PATH 01Next step
What you see
No water comes from the normal faucet, but other fixtures have flow.
Do this next
Check only visible valve position and hose condition; leave the sink isolated and call a plumber if flow does not return without force.
Why this path and its safety boundary
Why it matters: The local shutoffs, supply hoses, faucet, or sink-specific piping are more likely than an under-sink treatment tank.
-
PATH 02Next step
What you see
The normal faucet works, but a dedicated filtered faucet does not.
Do this next
Identify the actual device and follow its exact manual; do not treat a tankless unit as if it had a storage tank or replace an unverified cartridge.
Why this path and its safety boundary
Why it matters: The point-of-use filter, tank or tankless unit, dedicated faucet, inlet, or treatment tubing is implicated.
-
PATH 03Next step
What you see
Only hot or only cold water is absent at the sink.
Do this next
Leave the affected side unused and have a plumber inspect the visible supply path; do not open the faucet body.
Why this path and its safety boundary
Why it matters: The affected temperature-side shutoff, hose, faucet valve, or building branch is more likely than the treatment tank.
-
PATH 04Next step
What you see
The under-sink tank or treatment housing is wet, cracked, unstable, or still leaking after its inlet is isolated.
Do this next
Keep it isolated, avoid consumption from the affected outlet, and call a plumber or the water-treatment manufacturer.
Why this path and its safety boundary
Why it matters: The assembly may be pressurized or damaged, and its drinking-water path is not verified.
-
PATH 05Next step
What you see
The entire home or several fixtures have no water.
Do this next
Check for a known utility interruption from a safe location and contact the water utility or plumber; do not dismantle the sink device.
Why this path and its safety boundary
Why it matters: The problem is upstream of the sink, such as a home shutoff, service interruption, or supply issue.
Helpful context
Understand the symptom
Sink no-water reports can describe a normal faucet with no flow, one missing temperature, or only a filtered drinking-water faucet that has stopped dispensing. A tank under the sink may be part of a reverse-osmosis system, a different treatment device, or not the cause at all. The first useful distinction is which outlet is dry and whether other fixtures still have water.
Point-of-use treatment is commonly connected to one sink or dedicated faucet, while whole-house treatment affects many fixtures. EPA describes under-sink systems as drawing from a supply line, treating water, and directing it to a dedicated faucet; some reverse-osmosis systems store treated water in a tank and others produce water on demand without one. Identify the actual layout before changing a filter or tank setting.
Keep all checks external. A filter housing, storage tank, valve, and tubing can hold water or pressure, and an unknown replacement cartridge may affect drinking-water quality. Do not open a pressurized housing, adjust an unverified tank, or use a treatment claim from another model as proof that the affected water is safe.
If the cabinet is wet, a tank or connection is spraying, or water is close to an outlet or disposal wiring, stop using the sink and move to a dry location. Isolate water only when the valve is safely reachable; do not handle wet electrical equipment or keep testing a growing leak.
When checks do not resolve it
Need a professional?
Safety scope: Do not open a pressurized housing, adjust an unknown tank, disconnect tubing, force valves, handle wet electrical equipment, or consume water from an unverified treated path.
Common questions
FAQ
Does a tank under the sink always cause a no-water problem?
No. It may be an RO storage tank, another treatment device, or unrelated to the normal faucet. Compare the normal and dedicated filtered outlets and identify the tubing layout before treating the tank as the cause.
Why does the normal faucet work but the filtered faucet has no water?
That pattern isolates the point-of-use path: its inlet, filter, tank or tankless unit, dedicated faucet, or tubing. Use the exact device instructions and do not open a housing or replace an unverified cartridge.
Can I drink from the filtered outlet while the tank problem is unresolved?
Use a known-safe alternative until the device identity, cartridge, seals, and clean-water path are confirmed. EPA notes that treatment performance and contaminant claims vary by system, so do not assume an unknown or altered path is safe.
Read the exact guide
Official sources
- Treating Water With Less Waste | Reverse Osmosis SystemsU.S. Environmental Protection Agency · Under-sink point-of-use RO flow paths, storage tanks, tankless systems, dedicated faucets, and maintenance context
- WaterSense Guide to Selecting Water Treatment SystemsU.S. Environmental Protection Agency · Point-of-use, under-sink, faucet-integrated, and whole-house water-treatment layouts and use boundaries
- Point-of-Use Reverse Osmosis SystemsU.S. Environmental Protection Agency · Point-of-use reverse-osmosis systems connected to a single fixture, performance, and treatment-specific claims
Community feedback
Share a repair observation
Share a plain-text repair observation. Accepted observations are published automatically; this page may take a moment to update.