
On this page
Start here
Quick answer
When you return and find a leaking toilet, first stop the water from a safe, accessible shutoff valve and keep people away from contaminated water. Then identify the first wet point: the supply connection or tank, the bowl or base, the flush handle, or a ceiling or wall below. A tank-to-bowl or flapper leak may be slow and internal, while water at the base after a flush can indicate a seal or drain connection. Do not keep flushing, force a stuck valve, lift a toilet, or work near wet electrical equipment. Call a plumber urgently for an active leak, sewage, a base leak, ceiling damage, or a shutoff that will not stop the flow.
Before you begin
Safety first
- Do not force the shutoff, lift the toilet, remove supply or tank fittings, open a wall or ceiling, or touch wet electrical equipment.
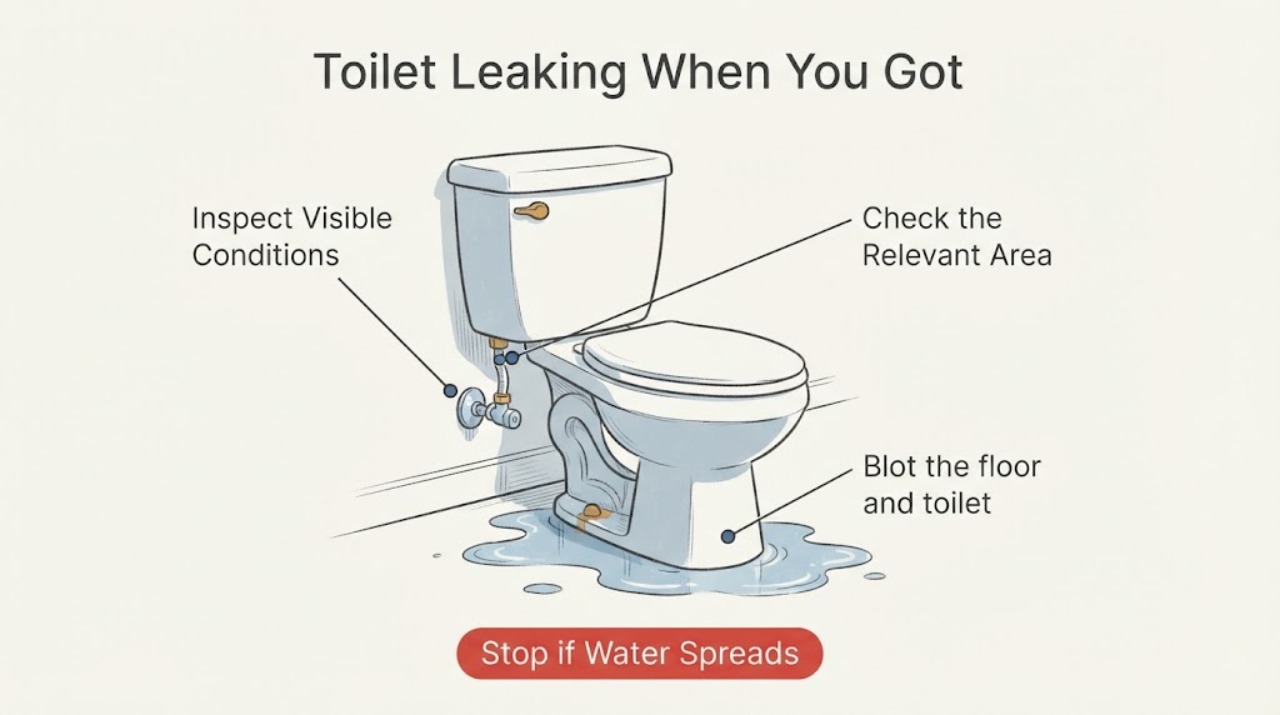
Work through in order
Diagnostic checks
Use only checks that match the exact appliance or system and its official guide.
-
Check 1
From a dry position, look at the water level, the floor, the toilet supply valve, nearby outlets, and the ceiling or wall below if visible. If water is spreading, reaches electrical equipment, smells like sewage, or the local valve is inaccessible, keep clear and arrange urgent plumbing or electrical help.
Expected result: The leak is a small clean-water drip, an active stream, water at the bowl or base, sewage-like water, or water near electrical equipment.
Next step: If safe, continue from a dry position. If the water is spreading or electrically unsafe, leave the area and call a plumber or emergency service from a safe location.
Stop if: Stop immediately for sewage, rapid flow, ceiling movement, water near electrical equipment, shock or tingling, or an inaccessible shutoff.
Why this matters
Why: A contained clean-water drip may permit a careful source check. Active flow, contaminated water, structural damage, or water near electrical equipment can worsen quickly and is not a hands-on troubleshooting situation.
-
Check 2
If the local shutoff valve is dry, visible, and turns normally without force, close it and observe the flow. Do not force a corroded valve, remove the supply line, or reach through standing water.
Expected result: The leak stops, slows but continues, or does not change after the local valve is closed.
Next step: Leave the toilet out of use and have a plumber isolate the building supply if the local valve does not stop the flow; do not keep operating the fixture.
Stop if: Stop for a valve that binds, spins, sprays, breaks, or cannot be reached without getting wet.
Why this matters
Why: A stopped leak points toward the toilet's pressurized supply or tank fill path. Continued flow suggests a valve that did not isolate the source, water already trapped in the tank or bowl, a drain-side leak, or another plumbing source.
-
Check 3
Blot the floor and toilet exterior from the outside with disposable paper, then watch which area becomes wet first without flushing: supply fitting, tank underside, tank bolts, flush handle, bowl rim, bowl base, or the floor behind the toilet.
Expected result: The first wet point is at the supply or tank, appears under the handle, forms at the bowl base, or cannot be located because water is coming from a wall or ceiling.
Next step: Photograph the first wet point and keep the toilet unused. Ask a plumber to inspect the corresponding connection, seal, tank, bowl base, and drain path.
Stop if: Stop if the bowl is unstable, the floor is soft, water reaches wiring, or locating the source would require moving or lifting the toilet.
Why this matters
Why: The first wet point is more useful than the largest puddle. Supply and tank points suggest clean-water hardware; a base leak is more concerning for a bowl seal or drain connection; a wall or ceiling source may be another plumbing line or an upstairs fixture.
-
Check 4
If the external surfaces stay dry, the local supply is isolated or stable, and there is no sewage or structural hazard, place a few drops of food coloring in the tank and wait without flushing. Observe whether color appears in the bowl, then flush once afterward to clear the dye.
Expected result: Color appears in the bowl, the tank level falls without use, or no color appears and the water level remains stable.
Next step: If the dye check indicates a leak, request a model-appropriate flapper or flush-valve diagnosis. Do not order a seal from appearance alone, and skip the test if water is already escaping externally.
Stop if: Stop if the tank is cracked, the lid or fittings are unstable, water is escaping externally, or the toilet may overflow.
Why this matters
Why: Color in the bowl supports a silent tank-to-bowl leak, commonly involving the flapper or flush valve seal. No color makes that particular leak less likely but does not rule out an intermittent external or drain-side leak.
-
Check 5
Only when the bowl and floor are dry, the supply is controlled, and there is no active external leak, observe one normal flush from a dry position. Watch the base, supply connection, tank, and ceiling or wall below for new water; do not repeat the flush to reproduce a leak.
Expected result: Water appears only during the flush at the base, rises or backs up in the bowl, appears at the supply or tank, or no new water appears.
Next step: Stop using the toilet after any abnormal result and provide the exact timing and first wet point to a plumber. Do not plunge aggressively when water is already escaping at the base or floor.
Stop if: Stop for overflow, sewage, a rocking bowl, a base leak, water in the ceiling below, or any need to move the toilet.
Why this matters
Why: A flush-only base leak can indicate a bowl-to-drain seal or drain connection. A rising or backing-up bowl points toward a drain restriction and overflow risk. A tank or supply leak remains on the clean-water side; no new water makes an intermittent leak or another source more likely.
-
Check 6
Compare the toilet area with nearby sinks, tubs, showers, appliances, and the room below while water remains isolated or the toilet remains unused. Record whether the leak continues with no toilet activity and whether another fixture changes it.
Expected result: The puddle grows while the toilet is unused, only the toilet area is wet, another fixture triggers water below, or the source is not the toilet.
Next step: Keep affected fixtures out of use and give the plumber the timing relationship, locations, and photos. Do not open the wall or ceiling to trace the pipe.
Stop if: Stop for ceiling staining that grows, bulging drywall, sewage, spreading water, or water near electrical fixtures.
Why this matters
Why: Growth while unused keeps the supply, tank, hidden wall line, or another continuous source in focus. A leak triggered by another fixture suggests shared or adjacent plumbing rather than a toilet-only fault, while a source elsewhere should not be repaired by changing toilet seals.
-
Check 7
Prepare a service handoff with the time you returned, whether the toilet was used while away, local-valve position, first wet point, whether the leak was continuous or flush-linked, dye result, bowl level, nearby fixtures affected, and any ceiling, wall, sewage, or electrical warning.
Expected result: The source and timing are documented, or the area cannot be approached safely.
Next step: Request a plumber and tell them whether water must be isolated at the building shutoff. Include safe photos and do not return the toilet to service until the leak and affected structure are assessed.
Stop if: Do not lift the toilet, remove a tank or supply fitting, open a wall, or work near wet electrical equipment.
Why this matters
Why: The sequence separates a supply or tank leak, a silent flapper leak, a bowl-base or drain connection, and an unrelated nearby source without unnecessary dismantling. An unsafe area needs professional assessment rather than more checks.
Use your observations
Decision map
Find the observation that best matches what you see, then follow the next safe action.
-
PATH 01Next step
What you see
The local valve stops a contained clean-water leak and the first wet point is the supply or tank.
Do this next
Arrange qualified service and follow the exact model guidance.
Why this path and its safety boundary
Why it matters: Leave the toilet unused and have a plumber inspect the supply connection, fill path, tank fittings, and model-specific seals before reopening the valve.
-
PATH 02Next step
What you see
The toilet is externally dry but dye reaches the bowl without a flush.
Do this next
Arrange qualified service and follow the exact model guidance.
Why this path and its safety boundary
Why it matters: Treat it as a silent tank-to-bowl leak and arrange a model-appropriate flapper or flush-valve diagnosis; do not choose a seal by appearance alone.
-
PATH 03Next step
What you see
Water appears at the bowl base during one controlled flush or the bowl rocks.
Do this next
Arrange qualified service and follow the exact model guidance.
Why this path and its safety boundary
Why it matters: Stop using the toilet and call a plumber for the bowl seal and drain connection; do not lift or reseat the toilet yourself.
-
PATH 04Next step
What you see
Water continues while the toilet is unused, or another fixture causes water in the same wall or ceiling.
Do this next
Arrange qualified service and follow the exact model guidance.
Why this path and its safety boundary
Why it matters: Keep the affected fixtures out of use and have a plumber trace the supply, shared drain, or hidden line without opening the structure as a DIY step.
-
PATH 05Next step
What you see
Water is contaminated, rapidly spreading, reaching electrical equipment, or damaging a ceiling or wall.
Do this next
Arrange qualified service and follow the exact model guidance.
Why this path and its safety boundary
Why it matters: Leave the area, isolate water only from a safe dry point if possible, and obtain urgent plumbing, electrical, or emergency help.
Helpful context
Understand the symptom
Finding a toilet leak after being away makes the timing important but does not identify the failed part. The leak may have been continuous from the supply or tank, may appear only during a flush, or may be water that traveled from the toilet to the floor, wall, or ceiling below. Dry the visible area only if it is safe, then trace the first place that becomes wet.
A toilet can leak silently through a worn flapper, while an external leak can come from a supply connection, tank seal, handle, bowl base, or drain connection. WaterSense recommends checking for a silent tank-to-bowl leak with dye and contacting a plumber when a toilet problem needs more than the simple check.
Treat water near outlets, appliances, lighting, or wiring as an electrical hazard. Do not enter contaminated or electrically unsafe water, and do not open a wall or ceiling to chase a leak.
Only after diagnosis
Potential parts
- Toilet flapper or flush-valve seal
Consider this only when a dye check supports a tank-to-bowl leak and the exact toilet design identifies the correct seal.
Confirm the toilet model and manufacturer instructions; do not select a seal from appearance or a leak symptom alone. - Toilet supply valve or connector
Consider this only when the first wet point is the supply connection and a plumber confirms the valve or connector is defective.
Confirm the connection type and installation requirements; do not force a corroded valve or remove a pressurized fitting. - Bowl seal or drain connection materials
Consider this only when a plumber confirms a flush-linked bowl-base leak and identifies the correct seal for the toilet and drain configuration.
Bowl removal and seal selection require plumbing assessment; do not lift or reseat a toilet based only on a floor puddle.
When checks do not resolve it
Need a professional?
Safety scope: Do not force the shutoff, lift the toilet, remove supply or tank fittings, open a wall or ceiling, or touch wet electrical equipment.
Common questions
FAQ
What should I do first when I find a toilet leaking after being away?
From a dry position, assess whether the water is spreading or contaminated, then close the local supply valve only if it is safe and turns normally. Keep the toilet unused and find the first wet point before asking a plumber to diagnose it.
Can a toilet leak while nobody is using it?
Yes. A worn flapper can allow a silent tank-to-bowl leak, and a supply or tank connection can leak continuously. A dye check can support a tank-to-bowl diagnosis when there is no active external leak.
What does water at the bottom of the toilet mean?
Water at the base may be from a flush-linked bowl seal or drain connection, but it can also travel from the tank, supply, wall, or another fixture. Keep the toilet unused and have a plumber identify the first wet point rather than lifting the bowl yourself.
When is a toilet leak an emergency?
Treat rapid flow, overflow, sewage, a rocking bowl, growing ceiling or wall damage, water near electrical equipment, or a shutoff that will not stop the leak as urgent. Leave the area when it is unsafe and obtain qualified plumbing, electrical, or emergency help.
Read the exact guide
Official sources
- CPSC Guide to Home Wiring HazardsU.S. Consumer Product Safety Commission · Residential electrical warning signs and water-related electrical safety boundaries
- Fix a Leak WeekU.S. Environmental Protection Agency WaterSense · Household leak detection, toilet leak identification, and plumbing professional guidance
- Home MaintenanceU.S. Environmental Protection Agency WaterSense · Residential toilet maintenance, silent leak checks, flapper guidance, and plumber escalation
Community feedback
Share a repair observation
Share a plain-text repair observation. Accepted observations are published automatically; this page may take a moment to update.