
On this page
Start here
Quick answer
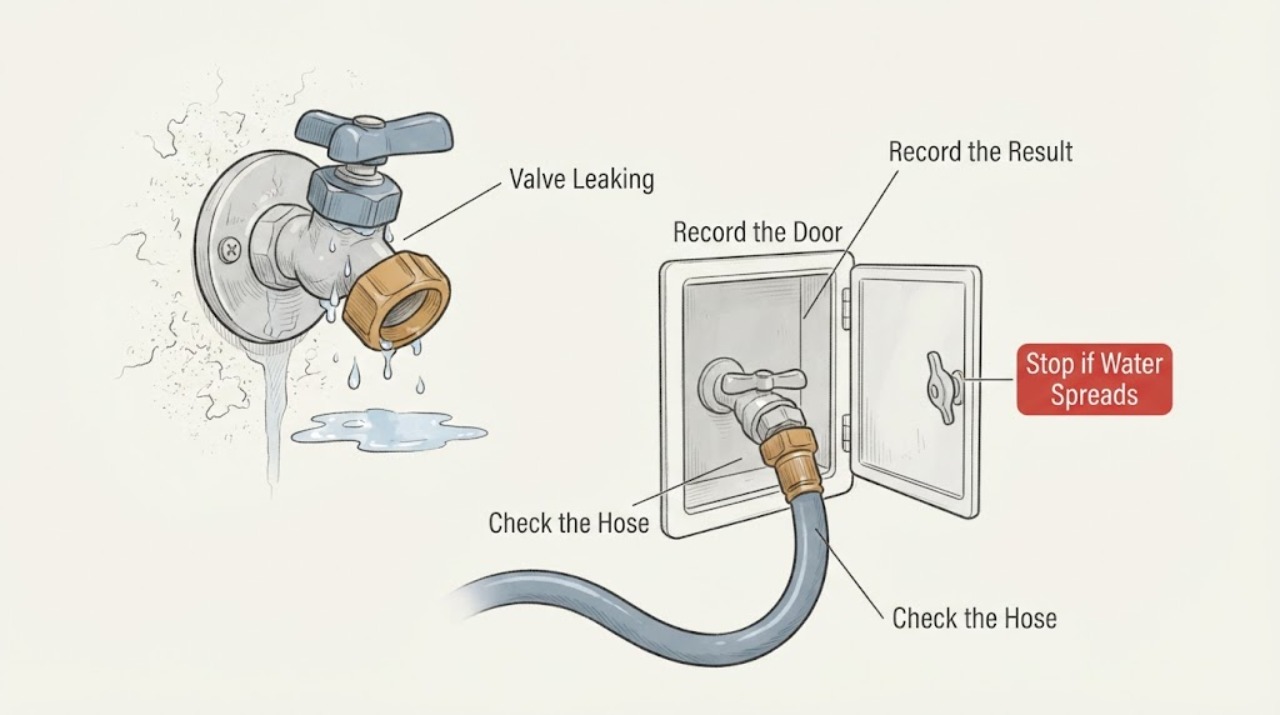
When an outside spigot leaks even though its shutoff valve is closed, first determine whether you are seeing a short release of trapped water or a continuous supply. Close the correct indoor branch shutoff or the main valve, remove any hose or splitter, and open the outside spigot briefly into a bucket only from a dry, safe position to relieve residual pressure. A short drain that stops can be residual water, especially with a frost-free or self-draining hydrant. A steady drip or stream that continues after pressure is released means the indoor shutoff may be passing water, the spigot's stem washer or valve seat may not seal, or the leak may be at the packing nut, vacuum breaker, threaded connection, or wall-side pipe. Do not keep tightening a stiff handle, open a wall or crawlspace pipe, remove a frost-free stem under pressure, or use an open flame to look for a leak. If water continues after the main is closed, the source is inside the wall, the shutoff will not isolate the line, the spigot is cracked, or water is reaching electrical equipment, keep the area clear and arrange a qualified plumber; use an electrician for wet electrical equipment.
Work through in order
Diagnostic checks
Use only checks that match the exact appliance or system and its official guide.
-
Check 1
Move people and tools away from the wet area. Close the outside spigot handle, then close the dedicated indoor shutoff for that faucet if you can identify it; if the leak is substantial, the branch valve will not close, or the dedicated valve is unknown, close the home's main water shutoff from a dry, accessible position. Do not stand in water to operate a valve or touch wet electrical equipment.
Expected result: The flow stops immediately, slows to a short drain, continues as a drip or stream, or water continues after the main valve is closed.
Next step: Keep the valve closed and use a container or towels to limit damage. If water continues after the main is closed, the valve cannot isolate the line, or the area is unsafe, stop and arrange a qualified plumber rather than opening fittings.
Why this matters
Why: Immediate stopping or a short drain suggests the accessible valve isolated the line and trapped water is leaving. Continued flow means the wrong valve may have been closed, the shutoff may be passing water, or there is another supply path; flow after the main is closed raises concern for a concealed or separate source.
-
Check 2
With the branch shutoff closed and the spigot pointed into a bucket, open the outside handle slowly for a moment to release only stored line pressure, then close it again. Do this only where the outlet and ground are safe; do not remove a cap or hose fitting under pressure and do not force a stiff handle.
Expected result: A brief flow stops, the spigot continues dripping after the line has drained, the flow increases when the handle is opened, or no water comes out at all.
Next step: Record how long the leak lasts and where it exits. If it continues after the line is drained, leave the branch off and proceed to visual source identification; do not dismantle the valve.
Why this matters
Why: A brief flow is consistent with residual water. Continued dripping after pressure release is not explained by residual pressure alone and keeps a passing shutoff, stem washer, seat, packing seal, vacuum breaker, or pipe leak in question. No flow can mean the valve worked, the wrong valve was closed, or the spigot is blocked.
-
Check 3
Remove any garden hose, Y-splitter, timer, or self-closing nozzle from the spigot only after water is isolated and pressure has been relieved. Dry the outlet, stem/packing-nut area, anti-siphon or vacuum-breaker openings, wall connection, and hose threads with separate towels, then watch for the first area that becomes wet.
Expected result: Water reappears at the outlet, around the stem or packing nut, from a vacuum-breaker opening, at the hose thread, or where the faucet enters the wall.
Next step: Use the location to choose the service path. Keep the branch shutoff closed for a continuing leak; do not keep tightening the handle, remove the bonnet, or substitute tape for a failed seat or pipe.
Why this matters
Why: Outlet leakage with the handle off is consistent with a worn washer or damaged seat. Stem-area leakage is a packing or bonnet path; vacuum-breaker leakage is its own seal/check assembly path. Wall-side moisture can be a fitting, freeze, or concealed pipe problem. A hose gasket or splitter can also mimic a faucet leak.
-
Check 4
Identify whether the outside fixture is a standard hose bib, frost-free wall hydrant, or anti-siphon/vacuum-breaker type from its visible shape and the exact installation manual if available. Check only that a hose has been removed and that the faucet points downward; do not infer the internal stem length, seat, or repair kit from appearance alone.
Expected result: The faucet has a long wall body or frost-free design, a visible anti-siphon/vacuum-breaker cap or vent, a standard short body, or signs of freezing such as a split body or wall-side dampness.
Next step: Keep the water isolated and use the exact manufacturer's documentation for identification. If there is a crack, wall-side moisture, or a frozen-pipe history, arrange plumbing service; do not remove a frost-free stem while pressurized.
Why this matters
Why: Frost-free hydrants are intended to drain when installed correctly and not left under pressure with a hose attached. Anti-siphon components can leak from their own seals. A freeze-damaged faucet or wall pipe can leak only when supply is restored and may require replacement rather than a washer.
-
Check 5
Confirm that the indoor shutoff you closed actually feeds this outside spigot. From a dry location, briefly open the spigot after the valve is closed and observe whether flow stops after residual water drains. If a water meter has a visible flow indicator, turn off all fixtures and compare the indicator before and after isolation; do not open the meter or disturb utility equipment.
Expected result: The spigot drains and the meter is still, the spigot keeps flowing and the meter moves, the meter is still but the spigot drips, or the shutoff handle will not turn or will not hold.
Next step: Do not repeatedly cycle a stuck or leaking shutoff. Keep the main or branch closed as needed and arrange a plumber to verify isolation and repair the shutoff or spigot.
Why this matters
Why: A still meter and a short drain support successful isolation. Meter movement means water is still being supplied somewhere, possibly through a passing shutoff or another fixture. A drip with no meter movement may be stored water, a very small leak, or a separate downstream pocket. A valve that will not hold is itself a service issue.
-
Check 6
Inspect the accessible wall, basement, crawlspace, or exterior siding around the spigot without removing finishes or entering standing water. Look for fresh dampness, staining, bulging, mineral deposits, frost damage, or a sound of running water behind the wall. If the home's meter is moving with all fixtures off, note that result without opening a utility box.
Expected result: The wall or crawlspace is wet, the faucet body is cracked, water appears only when the main is open, the meter moves despite all fixtures being off, or all visible areas are dry while the outlet drips.
Next step: Close the main or affected branch and arrange a qualified plumber for hidden, freeze-related, or meter-confirmed leaks. Protect flooring and finishes from water; do not cut into the wall or use heat or flame to locate a leak.
Why this matters
Why: Wall-side moisture, a cracked body, or unexplained meter movement points to a concealed supply or fixture leak. A dry wall with outlet dripping keeps the spigot's internal washer or seat more likely, but does not justify internal repair without the correct shutoff and fixture identification.
Use your observations
Decision map
Find the observation that best matches what you see, then follow the next safe action.
-
PATH 01Next step
What you see
The branch shutoff is closed, the spigot releases a short stream or a few drips, and the leak stops after the downstream water drains.
Do this next
Residual water or intended self-draining behavior is more likely than a continuously supplied leak.
-
PATH 02Next step
What you see
The outside spigot leaks from its outlet with the handle fully closed after residual pressure has drained.
Do this next
A worn stem washer or damaged valve seat is more likely than a packing-nut leak.
-
PATH 03Next step
What you see
The outlet is dry but water appears around the handle stem, packing nut, or bonnet when the spigot is operated or pressurized.
Do this next
A loose bonnet or worn packing seal is more likely than a failed outlet seat.
-
PATH 04Next step
What you see
Water exits an anti-siphon vent, weep hole, or vacuum-breaker opening rather than the spout or stem.
Do this next
The check assembly or vacuum-breaker seals may be worn, and the leak path is not the main shutoff seat alone.
-
PATH 05Next step
What you see
Water appears where the spigot enters the wall, inside a crawlspace, or at a cracked body, especially after freezing weather.
Do this next
A freeze split, fitting, or concealed supply leak is more likely than a replaceable handle washer.
-
PATH 06Next step
What you see
The outside spigot continues to flow after the intended indoor shutoff is closed, or the meter shows flow with all fixtures off and the shutoff should be isolating the faucet.
Do this next
The wrong valve may have been selected, the shutoff may be passing water, or another supply path may be present.
Helpful context
Understand the symptom
A closed handle and a closed indoor shutoff are different tests
The outside spigot handle controls the faucet's internal stem, washer, and seat. An indoor branch shutoff, when present, controls the pipe feeding the spigot; the main valve controls the home. A spigot may continue to drip briefly after the branch valve is closed because water is trapped in the line. It should not continue flowing indefinitely after the accessible line has drained. The first useful observation is the leak's duration after isolation and pressure release, not the brand or shape of the handle.
Where the water appears changes the likely repair
Water from the spigot outlet with the handle off points toward the internal washer or seat. Moisture around the stem or packing nut points toward the bonnet or packing seal. Water from an anti-siphon or vacuum-breaker opening is a different part path. A wet threaded connection or the wall penetration can indicate a fitting, freeze split, or concealed pipe leak. Do not order one valve part until the first wet point and shutoff behavior have been established.
Keep pressurized, concealed, and electrical work behind the service boundary
Safe owner checks are limited to closing an accessible shutoff, removing a hose, catching residual water, observing the leak, inspecting visible surfaces, and checking a meter or visible crawlspace area without opening a wall. Do not remove a stem or bonnet while water pressure remains, cut into siding or drywall, enter a flooded area, apply an open flame, or energize wet electrical equipment. A licensed or qualified plumber should isolate the line, identify a failed shutoff or sillcock, and repair a wall-side leak.
Safety boundary
Stop conditions
- Stop immediately for a stream that continues after the main valve is closed, a cracked faucet or pipe, water inside a wall or ceiling, flooding, or a shutoff valve that will not isolate the leak.
- Do not remove a stem, bonnet, vacuum breaker, or wall fixture while pressurized. Do not cut into finishes, use an open flame or torch to find or thaw a leak, block an anti-siphon opening, or keep forcing a stuck handle.
- Stop and arrange qualified plumbing service when the first wet point is uncertain, the leak returns after residual pressure drains, the meter shows unexplained flow, or the repair requires pipe, wall, freeze-damage, or electrical-area work.
Only after diagnosis
Potential parts
- hose-bib stem washer and seat kit
Relevant only when leakage is confirmed at the spigot outlet with its handle closed and a plumber or exact manufacturer guide identifies a worn washer or seat.
Standard, frost-free, and anti-siphon designs differ; confirm the faucet manufacturer, series, stem length, and shutoff before selecting a kit. - packing or bonnet seal
Relevant only when the first wet point is around the stem, packing nut, or bonnet rather than the outlet or wall connection.
Do not tighten or remove a bonnet on a pressurized or corroded fixture; verify isolation and the exact repair procedure. - anti-siphon or vacuum-breaker assembly
Relevant only when water exits the vent or weep-hole area and the faucet design includes a replaceable check or vacuum-breaker assembly.
Backflow devices and thread styles vary; do not block or bypass the device and confirm local code and manufacturer fit. - complete outdoor sillcock or wall hydrant
Relevant when the body or seat is cracked, the wall-side pipe is damaged, or the exact fixture cannot be safely repaired with a seal or stem component.
Confirm pipe depth, length, orientation, freeze protection, and backflow requirements with a qualified plumber; a visible exterior length alone is not enough.
When checks do not resolve it
Need a professional?
Arrange a qualified plumber when an outside spigot continues leaking after the correct shutoff is closed and residual pressure has drained, when the shutoff itself will not hold, when water comes from the wall or crawlspace, or when a faucet body, seat, stem, or anti-siphon device is damaged or cannot be identified. Close the main from a safe dry position for a substantial or concealed leak. Do not energize wet electrical equipment; use a qualified electrician if water reaches electrical components.
Common questions
FAQ
Why does my outside spigot still drip after I close the shutoff valve?
A short stream or a few drips may be water trapped downstream of the shutoff, especially on a self-draining or frost-free hydrant. Open the spigot briefly into a bucket only after isolation to release residual pressure. If dripping continues after the line drains, the shutoff may be passing water or the spigot may have a failed washer, seat, packing, or vacuum-breaker component.
What if the spigot leaks from the outlet with its handle turned off?
After residual water drains, continuous outlet leakage is consistent with a worn stem washer or damaged valve seat. Keep the upstream shutoff closed and arrange service or follow only the exact manufacturer's isolated repair procedure; do not force the handle or remove the stem while pressurized.
How can I tell whether the leak is from the spigot or inside the wall?
Dry the outlet, stem, anti-siphon area, hose threads, wall connection, and nearby interior surfaces, then watch for the first wet point after safe isolation. Water at the wall penetration, in a crawlspace, or with a cracked faucet body points toward a concealed or freeze-related pipe problem and needs a plumber.
Should I leave a hose attached to a leaking outdoor spigot?
No. Remove the hose only after the water is isolated and residual pressure is released. City guidance recommends disconnecting hoses from outdoor spigots and draining them for freeze protection; a hose or splitter can also conceal the source and interfere with self-draining behavior.
When should I call a plumber for an outside spigot that leaks with the shutoff closed?
Call when the leak continues after residual water drains, the shutoff will not isolate the line, the meter shows unexplained flow, the first wet point is in a wall or crawlspace, the faucet is cracked, or the repair would require removing a stem, opening a wall, or working on pressurized piping. Keep the branch or main valve closed from a safe dry position.
Read the exact guide
Official sources
- Leak Detection and Water UseCity of Greensboro · Shutoff verification, outdoor or hidden leaks, visible valve/fitting deterioration, and plumber escalation
- Prevent Frozen PipesCity of Oklahoma City · Separate outside-faucet shutoffs, hose removal, drainage, freeze prevention, and licensed-plumber escalation
- LeaksCity of Dayton · Using a water-meter flow indicator after shutting off fixtures and checking whether a main shutoff isolates a leak
- Frost-Proof Wall Hydrant Repair GuideArrowhead Brass · Manufacturer distinctions among outlet, packing, seat, vacuum-breaker, and self-draining leaks; pressure relief and freeze-protection cautions
- Electrical SafetyOccupational Safety and Health Administration, U.S. Department of Labor · Keeping electrical equipment out of standing water and requiring qualified inspection before wet equipment is energized
Community feedback
Share a repair observation
Share a plain-text repair observation. Accepted observations are published automatically; this page may take a moment to update.