
On this page
Start here
Quick answer
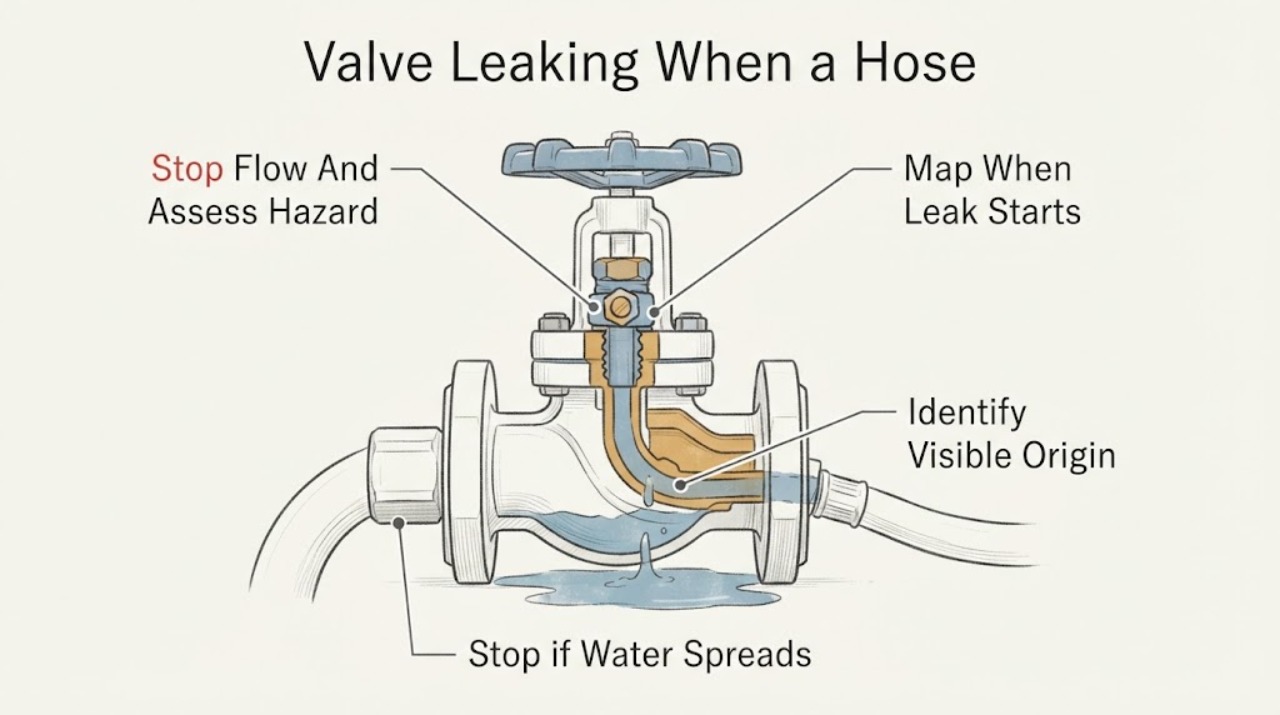
If a valve leaks when a hose shutoff is used, first determine whether water is escaping at the valve stem or packing area, the valve body or wall connection, the hose threads or washer, or a downstream fitting. A drip that appears only when the hose shutoff is opened points toward a loaded connection, hose gasket, packing seal, or downstream pressure path; a leak that continues with the hose shutoff closed points more toward the valve, stem seal, body, or upstream connection. Stop the flow using the nearest safe shutoff, dry the area, and observe without loosening a pressurized hose or forcing a stiff handle. A minor exposed packing-nut leak may sometimes be stopped by a small, model-appropriate clockwise snug, but a body seam, wall penetration, damaged hose, frozen valve, active spray, or recurring leak needs a plumber. If several fixtures leak or pressure surges, have the service pressure and pressure-reducing valve checked rather than treating one valve as the whole cause.
Before you begin
Safety first
- This article supports dry visual inspection, symptom timing, safe isolation, and one model-appropriate minor packing check only when the valve and connection are stable. Do not loosen pressurized connections, force handles or fittings, cut pipe, open walls, remove concealed valves, adjust pressure regulators blindly, or work near water and electricity.
Work through in order
Diagnostic checks
Use only checks that match the exact appliance or system and its official guide.
-
Check 1
Stop using the hose shutoff and, if it is safe to operate normally, close the nearest upstream supply valve; if that valve is inaccessible, seized, broken, or the water is spraying, close the main water shutoff. Keep water away from outlets, appliances, and electrical equipment.
Expected result: Record whether the flow stops, continues as a spray or stream, reaches a wall or ceiling, or is near an electrical connection; note whether the shutoff handle moved normally or was stiff.
Next step: Keep the water isolated and obtain emergency plumbing help for uncontrolled flow, concealed leakage, structural damage, or water near electricity. If the area is stable and dry, continue with external identification only.
Stop if: Do not touch wet electrical equipment, repeatedly cycle a stiff handle, pull a hose from a pressurized connection, or leave an active leak unattended.
Why this matters
Why: An active spray, flooding, water near electricity, or a valve that cannot isolate the leak is an emergency stop-use condition. A controlled drip after isolation can be documented, but it is not permission to disassemble a pressurized connection.
-
Check 2
Once the area is safe, dry the valve, hose, and nearby pipe. From a dry position, observe one controlled change at a time: hose shutoff closed and idle, hose shutoff opened briefly, and hose shutoff closed again only if the valve and hose are stable.
Expected result: Record whether the leak occurs only during flow, only after closing, continuously with the hose shutoff closed, or at every position; note whether another fixture being used changes it.
Next step: Use the leak-location check below and do not repeat the test if the drip becomes a stream, the valve moves abnormally, or water enters a concealed area.
Stop if: Stop if the valve cannot be operated without force, the hose twists or strains the pipe, the wall connection moves, or the leak worsens when flow changes.
Why this matters
Why: A flow-dependent drip suggests a loaded hose connection, gasket, packing seal, or downstream fitting. A continuous leak with the hose shutoff closed shifts concern toward the valve, stem, body, or upstream connection. A home-wide pattern raises pressure or regulator concerns.
-
Check 3
With the supply isolated and residual pressure released, place dry tissue or a cloth separately at the valve stem or packing nut, the valve body and wall entry, the hose swivel or threaded end, and any downstream hose shutoff or fitting. Do not wrap tape, loosen nuts, or scrape corrosion during this check.
Expected result: Identify the first point that becomes wet: stem or packing area, body seam or wall connection, hose gasket or threads, a vacuum-breaker-type fitting, or the downstream shutoff itself.
Next step: Photograph and label the origin. Use only the exact valve or hose manufacturer's instructions for a simple accessible seal check; otherwise leave the supply off for a plumber.
Stop if: Do not open a wall, remove a valve from piping, pry a corroded fitting, or use a sharp tool to search for the leak source.
Why this matters
Why: The first wet point is more useful than the lowest drip. A stem-area leak can be a packing or internal seal issue; a hose-end leak can be a gasket or thread issue; water from a seam, wall, or pipe indicates a body or connection failure that tightening a packing nut will not fix.
-
Check 4
If the first wet point is at the hose swivel or downstream hose shutoff, inspect the hose end, sealing washer or O-ring, threads, and shutoff body visually while disconnected only after the upstream supply is off and pressure is released. Keep the hose aligned; do not cross-thread or force the connection.
Expected result: Record a flattened or missing washer, damaged or crossed threads, a cracked hose end, corrosion, water from the shutoff body seam, or a dry connection that becomes wet only farther upstream.
Next step: Replace a visibly damaged hose washer or hose only with a matching, pressure-rated part and no forced fit if the instructions support owner replacement. Use a plumber for a cracked valve body, seized fitting, damaged threads, or any connection that will not reseal safely.
Stop if: Do not reconnect a cracked hose, use multiple improvised washers, over-tighten plastic threads, use sealant where the gasket is the seal, or restore water to a connection that is not fully supported and aligned.
Why this matters
Why: A replaceable hose-end seal or damaged hose can leak at the connection even when the upstream valve is sound. Water from the shutoff body or valve side is a valve repair or replacement diagnosis, not a washer-only assumption.
-
Check 5
If water begins at an exposed stem or packing-nut area, confirm that the valve is the type covered by its manufacturer's instructions and that the nut and body are accessible, dry, and not heavily corroded. If the instructions permit it, make only a small clockwise snug with the correct tool while holding the valve body stable; do not turn the handle or packing nut repeatedly.
Expected result: Record whether the drip stops, decreases, stays unchanged, or becomes worse, and whether the valve body or pipe moves while the nut is touched.
Next step: Restore normal valve position and perform one brief leak observation only if the connection remained stable. If the leak persists or the part is not clearly covered by instructions, keep water isolated and call a plumber.
Stop if: Do not force a frozen valve, remove the packing nut under pressure, dismantle a valve in the wall, hold a body with a pipe wrench that could twist piping, or treat a temporary reduction as a completed repair.
Why this matters
Why: A minor stem-area leak that stops after a model-appropriate snug may have been packing compression. No change, worsening, body movement, corrosion, or a leak from elsewhere means the seal, stem, body, or connection needs professional diagnosis.
-
Check 6
Check whether other faucets, hose bibbs, appliances, or relief valves drip or show unusual pressure at the same time. If no water is flowing elsewhere and the hose bibb is a suitable gauge connection, take one static pressure reading according to the gauge instructions; do not adjust a pressure-reducing valve during this article's check.
Expected result: Record whether the leak is isolated to this valve, whether pressure or flow changes at several fixtures, whether there are pressure surges or hammering, and the gauge reading if safely obtained.
Next step: Give the pressure pattern and reading to a plumber or water utility. Have a professional assess any pressure-reducing valve or regulator and the local code requirements before adjustment or replacement.
Stop if: Do not exceed the gauge's rating, connect a gauge to a damaged outlet, turn a regulator screw blindly, remove a pressure device, or use pressure readings to justify leaving a leaking valve pressurized.
Why this matters
Why: An isolated leak favors a local seal, hose, body, or connection fault. Several leaks, unusually high pressure, or broad fluctuations make a pressure regulator, service pressure, thermal expansion, or distribution issue more likely; a single reading cannot identify the component.
-
Check 7
Record the valve location and type if safely visible, whether the hose shutoff was open or closed when leakage appeared, the first wet point, hose and gasket condition, pressure pattern, isolation result, photos, and any prior repair or freezing event.
Expected result: Confirm whether the leak is continuous or flow-dependent, local or widespread, accessible or concealed, and whether a safe isolation or model-appropriate packing check changed it.
Next step: Arrange a plumber for a persistent drip, failed isolation, damaged threads or body, concealed leak, recurring pressure issue, or any repair requiring pipe cutting, valve removal, wall access, or pressure-regulator work.
Stop if: Do not order a generic valve, hose, washer, cartridge, or regulator from the word 'leaking' alone, and do not leave a connection pressurized while waiting for a part.
Why this matters
Why: A location-and-condition record separates packing, hose connection, valve-body, downstream fitting, concealed pipe, and pressure causes without guessing at a replacement part.
Use your observations
Decision map
Find the observation that best matches what you see, then follow the next safe action.
-
PATH 01Next step
What you see
The first wet point is the hose swivel, hose washer, or threaded outlet, and the valve body and stem remain dry when the hose shutoff is used.
Do this next
Isolate and depressurize the line, inspect the washer and threads, and replace only a visibly damaged matching hose seal or hose if the connection is owner-accessible and the instructions support it. A cracked outlet, cross-threaded connection, or recurring leak needs a plumber.
-
PATH 02Next step
What you see
Water starts around the valve stem or packing nut, especially while the hose shutoff is opened or closed, while the hose connection and body seam stay dry.
Do this next
Use the exact valve manufacturer's guidance. A small, careful snug may be appropriate for a minor exposed packing leak on a suitable valve, but no change, corrosion, body movement, or a stiff handle means isolate the supply and call a plumber.
-
PATH 03Next step
What you see
Water emerges from a valve seam, behind a wall plate, at the pipe entering the wall, or from the valve body rather than from the stem or hose gasket.
Do this next
Keep the nearest safe shutoff or main closed, protect the area from water damage, and arrange prompt plumber service. Do not attempt to cure a body or concealed connection leak by tightening a packing nut or forcing the hose shutoff.
-
PATH 04Next step
What you see
Several fixtures leak or show changing flow, pressure surges occur when water use changes, or a pressure reading is unusually high while the local valve does not have one clear wet origin.
Do this next
Treat the local leak as real, keep it isolated when possible, and have a plumber or water utility evaluate service pressure and the pressure-reducing valve. Do not adjust or replace the regulator from a symptom alone.
-
PATH 05Next step
What you see
The valve is dry while the hose shutoff is closed, but leakage appears only while downstream flow is opened or when the shutoff closes, with no home-wide pressure pattern.
Do this next
Check the hose-end seal and downstream fitting after safe isolation; then have a plumber evaluate packing compression, valve seat, backflow or vacuum-breaker components, and downstream restrictions if the leak repeats.
-
PATH 06Next step
What you see
The leak is uncontrolled, the valve cannot isolate flow, the handle or fitting is seized, water is near electricity, or the leak persists after one safe, model-appropriate external check.
Do this next
Leave water isolated, keep people away from the wet area, and obtain emergency or qualified plumbing help. Do not continue cycling the hose shutoff or disassemble the valve.
Helpful context
Understand the symptom
The condition changes what the leak means
A hose shutoff changes the pressure and flow state at the valve, so note exactly when the drip starts: while the downstream shutoff is opened and water is flowing, immediately after it closes, or even while the hose is idle. A stem or packing leak, hose-end gasket, threaded connection, vacuum-breaker-type device, valve body, and concealed wall connection are different repair paths. Water can travel along a hose or fitting, so dry the whole area before deciding where it began.
Make the area safe before touching the connection
Close the nearest upstream shutoff only if its handle moves normally and the valve is accessible and dry. If the local valve will not close, is broken, or the leak is spraying, close the home's main water shutoff and keep people away from the wet area. Open a downstream faucet or hose outlet only after the supply is isolated to release residual pressure. Do not loosen a hose, packing nut, vacuum breaker, union, or wall connection while water is still pressurized.
Separate a seal leak from a body or connection failure
After the area is dry and pressure is relieved, place a dry cloth below the stem, around the valve body, and at the hose connection. Restore water only long enough for a controlled visual check if no hazard is present. A wet stem or packing area is not the same as a wet hose washer; water emerging from a crack, seam, wall penetration, or pipe connection is not a packing adjustment. Do not use a wrench to force a corroded handle or a component that is designed to be hand-loosened.
Consider pressure only when the pattern supports it
If this valve is one of several fixtures that drip, if leaks appear when other water users start or stop, or if flow and pressure fluctuate throughout the home, the downstream hose may only be exposing a broader pressure or regulator problem. A pressure gauge can provide a static reading at a hose bibb when all water use is stopped, but adjustment or replacement of a pressure-reducing valve is plumbing work. Do not turn a regulator screw or change a valve based on a single unverified reading.
Safety boundary
Stop conditions
- Water is spraying, flooding, entering a wall or ceiling, or reaching an outlet, appliance, cord, panel, or other electrical connection.
- The nearest valve or main shutoff will not close, the handle is seized or broken, the pipe twists, or the connection moves when touched.
- The leak comes from a valve body seam, wall penetration, soldered or compression joint, cracked hose, damaged thread, or concealed pipe rather than a clearly accessible gasket.
- A hose, union, packing nut, vacuum breaker, or downstream fitting would need to be loosened while pressurized, forced with excessive torque, or held with a tool that could twist the pipe.
- The wet area contains electrical equipment, the water supply cannot be isolated, or there is structural water damage; use qualified emergency help from a safe location.
- The valve is corroded, frozen, or designed with a component that the manufacturer's guidance says not to wrench loose; do not force it.
- Several fixtures leak, pressure surges, or a pressure-reducing valve may be involved; do not adjust or replace a regulator without professional assessment.
- The leak remains after one safe external identification or a model-appropriate minor packing check, or it returns when the hose shutoff is used.
- Any proposed repair requires cutting pipe, opening a wall, removing the valve body, changing a pressure device, or testing a concealed or pressurized system.
Only after diagnosis
Potential parts
- hose washer or O-ring
Consider only when the first wet point is the hose connection and inspection confirms a flattened, missing, hardened, or damaged seal.
Match the hose-end geometry and service use; a seal does not repair a cracked outlet, damaged thread, or leaking valve body. - hose or downstream shutoff
Consider only when the hose or downstream shutoff is visibly cracked, damaged, corroded, or confirmed to leak after safe isolation.
Verify connection type, pressure and temperature rating, intended water use, and supported pipework; do not force a mismatched thread. - packing or stem repair component
Consider only when leakage is confirmed at an accessible stem or packing area and the exact manufacturer identifies a service component.
Valve internals vary by design and age; confirm the exact valve and depressurize the line before any repair, preferably through a plumber. - hose bibb or shutoff valve assembly
Consider only when the valve body, seat, threads, or internal components are confirmed damaged or the valve cannot be repaired safely.
Match inlet, outlet, mounting, backflow protection, freeze exposure, material, and local code; do not select a generic valve from appearance alone. - pressure-reducing valve or regulator
Consider only when a qualified assessment or consistent system-wide pressure evidence identifies regulator failure or an out-of-range service pressure.
Sizing, setpoint, thermal expansion, code, and water-source configuration must be evaluated by a qualified plumber; do not adjust from one leak alone.
When checks do not resolve it
Need a professional?
Call a plumber promptly for a persistent valve leak, failed isolation, body or wall-connection leak, damaged hose or threads, seized or corroded valve, concealed water, or a leak that returns whenever the hose shutoff is used. Request emergency help for uncontrolled flow, flooding, or water near electricity. Have a professional assess service pressure or a pressure-reducing valve when several fixtures leak or pressure fluctuates.
Safety scope: This article supports dry visual inspection, symptom timing, safe isolation, and one model-appropriate minor packing check only when the valve and connection are stable. Do not loosen pressurized connections, force handles or fittings, cut pipe, open walls, remove concealed valves, adjust pressure regulators blindly, or work near water and electricity.
Common questions
FAQ
Why does the valve leak only when the hose shutoff is used?
Changing the hose shutoff changes flow and pressure at the valve. A leak that appears only during flow or immediately after closing can involve the hose seal, packing, downstream fitting, or valve seat; a leak that continues while closed needs a broader valve or connection check.
How can I tell whether the hose or valve is leaking?
Isolate and depressurize the connection, dry it, then place a dry cloth separately at the hose end, stem or packing area, valve body, and wall entry. The first point to become wet matters more than where water eventually drips.
Can I tighten a leaking packing nut?
Some manufacturer guidance allows a small, careful clockwise snug for a minor exposed packing-nut leak, but valve designs differ. Do not force a corroded or stiff valve, twist the pipe, remove the nut under pressure, or continue if the leak does not stop; use a plumber.
Should I use thread tape to stop a leaking hose connection?
First identify whether the connection seals with a gasket or with pipe threads. Adding tape to a gasketed hose swivel will not repair a missing washer, cracked fitting, or leaking valve body, and forcing or over-tightening can damage threads. Follow the exact fitting instructions or call a plumber.
Could high water pressure make one valve leak?
Yes, high or fluctuating service pressure can stress fixtures and connections, but one leaking valve does not prove a regulator fault. Compare other fixtures and, if safe, obtain one pressure-gauge reading at a suitable hose bibb; have a professional evaluate a pressure-reducing valve.
When is a leaking valve an emergency?
Treat uncontrolled flow, flooding, a leak into a wall or ceiling, water near electricity, a failed main or local shutoff, or a pipe that moves or may rupture as urgent. Isolate water only if safe, keep people away, and obtain qualified emergency plumbing help.
Read the exact guide
Official sources
- Home Maintenance | US EPAU.S. Environmental Protection Agency WaterSense · Supports pressure-gauge and professional-PRV boundaries and visual monitoring of leaks at plumbing connections.
- Fix & Prevent Leaky Hose Bibbs with SharkBite SolutionsSharkBite · Supports packing-nut, O-ring, internal-component, corrosion, frost, and exact-size/style distinctions for hose shutoff valve scenarios.
- How to Repair a Leaky Hose BibbSharkBite · Supports separating packing-nut, vacuum-breaker, O-ring, internal-component, and connection leaks and preserving exact-fit caution; it is not a universal procedure for every valve.
- Moen Home Care & Safety Guide (MF854)Moen · Supports safe main-shutoff planning, careful handle operation, packing-nut leak distinction, and professional escalation for stuck valves; it is not a universal repair manual.
- Troubleshooting water pressure and flowCity of Portland, Oregon · Supports distinguishing pressure from flow, local versus system-wide clues, and professional handling of high pressure or pressure-reducing-valve concerns.
Community feedback
Share a repair observation
Share a plain-text repair observation. Accepted observations are published automatically; this page may take a moment to update.