
On this page
Start here
Quick answer
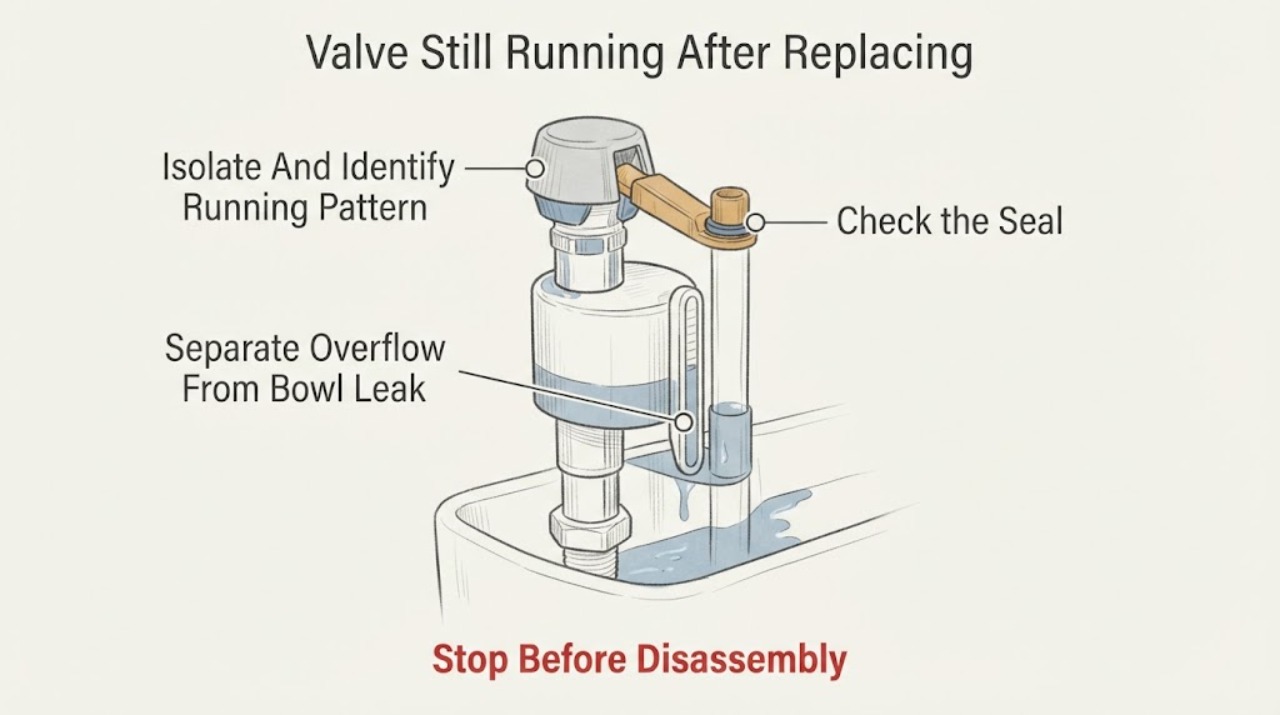
If a toilet fill valve still runs after a seal replacement, first determine whether the tank is actually overflowing or whether a flush-valve seal is letting water escape into the bowl. Close the toilet supply before removing a cap or touching a seal. With the tank refilling, observe the water level, overflow tube, refill tube, float, and bowl. Water entering the overflow tube points to a high or poorly locked fill-valve setting, a refill tube siphon, or a fill valve that is not shutting off; a tank level that falls while the supply is closed points to the newly replaced flush seal, flapper, or another tank leak. Confirm that the replacement seal is the exact design for the flush valve or fill-valve model, is fully seated and clean, and that the fill-valve cap, float, and refill tube are assembled as the model instructions require. Keep the supply closed and call a licensed plumber if the shutoff will not close, the tank or valve is cracked, water reaches the floor or electrical equipment, the repair requires removing the tank or opening a non-serviceable valve, or one supervised test still runs.
Work through in order
Diagnostic checks
Use only checks that match the exact appliance or system and its official guide.
-
Check 1
Close the toilet's supply shutoff, flush once, and watch whether the sound stops as the tank empties. Do not remove the fill-valve cap or the replaced seal until the supply is closed and the tank is at a safe level.
Expected result: The shutoff stops the water and the sound fades, the shutoff will not stop flow, or water continues to enter from an uncontrolled connection.
Next step: Keep the supply closed, dry the work area, and continue only with visible observations. Arrange a licensed plumber if the shutoff is seized, the supply line leaks, or water cannot be controlled.
Stop if: Stop immediately for flooding, a cracked tank or valve, a supply connection that sprays, water near electrical equipment, or a shutoff that cannot stop the flow.
Why this matters
Why: A stopping sound confirms that the fill valve is responding to supply pressure but does not identify whether it is reacting to a tank leak or failing to shut off. A shutoff that will not isolate the toilet turns this into a plumber task before opening the valve.
-
Check 2
Restore the supply only while supervising from a dry position, let the tank fill, and look at the water level in relation to the top of the flush-valve overflow tube. Also look for a visible stream from the refill tube and for a quiet trickle entering the bowl after the tank appears full.
Expected result: The tank water rises into the overflow tube, the tank stops below the overflow but the bowl receives a continuous trickle, or the tank reaches its normal level and stays there.
Next step: Close the supply again before touching parts. Use the overflow result to guide the next check; do not keep a toilet running unattended while diagnosing it.
Stop if: Stop the test if water approaches the tank rim, reaches the floor, or the refill path cannot be observed without leaning over an unstable fixture.
Why this matters
Why: Overflow indicates a fill-valve height, float, cap, or shutoff problem. A tank that stays below the overflow while the bowl trickles is losing water through the flush seal, flapper, flush-valve seat, or another tank seal, so the fill valve may only be refilling that loss. A stable tank and dry bowl shifts attention to a refill-tube or control-state issue rather than the replaced seal alone.
-
Check 3
With the supply closed and the tank emptied as far as practical, identify exactly which seal was replaced: a flush-valve flapper or tower seal, or a fill-valve cap seal. Compare its shape and installation position with the exact toilet and valve instructions; inspect the sealing surface for grit, residue, folding, tears, distortion, or a seal that is not fully in its groove.
Expected result: The part is a different seal type, the seal is not seated evenly, the sealing surface has mineral buildup or debris, the flapper chain holds the seal open, or the seal and seat appear clean and correctly matched.
Next step: Correct only a visible, model-documented seating or chain issue with the supply isolated. If the exact seal cannot be identified, keep the supply closed and obtain the toilet model instructions or plumbing help rather than guessing a replacement.
Stop if: Do not stretch a seal to fit, shave it, stack seals, use unapproved lubricant or sealant, or continue if the flush-valve seat, tank, or valve body is cracked or warped.
Why this matters
Why: A wrong, pinched, dirty, or incompletely seated flush seal can let tank water escape and cause repeated fill cycles even when the fill valve is sound. A fill-valve cap seal that was installed in the wrong orientation or under a cap that is not locked can prevent the valve from closing. A clean, correctly matched seal makes float height, refill-tube routing, debris, or valve failure more likely.
-
Check 4
With the water off, inspect the fill-valve height mark, float or float cup, cap lock, and nearby tank wall. Confirm the float can move without rubbing, the height adjustment is locked, and the valve's marked level is below the overflow opening as specified by that model. Do not dismantle a non-serviceable valve or apply power to any unrelated device.
Expected result: The float rubs or sticks, the adjustment is too high or unlocked, the cap is not fully locked, sediment is visible, or the assembly moves freely and is correctly set.
Next step: Use only the exact model's adjustment method after the supply is isolated, then perform one supervised fill test. If debris requires opening a serviceable cap, follow that manufacturer's instructions; otherwise replace or service the complete valve through a qualified professional.
Stop if: Stop if the float cannot move, the cap will not lock, the valve body is cracked, the tank mounting hardware twists, or adjustment cannot bring the final level below the overflow without forcing the part.
Why this matters
Why: A high or unlocked setting can keep the valve open until water enters the overflow. A rubbing float, loose cap, or debris can keep the shutoff mechanism from responding. If the assembly is correctly set and the tank still runs, the valve may be damaged or the tank may still be losing water through another seal.
-
Check 5
Inspect the refill tube connection without pulling on the valve: it should be clipped or attached at the overflow-tube lip in the model-approved position, not pushed down inside the tube. Check the supply line and the bottom connection for kinks, cross-threading, or active leakage before a brief supervised restoration.
Expected result: The refill tube is inserted deeply into the overflow, the tube is disconnected or kinked, the supply connection leaks, or the tube and connection are correctly routed and dry.
Next step: With the supply off, reposition only the tube attachment allowed by the exact instructions and hand-correct a visibly misaligned connection without forcing it. Restore water slowly while watching the connection, tank level, overflow, and bowl.
Stop if: Do not use tools to force a plastic connection, add tape or sealant where the instructions do not call for it, or continue if water appears under the tank or at the supply line.
Why this matters
Why: A refill tube pushed into the overflow can create a siphon and make the fill valve run continuously. A loose or leaking supply connection can mimic a valve fault and lower the tank or wet the floor. Correct routing with no connection leak makes the fill-valve shutoff and flush seal results more significant.
-
Check 6
After a permitted correction, open the supply slowly and observe one complete refill and one flush. Confirm that the fill valve stops at the model's marked level, the overflow tube is not receiving excess water, the bowl is not receiving an unexplained stream, and the tank and floor remain dry.
Expected result: The valve shuts off and the tank remains stable, the valve still runs into the overflow, the tank level falls and triggers another refill, or a connection/body leak appears.
Next step: Close the supply and arrange a licensed plumber when the run persists after the exact seal and adjustment checks, when a tank or valve must be removed, or when the fault cannot be isolated to a visible, model-approved correction.
Stop if: Do not leave the toilet pressurized unattended while it is running, repeat tests after a failed correction, or use it if water reaches the floor, the tank is cracked, or the shutoff cannot control the supply.
Why this matters
Why: A stable tank and dry bowl support a corrected seal, float, cap, or refill-tube issue. Continued overflow supports fill-valve adjustment or valve failure. A falling tank with the supply off supports a flush seal or flush-valve seat leak. Any external leak is a separate water-containment problem, not a reason to keep testing.
Use your observations
Decision map
Find the observation that best matches what you see, then follow the next safe action.
-
PATH 01Next step
What you see
After the seal replacement, the tank rises into the overflow tube or the fill valve continues flowing after the marked level is reached.
Do this next
Close the supply, verify the model height mark and free float movement, then check cap lock and refill-tube routing. If it still overflows at the correct setting, keep the supply off and have the fill valve assessed or replaced.
Why this path and its safety boundary
Why it matters: The replacement seal may not be the cause. A fill valve set too high, an unlocked or rubbing float, an incompletely locked cap, debris, or a failed shutoff is more likely than a flush-seal leak that lowers the tank.
-
PATH 02Next step
What you see
The tank never reaches the overflow, but the bowl receives a quiet stream and the tank level falls when the supply is closed.
Do this next
Keep the supply closed and recheck the exact flush-seal type, seating, chain or actuator clearance, and sealing surface. Stop for a cracked or warped seat, tank leak, or any repair that requires tank removal, and call a plumber.
Why this path and its safety boundary
Why it matters: The fill valve is likely refilling water lost through the flush-valve flapper or tower seal, the flush-valve seat, or a tank connection. Replacing a seal without matching the model or cleaning and seating the surface can leave the original leak unchanged.
-
PATH 03Next step
What you see
The tank level is correct or nearly correct, but water continues through the refill tube into the overflow, or the refill tube is pushed below the overflow opening.
Do this next
With the supply off, restore the tube to the model-approved clip or lip position with the required air gap, then make one supervised refill test. Use the exact manual when the toilet uses a different overflow arrangement.
Why this path and its safety boundary
Why it matters: Incorrect refill-tube routing can create a siphon and keep the valve running. This is distinct from a leaking flush seal and from a float that is set too high.
-
PATH 04Next step
What you see
The replacement seal matches and sits evenly, the bowl and tank hold water with the supply off, the float moves freely, the cap is locked, the refill tube is routed correctly, and the valve still does not shut off.
Do this next
Leave the supply closed and have a plumber or the valve manufacturer identify the exact model and whether the complete fill valve must be serviced or replaced. Do not keep cycling a valve that will not stop.
Why this path and its safety boundary
Why it matters: A worn or obstructed fill-valve shutoff, wrong valve installation, supply-pressure issue, or damage to the fill-valve body is more likely than another seal adjustment.
-
PATH 05Next step
What you see
Water appears at the supply connector, valve base, tank-to-bowl joint, tank crack, or floor during the supervised test.
Do this next
Close the supply, dry the area, and arrange a licensed plumber. Do not overtighten plastic nuts, continue testing, or treat an external leak as proof that the replacement seal is wrong.
Why this path and its safety boundary
Why it matters: This is an external containment fault and can cause property damage even if the tank level or fill-valve setting looks correct.
Helpful context
Understand the symptom
A replaced seal does not prove that the fill valve is the source
The sound is often the fill valve doing its job: it opens because water is leaving the tank. A flush-valve seal or flapper that is the wrong type, dirty, damaged, or not seated can lower the tank level and make the fill valve refill repeatedly. If the tank reaches the overflow tube, the fill valve setup or shutoff is the stronger lead. Treat the fill-valve seal and the flush-valve seal as different parts until the water path is clear.
Isolate the supply before checking the replacement
Turn the toilet supply shutoff clockwise until closed, flush to lower the tank, and keep a towel ready for residual water. Do not force a stuck shutoff or remove a fill-valve cap while water is still entering the tank. If the shutoff does not stop flow, leave the area safe and have a plumber isolate the branch before further repair.
Use the overflow tube and bowl as separate evidence
A properly operating tank stops below the overflow opening and sends only the model-approved refill flow to the bowl. Water over the overflow points toward fill-valve height, float movement, cap assembly, or an overlong refill tube. A bowl trickle with a tank level that falls while the supply is closed points toward the flush seal, flapper, flush-valve seat, or tank connection instead.
Safety boundary
Stop conditions
- Close the toilet supply and stop immediately for uncontrolled flow, a seized shutoff, a cracked or distorted tank or valve, water on the floor, or water near electrical equipment.
- Do not remove a fill-valve cap, flush-valve seal, supply connection, or tank hardware while water is entering or the part is under uncontrolled pressure; do not force plastic fittings or overtighten them.
- Do not stretch, trim, stack, or substitute a seal, use unapproved sealant, or operate a toilet that continues to overflow or leak externally.
- After one supervised refill and flush, keep the supply closed and call a licensed plumber if the valve still runs, the tank level falls, the shutoff cannot isolate the toilet, or tank/valve removal or internal diagnosis is required.
Only after diagnosis
Potential parts
- exact-model flush-valve flapper or tower seal
Consider this only if the tank level falls with the supply closed and water is entering the bowl, or if inspection finds the installed flush seal is the wrong type, damaged, dirty, or not seated on its intended surface.
Match the toilet and flush-valve design, opening size, actuator or chain arrangement, and the manufacturer's fit information; a fill-valve seal is not automatically interchangeable with a flush-valve seal. - exact-model fill-valve cap seal or complete fill valve
Consider this only if the fill valve remains open after the tank reaches the correct model-marked level, the float moves freely, the cap is correctly locked, the refill tube is routed correctly, and the flush seal holds water.
Confirm the valve model and whether its cap or seal is serviceable; do not substitute a seal by appearance or replace only an internal piece when the manufacturer requires the complete valve.
When checks do not resolve it
Need a professional?
Call a licensed plumber when the toilet supply shutoff will not stop the flow, the tank or valve is cracked, water reaches the floor, the fill valve continues to run after the exact seal, float, cap, and refill-tube checks, the tank loses water while the supply is closed, or the repair requires removing the tank or opening a non-serviceable valve. Keep the supply closed while waiting for service.
Common questions
FAQ
Why is the fill valve still running after I replaced the seal?
The fill valve may be replacing water that is escaping through a flush-valve seal, or it may be unable to shut off because the float is too high, rubbing, obstructed, or incorrectly assembled. Check whether water enters the overflow tube or whether the tank level falls and the bowl trickles with the supply closed.
How can I tell whether the new seal is the wrong part?
Identify whether you replaced a flush-valve flapper or tower seal or a fill-valve cap seal, then compare the shape, position, opening size, and installation method with the exact toilet or valve instructions. A seal that is folded, pinched, dirty, held open by its actuator, or not fully in its groove can leave the leak unchanged.
What does it mean if water is going into the overflow tube?
It means the tank is filling beyond its intended shutoff level. A fill valve set too high, a stuck float, a loose cap, debris, or a refill tube creating a siphon can cause this. Close the supply before adjusting anything and use the model's marked water level rather than guessing.
Should I replace the whole fill valve after changing its seal?
Not automatically. If the correct seal is seated, the cap is locked, the float moves freely, and the valve still runs after the tank reaches the model-marked level, the valve may be damaged or non-serviceable and a complete replacement may be appropriate. Confirm the exact model or have a plumber diagnose it before ordering a part.
When should I call a plumber for a running toilet?
Call a licensed plumber when the shutoff cannot isolate the toilet, the tank or valve is cracked, water reaches the floor, the tank loses water with the supply closed, the fill valve still runs after the seal and adjustment checks, or tank removal and internal valve work are required.
Read the exact guide
Official sources
- How a Toilet Works - Anatomy of a ToiletKorky / Lavelle Industries · Korky official general toilet-mechanics explanation; exact fixture design may differ.
- Fix a Leak WeekU.S. Environmental Protection Agency · EPA WaterSense leak-detection guidance; exact toilet and plumbing instructions control repairs.
- How to Replace Toilet Fill ValveKorky / Lavelle Industries · Korky official fill-valve installation guidance; model-specific markings and instructions control for other valves.
- How to Fix a Running ToiletKorky / Lavelle Industries · Korky official troubleshooting guidance; exact toilet, flush-valve, and fill-valve instructions control.
- Home MaintenanceU.S. Environmental Protection Agency · EPA WaterSense household maintenance guidance; local plumbing requirements and exact manufacturer instructions also apply.
- How to Fix Slow Filling ToiletKorky / Lavelle Industries · Korky official fill-valve service guidance; do not apply its service steps to a different valve unless that product permits service.
Community feedback
Share a repair observation
Share a plain-text repair observation. Accepted observations are published automatically; this page may take a moment to update.