
On this page
Start here
Quick answer
If a toilet fill valve keeps running after its seal was replaced, first determine whether the fill valve is actually failing to shut off or is refilling because water is escaping through the flush valve seal, flapper, or overflow. With the tank lid removed and your hands clear of moving parts, watch the water level after a flush: water that rises above the overflow or continues entering after the float reaches its stop points to fill-valve height, float, debris, or valve-body trouble; a tank that reaches its level while water continues into the bowl points to a flush seal or flapper leak. Confirm that the replacement seal is the correct model, seated cleanly, and that the valve cap is fully locked, but do not force a universal part into an unidentified valve. If water is spraying, the tank is approaching overflow, the shutoff will not stop flow, the tank or floor is leaking, or the repair requires removing a seized valve or supply connection, close the toilet's supply valve and call a licensed plumber. Do not leave a continuously running toilet unattended.
Before you begin
Safety first
- Keep the supply controlled, do not work on pressurized fittings or cracked porcelain, do not overtighten plastic or ceramic parts, and do not leave the toilet running when the valve or overflow cannot be trusted.
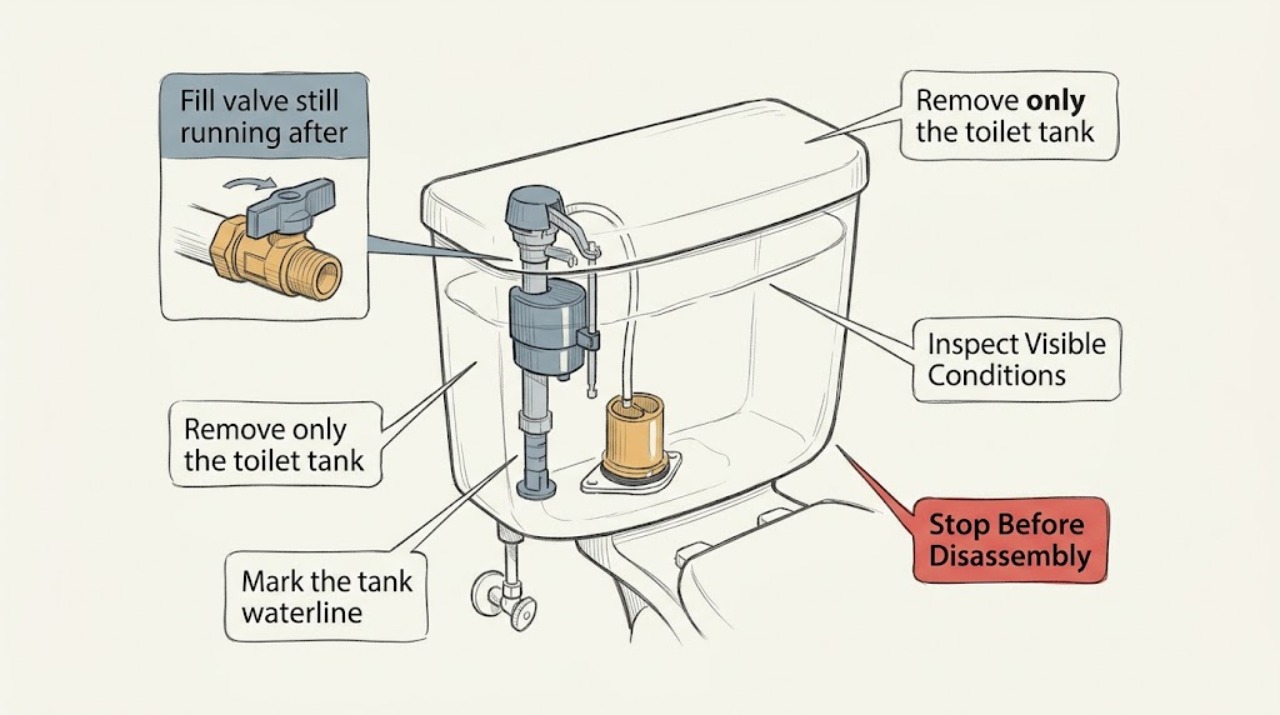
Work through in order
Diagnostic checks
Use only checks that match the exact appliance or system and its official guide.
-
Check 1
Remove only the toilet tank lid and flush once. Keep hands clear of the float and linkage, then watch whether water enters through the fill valve, whether the tank reaches its normal level, whether water is visibly flowing into the bowl, and whether the fill sound stops.
Expected result: The water level keeps rising, the tank reaches its level but the bowl receives a steady trickle, the valve cycles on and off, or the valve continues filling after the tank is full.
Next step: If the tank is approaching the overflow or water is spraying, close the local supply valve. Otherwise continue with the water-loss test and seal-fit checks; do not hold the float up as a permanent repair.
Why this matters
Why: Water entering the bowl or a tank level that falls after filling makes a flush-valve seal, flapper, chain, or overflow path more likely. Water that remains at the correct level while the fill valve keeps flowing makes the fill-valve float, height, debris, or valve body more likely.
-
Check 2
Mark the tank waterline with a pencil after the fill cycle, close the toilet's local supply valve without forcing it, and wait about 25–30 minutes without flushing. Check whether the tank level moved and where the bowl water is relative to its normal level.
Expected result: The tank level drops with the supply closed, the level stays stable, or the tank empties toward the flush seal or overflow path.
Next step: If the level drops, inspect only accessible chain, flapper, seal seating, and visible overflow routing. If it stays stable, reopen the supply slowly and continue with the fill-valve checks; call a plumber if the shutoff leaks or will not operate.
Why this matters
Why: A falling tank confirms water is leaving the tank independently of the fill valve; a stable tank shifts attention toward the fill valve not shutting off, its float/height, debris, or the replacement seal's internal installation.
-
Check 3
Inspect the replaced seal and its surrounding flush-valve surface only with the supply closed and tank mostly empty. Compare the seal shape and valve style with the toilet or valve manufacturer's instructions; look for wrong size, twisting, debris, mineral buildup, cracks, or a chain holding the flapper open.
Expected result: The seal is not the matching style, is folded or nicked, has residue on its seating surface, the chain is tight, or the sealing surface is cracked or warped.
Next step: Use only the exact model-specific seal or flapper specified by the manufacturer and clean only accessible residue with the supply off. Stop and arrange plumbing service for cracks, warping, a seized assembly, or uncertainty about the valve style.
Why this matters
Why: A wrong or poorly seated seal, debris, chain tension, or damaged flush-valve seat can let tank water bypass the repair and make the fill valve cycle. A damaged seat or flush valve is not corrected by changing a fill-valve seal.
-
Check 4
With the tank lid off and no leak hazard present, check that the fill valve sits below the overflow-tube top, its height adjustment is locked, the float can move freely without rubbing the tank, and the refill tube is clipped as intended rather than pushed down into the overflow tube.
Expected result: The valve is too high, its adjustment is unlocked, the float catches on the tank, or the refill tube is submerged in the overflow tube; alternatively, all visible positions are correct.
Next step: Make only the model-directed external height or tube correction, then observe one refill cycle. Do not remove the valve cap or supply connection while pressurized; if the valve still runs, close the supply and obtain service or use the exact manufacturer procedure.
Why this matters
Why: Incorrect valve height can prevent shutoff or risk overflow, a rubbing or stuck float can keep the inlet open, and a submerged refill tube can siphon tank water into the bowl. Correct visible positioning with continued running makes debris or a failed valve more likely.
-
Check 5
Look around the tank bottom, supply connection, shutoff valve, bowl base, and floor while the supply is reopened slowly. Use a dry tissue on the outside of joints to identify fresh water; do not place hands inside the valve or tighten a fitting aggressively.
Expected result: Water appears at the tank-to-bowl area, supply connection, shutoff stem, tank porcelain, or floor, or the exterior remains dry while the valve runs internally.
Next step: Close the local supply for any external leak, cracked porcelain, or failed shutoff and arrange a plumber. If the exterior is dry, proceed only with the single safe cycle test and do not leave the toilet running unattended.
Why this matters
Why: An external leak is separate from a running fill-valve symptom and can worsen when the supply remains on. A dry exterior with internal running keeps the diagnosis centered on tank water loss, water level, or the fill valve itself.
-
Check 6
After the seal and visible adjustments are confirmed, perform one supervised flush and record whether the fill valve stops at the same tank level, whether the bowl receives refill water only during the cycle, and whether the symptom returns after the toilet is idle.
Expected result: The valve stops and stays quiet, it cycles on again while idle, it continues running at a full tank, or the symptom returns with an unexplained level drop.
Next step: Do not keep flushing for evidence. Close the supply and call a plumber if one supervised cycle fails, water approaches overflow, the valve cannot shut off, or the cause remains uncertain.
Why this matters
Why: A stable full tank with no bowl flow supports a successful seal repair. Idle cycling with a falling tank points to a remaining flush-valve leak; continuous flow at a stable full tank points to fill-valve shutoff, float, debris, or valve-body trouble.
Use your observations
Decision map
Find the observation that best matches what you see, then follow the next safe action.
-
PATH 01Next step
What you see
Do this next
Recheck the exact seal style, seating surface, chain slack, and overflow routing with the supply closed. Use a plumber for a cracked or warped seat, inaccessible assembly, or continued leak.
-
PATH 02Next step
What you see
Do this next
Check only the visible height, locked adjustment, and float movement. Close the supply and arrange service if the valve still runs or requires cap removal, cleaning, or replacement.
-
PATH 03Next step
What you see
Do this next
Stop treating the part as confirmed. Identify the toilet and valve style from the manufacturer's documentation and use the specified seal, or ask a plumber when the model or valve is unclear.
-
PATH 04Next step
What you see
Do this next
Make only the documented external adjustment with water controlled, then observe one cycle. If the adjustment cannot be locked or the symptom remains, close the supply and arrange plumbing service.
-
PATH 05Next step
What you see
Do this next
Close the toilet supply valve if it operates safely and arrange a plumber. Do not overtighten, remove pressurized fittings, or continue testing a cracked or leaking tank.
-
PATH 06Next step
What you see
Do this next
Stop repeated cycling and record the water-level behavior, bowl flow, seal style, and visible settings for a plumber. Close the supply when the fixture cannot be monitored.
-
PATH 07Next step
What you see
Do this next
Move people and belongings away from the water, use the home's main shutoff only if the local valve cannot safely control flow, and obtain urgent plumbing help. Do not force a seized valve or disassemble the pressurized fitting.
Helpful context
Understand the symptom
Separate a fill-valve failure from a tank leak
The fill valve supplies water while the tank refills; the flapper or flush-valve seal keeps tank water from entering the bowl between flushes. After a seal replacement, a continuing hiss may mean the new seal is wrong, dirty, damaged, or not seated, but it may also mean the fill valve is being asked to replace water that is still leaking through the flush valve. Watch the tank water level and the bowl rather than diagnosing by sound alone.
Use the replacement seal and fill-valve adjustment as separate checks
A seal replacement does not automatically repair a fill valve. The installed seal must match the flush-valve design, and the fill valve must be correctly positioned and able to shut off below the overflow. Keep the refill tube in its intended position above the tank waterline; do not make an unknown adjustment or keep testing a tank that is close to overflowing.
Know when the supply valve or a plumber is the next step
If the fixture cannot be left safely with water on, close the local toilet supply valve and place a towel around—not inside—the tank base to observe for external leaks. Do not overtighten a stuck shutoff, remove a corroded tank fitting, or disassemble a valve while it is pressurized. A licensed plumber is appropriate for a failed shutoff, leaking tank connection, cracked porcelain, hidden leak, or a valve that still runs after a correct seal and safe adjustment.
Safety boundary
Stop conditions
- Close the toilet's local supply valve and stop testing if the tank is approaching the overflow, water is spraying, the fill valve will not shut off, or the fixture cannot be monitored.
- Stop for water at the tank bottom, supply connection, shutoff valve, bowl base, wall, or floor; a cracked tank or porcelain; or a shutoff that leaks, spins, or will not close. Arrange a licensed plumber and use the home's main shutoff only when necessary and safe.
- Do not remove a fill-valve cap, supply line, tank fitting, or seized shutoff while pressurized; do not overtighten plastic or ceramic connections; and do not force a seal into an unidentified valve.
- Do not repeatedly flush, hold the float up as a permanent repair, bypass the overflow, submerge the refill tube, or leave a continuously running toilet unattended.
- If the correct model-specific seal and visible adjustments do not stop the symptom after one supervised cycle, stop part swapping and arrange plumbing service to diagnose the fill valve, flush valve, water level, and supply controls.
Only after diagnosis
Potential parts
- model-specific flush-valve seal or flapper
Consider only when a controlled water-loss test shows the tank is leaking into the bowl and the installed seal is worn, damaged, mismatched, or unable to seat on an intact flush-valve surface.
Match the exact toilet and flush-valve style; tower, canister, dual-flush, and conventional flapper seals are not interchangeable by appearance. - toilet fill valve or valve cap assembly
Consider only when the tank holds its level, the visible float and height are correct, and the fill valve still admits water after a supervised refill or qualified debris/service diagnosis.
Confirm the toilet tank, overflow, water-level, and manufacturer requirements before selecting a replacement; a running sound alone does not identify a fill valve. - toilet supply shutoff valve or supply line
Consider only when the local shutoff leaks, will not close, or the supply connection is the confirmed external leak after water is controlled.
Pressurized supply work and seized or corroded fittings may need a licensed plumber; confirm connection size and installation requirements rather than forcing a fitting.
When checks do not resolve it
Need a professional?
Call a licensed plumber when the fill valve still runs after the seal style, seating, water level, float movement, and refill-tube position are confirmed; when the tank loses water with the supply closed; when the valve requires internal service or replacement; or when the shutoff, tank, supply connection, overflow, or floor is leaking. Use urgent plumbing help for uncontrolled flow, near overflow, a failed shutoff, cracked porcelain, or water damage.
Safety scope: Keep the supply controlled, do not work on pressurized fittings or cracked porcelain, do not overtighten plastic or ceramic parts, and do not leave the toilet running when the valve or overflow cannot be trusted.
Common questions
FAQ
Why is my toilet fill valve still running after I replaced the seal?
The sound may be the fill valve replacing water that is leaking through the flush valve seal, flapper, chain, or overflow. Mark the tank level, close the local supply, and watch whether the level falls; if it stays stable but water still enters at a full tank, focus on fill-valve height, float movement, debris, or valve failure.
How can I tell whether the new seal is the wrong part?
Identify whether the toilet uses a conventional flapper, a tower, or a canister flush valve, then compare the replacement with the manufacturer's model-specific guidance. A seal that is folded, damaged, dirty, or not shaped for the installed valve can continue leaking even though it is new.
What if the tank water level is above the overflow tube?
Close the local supply if the level is rising toward overflow. A fill valve set too high may not shut off correctly; do not bypass the overflow or keep testing an uncontrolled tank. Correct only the model-directed visible adjustment, then seek plumbing service if the level cannot be controlled.
Why does the valve turn on and off by itself when nobody flushed?
Periodic cycling usually means the tank is slowly losing water, so the fill valve is refilling it. Test with the supply closed and a marked tank level; a drop points toward the flapper, flush-valve seal, chain, or overflow path rather than proving the fill valve itself is bad.
Should I replace the whole fill valve after replacing its seal?
Not from the running sound alone. First determine whether the tank is losing water, verify the visible water level and float movement, and confirm the seal and valve type. Replace or service a fill valve only after those checks or a qualified diagnosis show that it will not shut off.
When should I call a plumber for a running toilet?
Call when the local shutoff will not close, water is outside the tank or on the floor, the tank is near overflow, porcelain is cracked, a pressurized fitting is seized, or the correct seal and visible adjustments do not stop the problem after one supervised cycle.
Read the exact guide
Official sources
- How to Fix a Running ToiletKorky / Lavelle Industries · Manufacturer repair guidance for common tank-type toilets; exact parts and adjustments vary by toilet and valve model.
- What Flush Valve Seal Do I Need?Korky / Lavelle Industries · Manufacturer seal-identification guidance; exact fit requires the toilet and flush-valve model.
- Water Efficiency Management Guide Bathroom SuiteU.S. Environmental Protection Agency WaterSense · Government maintenance guidance for tank-type toilets; commercial guidance is useful for the same component behavior but exact settings remain model-specific.
- Fix a Leak WeekU.S. Environmental Protection Agency WaterSense · Government consumer guidance for finding common household leaks, including tank-type toilet leaks.
- Home MaintenanceU.S. Environmental Protection Agency WaterSense · Government home-maintenance guidance for constantly running toilets and visible overflow conditions.
- How to Replace Toilet Fill ValveKorky / Lavelle Industries · Manufacturer guidance for Korky-style fill valves; use the installed valve and toilet manual for model-specific settings.
Community feedback
Share a repair observation
Share a plain-text repair observation. Accepted observations are published automatically; this page may take a moment to update.