
On this page
Start here
Quick answer
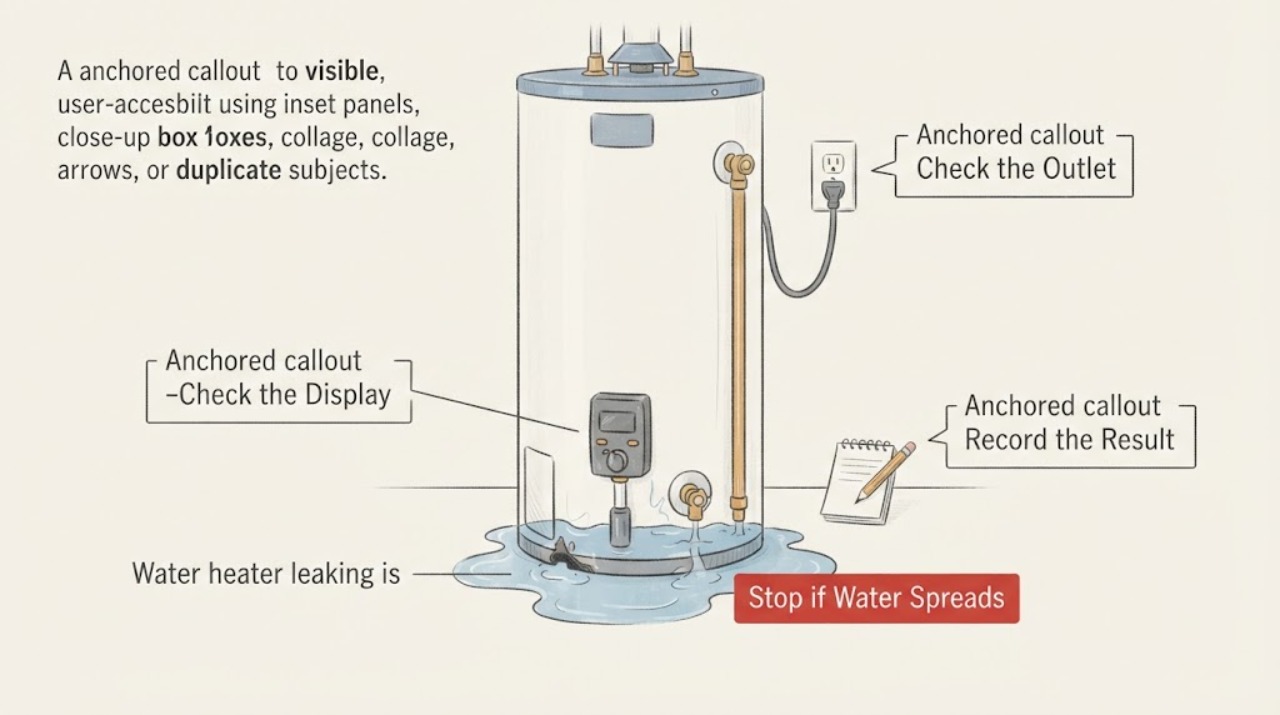
Water at a water heater's base can come from a loose connection, drain valve, temperature-and-pressure relief valve or discharge pipe, condensation, an electric-element gasket, or a tank leak that is tracking down behind the jacket. First keep people away from hot discharge, turn off the heater's energy source as the manual permits, and close the cold-water inlet if water is actively escaping. Dry and trace the first wet point without removing panels or plugging a relief outlet. A valve or fitting may be serviceable; moisture from the tank shell, seam, or concealed bottom usually means the heater needs prompt professional assessment and may need replacement. Never cap, plug, or obstruct a relief-valve discharge path.
Before you begin
Safety first
- A qualified technician can distinguish a fitting, drain valve, relief valve, element gasket, condensation path, piping issue, or failed tank and can service gas, electrical, pressure, and hot-water hazards. Keep homeowner work to safe isolation, external visual tracing, documentation, and manual-directed checks.
Work through in order
Diagnostic checks
Use only checks that match the exact appliance or system and its official guide.
-
Check 1
Keep people away from the heater and any discharge pipe, turn off the gas control or electrical supply as the manufacturer's manual permits, and close the cold-water inlet if water is actively escaping.
Expected result: Water is hot or forceful, gas odor or combustion concern is present, water is near electrical equipment, the leak is rapidly worsening, or the flow is only a cool slow drip.
Next step: For gas odor, smoke, sparking, hot spray, rapidly spreading water, or water at electrical parts, leave the area as appropriate and obtain emergency utility, fire, or qualified service help. Otherwise keep the heater isolated and continue only with a dry external inspection.
Why this matters
Why: Hot discharge, gas, electricity, and rapid flow can cause burns, fire, shock, or serious water damage. A cool slow drip is still a leak but permits only careful external tracing after energy and water are controlled.
-
Check 2
From a safe position, dry the accessible exterior and place a dry cloth or paper towel at the cold inlet, hot outlet, drain valve, relief-valve discharge, element-cover area if visible, jacket seams, and floor pan to identify the first location that becomes wet.
Expected result: The first wet point is a threaded fitting or valve, the relief discharge path, a side or bottom seam, an element-cover area, or moisture appears broadly without a clear source.
Next step: Photograph the first wet point and do not remove the jacket, panels, insulation, or safety devices. Keep the energy and inlet isolated while arranging the appropriate qualified service for a shell leak, relief path, or unclear source.
Why this matters
Why: A fitting or valve leak may be a replaceable component; relief discharge indicates a pressure, temperature, or valve issue; shell, seam, or concealed jacket moisture raises concern for internal tank corrosion or another hidden failure. Broad moisture may be condensation or water tracking from above.
-
Check 3
Inspect the visible cold-water inlet, hot-water outlet, nearby piping, drain valve, and threaded connections for a bead, rust trail, wet insulation, or water tracking down from above.
Expected result: Only one fitting or drain valve is wet, several fittings are wet, the tank shell is dry, or water appears behind the jacket or from the lower shell.
Next step: Do not wrench a hot, corroded, or pressurized fitting. If the drain valve is visibly open, close it only as the manual permits; if it still drips, or water comes from the shell, leave the heater isolated and call a plumber.
Why this matters
Why: A single wet fitting or drain valve is more consistent with a connection or valve leak. Several wet points may reflect condensation or water tracking. A dry shell with a wet fitting differs from water emerging through the tank body, which is more serious.
-
Check 4
Observe the temperature-and-pressure relief valve and its discharge pipe without touching the outlet, capping it, placing a valve in the line, or repeatedly operating the lever.
Expected result: The discharge pipe is wet or dripping, water is coming from the valve-to-tank fitting, the discharge is hot or forceful, or the relief path is dry.
Next step: Keep the relief outlet unobstructed and close the cold-water inlet if discharge continues, then arrange qualified water-heater service. Do not replace or test the relief valve while hot or pressurized and do not suppress its discharge.
Why this matters
Why: Discharge may indicate valve activation from pressure or temperature, thermal expansion, a defective valve, or a leak at the tank fitting. Hot or forceful discharge is an immediate burn hazard. A dry relief path makes another source more likely but does not clear the tank.
-
Check 5
Note whether moisture appears only after a long hot-water draw or cold start, whether it stops as the heater warms, and whether water pools or returns after the exterior has dried.
Expected result: A light film forms on cold pipes or the tank and then stops, a puddle continues or returns, or water begins at the tank seam or bottom rather than on a pipe.
Next step: Monitor only long enough to document the pattern without restoring unsafe operation. If pooling returns, the shell is wet, or the source cannot be separated from condensation, leave the heater isolated and have a plumber inspect it.
Why this matters
Why: Short-lived condensation can occur on cold surfaces, but recurring pooling is not explained safely by condensation alone. Water from the shell or seam is more consistent with internal tank damage than with a simple valve drip.
-
Check 6
Identify whether the heater is gas, electric, tankless, or another design and inspect only external labels, visible pipes, drain pan, and accessible connections; do not remove electrical covers, gas controls, venting, or the tank jacket.
Expected result: The heater is electric with moisture near an element cover, gas with moisture near a gas connection or vent, tankless with a valve or heat-exchanger path, or the design and source are uncertain.
Next step: Keep the energy source isolated and provide the model and fuel type to a qualified technician. Never relight a gas heater with an unfilled tank or disturb a gas connection or electrical panel as a leak test.
Why this matters
Why: Electric-element gaskets, gas-valve or vent connections, and tankless components have different hazards and repair methods. Uncertainty about the design or a concealed source makes self-repair unsafe.
-
Check 7
After the heater is isolated and the source documented, perform no further operation unless the manual and a qualified professional say it is safe; inspect the floor, drain pan, and nearby materials for ongoing water damage.
Expected result: The leak stops with the inlet closed, water continues from the shell or relief path, the pan or floor is filling, or the area stays dry after the source is corrected.
Next step: Arrange a plumber or qualified water-heater technician for any shell leak, relief discharge, recurring leak, damaged valve, or uncertainty. Do not restart a gas or electric heater after draining or isolation until it is correctly full and the manual's start-up checks are complete.
Why this matters
Why: Stopping with the inlet closed confirms water supply contributes but does not identify a safe repair. Continued shell or relief leakage, a filling pan, or water damage means the heater should remain out of service. A dry area after a confirmed external correction still warrants a monitored professional or manual-guided check.
Use your observations
Decision map
Find the observation that best matches what you see, then follow the next safe action.
-
PATH 01Next step
What you see
Only a cold-water, hot-water, or drain-valve connection becomes wet while the tank shell remains dry.
Do this next
Keep energy and water isolated as needed and have the fitting or drain valve repaired with the correct seal or part. Do not force a corroded connection or continue operating it to see if it worsens.
Why this path and its safety boundary
Why it matters: A localized fitting or valve leak is more likely than internal tank corrosion, although corrosion can hide behind insulation or a jacket opening.
-
PATH 02Next step
What you see
Water emerges from the tank body, bottom seam, jacket opening, or insulation rather than from one external fitting.
Do this next
Close the cold-water inlet, isolate gas or electricity as the manual permits, and arrange prompt qualified water-heater service. Do not patch, drill, remove the jacket, or assume a valve replacement will solve it.
Why this path and its safety boundary
Why it matters: An internal tank leak or concealed component failure is more likely than a simple loose valve. A tank leak can worsen suddenly even when the initial puddle is small.
-
PATH 03Next step
What you see
The temperature-and-pressure relief discharge is wet, hot, forceful, or repeatedly dripping, or the valve-to-tank fitting is wet.
Do this next
Stay clear of the outlet, close the cold-water inlet if discharge continues, and call a qualified technician. Do not cap the pipe, hold the valve closed, or install an unverified replacement.
Why this path and its safety boundary
Why it matters: Pressure, temperature, thermal expansion, or a defective relief valve may be involved. The relief path is protecting against a hazardous condition and must not be blocked.
-
PATH 04Next step
What you see
A light film appears on cold pipes or the tank only after a long draw or cold start and stops as the heater warms, with no recurring pool.
Do this next
Document the timing and monitor the dry exterior without opening panels. If condensation persists, pooling develops, or the first wet point changes, arrange a professional inspection.
Why this path and its safety boundary
Why it matters: Condensation is more plausible than an active leak, but a hidden fitting leak remains possible if moisture returns or leaves a rust trail.
-
PATH 05Next step
What you see
The source is unclear, water damage is increasing, the heater is gas or electrically enclosed, or the leak continues after an external valve or fitting check.
Do this next
Leave the heater isolated and arrange qualified plumbing or water-heater service. Give the technician the fuel type, model, first wet point, leak timing, and photos; do not dismantle the appliance.
Why this path and its safety boundary
Why it matters: The remaining possibilities include concealed piping, an element gasket, gas-valve or vent issue, internal tank damage, or a relief problem that cannot be safely diagnosed from outside.
Helpful context
Understand the symptom
A puddle at the base is a location, not a diagnosis
Water can run down pipes, the jacket, or the tank before reaching the floor, so the lowest wet point may not be the source. A. O. Smith's leak guidance separates condensation, drain-valve leakage, relief-valve discharge, piping connections, element gaskets, and an actual tank leak. Wipe or photograph the first wet point from a safe position before deciding that the whole heater must be replaced.
Make the heater safe before tracing
Hot water can burn, gas equipment can create a combustion hazard, and electric water heaters can leave energized parts behind access covers. Follow the heater manual to turn off gas or electrical energy, and close the cold-water inlet when water is actively escaping. Do not turn energy back on while the tank is empty; gas models must not be relit until the tank is completely full and the manufacturer's start-up procedure is followed.
Check fittings and the drain valve from outside
Look at the cold inlet, hot outlet, nearby pipe joints, drain valve, and any visible threaded connection. A wet fitting with a dry tank shell points toward a connection or valve. A drain valve that is not fully closed can drip, but a valve that continues to leak after the manual closure check needs replacement by a qualified person. Do not use force on corroded fittings or drain a hot tank onto the floor.
Treat the relief valve as a safety device
Water from the temperature-and-pressure relief valve or its discharge pipe may reflect high pressure, thermal expansion, a defective valve, or an unsafe temperature condition. Observe the outlet and discharge path without blocking it or repeatedly lifting the lever. Never cap the outlet, place a valve in the discharge line, or substitute a part based only on appearance. A continuing discharge is a service call, not a reason to suppress the symptom.
Base moisture may be condensation or a hidden tank leak
Small condensation can appear on cold pipes or a cooler tank surface, especially after a long hot-water draw or when incoming water is cold. It should not be assumed to be harmless if water pools, returns after the heater warms, or appears from the shell seam or bottom. Water emerging from the tank body or jacket opening is more concerning than a dry shell with one wet fitting and needs professional assessment.
Electric and gas models have different service boundaries
An electric heater may leak at an element gasket, while a gas model may have a gas-valve connection or vent-related condensation. Do not remove electrical covers, disturb the gas valve or vent, or drain the tank as an experiment. Record the model, fuel type, leak timing, and exact wet location for the technician.
Safety boundary
Stop conditions
- Stay clear and isolate gas or electrical energy and the cold-water inlet as the manual permits for hot spray, gas odor, smoke, sparking, water near electrical parts, rapidly increasing flow, or a filling drain pan.
- Never cap, plug, block, valve off, or otherwise restrict a temperature-and-pressure relief valve or its discharge pipe. Do not repeatedly operate a hot relief valve or stand in front of its outlet.
- Do not remove the tank jacket, electrical covers, gas controls, venting, insulation, heating elements, or threaded valves as an ordinary leak check. Do not drain a hot tank onto the floor or relight a gas heater before it is completely full.
- Arrange qualified service for water from the tank shell or bottom seam, recurring relief discharge, a damaged or corroded valve, a concealed source, ongoing pooling, or any leak that does not stop after a safe external check.
Only after diagnosis
Potential parts
- water-heater drain valve
Consider this only when the leak is confirmed at the drain valve itself and the tank and threaded tank fitting are sound; a wet tank base or seam is not a drain-valve diagnosis.
Match the heater model, valve connection, materials, and temperature and pressure service requirements. Have a qualified plumber handle a hot, pressurized, or corroded valve. - temperature-and-pressure relief valve
Consider this only after a qualified diagnosis confirms a defective or leaking relief valve and rules out unsafe pressure, temperature, thermal expansion, or a tank-fitting leak.
Use the exact rated and sized valve required by the heater and local code. Never substitute, cap, or obstruct the relief path. - water-heater tank or complete replacement heater
Consider this only when the tank shell, seam, or concealed body is confirmed to leak or the heater cannot be safely repaired; do not infer replacement from a puddle before tracing the source.
Sizing, fuel, venting, electrical supply, drain pan, expansion control, code, and installation require qualified assessment and exact model information.
When checks do not resolve it
Need a professional?
Safety scope: A qualified technician can distinguish a fitting, drain valve, relief valve, element gasket, condensation path, piping issue, or failed tank and can service gas, electrical, pressure, and hot-water hazards. Keep homeowner work to safe isolation, external visual tracing, documentation, and manual-directed checks.
Common questions
FAQ
Why is my water heater leaking from the bottom?
Water may be tracking down from an inlet or outlet, relief valve, drain valve, condensation, electric-element gasket, or the tank shell itself. Dry and trace the first wet point from outside after safely isolating the heater; a shell or seam leak needs prompt professional assessment.
Can I tighten the water heater valve that is leaking?
Do not force a hot, pressurized, corroded, or relief-valve connection. A visibly open drain valve may be closed only as the manual permits, but a valve that continues to leak requires the correct replacement and qualified service. A wet tank fitting or shell is not solved by tightening the wrong part.
What does water from the temperature-and-pressure relief pipe mean?
It may indicate pressure, temperature, thermal expansion, a defective relief valve, or a leak at the valve's tank fitting. The pipe and outlet must remain open and unobstructed. Stay clear of hot discharge, close the cold inlet if it continues, and arrange qualified service.
Could water at the water heater base just be condensation?
Brief moisture on cold pipes or the tank can be condensation, especially after a long hot-water draw or cold start. Pooling, recurring moisture, a rust trail, or water from the shell or seam should not be dismissed as condensation; have the source inspected.
When should I replace the whole water heater?
Replacement becomes a consideration when the tank shell or bottom seam is confirmed to leak, but a floor puddle alone is not enough to decide. First trace valves, fittings, relief discharge, condensation, and other accessible sources. A qualified technician should evaluate fuel type, venting, electrical supply, code, and installation before replacement.
Read the exact guide
Official sources
- Water Leakage Is SuspectedA. O. Smith · A. O. Smith water-heater manual; relief-valve design and service instructions vary by model
- What to Do Before Calling a Plumber or Replacing Your Water HeaterRheem Manufacturing Company · General Rheem residential water-heater guidance; exact shut-offs and service procedures vary by model and fuel type
- Technical Bulletins - Bulletin #51 Puddle On The FloorA. O. Smith · A. O. Smith water-heater technical bulletin; exact heater construction and service procedures vary by model
- Leakage Test PointsA. O. Smith · A. O. Smith storage-water-heater manual guidance; tankless and other designs require their own manuals
Community feedback
Share a repair observation
Share a plain-text repair observation. Accepted observations are published automatically; this page may take a moment to update.